Last week I was sorting through a set of golden hour shots from Percy Priest Lake and doing that thing photographers do where you hover over the delete key like you’re defusing a bomb. Sky completely blown. Foreground perfect. Classic high-contrast nightmare. My instinct, same as it’s been since I started editing, was to write those frames off and move on.
Then I watched this.
In this Mark Denney tutorial on recovering blown highlights, he makes an argument I’ve heard before but never fully trusted: that a clipped histogram doesn’t automatically mean a dead photo. What shifted for me was seeing him work through the actual recovery process step by step, including the moment where Lightroom runs out of road and Photoshop has to take over. It reframed how I think about triage in my editing workflow, and I’ve been shooting in harder light with more confidence since.
What “Blown” Actually Means (and Why It Matters Before You Touch a Slider)
Before anything else, Mark draws a line between highlights that look blown and highlights that are genuinely clipped. This distinction is doing a lot of work and most tutorials skip right past it.
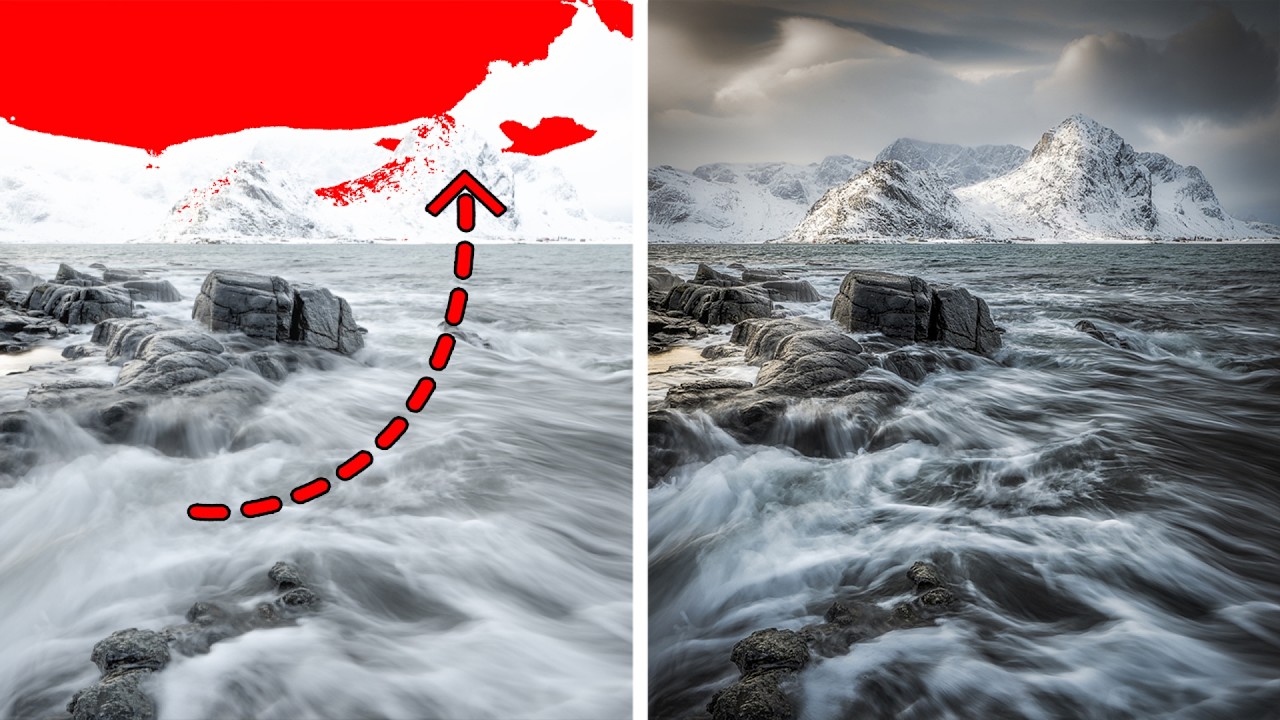
In Lightroom, you can turn on clipping warnings by pressing J. Areas that are fully clipped to pure white show up as a red overlay. Areas that are just bright, but still holding detail in at least one channel, don’t. The difference is everything. If you’re seeing red, you’ve got a harder road. If you’re not, the Highlights and Whites sliders in the Basic panel can probably pull that detail back on their own.
The workflow starts there: hit J, assess what’s actually clipped versus what just looks rough, and then decide which tool is appropriate. That single diagnostic step has already saved me from overcorrecting exposures that didn’t need it.
The Lightroom-First Recovery Process
For highlights that are bright but not fully clipped, the fix lives in the Basic panel. Mark’s approach is sequential: pull the Highlights slider left first, then Whites if you need more range. The order matters because Highlights targets a specific tonal band while Whites affects a broader range that can flatten your midtones if you’re aggressive with it.
From there, he brings in the Tone Curve for more surgical control. A gentle S-curve that specifically compresses the upper quarter of the tonal range lets you recover luminosity without making the whole image feel like it was shot on an overcast day in February. The goal isn’t to make the sky dark. It’s to make it believable.
If the recovery still isn’t complete after the Basic panel and Tone Curve work, he uses a Radial or Linear Gradient Mask directly over the blown area, then pushes Highlights and Exposure down within that mask. This is targeted work, not a global adjustment, and it’s the difference between fixing the problem and fixing the problem while introducing a new one.
When Lightroom Can’t Finish the Job
Here’s where Mark gets honest about the limits of RAW recovery, and I respect the tutorial more for it. If a channel is truly clipped to 255 across all three (red, green, and blue), there’s no data to recover. Lightroom can’t invent detail that the sensor didn’t capture. That’s not a slider problem, that’s a physics problem.
For those cases, he moves into Photoshop and uses luminosity-based selections to isolate the blown region more precisely than any Lightroom mask will allow. From there, he can blend in a second exposure if one exists, or use content-aware tools to build plausible texture in areas where the sky detail is genuinely gone. It’s more involved, but for a shot where everything else is working, it’s worth the extra fifteen minutes.
The key point he makes is that this isn’t cheating the image, it’s completing the edit the camera couldn’t finish.
Where I’d Push Back Slightly
Mark’s workflow is clean and I use most of it now. But the one place I’ve landed differently is with the Whites slider. He pulls it as a secondary move after Highlights, which makes sense for general recovery. In my landscape edits, especially anything with an overcast or hazy sky, I’ve found it more useful to set Whites first as a ceiling and then bring Highlights down within that range. It gives me a more controlled starting point before I go anywhere near a mask or the Tone Curve.
It’s a small difference in sequence, and I wouldn’t argue it’s categorically better. It’s just the muscle memory I’ve built after naming too many presets after Wilco songs and spending too many evenings comparing results on the same image. Your sequence might vary based on the shots you’re making and the look you’re after.
The One Thing Worth Taking From This
The biggest shift this tutorial created for me wasn’t technical. It was diagnostic. Pressing J before I touch a single slider, actually looking at what’s clipped versus what’s just bright, has kept me from deleting photos that had a recovery path the whole time.
Watch the full video to see Mark work through both the Lightroom and Photoshop steps with real examples. The visual walkthrough makes the masking and curve adjustments click in a way that’s hard to fully convey in writing.
Comments
Leave a Comment