My phone has about 4,000 unedited photos on it. Not because I’m lazy, but because the import-edit-export pipeline on mobile has always felt like homework. By the time I’ve pulled the images into Lightroom, I’ve lost the momentum I had when I took the shot. That friction is a creativity killer, and it’s the reason I kept defaulting to desktop even for quick edits I genuinely could have handled on my phone.
That changed after watching Katrin Eismann walk through the newest Lightroom Mobile features in a recent KelbyOne tutorial. Watch the full tutorial on YouTube — it’s worth your time even if you think you already know Lightroom Mobile. Katrin has a way of showing you things the app can do that you didn’t realize were options, and this one covers a feature combination that genuinely changes how fast you can turn a phone snapshot into a polished edit.
The short version: Adobe has quietly made Lightroom Mobile a legitimate editing environment. The long version is below.
Step 1: Access Your Photos Without Importing
 Lightroom Mobile bottom bar showing device photo access
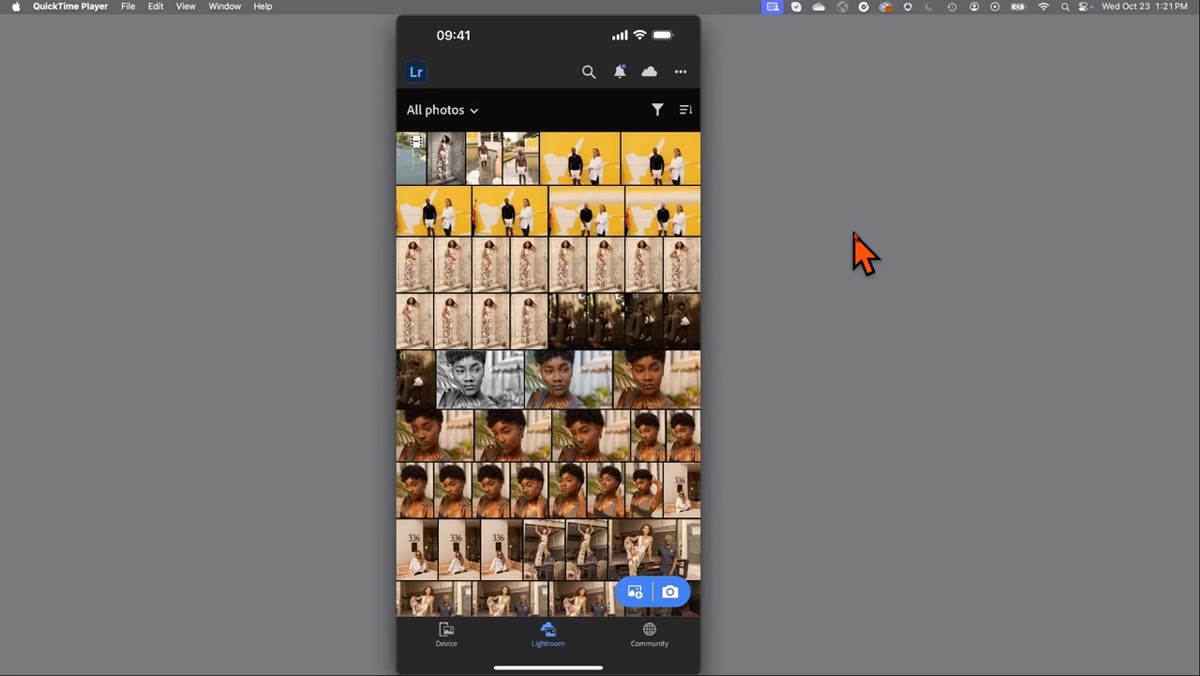
The first thing Katrin highlights is something Adobe added that sounds small but eliminates one of the most annoying steps in mobile editing. There’s now a dedicated option in Lightroom Mobile’s bottom row that lets you browse your device’s photo library directly, no import required. You scroll through your iOS camera roll right inside Lightroom, find the photo you want, and start editing immediately.
Lightroom Mobile bottom bar showing device photo access
The first thing Katrin highlights is something Adobe added that sounds small but eliminates one of the most annoying steps in mobile editing. There’s now a dedicated option in Lightroom Mobile’s bottom row that lets you browse your device’s photo library directly, no import required. You scroll through your iOS camera roll right inside Lightroom, find the photo you want, and start editing immediately.
The key thing to understand here: your original photo stays untouched in your camera roll. The moment you make your first edit, Lightroom creates its own version and that’s what gets modified. Your camera roll stays clean. This is non-destructive editing at the access level, not just the adjustment level.
Step 2: Start With Auto Tone, Then Punch the Color
 Auto button selected with Vibrance slider visible in color panel
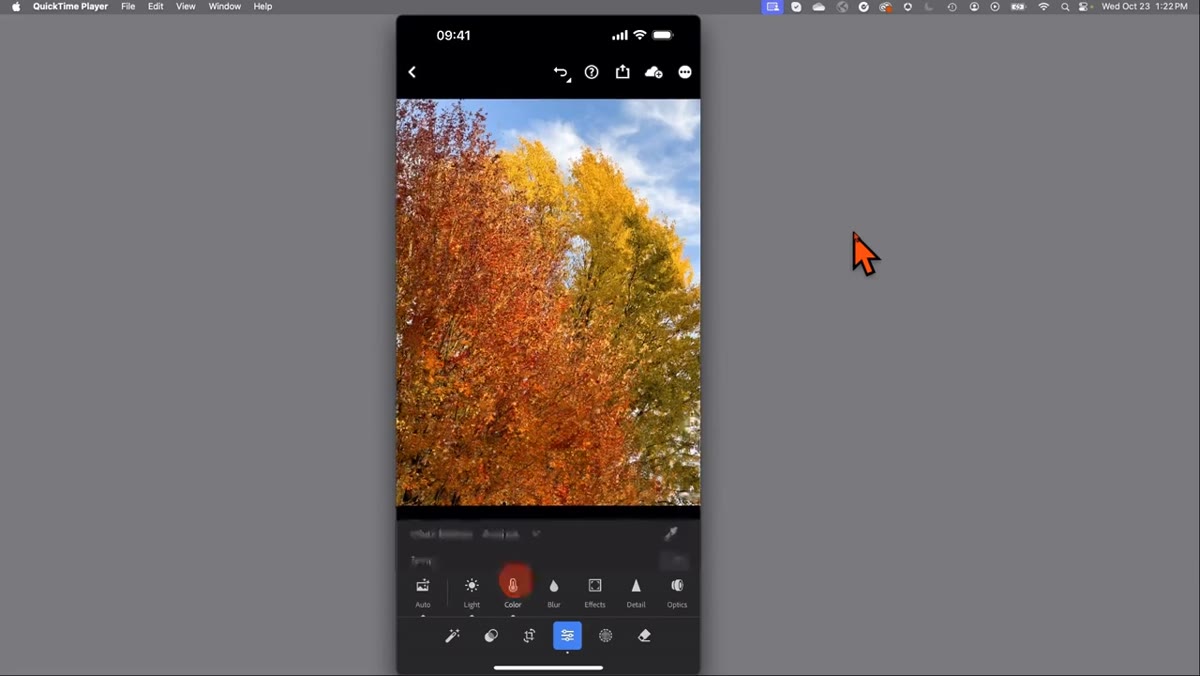
Once you’ve opened a photo from your device library, the fastest way to get a working starting point is the Auto button. Tap it and Lightroom analyzes the image and sets initial exposure and tone values. It won’t always be perfect, but it gets you 70 percent of the way there in under a second.
Auto button selected with Vibrance slider visible in color panel
Once you’ve opened a photo from your device library, the fastest way to get a working starting point is the Auto button. Tap it and Lightroom analyzes the image and sets initial exposure and tone values. It won’t always be perfect, but it gets you 70 percent of the way there in under a second.
From there, jump into the Color panel and reach for Vibrance before Saturation. Vibrance is the smarter of the two because it pushes color on the less-saturated parts of the image first, so you get richness without the skin tones going radioactive. For fall foliage, landscapes, or really any natural scene, a nudge of Vibrance does what three minutes of manual color adjustments used to do.
Step 3: Open Quick Actions and Let the AI Do the Analysis
 Magic wand icon tapped, subject detected with retouch icon visible
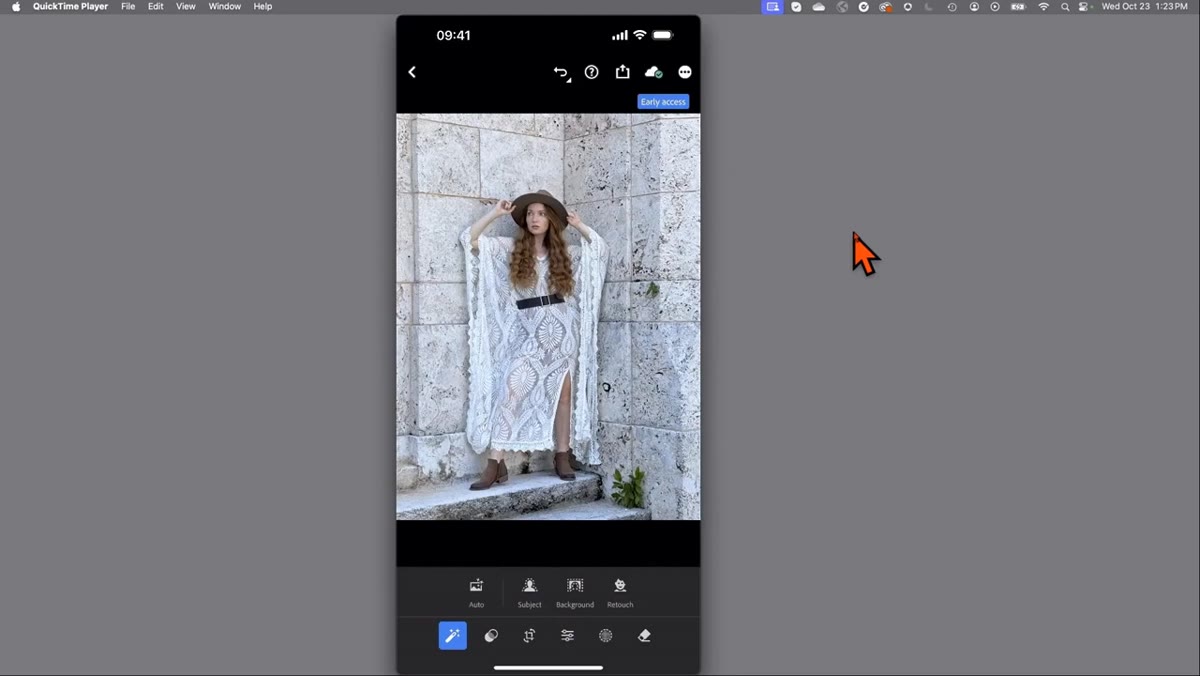
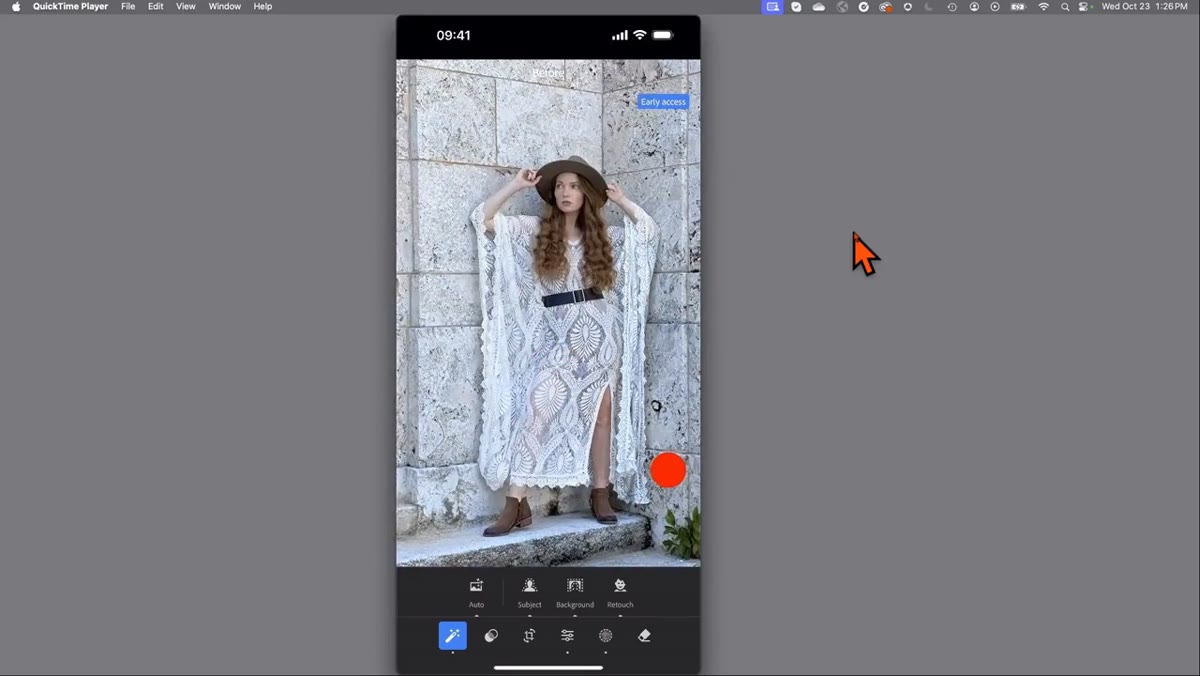
This is where the session gets interesting. Tap the magic wand icon to open Quick Actions, and Lightroom runs a fast AI scan of your image. It identifies the subject automatically and flags any areas that might benefit from retouching. You’ll see the analysis happen in real time, which honestly still impresses me every time.
Magic wand icon tapped, subject detected with retouch icon visible
This is where the session gets interesting. Tap the magic wand icon to open Quick Actions, and Lightroom runs a fast AI scan of your image. It identifies the subject automatically and flags any areas that might benefit from retouching. You’ll see the analysis happen in real time, which honestly still impresses me every time.
Quick Actions works best when you let it set the structure first and then adjust from there. Think of it less as a one-tap filter and more as a setup tool. It builds the masks, identifies the regions, and hands you the controls. You’re still making the creative calls, the AI just handles the time-consuming selection work.
Step 4: Apply Adaptive Presets to the Subject Mask
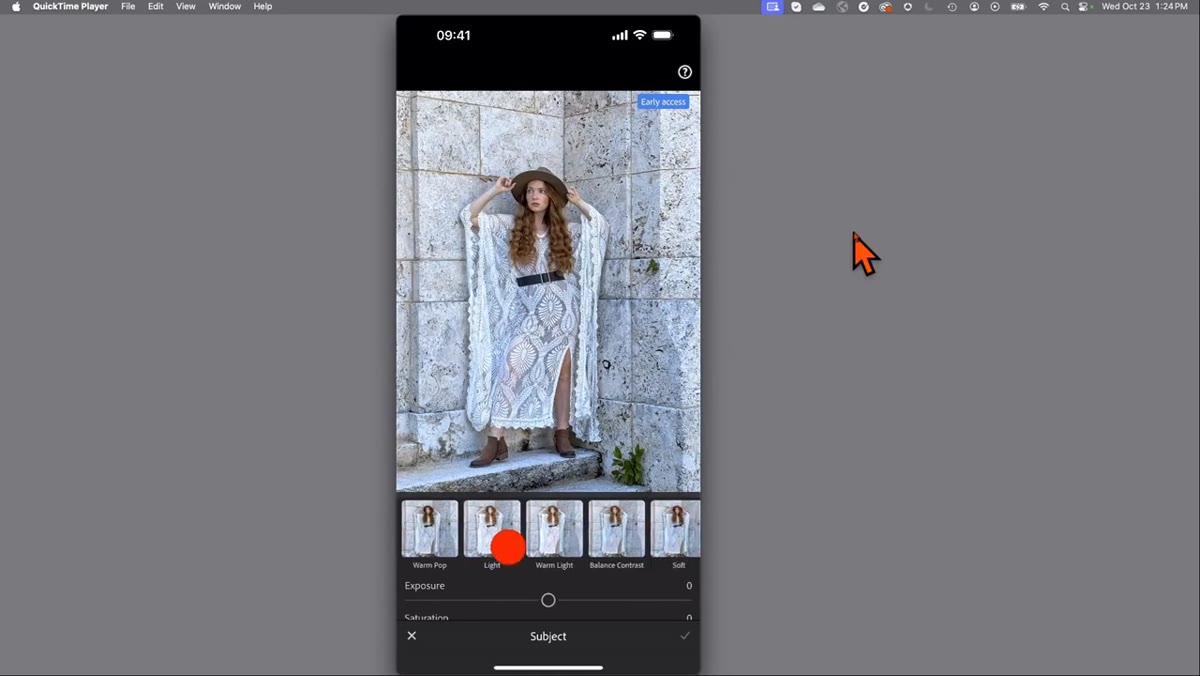 Subject mask selected with adaptive preset options showing on screen
With the subject detected, tap on it to build a precise subject mask. Lightroom then presents a horizontal scroll of adaptive presets specifically designed for masked regions. These aren’t the global presets you’d apply to a whole image. They’re localized, so a “Pop” preset on a subject mask brightens and adds contrast only to the person, not the sky behind them.
Subject mask selected with adaptive preset options showing on screen
With the subject detected, tap on it to build a precise subject mask. Lightroom then presents a horizontal scroll of adaptive presets specifically designed for masked regions. These aren’t the global presets you’d apply to a whole image. They’re localized, so a “Pop” preset on a subject mask brightens and adds contrast only to the person, not the sky behind them.
There are seven new adaptive presets that Katrin mentions, and they sync across Mobile, Web, Desktop, and Classic. Scroll through the options and preview them live. When you find one you like, there’s a strength slider so you can dial back the intensity. If you go further down in the panel, some presets reveal additional targeted controls. It’s a more nuanced system than it looks at first glance.
Step 5: Work the Background Mask Separately
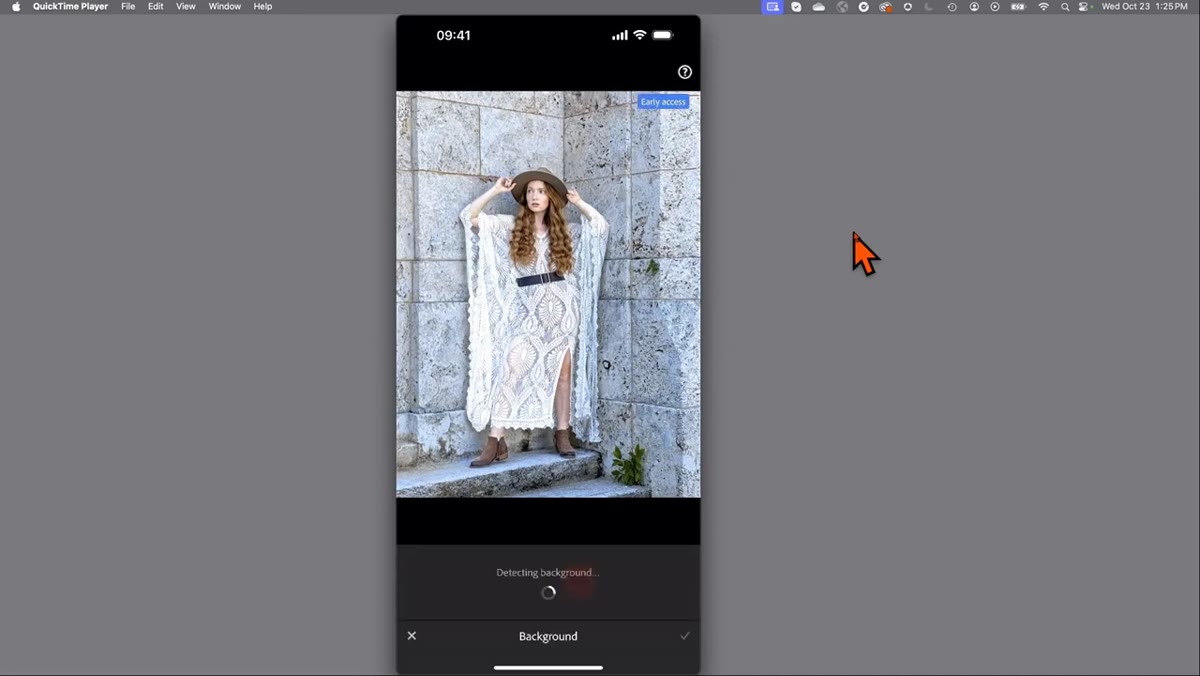 Background mask selected, exposure and saturation being reduced
After you’re done with the subject, tap into the background region. Lightroom builds that mask automatically as a separate layer, which is the part that saves the most time. You don’t have to paint anything. You just tap “Background” and start adjusting.
Background mask selected, exposure and saturation being reduced
After you’re done with the subject, tap into the background region. Lightroom builds that mask automatically as a separate layer, which is the part that saves the most time. You don’t have to paint anything. You just tap “Background” and start adjusting.
Katrin’s approach here is worth copying: rather than blurring the background (which can look artificial on phone shots), she drops the exposure slightly and pulls back the saturation a little. It creates separation between subject and environment without the fake bokeh look. The background feels grounded rather than processed. For street photos, environmental portraits, or anything where the background has texture you want to keep, this method is much more honest than a lens blur.
Step 6: Use the Retouch Options on Skin, Hair, and Clothing
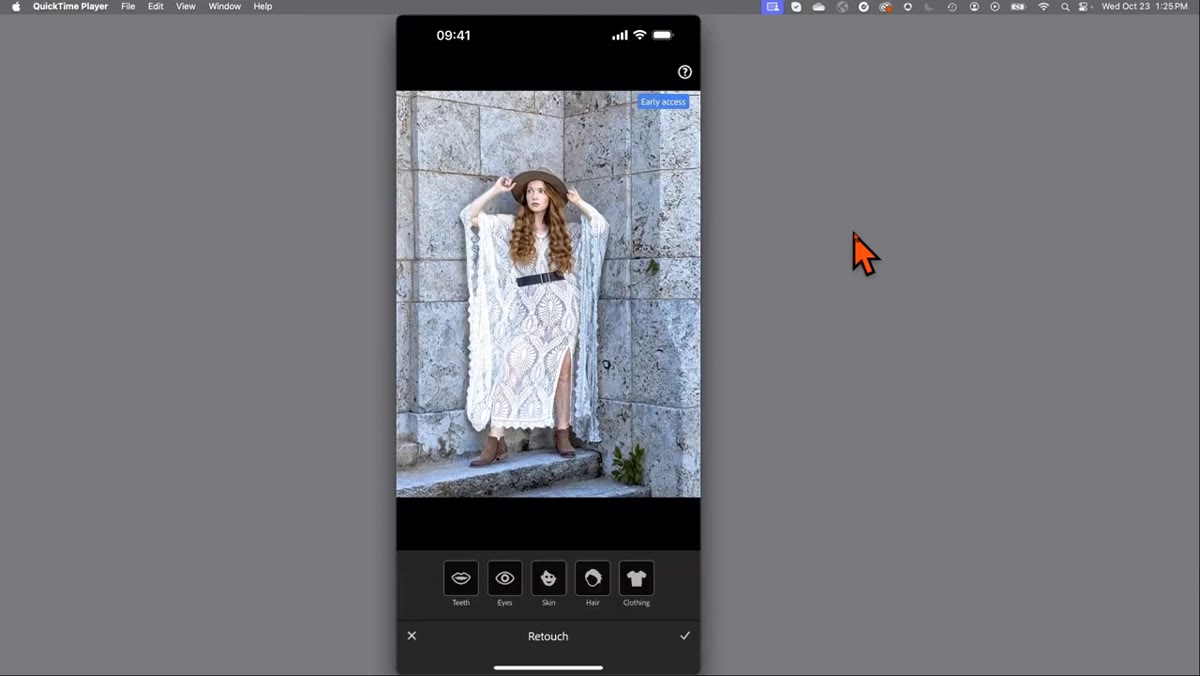 Retouch panel open showing skin, hair, and clothing preset options
The retouch section inside Quick Actions has portrait-specific adaptive presets for skin, hair, and clothing as separate options. Each one targets only the relevant area through its own mask logic. Skin smoothing softens texture without flattening it completely. Hair gets a detail-enhancement treatment that brings out individual strands. Clothing gets a subtle texture boost.
Retouch panel open showing skin, hair, and clothing preset options
The retouch section inside Quick Actions has portrait-specific adaptive presets for skin, hair, and clothing as separate options. Each one targets only the relevant area through its own mask logic. Skin smoothing softens texture without flattening it completely. Hair gets a detail-enhancement treatment that brings out individual strands. Clothing gets a subtle texture boost.
The practical move is to zoom in before applying skin retouching so you can see what the effect is actually doing at pixel level. These presets are restrained by default, which is the right call. Tap and preview, then adjust strength. The “enhance clothing” option in particular is underrated. It’s the difference between fabric looking flat and fabric looking like it has weight.
Step 7: Refine Masks After the Fact and Crop to Platform
 Mask panel open showing background and subject masks listed separately
Once Quick Actions has done its work, all the masks it built are visible and editable in the standard Mask panel. This is the part Katrin calls out as the real hidden value. You can go back into any of those AI-generated masks, tweak the adjustments, add to the selection, or use them as a jumping-off point for more detailed work.
Mask panel open showing background and subject masks listed separately
Once Quick Actions has done its work, all the masks it built are visible and editable in the standard Mask panel. This is the part Katrin calls out as the real hidden value. You can go back into any of those AI-generated masks, tweak the adjustments, add to the selection, or use them as a jumping-off point for more detailed work.
From there, crop to your output ratio. For Instagram, 4x5 is the move. It fills more screen real estate in the feed than a square or a landscape crop. Lightroom Mobile’s crop tool is fast and lets you snap to aspect ratios with a single tap.
What I Do Differently: Check Mask Overlap on Busy Backgrounds
The one place I’ve seen Quick Actions create a weird result is when the background and the subject share similar colors. If your subject is wearing a blue jacket against a blue wall, the subject mask can bleed into the background mask. Before you finalize anything, go into the Mask panel, toggle each mask’s overlay on, and look for overlap. It takes ten seconds and saves you from a color shift that looks fine at thumbnail size and terrible when someone actually looks at the image.
I’d also suggest saving your adaptive preset combinations as a starting preset once you find a look you like. I have one I built for outdoor portraits in flat light that I use constantly. I named it after a Wilco song, naturally.
The single biggest takeaway from this tutorial is that the friction is gone. You can go from photo on your camera roll to masked, retouched, color-graded, cropped image in under two minutes without touching a desktop. Katrin demonstrates it in real time, and the speed of it is genuinely convincing.
Watch the full tutorial on YouTube to see all of this in motion. The live preview of adaptive presets especially makes more sense when you can see the transitions happening.
Comments (3)
Applied this to my portfolio shots and the improvement is noticeable.
Bookmarked. Coming back to this one for sure.
This is fantastic. I've been recommending this approach to my readers too.
Leave a Comment