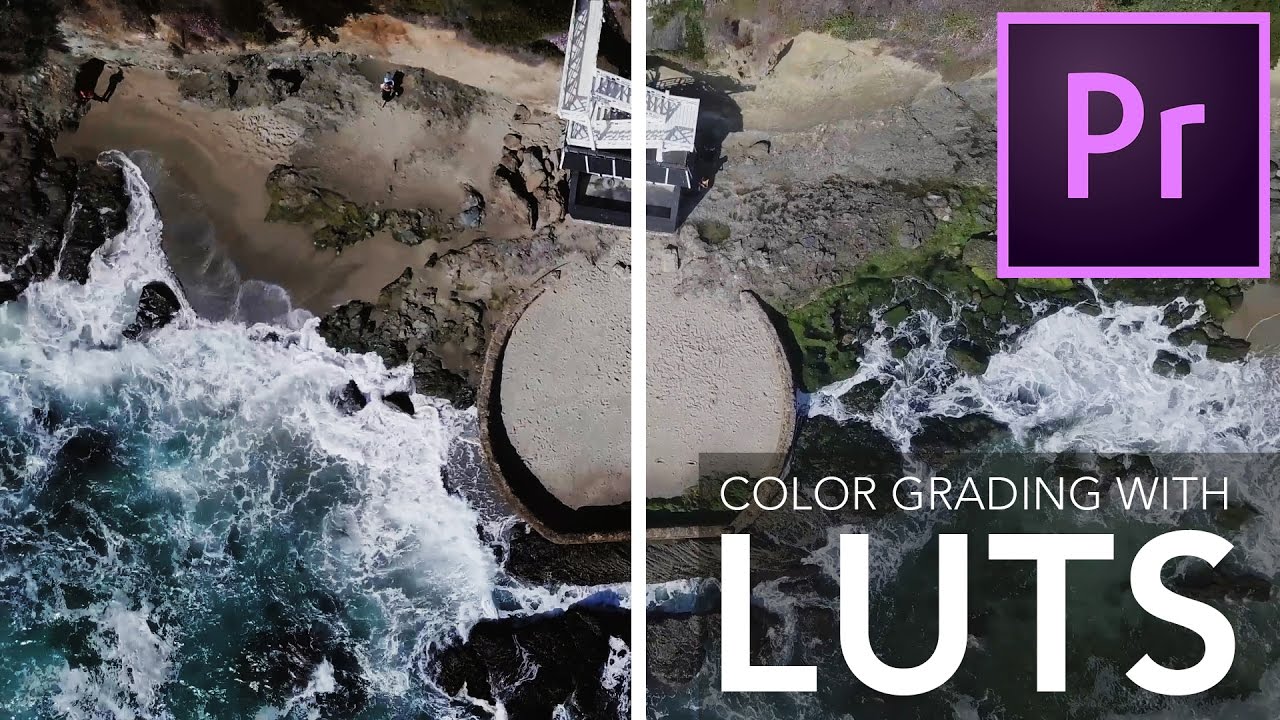
Most of my working life lives in Lightroom. Photo presets, tone curves, HSL panels - that’s my comfort zone. But clients keep asking me to weigh in on their video footage too, and for a long time I was quietly terrified every time someone dropped a .mov file on my desk. Video color grading has its own ecosystem: dedicated software, hardware scopes, colorists who have spent years just on this one discipline.
What I needed was a bridge. Something that used tools I already understood - adjustment layers, lookup tables, basic exposure controls - applied to video in a logical, repeatable way. That’s exactly what this Mango Street tutorial delivers. Watch the full tutorial on YouTube before or after reading this breakdown - either way, here’s the workflow reconstructed step by step.
One caveat the Mango Street team makes right up front, and I appreciate them for it: this is a streamlined approach, not a professional broadcast pipeline. There’s an entire industry of colorists who would wince at some of these shortcuts. But for photographers crossing into video, or small creators who need consistent results fast, this method is genuinely effective.
Step 1: Shoot Flat to Give Yourself Room
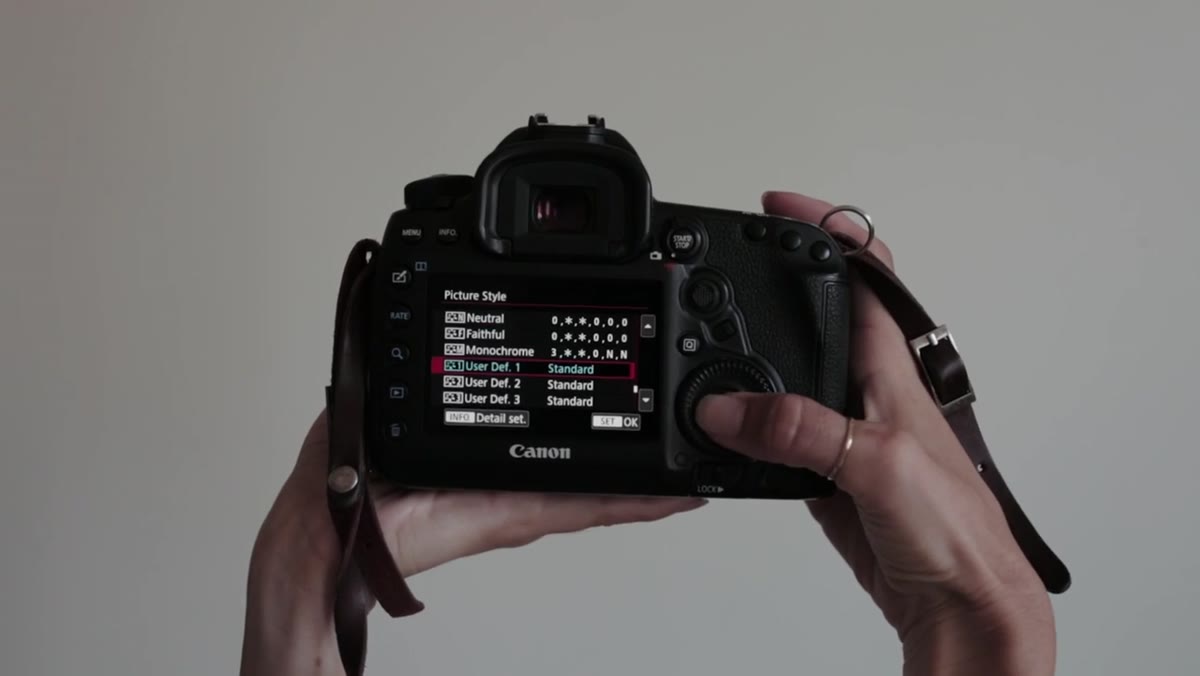 Canon 5D Mark IV set to custom flat picture profile
Before any software touches your footage, the grading work starts at the camera. Mango Street shoots all their video in a custom flat image profile on a Canon 5D Mark IV, deliberately crushing the contrast and desaturating the image so that it captures the maximum dynamic range available. Drone footage in their workflow often comes in at D-log, a similarly flat format.
Canon 5D Mark IV set to custom flat picture profile
Before any software touches your footage, the grading work starts at the camera. Mango Street shoots all their video in a custom flat image profile on a Canon 5D Mark IV, deliberately crushing the contrast and desaturating the image so that it captures the maximum dynamic range available. Drone footage in their workflow often comes in at D-log, a similarly flat format.
This matters because a LUT applied to already-contrasty footage tends to look harsh and clip highlights quickly. Flat profiles give you latitude, the same reason photographers shoot RAW instead of JPEG. If you’re shooting on a Sony, Canon, or Fuji mirrorless, look for S-Log, C-Log, or F-Log settings in your picture profile menu. The flatter the source, the more control you have downstream.
Step 2: Open the Lumetri Color Panel in Premiere Pro
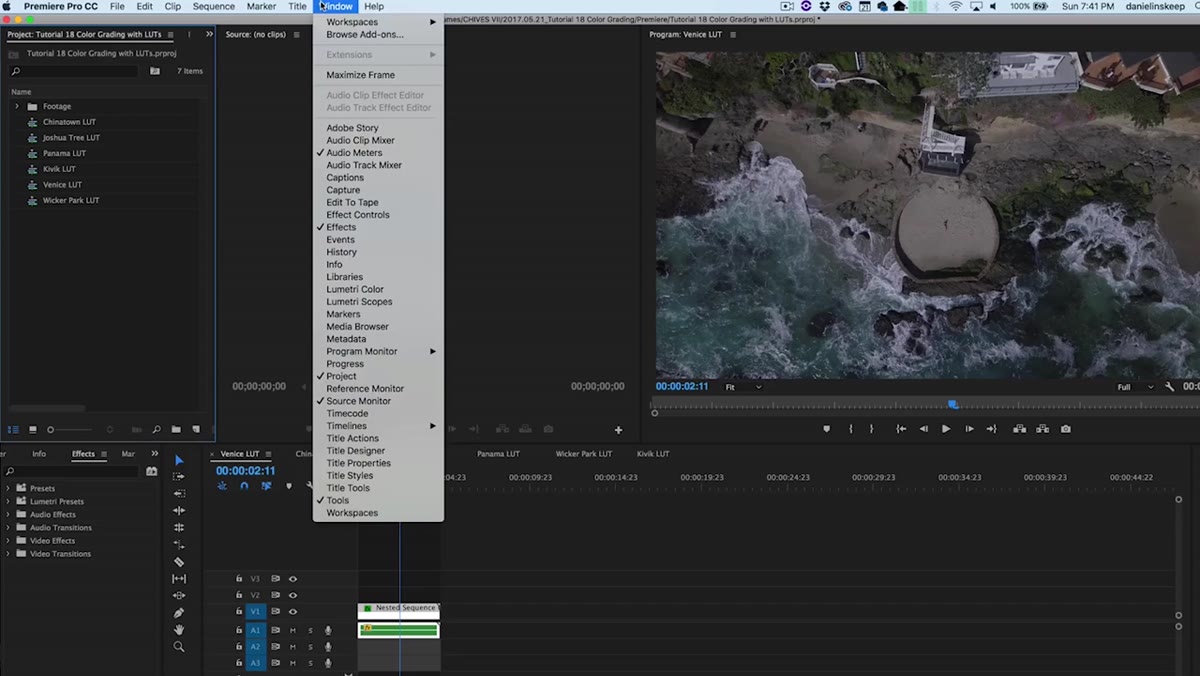 Lumetri Color panel opening in Premiere Pro timeline
With your flat footage on the timeline, the first stop is the Lumetri Color workspace. In Premiere Pro, you can access it through the Window menu or by switching to the Color workspace tab at the top. This panel is Premiere’s built-in answer to Lightroom’s Develop module - it has basic corrections, curves, HSL controls, and crucially, a LUT browser.
Lumetri Color panel opening in Premiere Pro timeline
With your flat footage on the timeline, the first stop is the Lumetri Color workspace. In Premiere Pro, you can access it through the Window menu or by switching to the Color workspace tab at the top. This panel is Premiere’s built-in answer to Lightroom’s Develop module - it has basic corrections, curves, HSL controls, and crucially, a LUT browser.
You’ll want to work clip by clip at this stage. Resist the urge to select all your clips and make sweeping global changes before you’ve evaluated each shot individually. Lighting conditions change between setups, and a correction that flatters one clip can wreck the next one.
Step 3: Make Basic Corrections Before the LUT Touches Anything
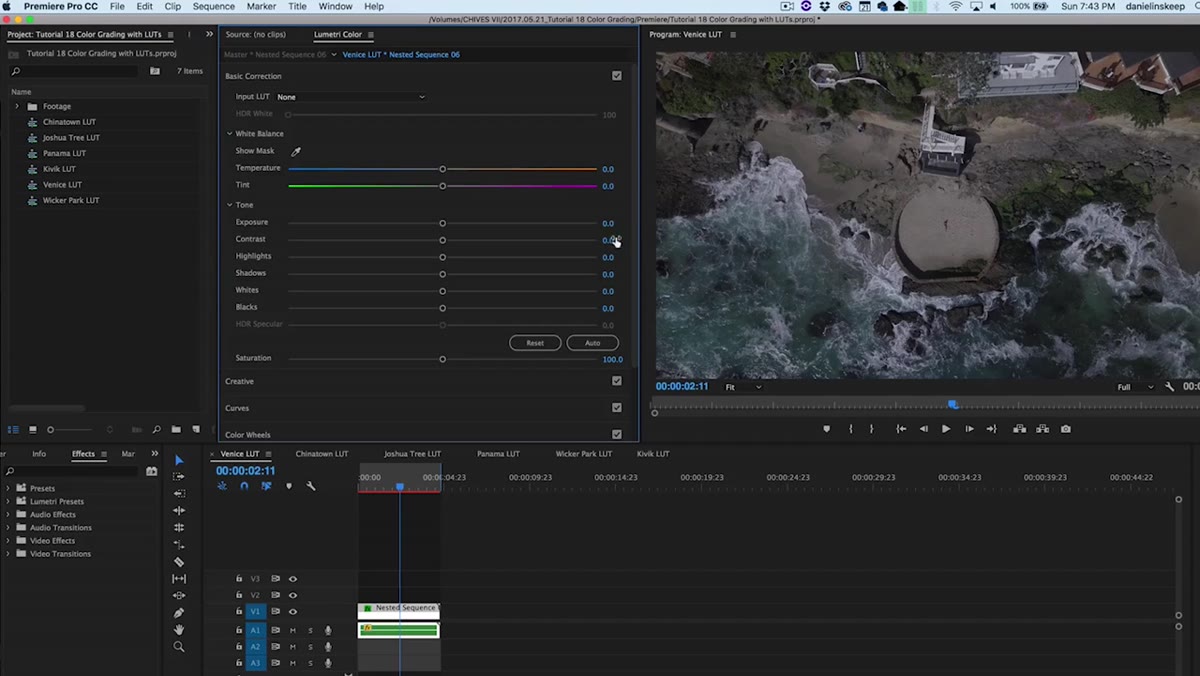 Contrast slider being raised in Lumetri Basic panel
This is the step most people skip, and it’s the one that makes the biggest difference. For each clip, before any LUT is applied, work through the Basic panel in Lumetri. For D-log drone footage, Mango Street brings contrast up to around 25, lifts highlights slightly, drops the blacks to deepen shadows, and pushes saturation up to about 115 (that’s a 15% boost from the default 100).
Contrast slider being raised in Lumetri Basic panel
This is the step most people skip, and it’s the one that makes the biggest difference. For each clip, before any LUT is applied, work through the Basic panel in Lumetri. For D-log drone footage, Mango Street brings contrast up to around 25, lifts highlights slightly, drops the blacks to deepen shadows, and pushes saturation up to about 115 (that’s a 15% boost from the default 100).
The goal isn’t to make the clip look finished - it’s to normalize it so the LUT has a predictable starting point to work with. Think of it like white-balancing your RAW files before batch-exporting them. A LUT is essentially a mathematical transformation of color values, and if the input values are inconsistent between clips, the output will be too.
Step 4: Create an Adjustment Layer for Your LUT
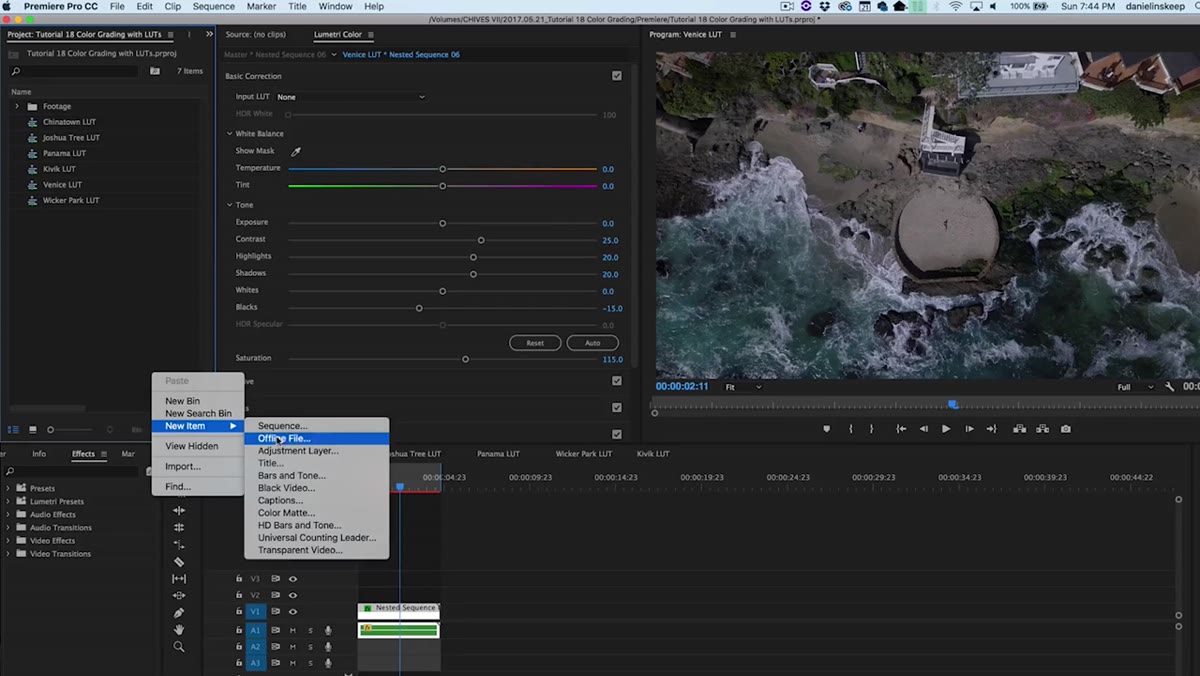 Right-click menu showing New Item and Adjustment Layer options
Here’s where the workflow gets smart. Rather than applying a LUT directly to each clip, Mango Street creates a single adjustment layer that sits above all the footage on the timeline. Right-click in the Project panel, choose New Item, then Adjustment Layer. Hit OK, rename it something obvious like “LUT,” and drag it onto a track above your video clips. Trim its in and out points to cover exactly the range of footage you want it to affect.
Right-click menu showing New Item and Adjustment Layer options
Here’s where the workflow gets smart. Rather than applying a LUT directly to each clip, Mango Street creates a single adjustment layer that sits above all the footage on the timeline. Right-click in the Project panel, choose New Item, then Adjustment Layer. Hit OK, rename it something obvious like “LUT,” and drag it onto a track above your video clips. Trim its in and out points to cover exactly the range of footage you want it to affect.
This approach means you can swap LUTs, adjust intensity, or turn the effect on and off for the entire sequence with one click. If you’ve ever used an adjustment layer in Photoshop for the same reason, this will feel immediately familiar.
Step 5: Apply the LUT Through the Creative Tab
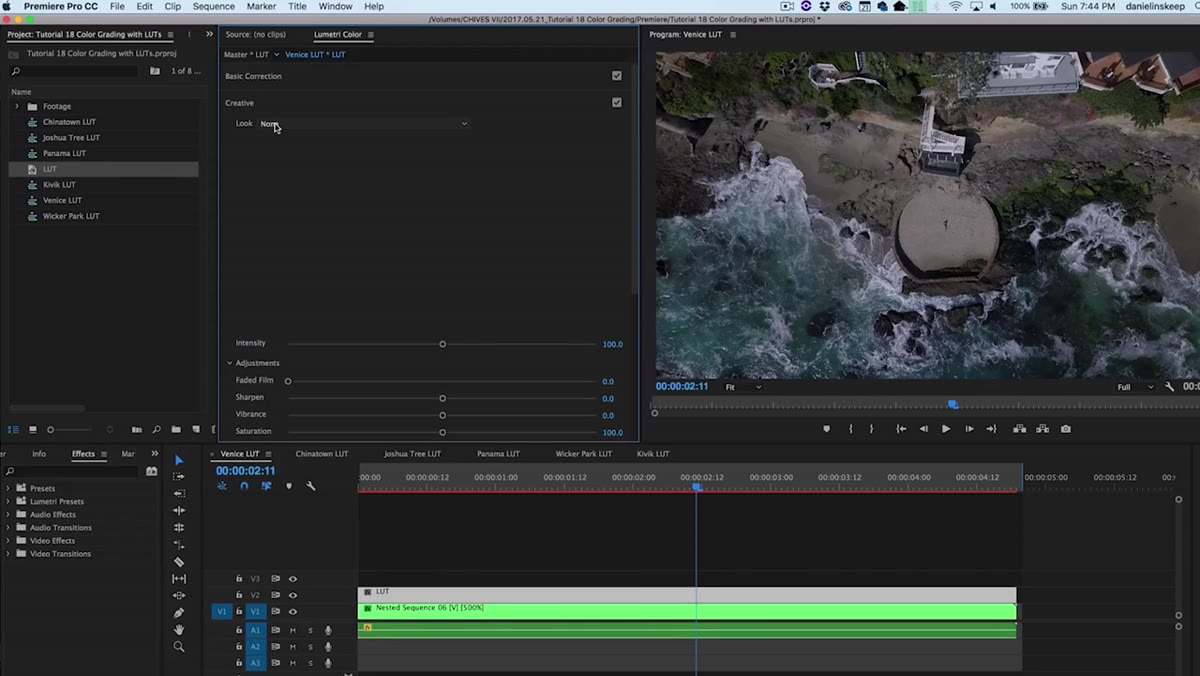 Creative tab in Lumetri with LUT dropdown menu visible
With the adjustment layer selected, go to the Creative tab inside the Lumetri Color panel - not the Basic tab. This is an important distinction. The Creative tab has a dedicated Look section with a dropdown for loading .cube or .3dl LUT files. Click the dropdown, navigate to your LUT file, and apply it.
Creative tab in Lumetri with LUT dropdown menu visible
With the adjustment layer selected, go to the Creative tab inside the Lumetri Color panel - not the Basic tab. This is an important distinction. The Creative tab has a dedicated Look section with a dropdown for loading .cube or .3dl LUT files. Click the dropdown, navigate to your LUT file, and apply it.
The reason Mango Street specifically uses the Creative tab instead of the Input LUT field in the Basic tab comes down to one feature: the Intensity slider. It sits directly below the LUT dropdown and lets you dial in how strongly the LUT affects the image, from 0 (no effect) to 100 (full strength). For their Venice LUT on this particular footage, they find full intensity too heavy and back it off to a more balanced level. That slider alone makes the Creative tab the right place for stylistic LUTs.
Step 6: Toggle the Layer to Check Your Work
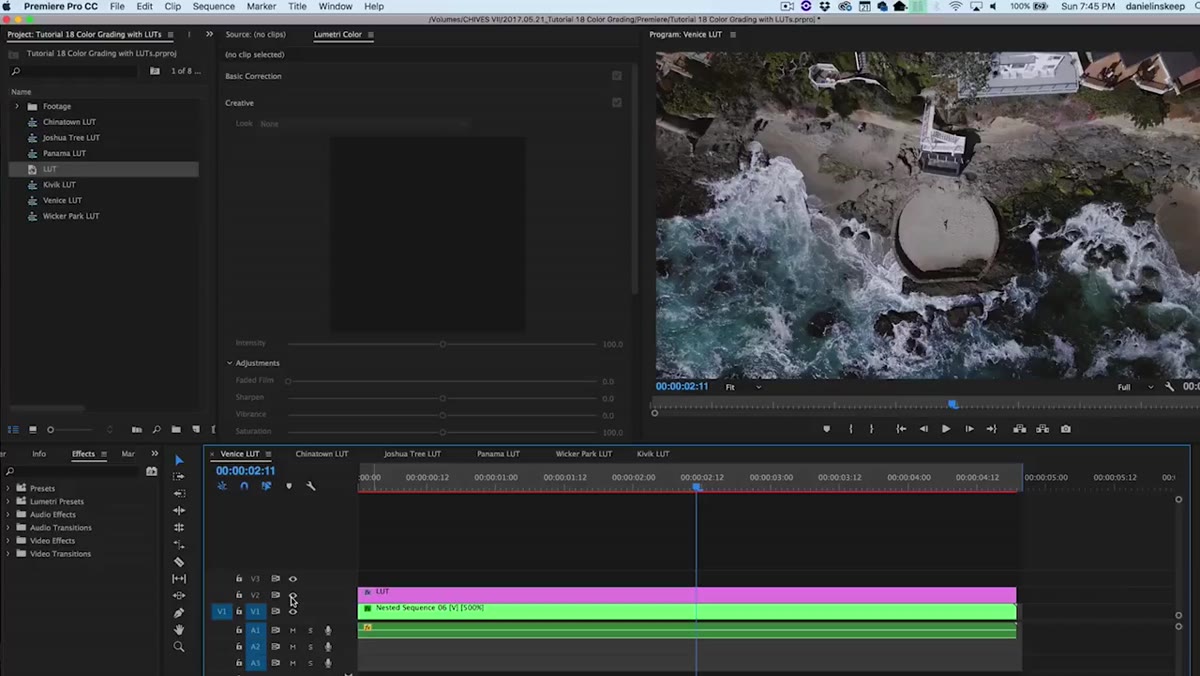 Eye icon on adjustment layer being toggled off and on
Once the LUT is applied, click the eye icon on the adjustment layer to toggle it off and on. This before/after check is the fastest way to see whether your grade is actually improving the image or just changing it. It’s the same reflex I use when evaluating a Lightroom preset - if turning it off makes me relieved, the preset isn’t right for that photo.
Eye icon on adjustment layer being toggled off and on
Once the LUT is applied, click the eye icon on the adjustment layer to toggle it off and on. This before/after check is the fastest way to see whether your grade is actually improving the image or just changing it. It’s the same reflex I use when evaluating a Lightroom preset - if turning it off makes me relieved, the preset isn’t right for that photo.
If the overall direction looks good but something feels off - maybe skin tones have shifted or the shadows feel too cool - go back to the clip-level Lumetri adjustments from Step 3 and fine-tune. The adjustment layer LUT and the per-clip corrections work together, and you can keep iterating between them.
What I’d Add From My Own Experience
Working with LUTs in video taught me the same lesson I keep relearning in photo editing: the LUT is not the correction, it’s the finish. I’ve seen people apply a beautiful cinematic LUT to footage that was never white-balanced properly, and wonder why it looks muddy. The Mango Street workflow is smart precisely because it separates the correction step (Step 3) from the grading step (Steps 4 and 5).
If you want to go deeper, the same logic that governs Lightroom presets applies here. A strong, opinionated LUT works best on footage that’s been normalized to a predictable exposure range. A subtle LUT can be pushed harder. And just like my photo presets, the best ones are starting points, not final answers. Name them after something meaningful, save your favorite settings, and build your own library over time. That’s how any consistent visual style actually gets built.
The single most important thing Mango Street’s workflow demonstrates is that the adjustment layer approach scales. One LUT, covering every clip, with individual corrections underneath. Clean, non-destructive, reversible. That architecture is worth stealing for any editing pipeline.
Watch the full tutorial on YouTube to see the Venice and Chinatown LUTs applied to real footage - the visual difference is the part that actually sells the technique.
Comments (3)
Bookmarked. Coming back to this one for sure.
I tried this on a client project yesterday and the results were way better than expected.
Excellent tutorial. I'd add that from a workflows standpoint, this technique is incredibly versatile.
Leave a Comment