I’ll be honest with you: for a long time I treated the Lightroom Mobile camera like that bonus disc that comes with a box set. Technically included, but never actually used. My default camera app got the shot, Lightroom did the editing, and that was the whole pipeline. Then I started noticing the RAW files I was working with from my phone felt limited in a way that had nothing to do with my editing. The ceiling was just lower. That’s the problem this tutorial fixed for me.
In this Matt Kloskowski tutorial, Watch the full tutorial on YouTube, Matt walks through the redesigned Lightroom Mobile camera interface and makes a case I couldn’t argue with: shooting DNG straight from the Lightroom app changes what’s possible in post. Not marginally. Significantly. The dynamic range you get back in the highlights and shadows when you’re working with an actual DNG versus a JPEG that’s been processed by your phone’s computational photography engine is a different conversation entirely.
What caught my attention wasn’t just the DNG support though. It was the way the new camera UI reorganizes the controls into something that actually makes sense for a working shooter. Here’s how it breaks down, step by step.
Step 1: Orient Yourself to the New Layout
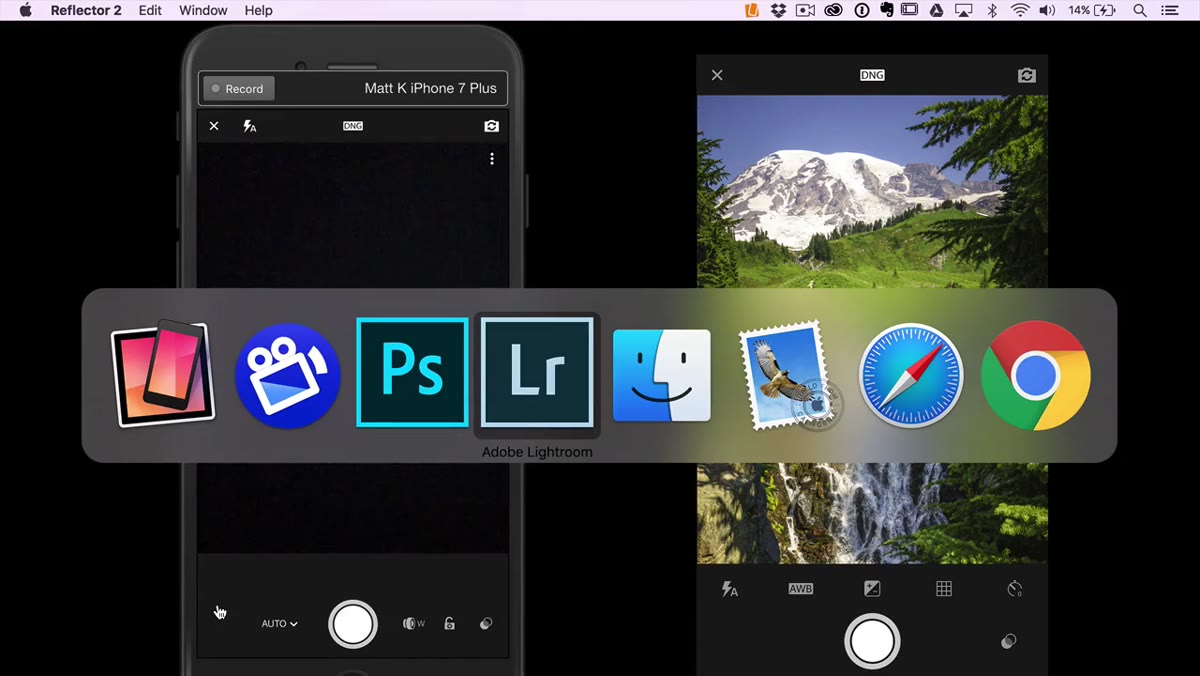
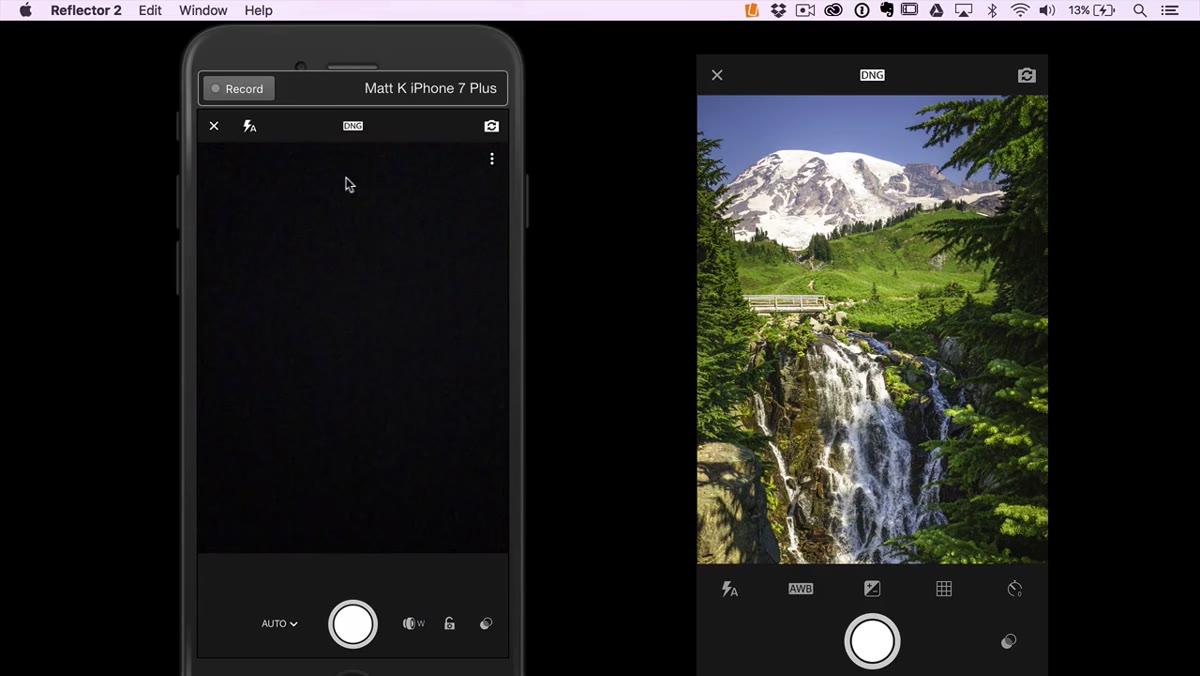 Side-by-side comparison of old and new Lightroom Mobile camera UI
Matt opens by showing the new camera interface side by side with a screenshot of the older version, and the comparison does a lot of work. The basic elements, your flash control and the front/back camera toggle, are in roughly the same positions they’ve always been. If you’ve used the Lightroom Mobile camera before, you won’t feel lost. What’s changed is how the more advanced controls are accessed. They’ve been consolidated rather than scattered, which sounds like a small thing until you’re actually trying to adjust exposure in a hurry.
Side-by-side comparison of old and new Lightroom Mobile camera UI
Matt opens by showing the new camera interface side by side with a screenshot of the older version, and the comparison does a lot of work. The basic elements, your flash control and the front/back camera toggle, are in roughly the same positions they’ve always been. If you’ve used the Lightroom Mobile camera before, you won’t feel lost. What’s changed is how the more advanced controls are accessed. They’ve been consolidated rather than scattered, which sounds like a small thing until you’re actually trying to adjust exposure in a hurry.
The top center of the screen is where you’ll tap to toggle between DNG and JPEG. That hasn’t moved. But the manual controls that used to live in various spots along the sides have been reorganized into a cleaner system that we’ll get to in Step 3.
Step 2: Set Your Capture Format to DNG
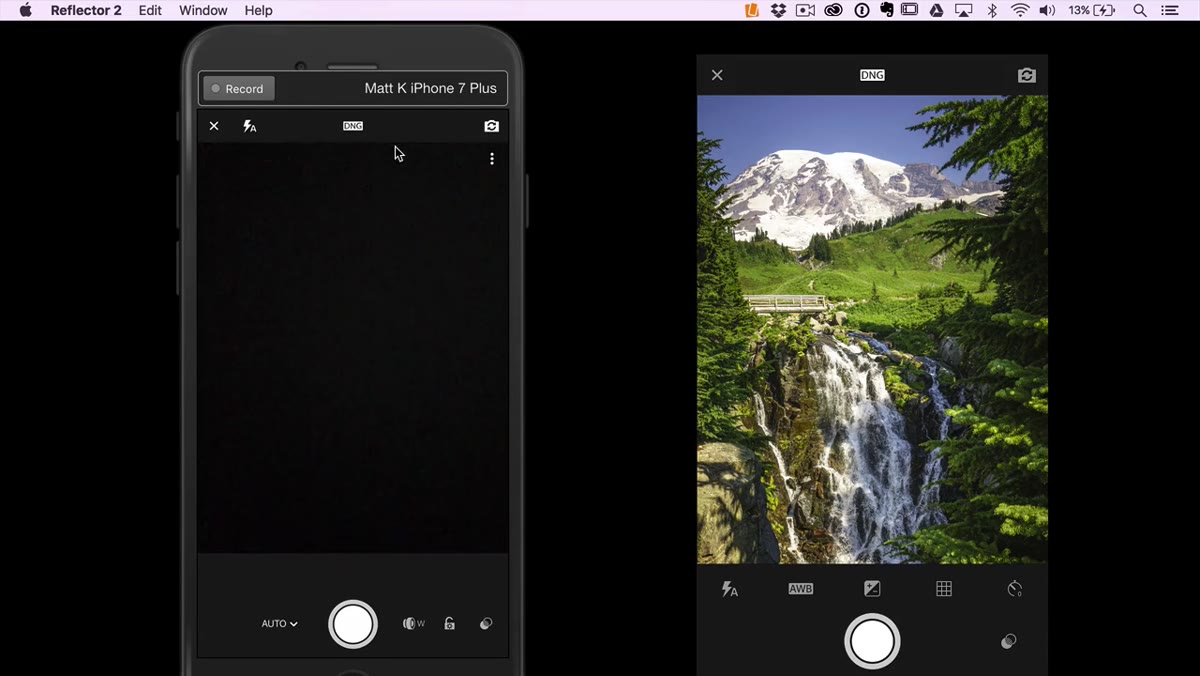
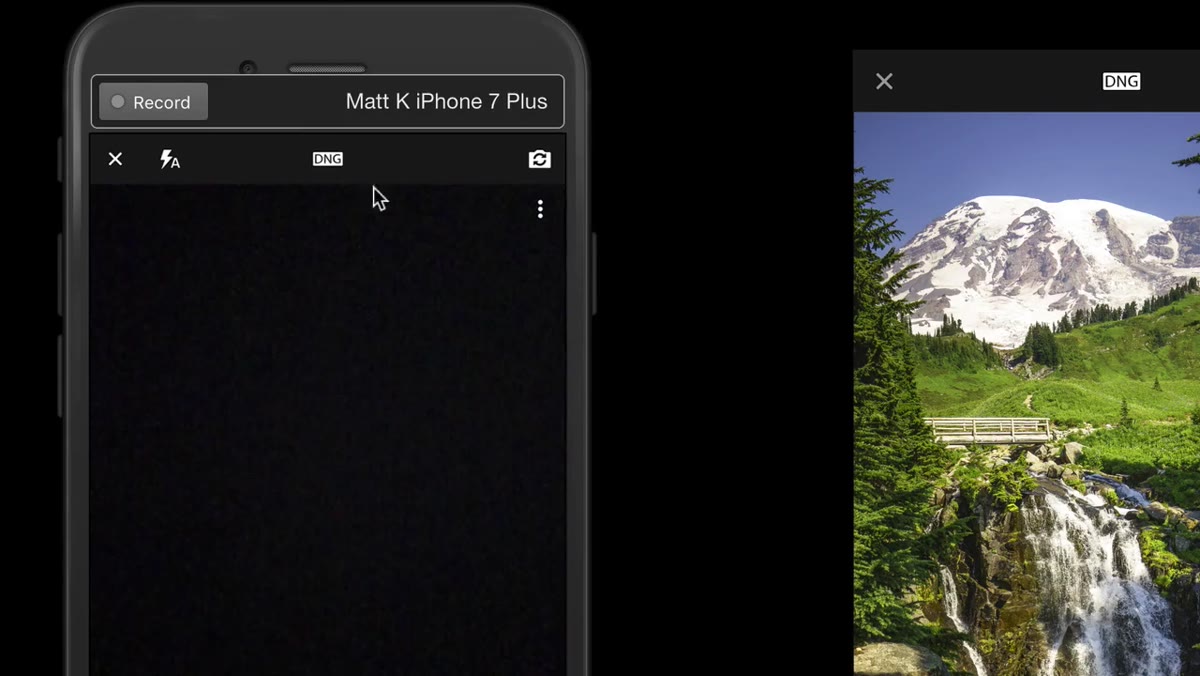 Tapping the DNG/JPEG toggle in the upper center of the screen
Tap the format indicator at the top center of the camera screen. You’ll see an option to switch between DNG and JPEG. Stay on DNG. This is the whole reason to shoot from Lightroom Mobile rather than your native camera app, and it’s the one setting Matt is emphatic about not changing back.
Tapping the DNG/JPEG toggle in the upper center of the screen
Tap the format indicator at the top center of the camera screen. You’ll see an option to switch between DNG and JPEG. Stay on DNG. This is the whole reason to shoot from Lightroom Mobile rather than your native camera app, and it’s the one setting Matt is emphatic about not changing back.
DNG is Adobe’s open RAW format. When you shoot JPEG on your phone, the device is making hundreds of micro-decisions about color, sharpening, noise reduction, and tone compression before you ever open the file. With DNG, those decisions stay yours. If your sky is blown out or your shadows are crushed, you have real data to recover. Not always, but far more often than with a JPEG. Worth noting: DNG capture on iPhone requires a 6s Plus or newer, but check Adobe’s site for the current compatibility list since it updates as new devices come out.
Step 3: Switch Between Auto and Professional Mode
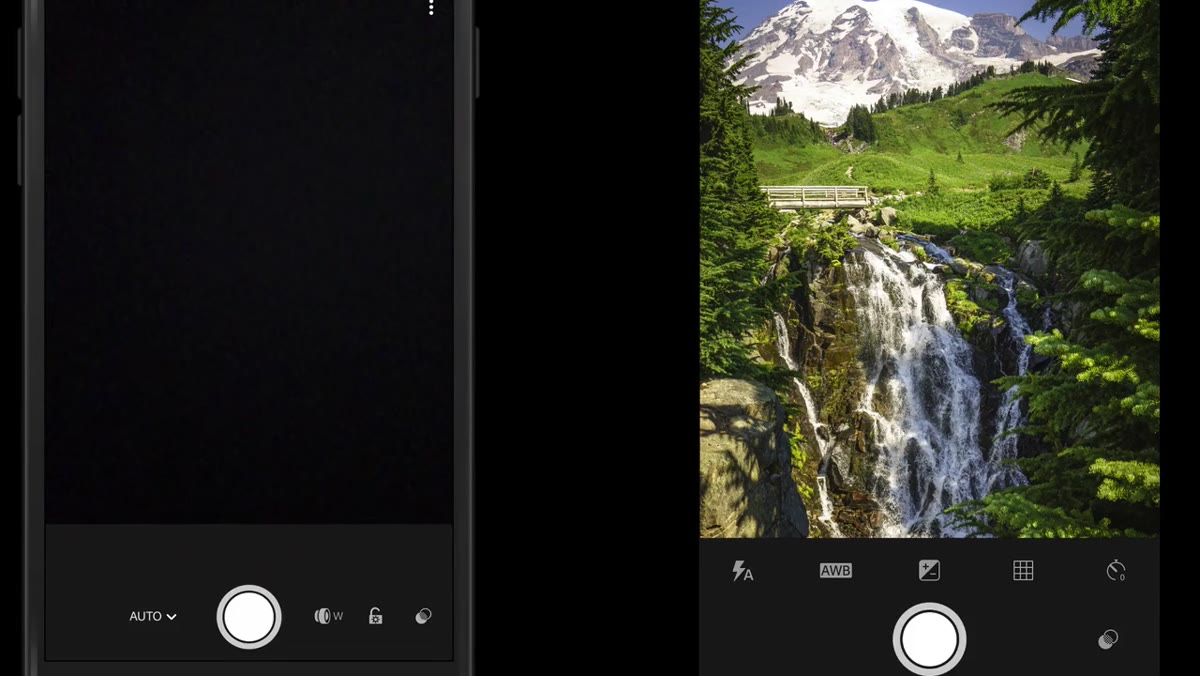 Professional mode controls showing shutter speed, ISO, and exposure
This is where the redesign shows its best work. In the older version of the app, manual controls like white balance and exposure were accessible but awkward to navigate. Now, the camera has two clear states: Auto and Professional. You toggle between them with a single tap on the mode label in the interface.
Professional mode controls showing shutter speed, ISO, and exposure
This is where the redesign shows its best work. In the older version of the app, manual controls like white balance and exposure were accessible but awkward to navigate. Now, the camera has two clear states: Auto and Professional. You toggle between them with a single tap on the mode label in the interface.
Auto mode is exactly what it sounds like, point and shoot, let the app handle the exposure decisions. Professional mode reveals a full set of manual controls: shutter speed, ISO, white balance, and exposure compensation. These controls are now laid out horizontally across the bottom of the screen and feel much more intentional than the previous version. If you’ve ever wanted to do any kind of intentional long exposure or lock in a specific white balance for a shoot, this is where you do it.
Step 4: Use Pro Mode for Long Exposure Shots
 Long exposure waterfall photo taken on iPhone 7 with EXIF data visible
Matt shares a photo that really sells the Professional mode argument. He used a small iPhone tripod, set a longer shutter speed in Pro mode, and triggered the shot with the timer to eliminate camera shake. The result is a waterfall image with genuine motion blur in the water. Sharp background, silky movement. That kind of shot is essentially impossible with a standard phone camera app because you have no manual shutter control.
Long exposure waterfall photo taken on iPhone 7 with EXIF data visible
Matt shares a photo that really sells the Professional mode argument. He used a small iPhone tripod, set a longer shutter speed in Pro mode, and triggered the shot with the timer to eliminate camera shake. The result is a waterfall image with genuine motion blur in the water. Sharp background, silky movement. That kind of shot is essentially impossible with a standard phone camera app because you have no manual shutter control.
The EXIF data on that photo reads iPhone 7, which means nothing about the output suggests it’s a phone image. If you do any outdoor or landscape work and you’ve been frustrated by the frozen, HDR-processed look of default phone photos, this workflow is worth the ten minutes it takes to set up. A small flexible tripod runs about fifteen dollars and fits in any camera bag.
Step 5: Switch Lenses with the Telephoto Toggle
 Tapping the wide/telephoto lens toggle in the bottom right corner
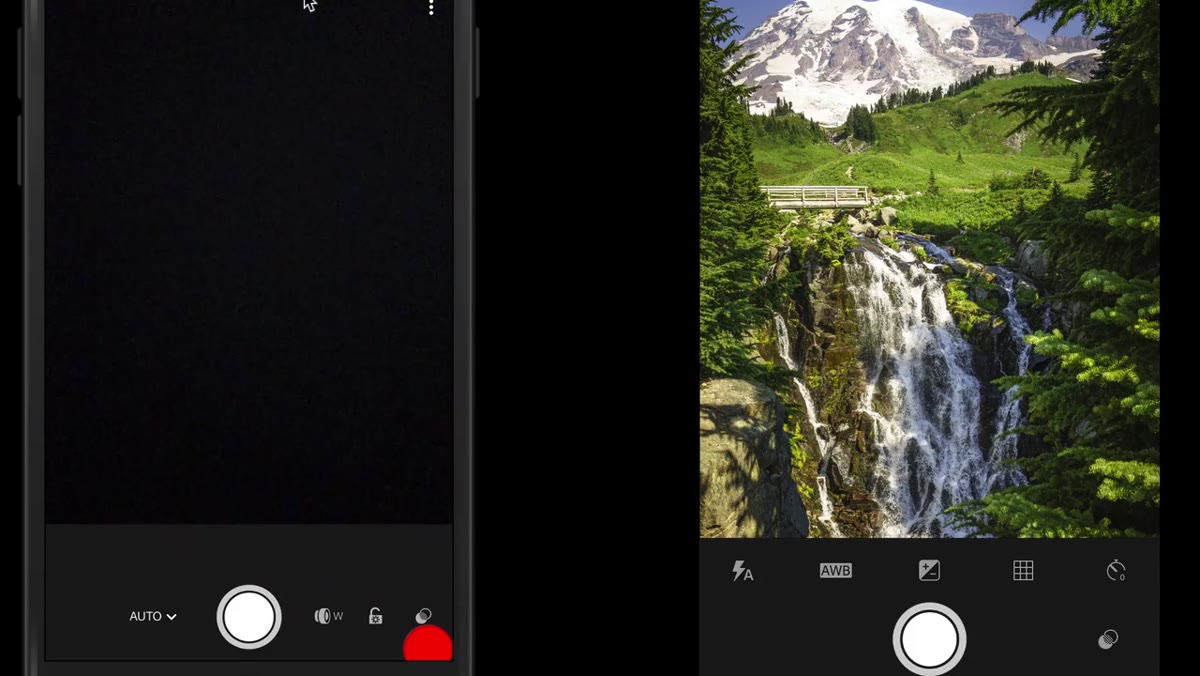
On devices with dual cameras, like the iPhone 7 Plus that Matt is using here, there’s a small icon in the bottom right corner of the camera screen showing a “W” with a lens symbol. Tapping it flips between the wide angle and telephoto lenses. It’s a fast toggle, faster than pinching to zoom, and it keeps you at the actual optical focal length rather than digital zoom territory.
Tapping the wide/telephoto lens toggle in the bottom right corner
On devices with dual cameras, like the iPhone 7 Plus that Matt is using here, there’s a small icon in the bottom right corner of the camera screen showing a “W” with a lens symbol. Tapping it flips between the wide angle and telephoto lenses. It’s a fast toggle, faster than pinching to zoom, and it keeps you at the actual optical focal length rather than digital zoom territory.
This matters more than it might seem. Digital zoom on a phone is just a crop. Optical zoom from the telephoto lens is a real focal length change, and the image quality difference is noticeable, especially when you’re shooting in lower light and need every pixel working for you.
Step 6: Ignore the In-Camera Filters
 Filter icon visible in the camera controls row at the bottom
The filter icon is there. Matt mentions it. We’re both telling you to leave it alone. Baking a filter into a capture defeats the entire purpose of shooting DNG. You want the clean file. You can do anything in post that those filters do, and you can undo it.
Filter icon visible in the camera controls row at the bottom
The filter icon is there. Matt mentions it. We’re both telling you to leave it alone. Baking a filter into a capture defeats the entire purpose of shooting DNG. You want the clean file. You can do anything in post that those filters do, and you can undo it.
What I’d Add From My Own Workflow
The one thing this tutorial doesn’t cover, because it’s focused on the camera side, is what happens immediately after capture. When you shoot DNG inside Lightroom Mobile, the file lands directly in your Lightroom catalog. No import step, no AirDrop, no waiting. You can start editing the moment you lower the phone.
I’ve built a few mobile-specific presets, starting points calibrated for the slightly different tonal character of phone DNGs versus full-frame DNGs, and having the file in Lightroom instantly means I can apply one and evaluate the shot while I’m still at the location. That feedback loop changes how you shoot. You start thinking in edits before you’ve even packed up.
The single biggest shift this tutorial pushed me toward: the default camera app on your phone is optimized for convenience, not for editability. If you care about what happens to your images after capture, shooting DNG through Lightroom Mobile is one of the lowest-friction upgrades you can make to your mobile photography workflow. No new gear, no subscription beyond what you likely already have.
Watch the full tutorial on YouTube to see Matt walk through the interface in real time, including the side-by-side comparison of the old and new camera screens that makes the layout changes much easier to follow.
Comments (4)
I keep coming back to this article. It's that useful.
I've been looking for exactly this kind of tutorial. Perfect timing.
Bookmarked. Coming back to this one for sure.
The before and after really sells it. Incredible difference.
Leave a Comment