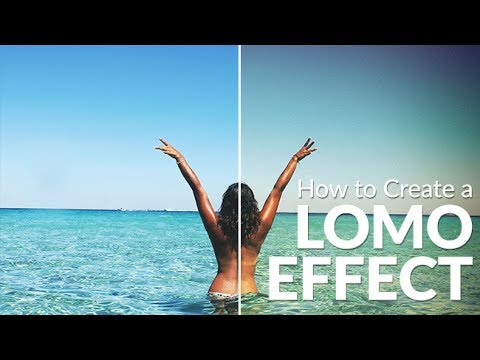
There’s a specific kind of photo that stops you mid-scroll. Edges gone dark and murky, colors pushed past polite, the center of the frame almost glowing by contrast. It looks like it came out of a thrift store camera bag, and that’s exactly the point. The Lomo effect has been quietly running through editorial photography, album artwork, and travel photography for years, and if you’ve ever tried to fake it by cranking saturation and slapping on a vignette, you already know that approach produces something closer to “toddler with a filter app” than “vintage film camera from Soviet Russia.”
Watch the full tutorial on YouTube
In this Aaron Nace (PHLEARN) tutorial, the technique gets the proper treatment it deserves. What makes it click is one move most people skip: adding color directly to the vignette. Not just darkening the edges, but staining them. That’s the difference between a photo that looks processed and one that looks like it was actually shot on a Lomo LC-A, the notoriously cheap Russian compact camera that started this whole aesthetic. I’ve been naming my own presets after songs for years, and after working through this tutorial, I built an entire preset I’m calling “Velvet Underground” around this method. It’s one of those techniques that looks complicated until someone shows you it’s basically two tools and a color picker.
Step 1: Import Your Image and Head to the Develop Module
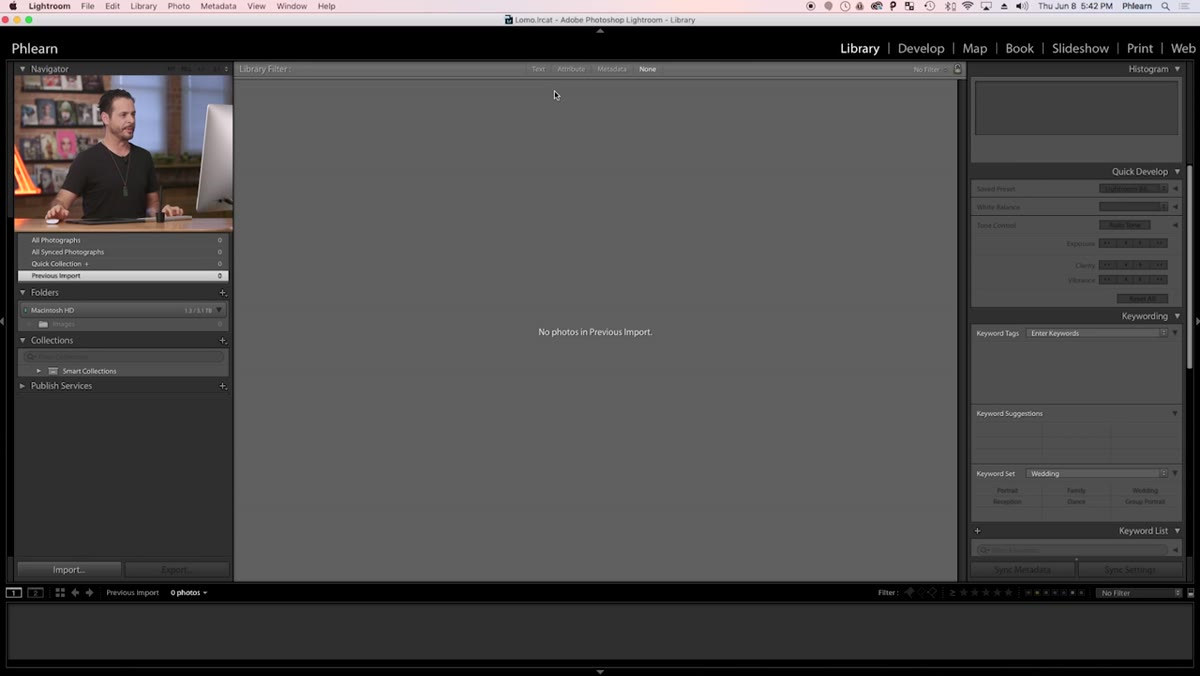 Dragging an image file directly into Lightroom’s interface
Drag your image straight into Lightroom from your file browser. Aaron uses a JPEG in the tutorial, but this workflow handles RAW files just as well. Once the image is in, go directly to the Develop module. Everything from this point forward happens there, so you can close any other panels you have open and give yourself a clean workspace. This is one of those edits where you want to see the full image without distraction.
Dragging an image file directly into Lightroom’s interface
Drag your image straight into Lightroom from your file browser. Aaron uses a JPEG in the tutorial, but this workflow handles RAW files just as well. Once the image is in, go directly to the Develop module. Everything from this point forward happens there, so you can close any other panels you have open and give yourself a clean workspace. This is one of those edits where you want to see the full image without distraction.
Step 2: Add a Radial Filter and Zero Out the Settings
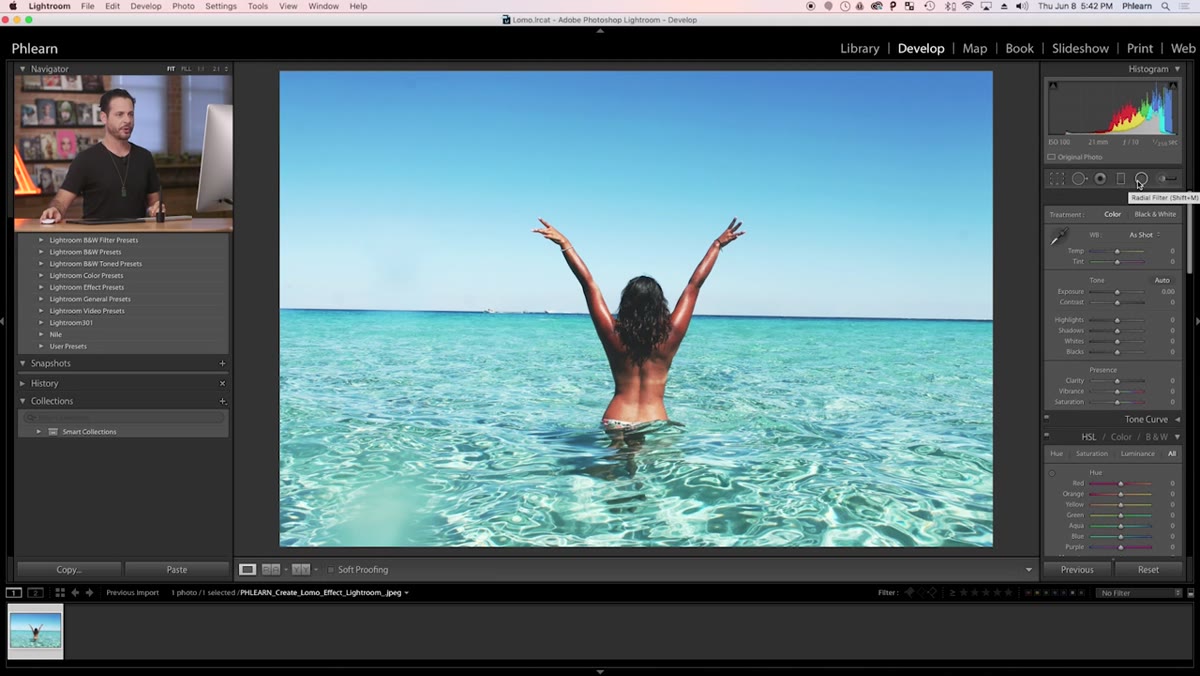 Radial filter menu open with all sliders at zero
Select the Radial Filter from the toolbar at the top of the Develop panel (it looks like a small oval). When the panel opens, zero out every slider before you do anything else. Starting from a clean slate means you’ll be able to see exactly what each adjustment is contributing, which matters a lot when you’re building something this layered. Click and drag a large oval across your image, covering most of the frame. Think of it as a selection that defines where your vignette effect will live.
Radial filter menu open with all sliders at zero
Select the Radial Filter from the toolbar at the top of the Develop panel (it looks like a small oval). When the panel opens, zero out every slider before you do anything else. Starting from a clean slate means you’ll be able to see exactly what each adjustment is contributing, which matters a lot when you’re building something this layered. Click and drag a large oval across your image, covering most of the frame. Think of it as a selection that defines where your vignette effect will live.
Step 3: Darken the Edges, Not the Center
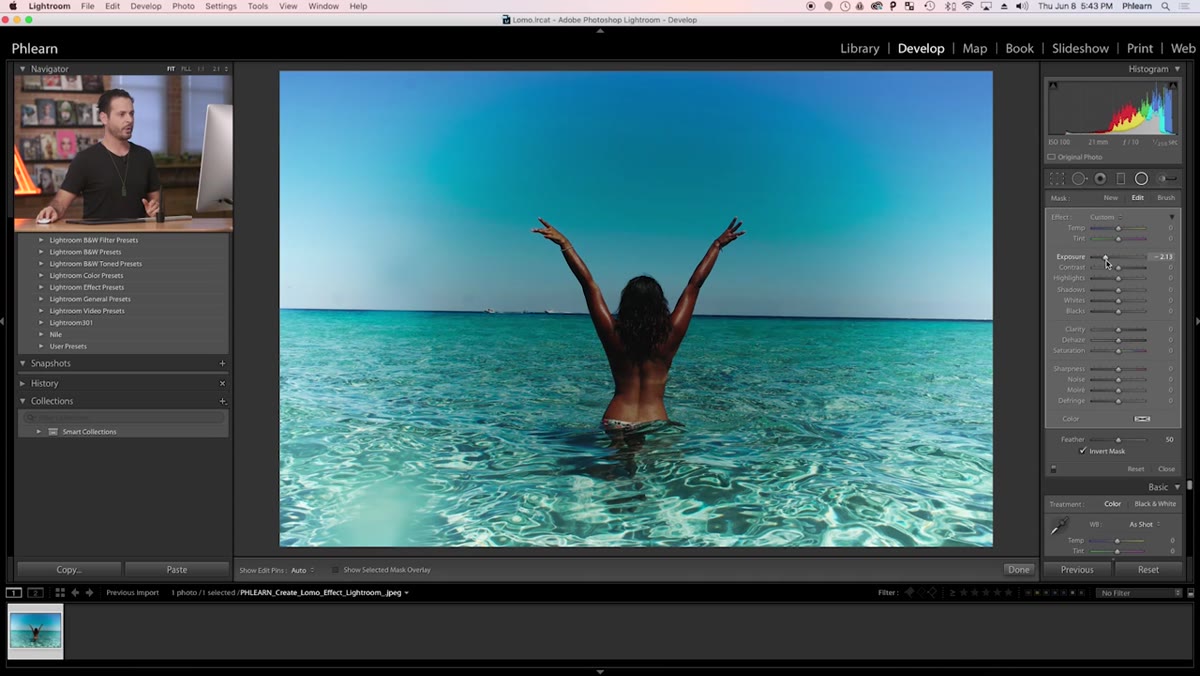 Exposure slider pulled down, invert mask checkbox visible
Pull the Exposure slider down slightly. You’ll probably notice the center of the image getting darker, which is the opposite of what you want. Look for the “Invert Mask” checkbox in the Radial Filter panel and make sure it is unchecked. With invert mask off, the effect applies outside the oval rather than inside it. Now when you pull exposure down, the edges darken and the center stays bright. Stretch the radial filter handle outward so it extends just past the edges of the frame both vertically and horizontally. The vignette should feel like it’s wrapping around the image, not sitting inside it.
Exposure slider pulled down, invert mask checkbox visible
Pull the Exposure slider down slightly. You’ll probably notice the center of the image getting darker, which is the opposite of what you want. Look for the “Invert Mask” checkbox in the Radial Filter panel and make sure it is unchecked. With invert mask off, the effect applies outside the oval rather than inside it. Now when you pull exposure down, the edges darken and the center stays bright. Stretch the radial filter handle outward so it extends just past the edges of the frame both vertically and horizontally. The vignette should feel like it’s wrapping around the image, not sitting inside it.
Step 4: Add Color to the Vignette
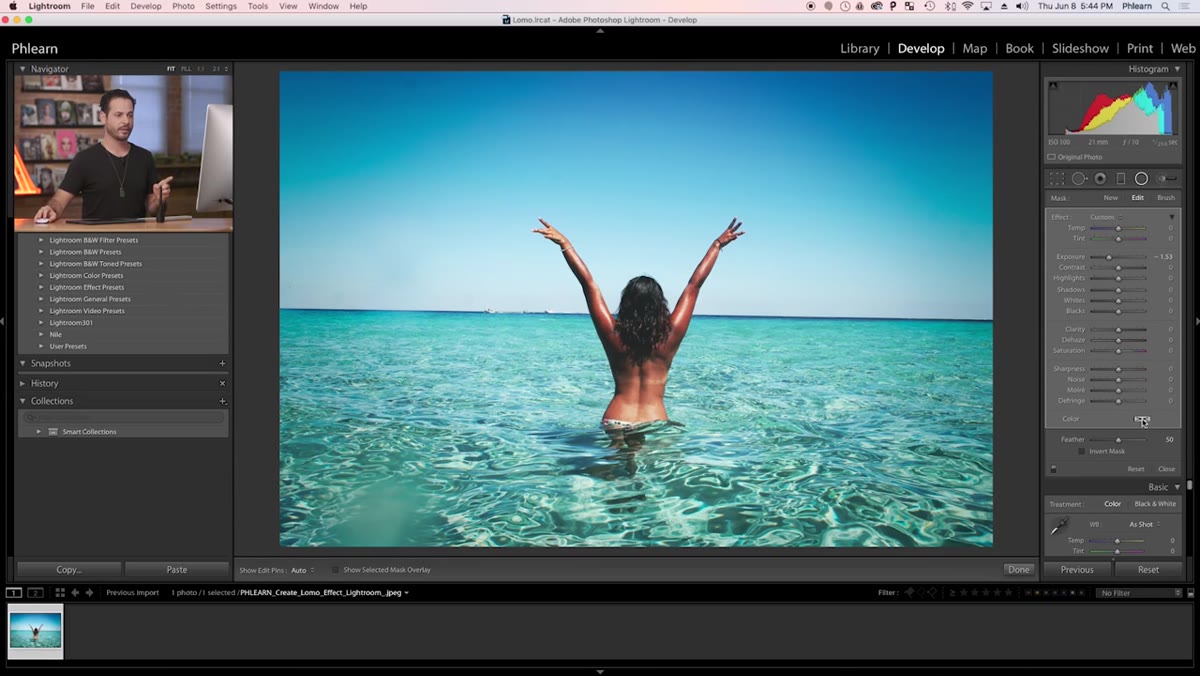 Color picker open with a magenta/green hue being selected
This is the step that separates a real Lomo edit from a standard vignette. At the very bottom of the Radial Filter panel there’s a Color option. Click it. A color picker opens, and here you choose a hue to tint the darkened edges. Aaron gravitates toward magenta in the tutorial, which works beautifully for portraits and warm-toned images. He also experiments with a greenish-yellow, which pulls the edit in a completely different direction. The Lomo LC-A was known for unpredictable color shifts, so there’s no wrong answer. Pick something that complements your subject’s existing tones and commit to it.
Color picker open with a magenta/green hue being selected
This is the step that separates a real Lomo edit from a standard vignette. At the very bottom of the Radial Filter panel there’s a Color option. Click it. A color picker opens, and here you choose a hue to tint the darkened edges. Aaron gravitates toward magenta in the tutorial, which works beautifully for portraits and warm-toned images. He also experiments with a greenish-yellow, which pulls the edit in a completely different direction. The Lomo LC-A was known for unpredictable color shifts, so there’s no wrong answer. Pick something that complements your subject’s existing tones and commit to it.
Step 5: Layer a Second Radial Filter for More Depth
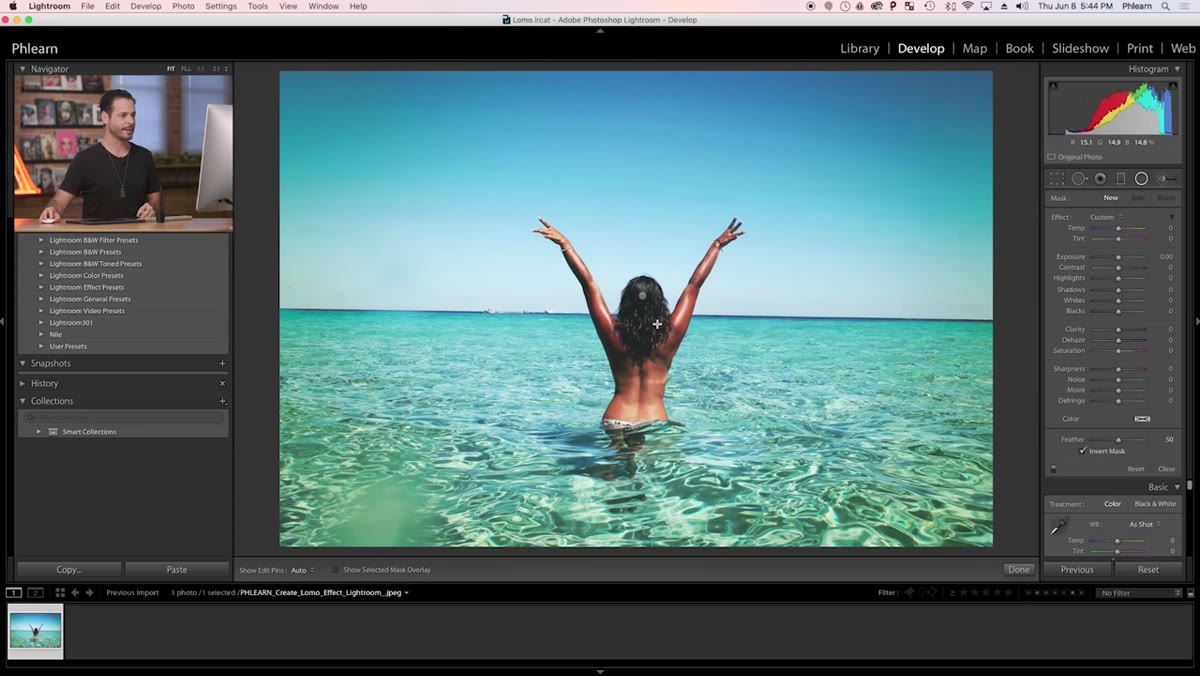 A second radial filter being drawn over the first
One radial filter gets you started. Two gets you there. Create a second Radial Filter, again starting with zeroed sliders, and draw it slightly smaller or positioned differently than the first. You can use this second layer to push the saturation and add a different color temperature to the edges, or simply to intensify the darkening in specific corners. Stacking two radial filters with slightly different color temperatures gives the edge treatment that organic, uneven quality that makes the Lomo look feel authentic rather than stamped on.
A second radial filter being drawn over the first
One radial filter gets you started. Two gets you there. Create a second Radial Filter, again starting with zeroed sliders, and draw it slightly smaller or positioned differently than the first. You can use this second layer to push the saturation and add a different color temperature to the edges, or simply to intensify the darkening in specific corners. Stacking two radial filters with slightly different color temperatures gives the edge treatment that organic, uneven quality that makes the Lomo look feel authentic rather than stamped on.
What I’d Add: Lock In the Look with a Tone Curve Adjustment
The tutorial covers the vignette and color edges thoroughly, but the one thing I always layer on top when building a Lomo-style preset is a custom tone curve. Pulling the blacks up slightly (so the shadow point sits at around 15-20 instead of 0) gives the image that faded, slightly milky quality that film photographers call “lifted blacks.” It keeps your shadows from going fully black, which tends to happen when you darken edges aggressively with radial filters. Combine that with a slight S-curve for contrast in the midtones, and the whole edit starts to look less like a filter and more like a photograph that came out of a camera with a personality.
If you want to take it even further, try a small adjustment in the HSL panel: push Saturation up on reds and oranges while pulling it down slightly on blues. Lomo cameras were famously biased toward warm tones, and this mimics that without blowing out skin tones or skies.
The biggest lesson here is one that sounds obvious but changes how you approach Lightroom completely: vignettes don’t have to be neutral. A gray or black vignette flattens a photo. A colored vignette transforms it. Aaron Nace makes this feel like a small detail, but once you see it, you’ll start noticing colored edge tones in film photography, vintage prints, and editorial work everywhere. That one color picker click is what gives the Lomo effect its identity.
Watch the full tutorial on YouTube and build out the full effect yourself. The original image Aaron uses is available on PHLEARN’s site if you want to follow along with the same file.
Comments (1)
My workflow just got 10x faster. Not even kidding.
Leave a Comment