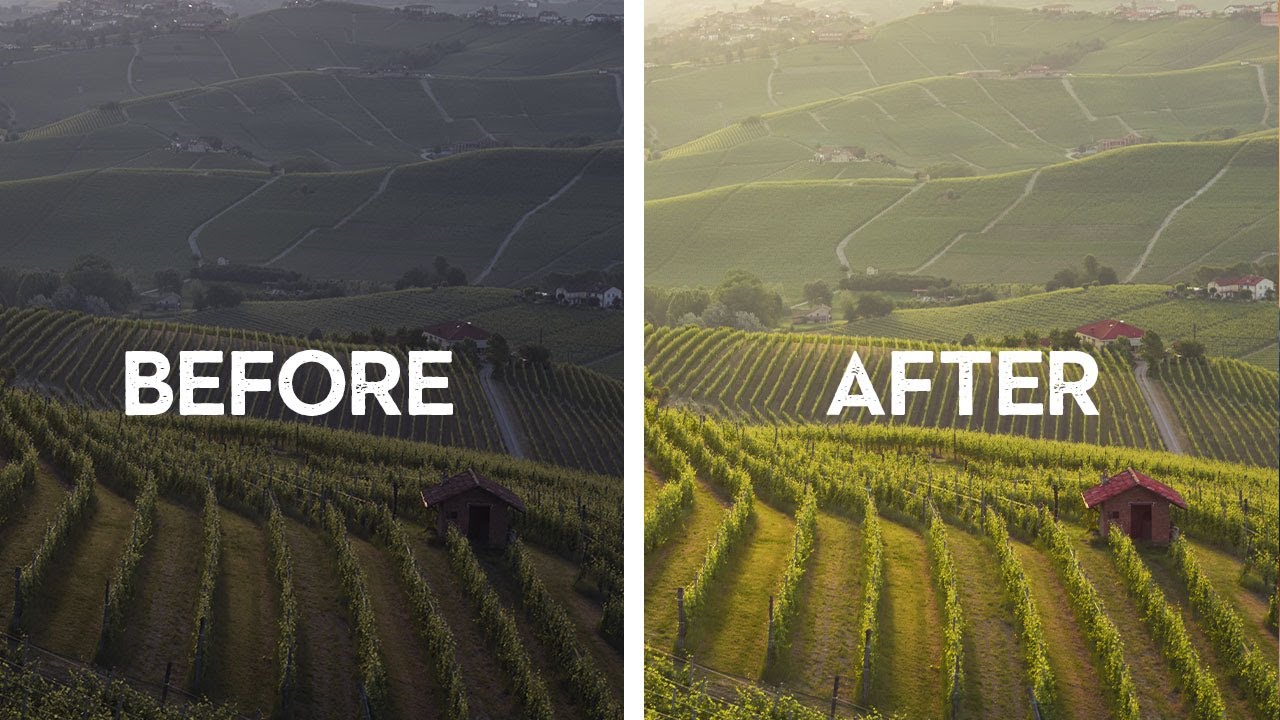
Every so often I watch another editor work through photos live and walk away genuinely recalibrating something I thought I already had figured out. I learned Lightroom years ago because someone had to edit my band’s press shots and we couldn’t afford to hire anyone. That scrappy, problem-solving approach to editing never really left me. So when I came across this Nigel Danson tutorial where he works through viewer-submitted RAW files on an iPad in real time, I paid attention. It’s the kind of session that rewards close watching because the decisions happen fast and they’re rooted in real images with real problems, not perfectly staged demo files.
Watch the full tutorial on YouTube
What Danson demonstrates across multiple images is less about any single tool and more about a consistent triage mindset: identify the structural problem first, fix the light second, and then address color last. That sequence matters more than most beginners realize. If you reach for the HSL panel before you’ve nailed your crop and your exposure, you’re color grading a broken image. The steps below follow the order he actually works through on screen, rebuilt here so you can follow along without pausing the video every thirty seconds.
Step 1: Crop Before You Do Anything Else
 Cropping the lake image to remove distracting foreground elements
Danson’s first move on the opening image, a stunning lake shot, is not to touch exposure or color. It’s to crop. Specifically, he removes a boat and a figure on the right side of the frame, then tightens the left edge to bring the composition closer to a square. The rule I follow here: if something in the frame is competing with your main subject, and cropping removes it without destroying your aspect ratio, crop it before you do anything else. Every other edit you make will be more accurate once the composition is locked.
Cropping the lake image to remove distracting foreground elements
Danson’s first move on the opening image, a stunning lake shot, is not to touch exposure or color. It’s to crop. Specifically, he removes a boat and a figure on the right side of the frame, then tightens the left edge to bring the composition closer to a square. The rule I follow here: if something in the frame is competing with your main subject, and cropping removes it without destroying your aspect ratio, crop it before you do anything else. Every other edit you make will be more accurate once the composition is locked.
Don’t overthink the crop tool on Lightroom Mobile. Drag the corner handles to adjust freely, or tap the aspect ratio options to lock to a specific ratio like 1:1 or 4:5 for social. Danson goes roughly square on this image because the lake sits naturally in the center and the square format stops the eye from wandering to the edges.
Step 2: Check the RAW File’s Dynamic Range Before Committing to Exposure
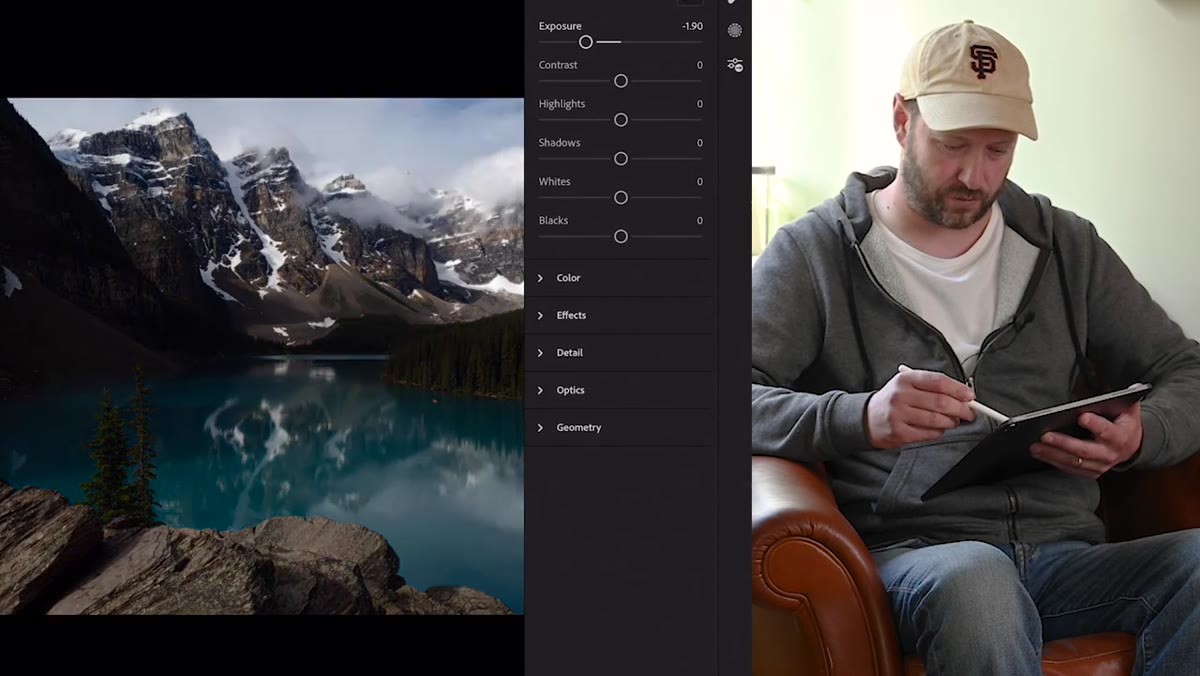 Pulling down exposure to reveal sky detail in the RAW file
Once the crop is set, Danson does something I always recommend to anyone moving from JPEGs to RAW files: he drags the exposure slider down hard just to see what’s hiding in the highlights. On this lake image, pulling exposure reveals a significant amount of sky detail that the JPG preview was clipping. He doesn’t commit to that exposure value, but the test tells him exactly how much range he has to work with.
Pulling down exposure to reveal sky detail in the RAW file
Once the crop is set, Danson does something I always recommend to anyone moving from JPEGs to RAW files: he drags the exposure slider down hard just to see what’s hiding in the highlights. On this lake image, pulling exposure reveals a significant amount of sky detail that the JPG preview was clipping. He doesn’t commit to that exposure value, but the test tells him exactly how much range he has to work with.
This is a habit worth building. RAW files hold far more data than your screen initially shows, especially in bright skies. A quick exposure pull down and then back up gives you a ceiling and a floor for the edit. On Lightroom Mobile, the exposure slider is in the Light panel. Set it, drag it to an extreme, look at what appears, then return to a natural starting point.
Step 3: Use a Graduated Filter to Darken and Refine the Sky
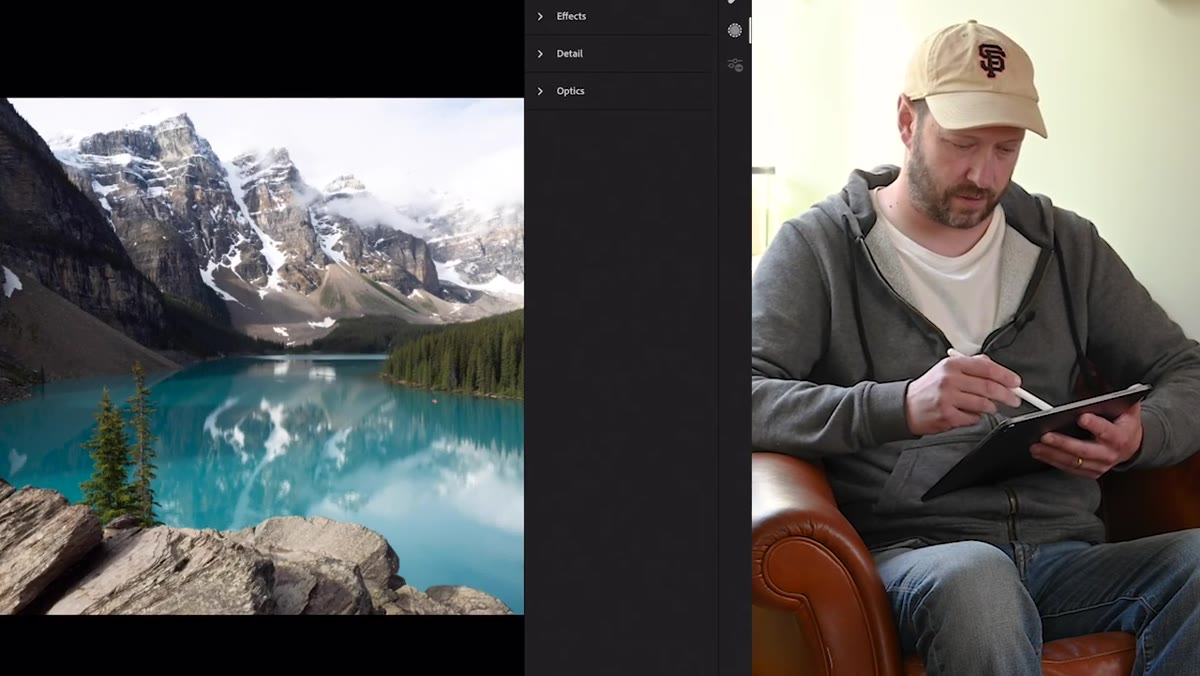 Drawing a graduated filter down from the top of the sky
Here is where Danson does the heavy lifting on the sky without affecting the foreground. He draws a graduated filter from the top of the image downward, covering roughly the upper half of the frame. Inside that filter, he drops the exposure, lifts the contrast slightly, pulls the highlights down, and desaturates the blue channel.
Drawing a graduated filter down from the top of the sky
Here is where Danson does the heavy lifting on the sky without affecting the foreground. He draws a graduated filter from the top of the image downward, covering roughly the upper half of the frame. Inside that filter, he drops the exposure, lifts the contrast slightly, pulls the highlights down, and desaturates the blue channel.
That last move, desaturating the blue in the sky, is the one most people skip. On this particular image the sky blue was competing with the teal of the lake water. By reducing the sky’s blue saturation inside the graduated filter, he lets the water become the dominant color in the scene. On Lightroom Mobile, access the masking tools through the icon that looks like a circle with a dotted edge. Choose Graduated Filter, draw from top to bottom, then dial in the adjustments. Keep your graduated filter angle straight unless the horizon is tilted.
Step 4: Work the HSL Panel to Isolate Your Hero Color
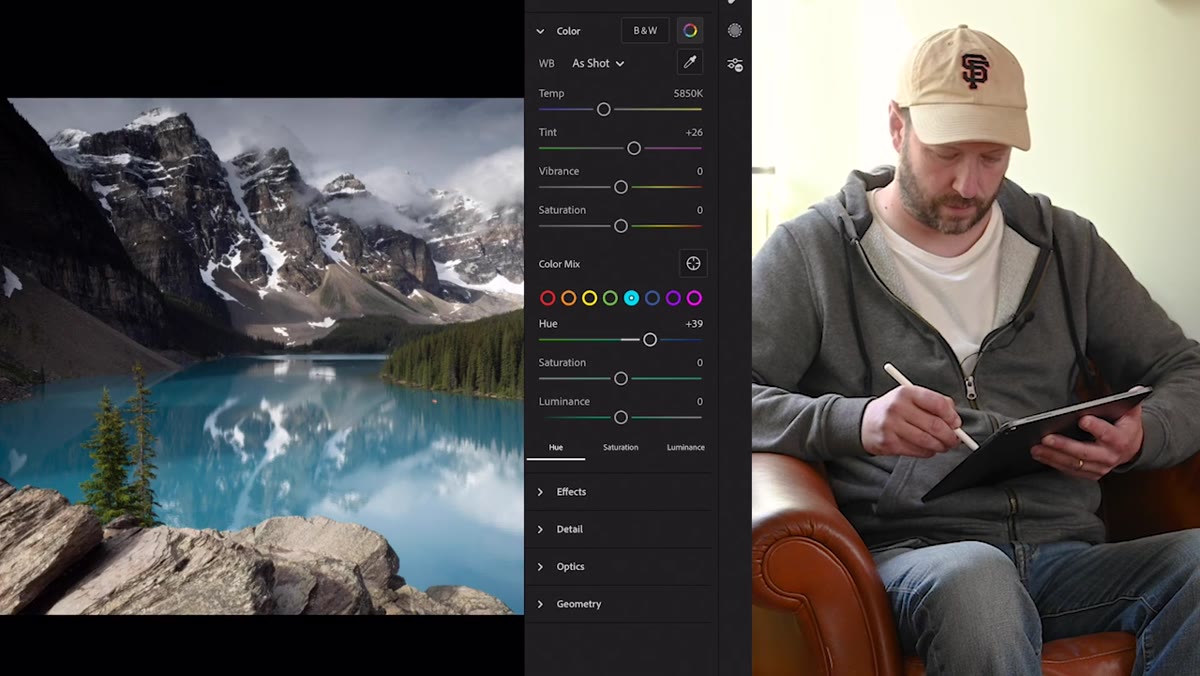 Adjusting saturation and hue of blues and greens in the HSL panel
After the sky is handled, Danson moves into the Color Mix panel (HSL) to push the lake’s teal more prominently into focus. He bumps the blue saturation modestly, then dials the green hue and saturation down specifically to keep the trees from pulling visual weight away from the water.
Adjusting saturation and hue of blues and greens in the HSL panel
After the sky is handled, Danson moves into the Color Mix panel (HSL) to push the lake’s teal more prominently into focus. He bumps the blue saturation modestly, then dials the green hue and saturation down specifically to keep the trees from pulling visual weight away from the water.
This is a technique I use constantly and it changed how I think about color grading. You’re not trying to make everything vivid. You’re deciding which color in the frame deserves to win, and then you’re quietly demoting everything else. On Lightroom Mobile the Color Mix panel breaks into Hue, Saturation, and Luminance tabs. Work Saturation first, then Hue to shift the shade if needed, and save Luminance for fine-tuning brightness of individual color ranges. Danson also pulls the orange channel down slightly to tone down any warm cast in the rocks, keeping the palette clean.
Step 5: Apply a Preset as a Starting Point, Then Customize
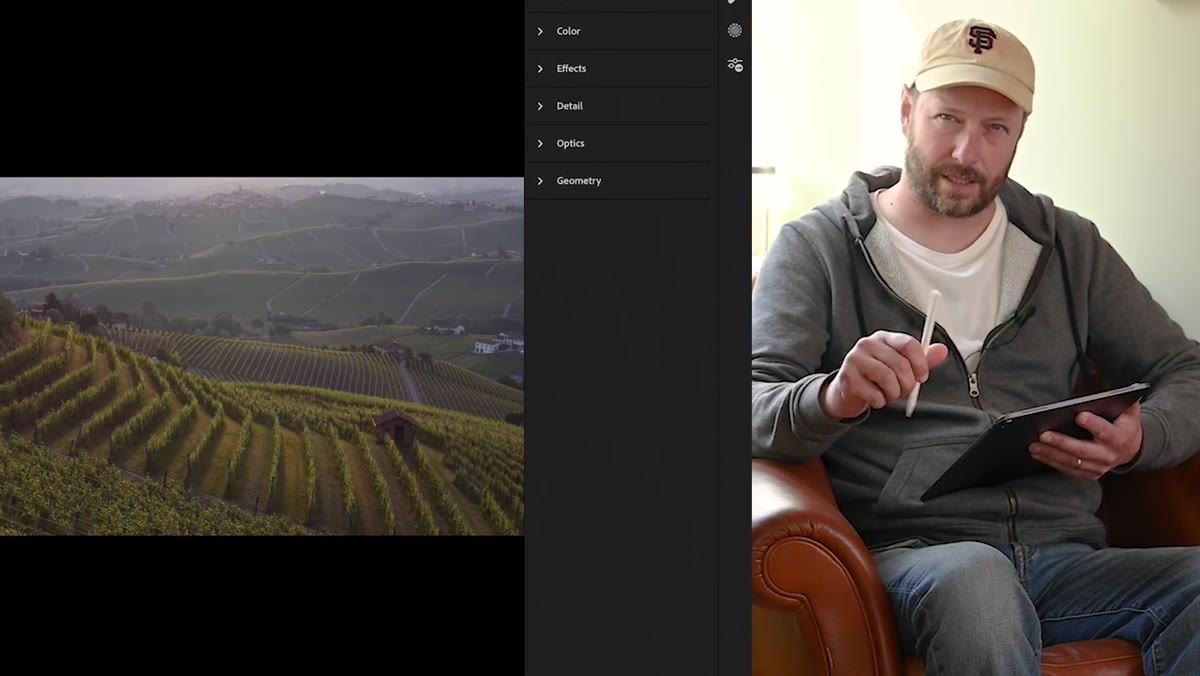 Applying a preset to a vineyard sunrise image in Italy
On the second image, a vineyard at sunrise in Italy, Danson applies one of his own presets as a first move rather than building from scratch. He’s clear about something I agree with completely: don’t buy someone else’s presets if you can avoid it. Build your own. A preset is just a saved combination of slider positions, and when you build them yourself you understand exactly what each one does and when to reach for it.
Applying a preset to a vineyard sunrise image in Italy
On the second image, a vineyard at sunrise in Italy, Danson applies one of his own presets as a first move rather than building from scratch. He’s clear about something I agree with completely: don’t buy someone else’s presets if you can avoid it. Build your own. A preset is just a saved combination of slider positions, and when you build them yourself you understand exactly what each one does and when to reach for it.
If you don’t have your own presets yet, use someone else’s as a template, then disassemble it. After applying, go into each panel and ask what changed and why. Danson applies his preset and then immediately returns to the crop tool because the preset doesn’t fix composition. No preset ever will.
Step 6: Crop Again After Applying the Preset
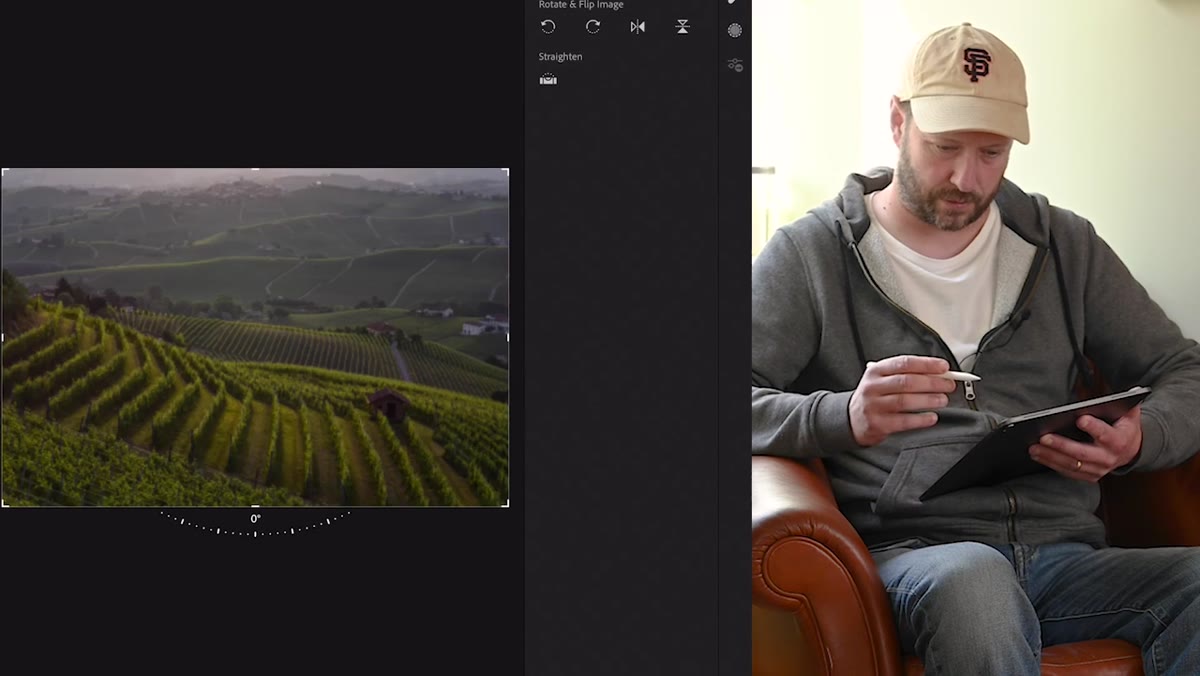 Cropping out houses on left and right edges of vineyard image
This is the step most beginner workflows skip. After applying the preset to the vineyard image, Danson goes straight back to crop and removes houses visible on both the left and right edges of the frame. The subject is the vineyard. The houses are context at best, distractions at worst.
Cropping out houses on left and right edges of vineyard image
This is the step most beginner workflows skip. After applying the preset to the vineyard image, Danson goes straight back to crop and removes houses visible on both the left and right edges of the frame. The subject is the vineyard. The houses are context at best, distractions at worst.
Two crops in a single edit session is not redundant. The first crop establishes your primary composition. The second crop is quality control after your edits shift your attention and you see the frame with fresh eyes. I often find my tightest crops happen after I’ve already done the majority of my tonal work.
What I’d Add: Don’t Skip the Vignette
Danson mentions adding a vignette at the end of the lake edit almost as an afterthought, and I think that undersells it. A subtle vignette in Lightroom Mobile, usually sitting between -10 and -25 in the Effects panel, acts like a very gentle mat around your image. It guides the eye inward without the viewer ever noticing the vignette itself. If someone can see your vignette, it’s too strong. The goal is invisible framing, not a dark ring.
I use a midpoint feather of around 50 and keep roundness near zero for most landscapes. You want the darkening to follow the natural edges of the frame rather than creating an obvious oval.
The single most important lesson from Danson’s session is the sequence: crop, check dynamic range, control light with masking, then shape color. Every step in that chain cleans up the job for the next one. Skip the order and you’re building on a shaky foundation. Get it right and the color work at the end almost edits itself.
Watch the full tutorial on YouTube to see Danson work through multiple images live, including how he reads viewer-submitted RAW files and adapts his approach on the fly. There’s a lot in the pacing and the real-time decision-making that text can only partially capture.
Comments
Leave a Comment