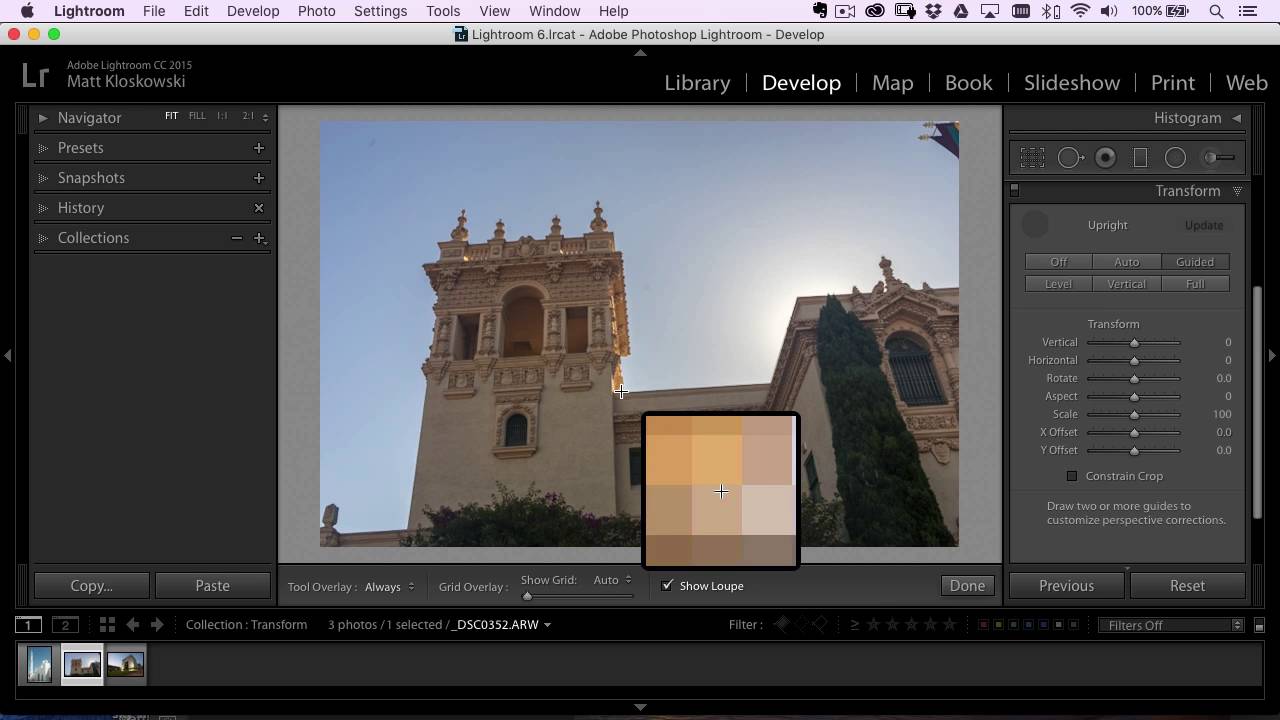
Shooting architecture while traveling is one of those things that looks easy until you get home and open Lightroom. You tilted the camera up to fit the building in the frame, and now every vertical line is falling inward like the walls are slowly closing in. The automatic Upright options in Lens Corrections do an okay job, but they’ve always felt like a negotiation you’re losing. Lightroom picks the reference points, and you just hope it chose wisely.
That changed quietly in a mid-2016 Lightroom CC update, when Adobe moved the Upright tools into a dedicated Transform panel and added something genuinely useful: a Guided mode that lets you draw the correction lines yourself. In this Matt Kloskowski tutorial, he walks through exactly how the tool works using real architectural shots, and the results are meaningfully better than anything the automatic modes were producing before. Watch the full tutorial on YouTube if you want to see it in motion, but the walkthrough below has everything you need to put it into practice right now.
I’ve been using this feature ever since and it’s changed how I approach wide-angle city shots. The key shift in thinking is this: you’re not asking Lightroom to guess what straight looks like. You’re showing it.
Step 1: Open the Transform Panel in Lightroom CC
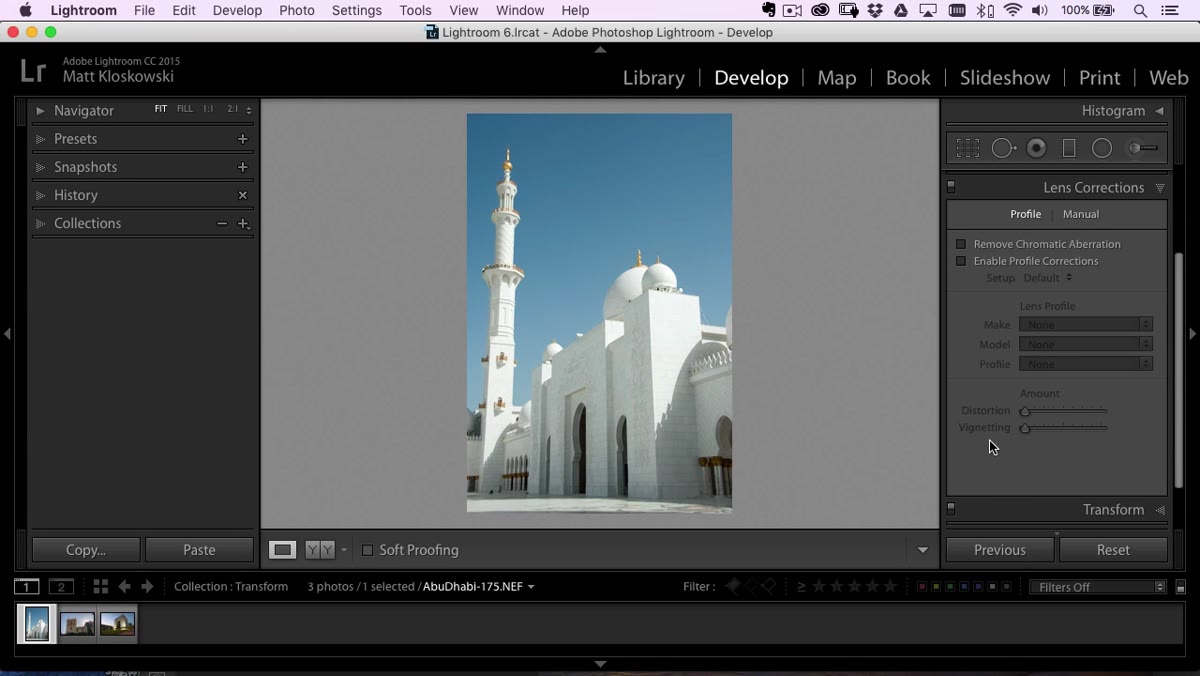 The new Transform panel open inside Lens Corrections
The Upright controls used to live inside the Lens Corrections panel. After the mid-2016 update, they moved into their own dedicated Transform panel in the Develop module. Open it and you’ll see the familiar Upright buttons at the top, Level, Vertical, Auto, Full, but now there’s a Guided option alongside them. That’s the one you want for precise work on buildings and architectural lines.
The new Transform panel open inside Lens Corrections
The Upright controls used to live inside the Lens Corrections panel. After the mid-2016 update, they moved into their own dedicated Transform panel in the Develop module. Open it and you’ll see the familiar Upright buttons at the top, Level, Vertical, Auto, Full, but now there’s a Guided option alongside them. That’s the one you want for precise work on buildings and architectural lines.
Step 2: Select Guided Mode and Activate the Drawing Tool
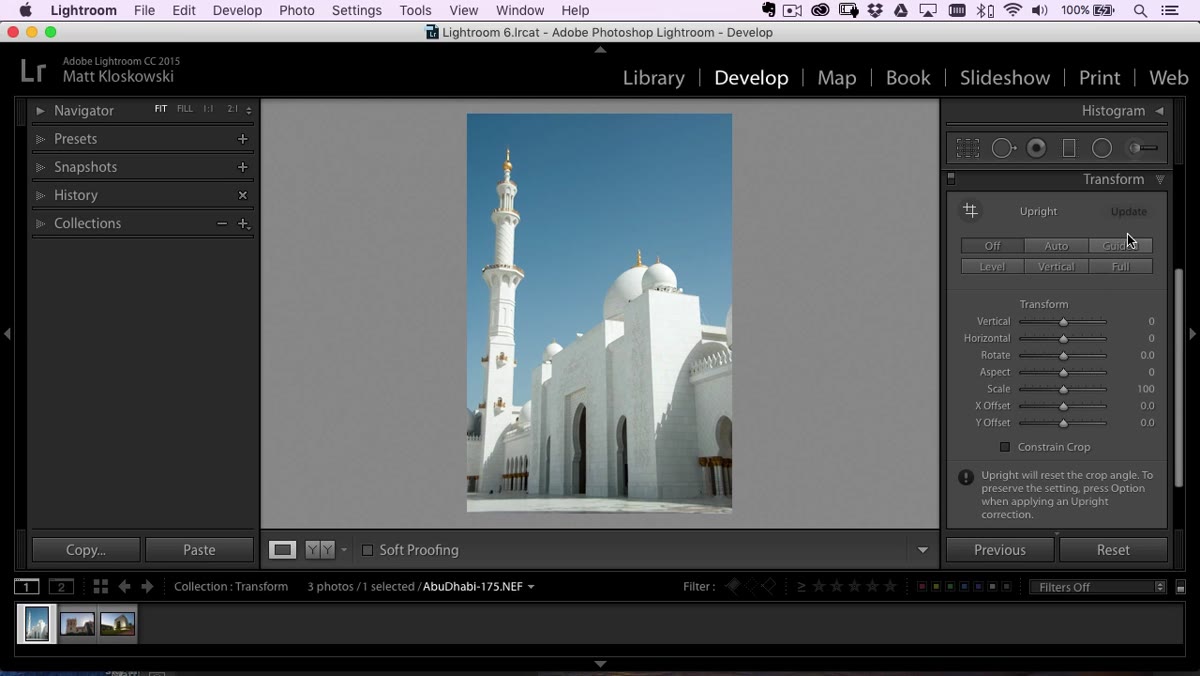 Guided mode selected, cursor ready to draw on building
Click the Guided button in the Transform panel. A small loupe or magnifier tool activates automatically alongside your cursor. That loupe is your best friend here because it zooms into the exact area where your line starts and ends, so you can place it precisely on an edge rather than somewhere in the middle of a wall. Don’t skip this. Sloppy line placement leads to overcorrection.
Guided mode selected, cursor ready to draw on building
Click the Guided button in the Transform panel. A small loupe or magnifier tool activates automatically alongside your cursor. That loupe is your best friend here because it zooms into the exact area where your line starts and ends, so you can place it precisely on an edge rather than somewhere in the middle of a wall. Don’t skip this. Sloppy line placement leads to overcorrection.
Step 3: Draw Your First Correction Line Along a Vertical Surface
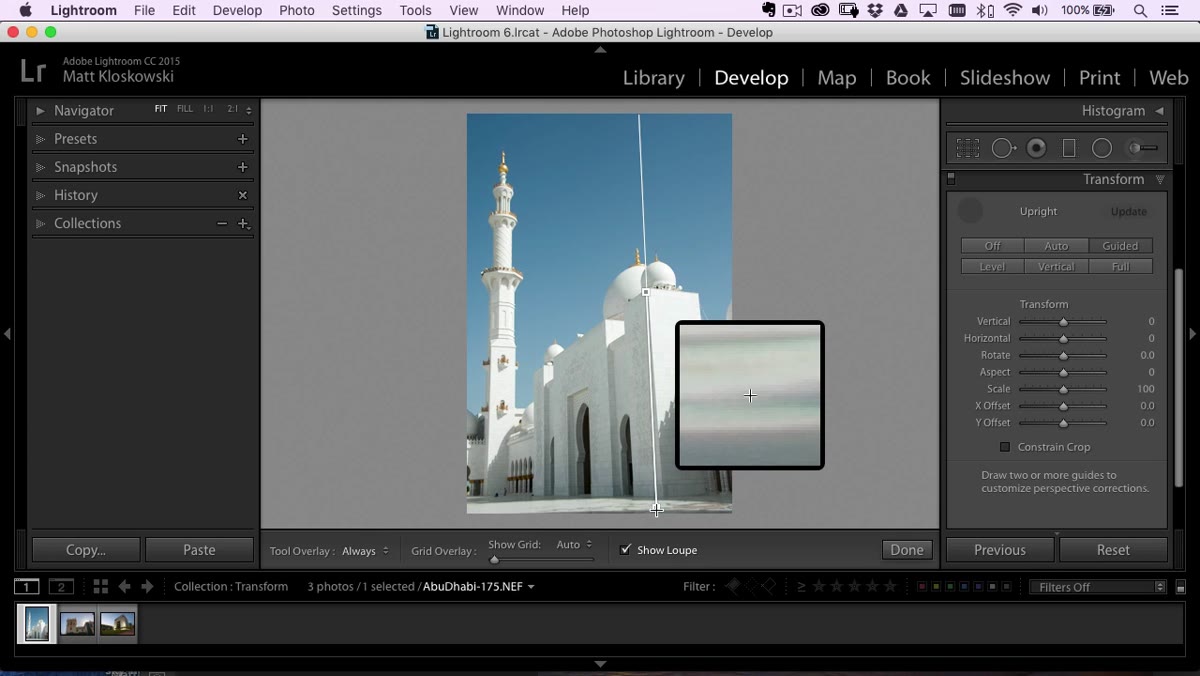 First line being drawn along the edge of a building
Click and drag along any line in your photo that should be perfectly vertical, a window edge, a column, the corner of a building. The line snaps to the angle you draw, but nothing happens yet. One line alone won’t trigger a correction. Lightroom needs a second line to understand the geometry it’s working with, similar to how a surveyor needs two reference points before they can level anything. Draw the line as long as the surface allows, short lines give the algorithm less to work with.
First line being drawn along the edge of a building
Click and drag along any line in your photo that should be perfectly vertical, a window edge, a column, the corner of a building. The line snaps to the angle you draw, but nothing happens yet. One line alone won’t trigger a correction. Lightroom needs a second line to understand the geometry it’s working with, similar to how a surveyor needs two reference points before they can level anything. Draw the line as long as the surface allows, short lines give the algorithm less to work with.
Step 4: Draw a Second Line to Complete the Correction
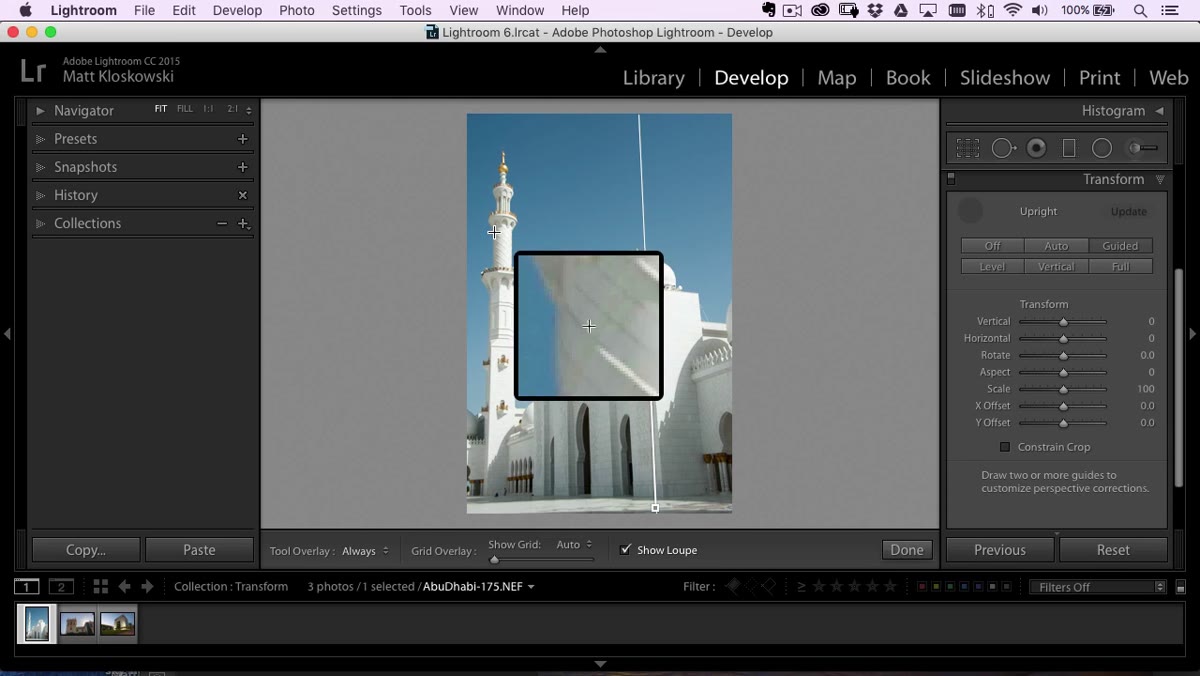 Second line added, building snapping into vertical alignment
Draw a second line along another vertical surface, ideally on the opposite side of the frame from your first line. The moment you release the mouse, Lightroom calculates the correction and the image snaps into alignment. The two lines together define what “straight” means in this photo, and Lightroom rotates and skews the image to match. If the result looks extreme or strange, you can grab either line and nudge it slightly to dial back the effect.
Second line added, building snapping into vertical alignment
Draw a second line along another vertical surface, ideally on the opposite side of the frame from your first line. The moment you release the mouse, Lightroom calculates the correction and the image snaps into alignment. The two lines together define what “straight” means in this photo, and Lightroom rotates and skews the image to match. If the result looks extreme or strange, you can grab either line and nudge it slightly to dial back the effect.
One thing worth watching: very wide angle shots taken close to a building can start to bow or barrel at the top when corrected too aggressively. If your straight lines are curving after correction, you’ve pushed it too far. Back off by adjusting the lines rather than fighting it with sliders.
Step 5: Use Constrain Crop to Clean Up the Edges
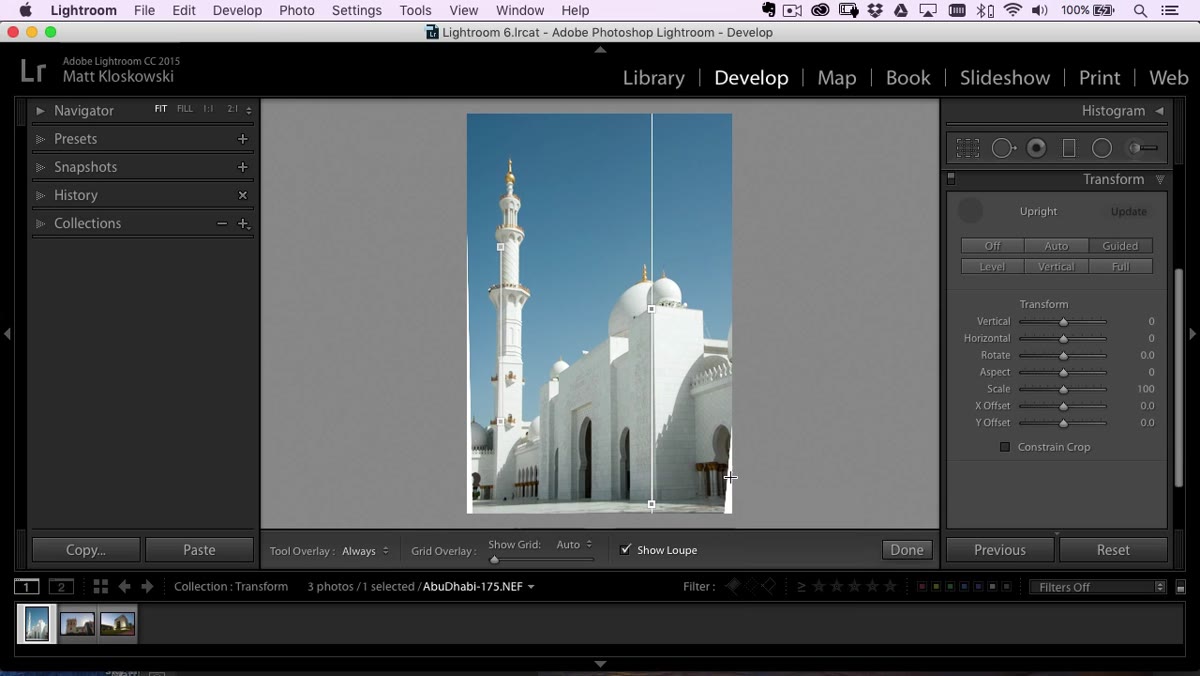 Constrain Crop checkbox enabled, white edge areas disappearing
After perspective correction, white triangular gaps appear at the corners of your frame where the image was rotated to meet the correction. Tick the Constrain Crop checkbox in the Transform panel and Lightroom automatically crops to remove those gaps. It’s a clean solution and usually the first thing I enable after any perspective work. You will lose a bit of your original composition, but it’s a better trade than having white voids in your corners.
Constrain Crop checkbox enabled, white edge areas disappearing
After perspective correction, white triangular gaps appear at the corners of your frame where the image was rotated to meet the correction. Tick the Constrain Crop checkbox in the Transform panel and Lightroom automatically crops to remove those gaps. It’s a clean solution and usually the first thing I enable after any perspective work. You will lose a bit of your original composition, but it’s a better trade than having white voids in your corners.
Step 6: Recover Lost Framing with the X and Y Offset Sliders
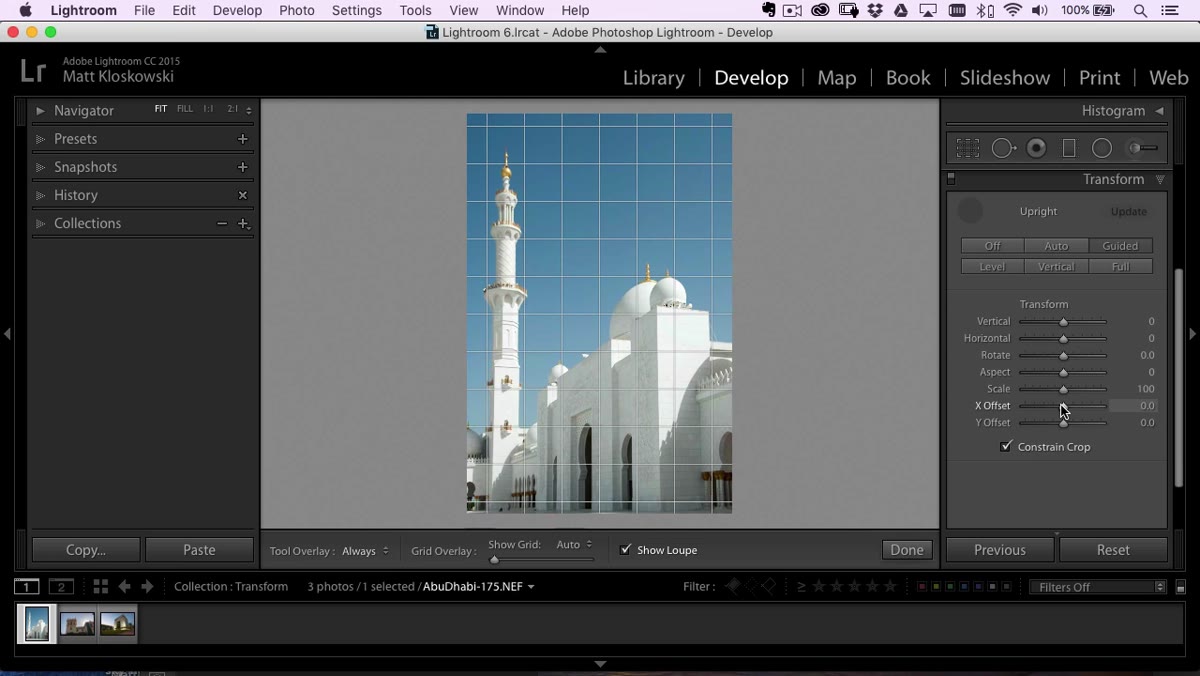 Y Offset slider being dragged to reveal bottom of building frame
Here’s the part of this feature that most people miss. After correction and cropping, you sometimes lose the bottom of your scene, the sidewalk disappears or the base of the building gets clipped. The X Offset and Y Offset sliders let you shift the image within the crop frame without redoing any of the correction work. X moves left and right, Y moves up and down. A small nudge down on the Y Offset can bring back foreground detail that got cropped out, so you’re not forced to choose between straight lines and a complete composition.
Y Offset slider being dragged to reveal bottom of building frame
Here’s the part of this feature that most people miss. After correction and cropping, you sometimes lose the bottom of your scene, the sidewalk disappears or the base of the building gets clipped. The X Offset and Y Offset sliders let you shift the image within the crop frame without redoing any of the correction work. X moves left and right, Y moves up and down. A small nudge down on the Y Offset can bring back foreground detail that got cropped out, so you’re not forced to choose between straight lines and a complete composition.
Step 7: Apply the Same Technique to Horizontal Lines
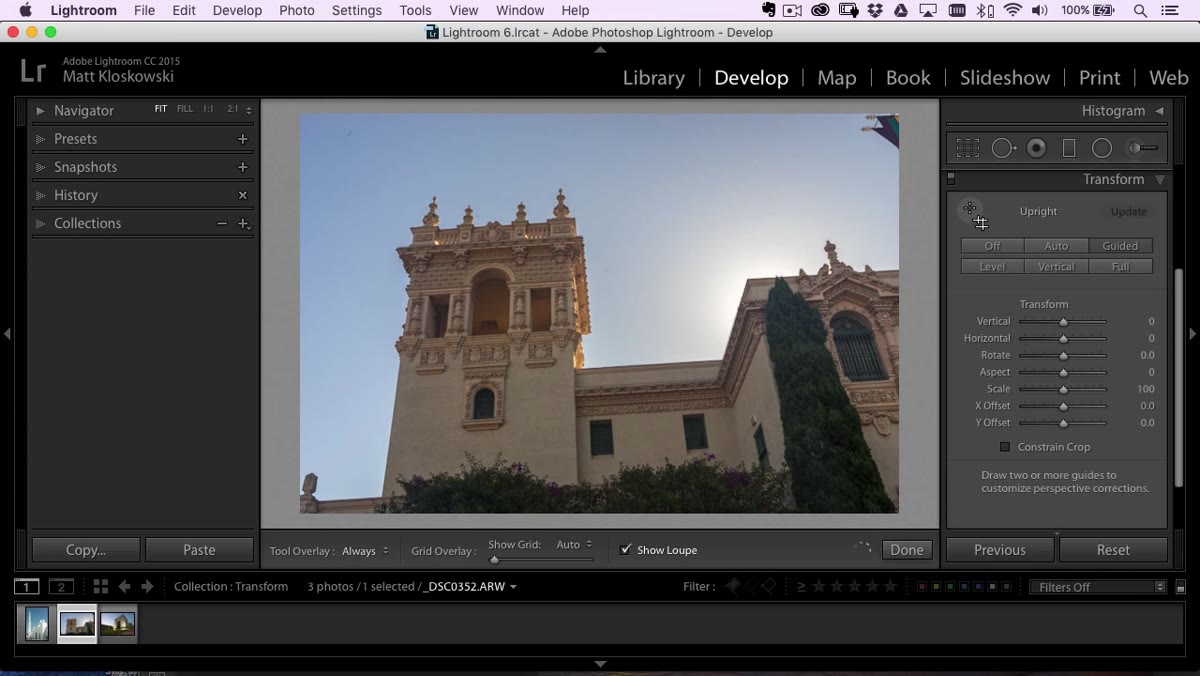 Two horizontal guide lines drawn across a building facade
Guided Upright isn’t only for fixing vertical convergence. If a photo has horizontal lines that are running at an angle, a roofline, a row of windows, the horizon in a wide establishing shot, you can draw your two lines horizontally instead. The workflow is identical. Draw one line along an edge that should be level, draw a second along another horizontal surface, and Lightroom corrects the tilt. You can even mix vertical and horizontal lines in the same image if the photo needs both kinds of correction.
Two horizontal guide lines drawn across a building facade
Guided Upright isn’t only for fixing vertical convergence. If a photo has horizontal lines that are running at an angle, a roofline, a row of windows, the horizon in a wide establishing shot, you can draw your two lines horizontally instead. The workflow is identical. Draw one line along an edge that should be level, draw a second along another horizontal surface, and Lightroom corrects the tilt. You can even mix vertical and horizontal lines in the same image if the photo needs both kinds of correction.
When to Leave It Alone
Guided Upright is powerful enough that it’s tempting to apply it to everything shot at a wide angle. Resist that. A photo taken with a 14mm lens just a few feet from a building has so much natural distortion baked into the geometry that trying to fully straighten it looks artificial and a little eerie. The building starts looking like it was constructed by someone who’d never seen a right angle.
My rule is this: if the perspective was mildly affected by camera tilt and the building was reasonably far away, Guided Upright can fix it invisibly. If the distortion is radical because of lens choice or shooting distance, no amount of post-processing corrects it without the image looking wrong. For serious architectural work, a tilt-shift lens is the actual solution. For travel shots where you tilted up slightly to get the whole building in, Guided Upright is exactly the right tool.
The thing I appreciate most about this feature is the control it returns to you. Automatic Upright was always a roll of the dice. Guided mode is a conversation with the software where you actually get a vote. That’s worth a lot in a workflow where most corrections are invisible when done right and very visible when done wrong.
Watch the full tutorial on YouTube to see Matt walk through multiple real examples from start to finish, including the moment where over-correcting a wide-angle shot goes sideways in a way that’s very instructive.
Comments (4)
Just subscribed. If the rest of your content is this good, I'm in.
Shared this with my photography group. Everyone loved it.
Just subscribed. If the rest of your content is this good, I'm in.
This saved me so much time on my last edit. Wish I'd found this sooner.
Leave a Comment