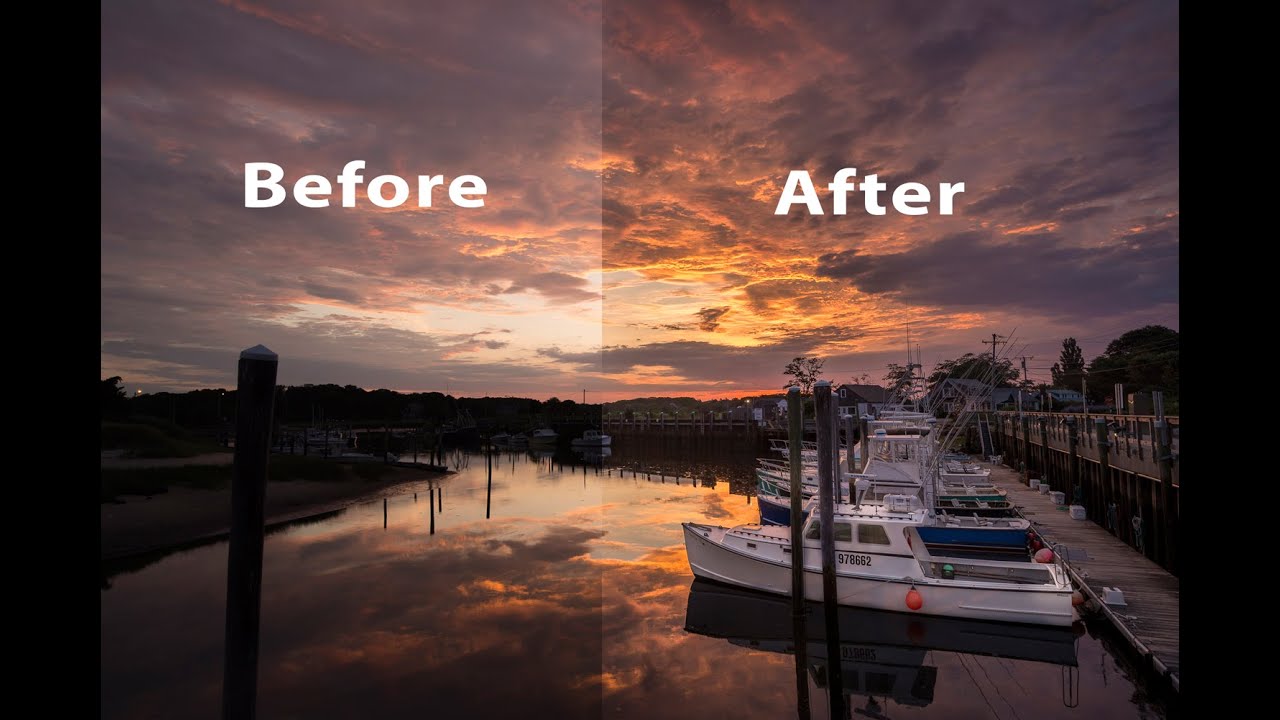
Sunset photos are the ones that fool you into thinking you nailed it in camera. The light is gorgeous, the composition feels right, and then you open the RAW file and the sky looks like a nuclear event while the dock is a silhouette. I’ve been there more times than I want to count. It’s one of the most common problems I hear about from readers, and it’s also one of the most solvable ones once you understand how Lightroom’s tone controls actually work together.
Watch the full tutorial on YouTube
In this Matt Kloskowski tutorial, he takes a Cape Cod sunrise shot straight from a camera reset and walks through the full development process live, no cheating with pre-applied edits. The scene is a boat dock at golden hour: bright sky with beautiful cloud detail that’s being buried by overexposure, and a foreground that needs lifting without blowing the whole image apart. It’s the kind of photo where the single Exposure slider will fail you immediately, and watching how Matt solves that problem methodically is worth more than a hundred preset packs.
The photo was shot on a tripod at f/8, 1/10 of a second, ISO 100. Clean file, lots of dynamic range to work with. That matters because good technique and a well-exposed RAW give you room to maneuver. Here’s how the edit unfolds.
Step 1: Ignore the Exposure Slider (At First)
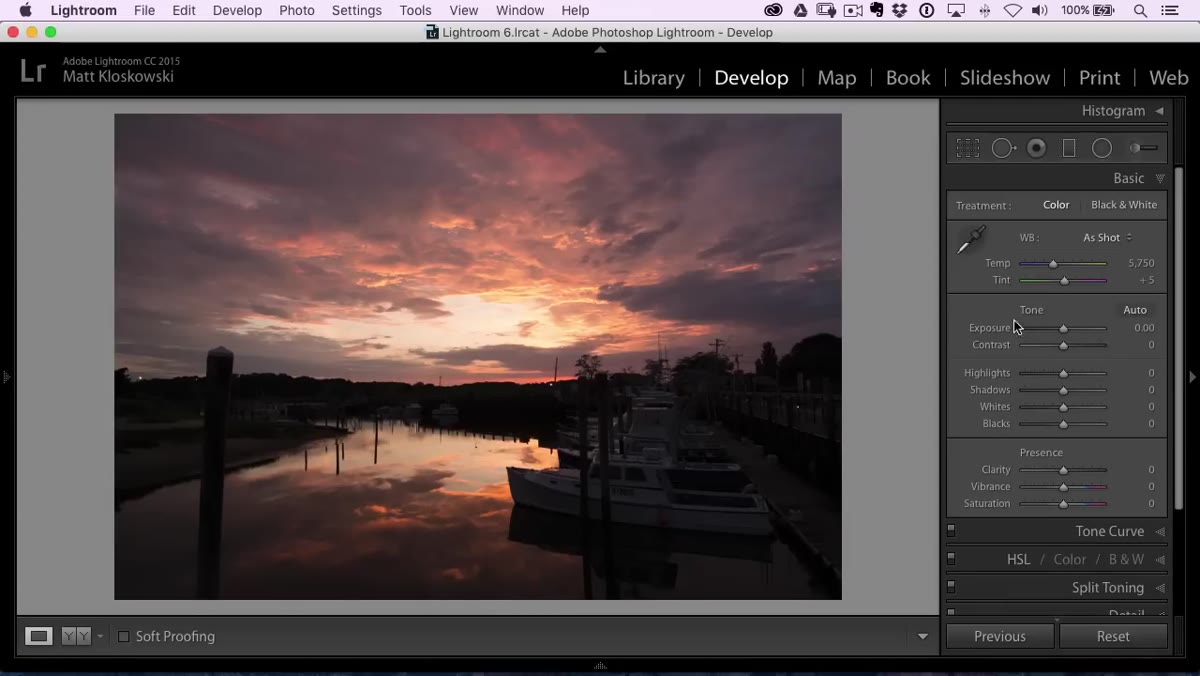 Basic panel open, Exposure slider highlighted in Lightroom
The instinct with a dark foreground and a bright sky is to grab the Exposure slider and split the difference. Matt explicitly skips this. Instead, he uses Exposure temporarily as a diagnostic tool, dragging it up and down to see how much detail is available in both the highlights and shadows. Once he knows the range he’s working with, he resets it and reaches for the targeted controls instead. This is a mindset shift that changes how you approach every high-contrast scene: Exposure is a blunt instrument. Highlights, Shadows, Whites, and Blacks are the scalpels.
Basic panel open, Exposure slider highlighted in Lightroom
The instinct with a dark foreground and a bright sky is to grab the Exposure slider and split the difference. Matt explicitly skips this. Instead, he uses Exposure temporarily as a diagnostic tool, dragging it up and down to see how much detail is available in both the highlights and shadows. Once he knows the range he’s working with, he resets it and reaches for the targeted controls instead. This is a mindset shift that changes how you approach every high-contrast scene: Exposure is a blunt instrument. Highlights, Shadows, Whites, and Blacks are the scalpels.
Step 2: Pull Highlights, Push Shadows
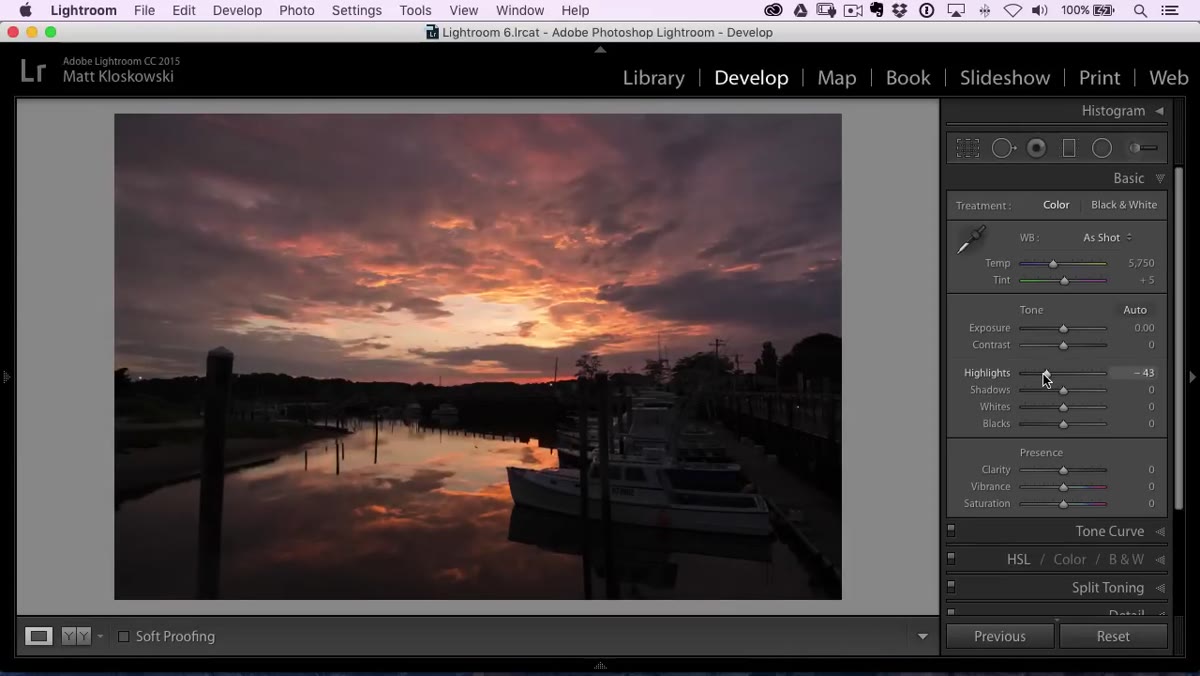 Highlights slider pulled left, sky detail returning in preview
With Exposure back to zero, Matt brings the Highlights slider to the left to start recovering sky detail. He stops well short of the minimum, though. Pulling Highlights all the way to -100 can introduce an artificial, muddy look in skies, especially where clouds meet warm light. The goal is to bring back just enough detail to give the sky texture and depth, not to flatten it completely. From there, he pushes Shadows to the right, opening up the dock and water in the foreground. This combination, highlights down and shadows up, is the core move for high-contrast scenes and works far better than any single-slider approach.
Highlights slider pulled left, sky detail returning in preview
With Exposure back to zero, Matt brings the Highlights slider to the left to start recovering sky detail. He stops well short of the minimum, though. Pulling Highlights all the way to -100 can introduce an artificial, muddy look in skies, especially where clouds meet warm light. The goal is to bring back just enough detail to give the sky texture and depth, not to flatten it completely. From there, he pushes Shadows to the right, opening up the dock and water in the foreground. This combination, highlights down and shadows up, is the core move for high-contrast scenes and works far better than any single-slider approach.
Step 3: Set White and Black Points with Alt/Option
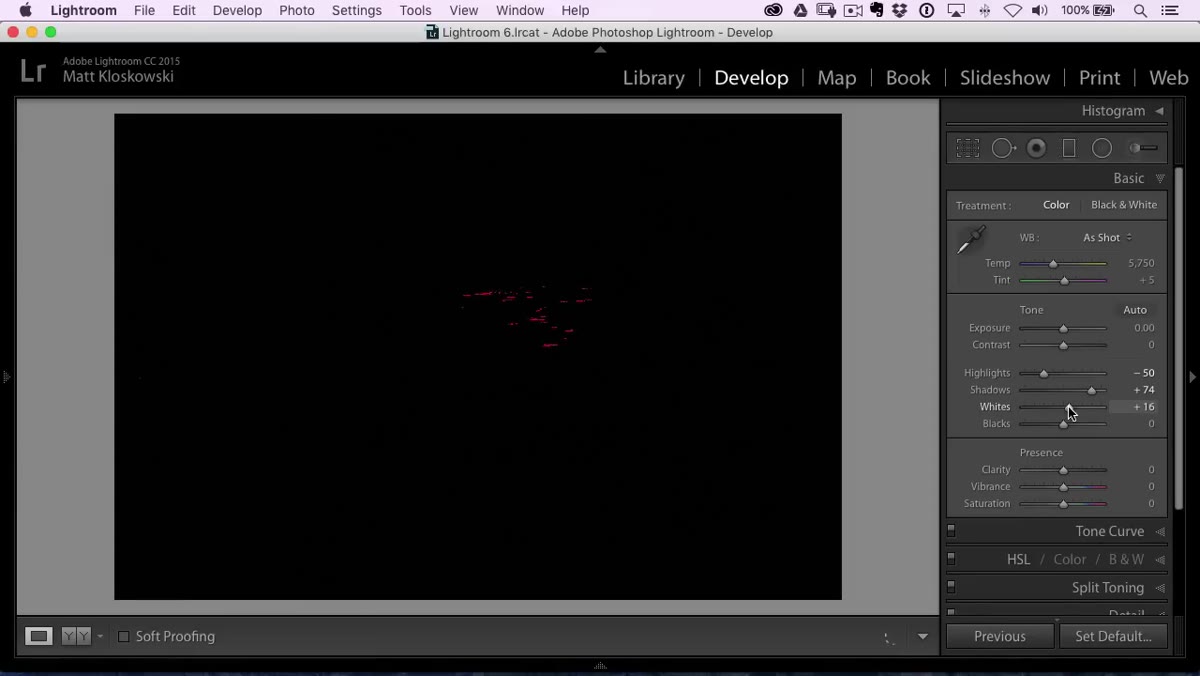 Alt-click on Whites slider showing clipping preview overlay
Once the midrange is balanced, Matt sets the white and black points using a technique most beginners skip entirely. Holding down Alt on Windows or Option on Mac while dragging the Whites slider changes the canvas to a black preview. Any pixels that turn white or colored are clipping. You drag the slider up until just a few small specks appear, which means you’ve found the edge of your true white point without blowing detail. Then you do the same with the Blacks slider, dragging left until a handful of specks appear on an all-white canvas. This gives the image real tonal contrast from edge to edge without guessing. It’s the same principle as reading the histogram, but visual and direct.
Alt-click on Whites slider showing clipping preview overlay
Once the midrange is balanced, Matt sets the white and black points using a technique most beginners skip entirely. Holding down Alt on Windows or Option on Mac while dragging the Whites slider changes the canvas to a black preview. Any pixels that turn white or colored are clipping. You drag the slider up until just a few small specks appear, which means you’ve found the edge of your true white point without blowing detail. Then you do the same with the Blacks slider, dragging left until a handful of specks appear on an all-white canvas. This gives the image real tonal contrast from edge to edge without guessing. It’s the same principle as reading the histogram, but visual and direct.
Step 4: Use a Graduated Filter to Handle the Sky Separately
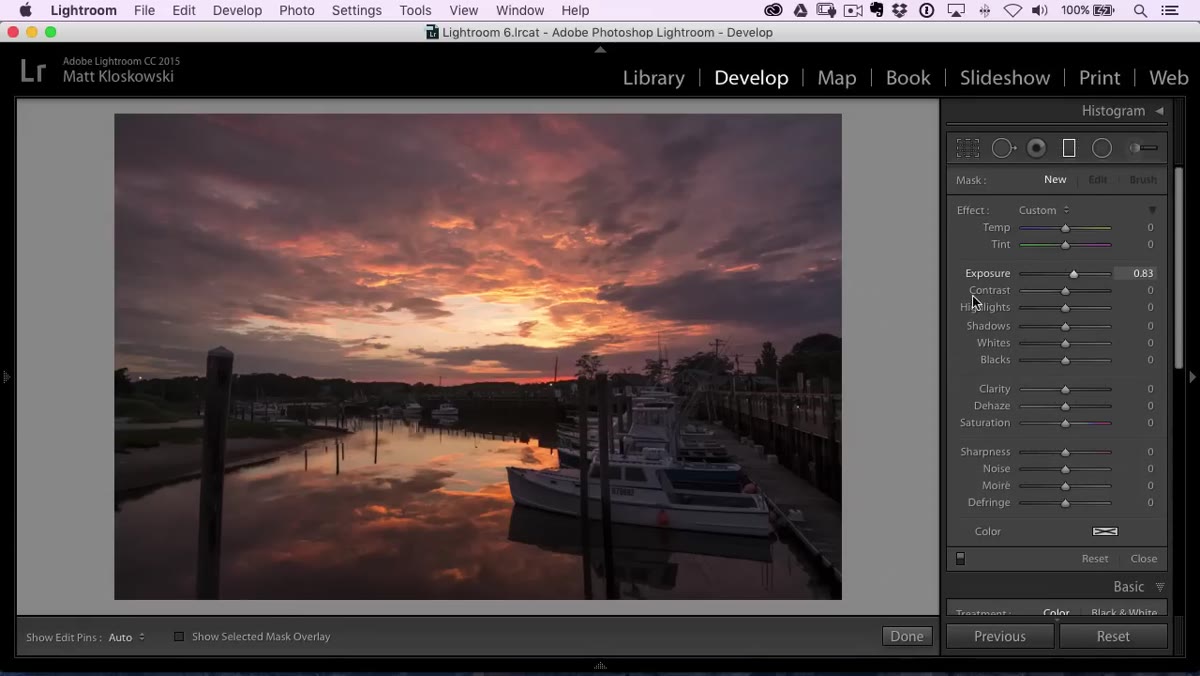 Graduated filter dragged over sky, exposure being adjusted in panel
The Basic panel can only do so much on a scene with this much contrast between sky and foreground. Matt reaches for the Graduated Filter to treat the sky as its own region. He drags it down from the top of the frame, covering the sky and clouds. The key move here is not just darkening the exposure inside the filter. He’s thinking in terms of recovering detail and controlling the mood of the clouds specifically, without touching the dock or water below. The Graduated Filter in Lightroom lets you apply any combination of Basic panel adjustments to a selected zone, so you can bring down highlights in the sky independently from the global sliders you’ve already set.
Graduated filter dragged over sky, exposure being adjusted in panel
The Basic panel can only do so much on a scene with this much contrast between sky and foreground. Matt reaches for the Graduated Filter to treat the sky as its own region. He drags it down from the top of the frame, covering the sky and clouds. The key move here is not just darkening the exposure inside the filter. He’s thinking in terms of recovering detail and controlling the mood of the clouds specifically, without touching the dock or water below. The Graduated Filter in Lightroom lets you apply any combination of Basic panel adjustments to a selected zone, so you can bring down highlights in the sky independently from the global sliders you’ve already set.
Step 5: Fine-Tune the Graduated Filter’s Effect
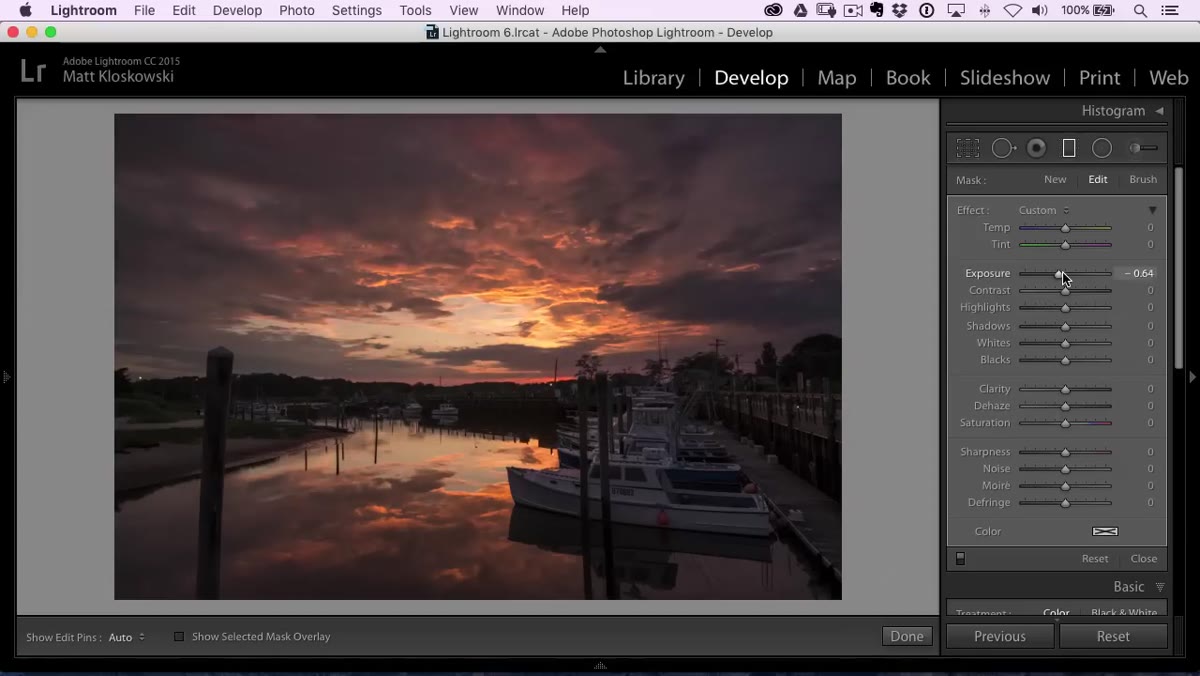 Graduated filter settings adjusted, cloud detail visible in sky
Once the filter is placed, Matt dials in the exposure reduction carefully. The risk with darkening a sky is making the clouds look heavy and gray when they should feel warm and luminous. He keeps the reduction moderate, watching how it affects the cloud texture and the color of the light. The graduated filter’s feathering, controlled by how far you drag when placing it, determines how smoothly the effect blends into the unaffected area below. A short drag creates a hard line; a longer drag creates a softer, more natural transition across the horizon.
Graduated filter settings adjusted, cloud detail visible in sky
Once the filter is placed, Matt dials in the exposure reduction carefully. The risk with darkening a sky is making the clouds look heavy and gray when they should feel warm and luminous. He keeps the reduction moderate, watching how it affects the cloud texture and the color of the light. The graduated filter’s feathering, controlled by how far you drag when placing it, determines how smoothly the effect blends into the unaffected area below. A short drag creates a hard line; a longer drag creates a softer, more natural transition across the horizon.
A Note from My Own Editing Practice
One thing I’d add to Matt’s approach: the order of operations here is almost as important as the adjustments themselves. Setting your Highlights and Shadows before placing local adjustments like the Graduated Filter means your local tweaks are working on top of a well-balanced base rather than fighting a flat or overexposed starting point. I learned this the hard way editing band press shots years ago when I kept stacking local adjustments that looked fine individually but made the final image look layered and fake. Getting the global tone right first makes every local tool more predictable.
Also worth noting: if you’re shooting landscapes with high dynamic range regularly, this workflow translates directly to blue-hour cityscapes, backlit portraits shot outdoors, and any forest scene where the canopy is bright and the ground is dark. The specific slider values will change, but the logic stays the same.
The single most transferable idea from this tutorial is that Lightroom’s Exposure slider is a preview tool, not always an editing destination. When a scene has both bright and dark regions you want to preserve, go straight to Highlights, Shadows, Whites, and Blacks, and let those four controls do the work together. That shift alone will make you a faster, more confident editor on high-contrast images.
Watch the full tutorial on YouTube to see Matt walk through the Photoshop retouching pass at the end and download the original RAW file to follow along with your own edits.
Comments (2)
Finally someone explains this in a way that actually makes sense.
This is fantastic. I've been recommending this approach to my readers too.
Leave a Comment