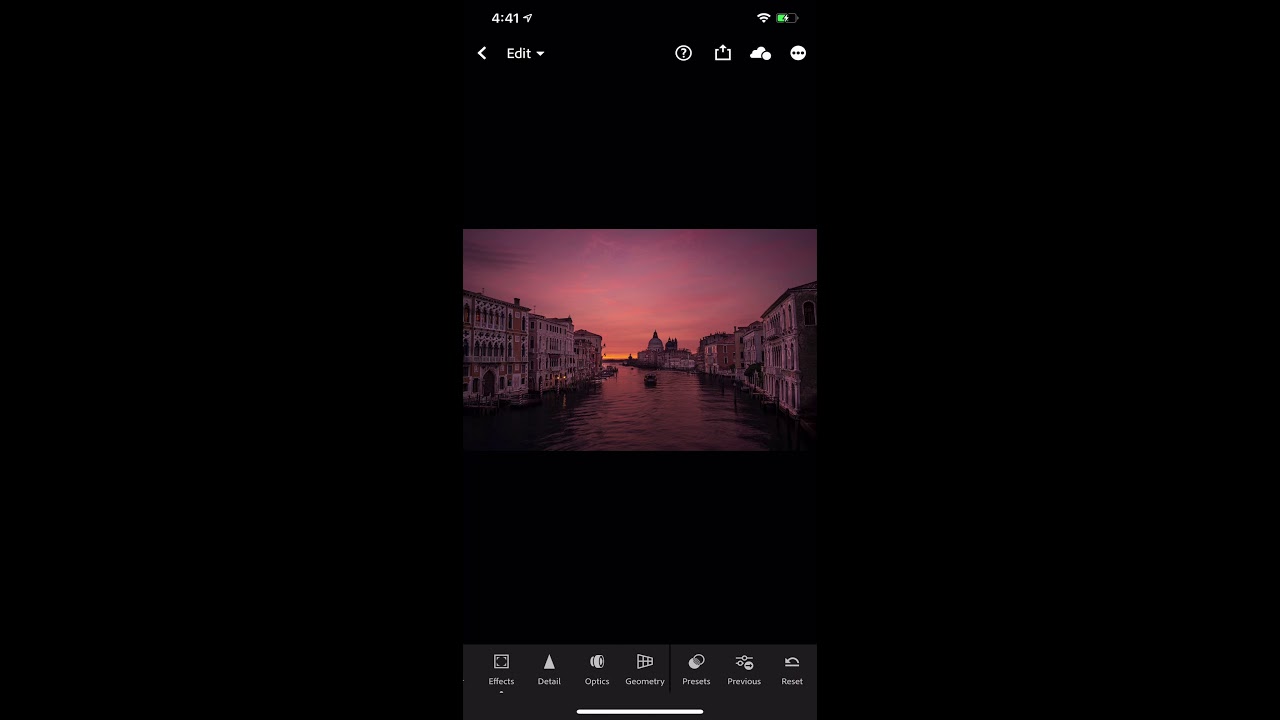
Every photographer I know has a version of the same embarrassing habit. You finish editing a set of photos on your desktop, and then you either email them to yourself, drop them in a random Google Drive folder, or AirDrop them to your phone while standing awkwardly close to your own computer. I did this for longer than I want to admit. The whole time, the answer was sitting right inside Lightroom Classic, one right-click away.
In this Matt Kloskowski tutorial on getting Lightroom desktop photos to your phone, Matt walks through the built-in sync workflow that pushes your existing collections directly to Lightroom Mobile. Watch the full tutorial on YouTube – it’s short, focused, and the kind of thing that makes you feel like you’ve been doing unnecessary work for years. Because you have been.
The best part is what this sync does NOT do. It does not upload your full raw files to Adobe’s cloud and eat into your Creative Cloud storage. It syncs smart previews instead, which land around 2,000 to 2,500 pixels – more than enough to review your work, share it with clients, or post directly from your phone. If you shoot raw, this distinction matters a lot.
Step 1: Make Sure You’re Signed In and Syncing
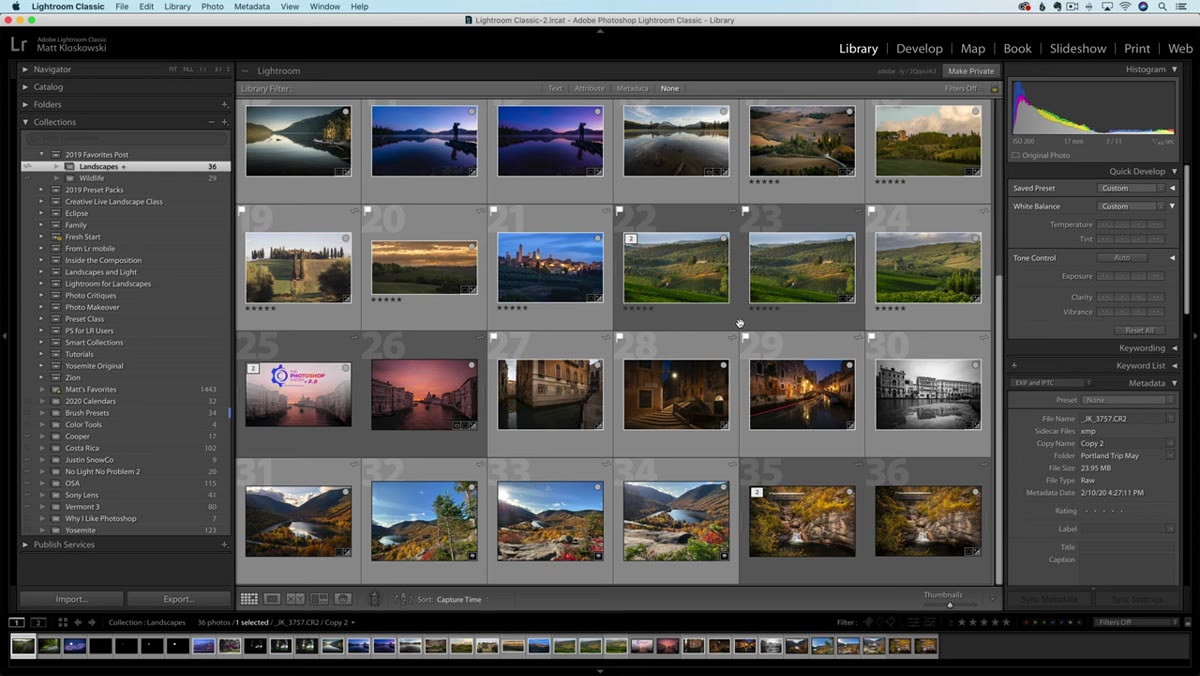 Lightroom Classic identity plate showing sync status in top left
Before anything else, you need to confirm that Lightroom Classic is actually talking to Adobe’s cloud. Head to the top left corner of Lightroom and click on your identity plate – that’s the small area that usually shows your name or a logo. A dropdown will appear showing your sync status. You want to see that sync is turned ON. If it’s running, you’ll see a pause button icon. If sync is off or paused, you’ll see a play button instead. Click it to start syncing.
Lightroom Classic identity plate showing sync status in top left
Before anything else, you need to confirm that Lightroom Classic is actually talking to Adobe’s cloud. Head to the top left corner of Lightroom and click on your identity plate – that’s the small area that usually shows your name or a logo. A dropdown will appear showing your sync status. You want to see that sync is turned ON. If it’s running, you’ll see a pause button icon. If sync is off or paused, you’ll see a play button instead. Click it to start syncing.
Also worth noting here: Matt flagged in the tutorial that some of these features require the latest version of Lightroom Classic. If you haven’t updated in a while, do that first. Adobe pushes meaningful updates, not just bug fixes, and the sync behavior in older versions can be inconsistent enough to cause real confusion.
Step 2: Check the Sync FAQs Before You Go Further
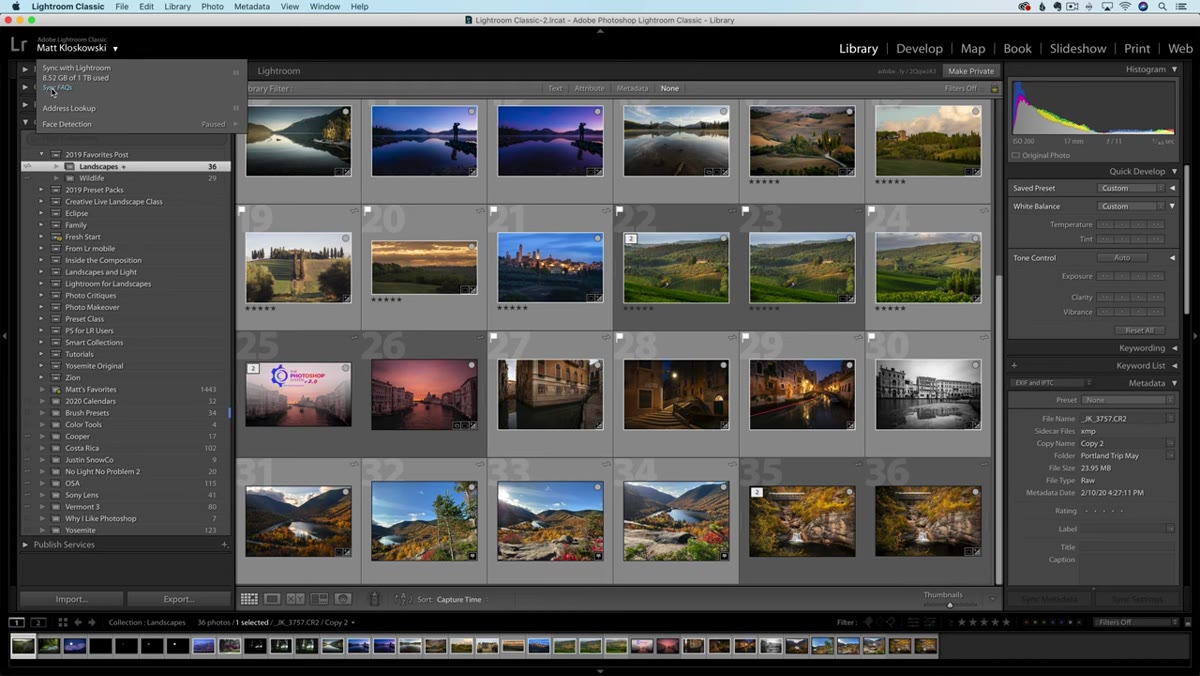 Sync FAQ link visible in the Lightroom identity plate dropdown
Right below the sync status in that same dropdown, you’ll find a link labeled Sync FAQs. Click it. Matt makes a point of stopping here in the tutorial, and it’s good advice. The FAQ page Adobe maintains covers the questions that come up every single time this topic gets discussed: What counts against your cloud storage? How big are the synced files? What formats can be synced? Where do the images actually live?
Sync FAQ link visible in the Lightroom identity plate dropdown
Right below the sync status in that same dropdown, you’ll find a link labeled Sync FAQs. Click it. Matt makes a point of stopping here in the tutorial, and it’s good advice. The FAQ page Adobe maintains covers the questions that come up every single time this topic gets discussed: What counts against your cloud storage? How big are the synced files? What formats can be synced? Where do the images actually live?
If you have any of those questions – and most people do – the FAQ page will give you a cleaner answer than any forum thread will. The short answer on storage is that smart previews synced through this workflow do not count against your Creative Cloud storage limit. But check the FAQ for the current specifics, since Adobe does update these policies.
Step 3: Create a Standard Collection (Not a Smart Collection, Not a Set)
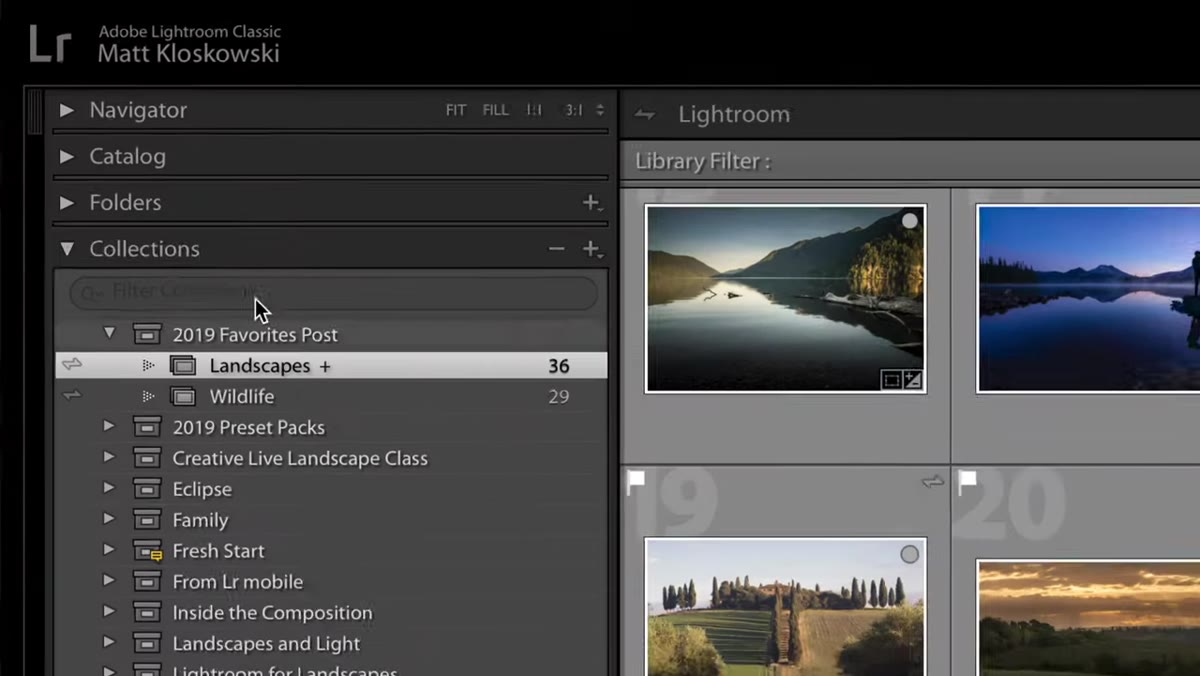 Collections panel in Lightroom Classic with plus icon highlighted
This is where a lot of people get tripped up the first time. Navigate to the Collections panel in Lightroom Classic’s left sidebar and click the small plus icon to create a new collection. The key here is to choose “Create Collection” – not a Smart Collection and not a Collection Set. Those two options look similar in the menu but they behave completely differently when it comes to syncing.
Collections panel in Lightroom Classic with plus icon highlighted
This is where a lot of people get tripped up the first time. Navigate to the Collections panel in Lightroom Classic’s left sidebar and click the small plus icon to create a new collection. The key here is to choose “Create Collection” – not a Smart Collection and not a Collection Set. Those two options look similar in the menu but they behave completely differently when it comes to syncing.
Smart Collections and Collection Sets cannot be synced to Lightroom Mobile. Only a standard collection can. If you want to keep things organized inside a Collection Set, that’s fine – Matt confirms you can nest a syncable collection inside a set. But the collection itself must be a plain collection. Once you’ve created it and added your photos, you’re ready for the last step.
Step 4: Right-Click the Collection and Enable Sync with Lightroom
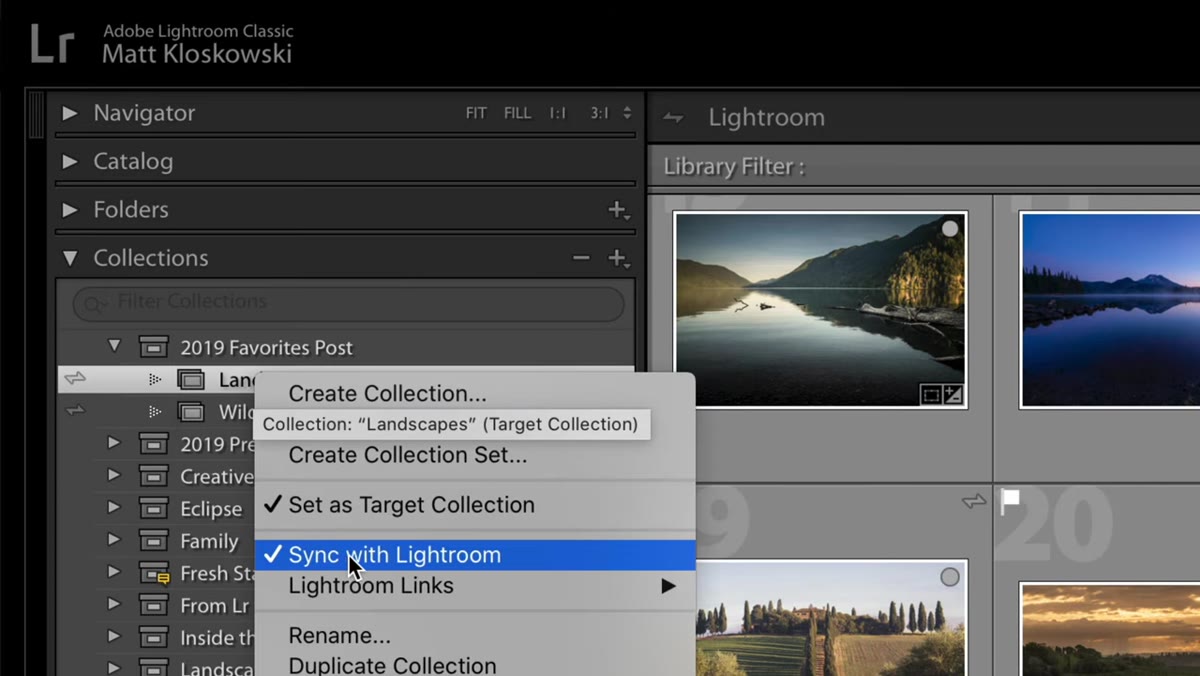 Right-click context menu on a collection showing Sync with Lightroom option
Right-click on your collection in the Collections panel. In the context menu, you’ll see an option called “Sync with Lightroom.” Click it to enable it. Once it’s checked, Lightroom immediately begins pushing smart preview versions of every photo in that collection up to your Adobe account.
Right-click context menu on a collection showing Sync with Lightroom option
Right-click on your collection in the Collections panel. In the context menu, you’ll see an option called “Sync with Lightroom.” Click it to enable it. Once it’s checked, Lightroom immediately begins pushing smart preview versions of every photo in that collection up to your Adobe account.
You’ll also notice a small lightning bolt icon appears to the left of the collection name in the panel. That icon is another way to toggle syncing on or off, but right-clicking is faster and more intuitive. From this point forward, any photos you add to that collection will also sync automatically. You don’t have to repeat this step every time you add new images – the connection stays live.
Step 5: Open Lightroom Mobile and Find Your Photos
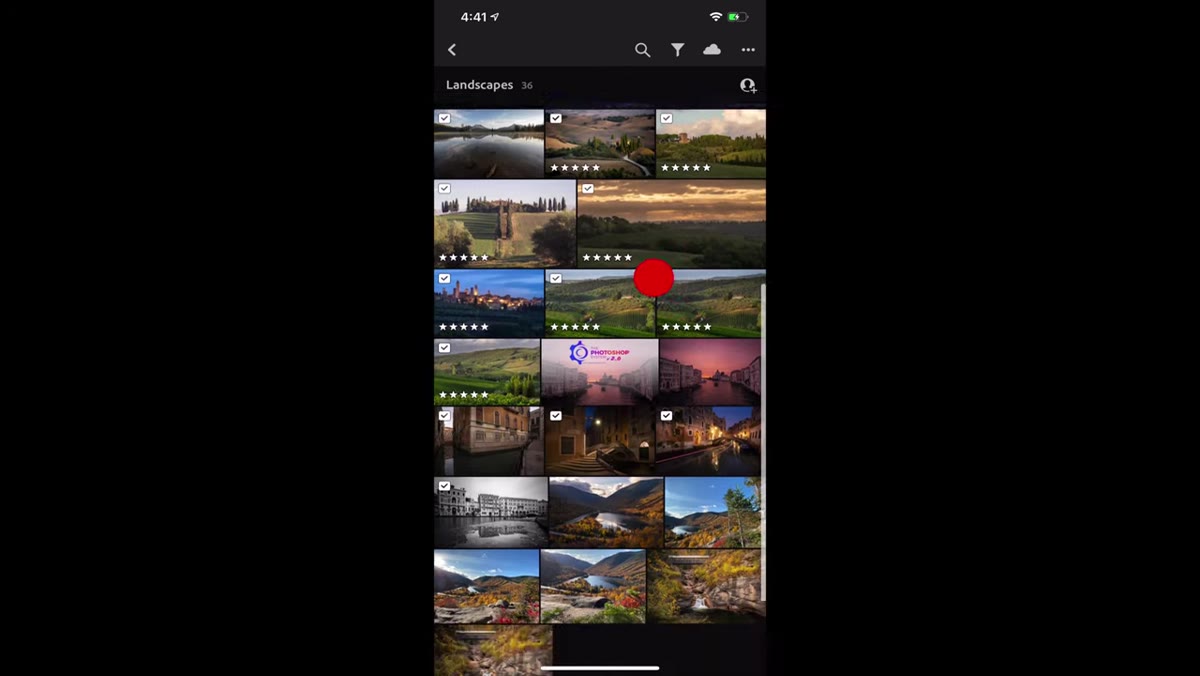 Lightroom Mobile on phone showing synced album matching desktop collection
Once sync is enabled on the desktop side, open the Lightroom app on your phone. If you’re signed in with the same Adobe account, the collection you just synced will appear as an album in the mobile app. The photos won’t be full-resolution raw files – they’ll be the smart preview versions – but they’ll look sharp, they’ll carry all your desktop edits, and they’ll be ready to share or review.
Lightroom Mobile on phone showing synced album matching desktop collection
Once sync is enabled on the desktop side, open the Lightroom app on your phone. If you’re signed in with the same Adobe account, the collection you just synced will appear as an album in the mobile app. The photos won’t be full-resolution raw files – they’ll be the smart preview versions – but they’ll look sharp, they’ll carry all your desktop edits, and they’ll be ready to share or review.
Give it a few minutes if the album doesn’t appear immediately. Sync speed depends on your connection and how many photos are in the collection, but in most cases it moves fast. Once it’s there, you’re done. No export, no transfer cable, no emailing yourself anything.
One Thing I’d Add From My Own Workflow
Here’s a small habit that’s made this sync feature even more useful for me: I create a dedicated “Mobile Review” collection that I cycle photos through. When I’m in the middle of a bigger editing project and want to step away from my desk and review selects on my phone – maybe while I’m flipping a record or sitting somewhere else – I drop the top candidates into that collection, sync it, and have a portable gallery ready in minutes.
The key insight is that a photo can live in multiple collections at once in Lightroom Classic. You’re not moving files around. So your master organization stays intact while the mobile sync collection acts more like a temporary viewing layer. Delete the photos from the sync collection when you’re done reviewing, and they’re still safe in their original collection. Nothing gets lost.
The single most useful thing this tutorial hammers home is that you’re already paying for this functionality. If you have a Lightroom Classic subscription, the cloud sync and the mobile app are part of the package. Using them costs you nothing extra and saves you the low-grade friction of moving photos around manually every time you want them on your phone.
Watch the full tutorial on YouTube to see Matt walk through the whole thing live – it’s under five minutes and worth every second.
Comments (3)
Never thought of approaching it this way. Really creative.
Been doing this wrong for years apparently. Thanks for the wake-up call.
Great article! I actually covered something related on my site — the gear angle is really complementary to this.
Leave a Comment