There’s a workflow tax most photographers don’t think about: the time spent outside Lightroom doing things Lightroom can already handle. You finish an edit, export the file, open a browser, log into Facebook, navigate to your album, upload the photo, write a caption, and post. That whole sequence takes maybe five minutes. Multiply it by every shoot, every client update, every “hey look what I captured this weekend” moment, and you’ve lost a meaningful chunk of time that could’ve gone toward actual editing. Or, you know, dinner.
In this CreativeLive tutorial, instructor Jared Platt walks through how to use Lightroom’s native Facebook publishing service to send images straight from the Develop module to your Facebook timeline or albums, with watermarks, captions, and album targeting all handled inside Lightroom. Watch the full tutorial on YouTube if you want to see it in motion, but what follows is everything you need to set it up and actually use it.
I’ll be honest: I ignored this feature for an embarrassingly long time because I assumed it was one of those half-baked integrations that breaks every time Facebook updates its API. It isn’t. Once it’s authorized, it’s one of the smoothest one-click workflows in Lightroom’s toolkit.
Step 1: Locate the Facebook Publishing Service in the Left Panel
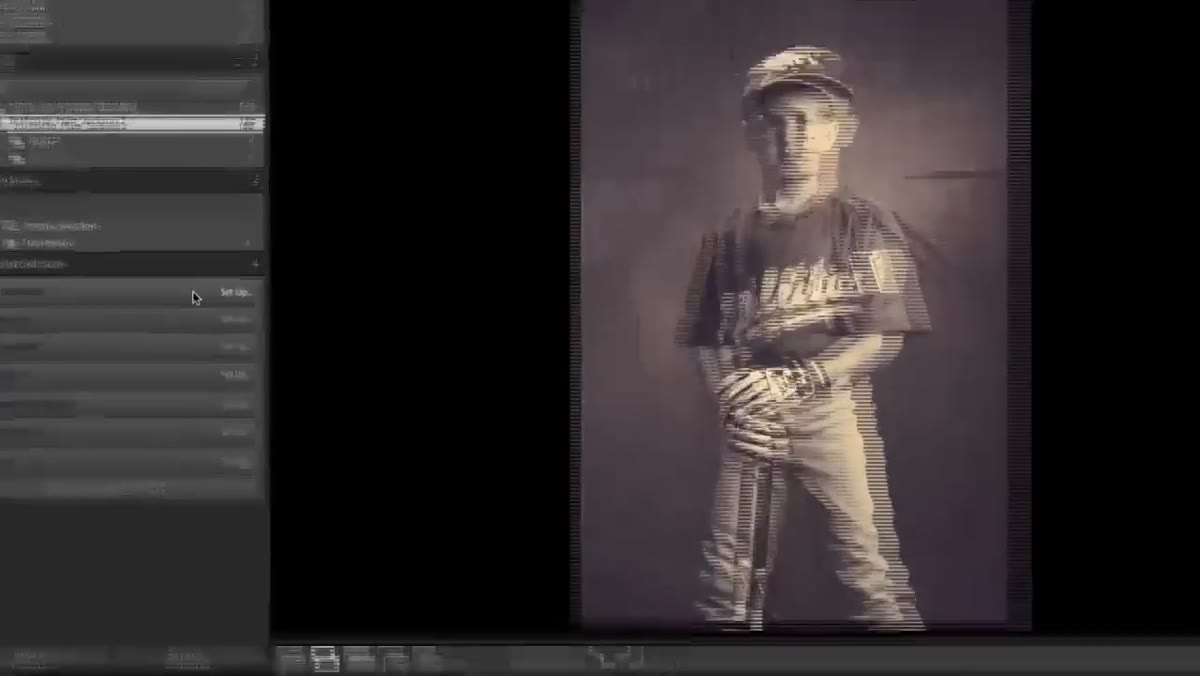 Lightroom’s left panel showing Facebook in published services
Open Lightroom and look at the left panel while you’re in the Library module. Scroll down until you see the “Published Services” section. Facebook will already be listed there, because unlike some third-party publish services that need to be installed separately, Facebook ships pre-packaged with Lightroom. You don’t need to download anything or find a plugin. It’s already waiting.
Lightroom’s left panel showing Facebook in published services
Open Lightroom and look at the left panel while you’re in the Library module. Scroll down until you see the “Published Services” section. Facebook will already be listed there, because unlike some third-party publish services that need to be installed separately, Facebook ships pre-packaged with Lightroom. You don’t need to download anything or find a plugin. It’s already waiting.
Step 2: Open the Setup Dialog and Authorize Your Account
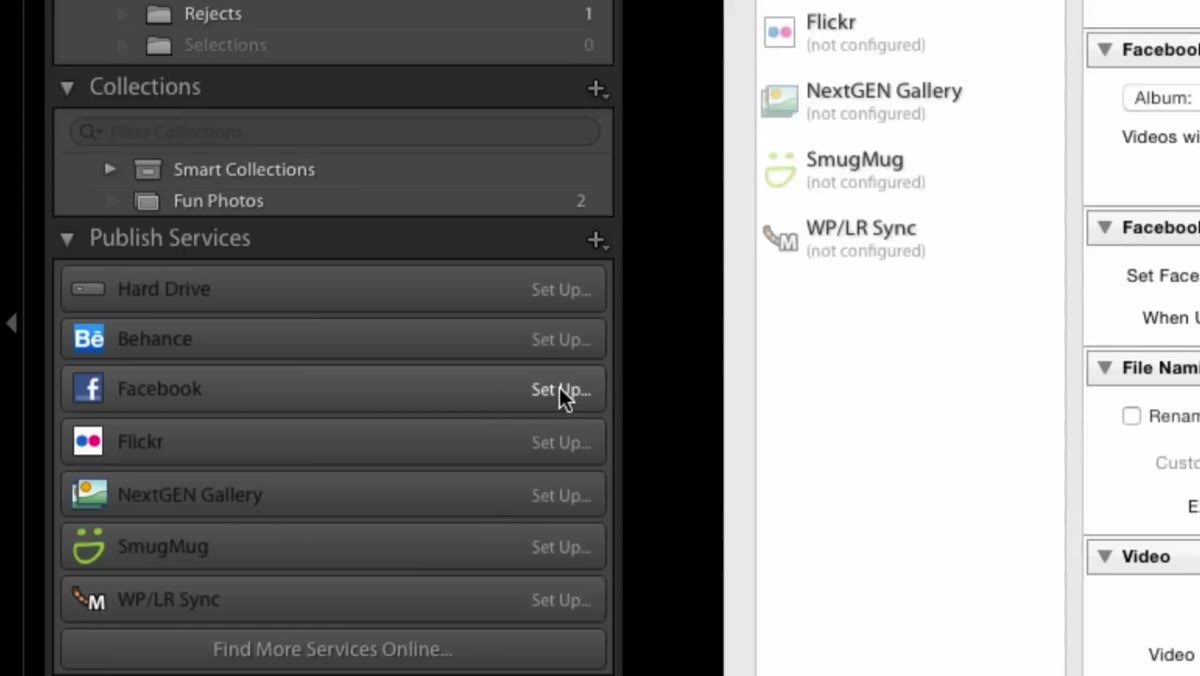 Setup button clicked, authorization dialogue box open
Click the “Setup” button next to the Facebook service. A dialog box will open prompting you to authorize Lightroom to connect to your Facebook account. If you’re doing this for the first time, click the “Authorize” button. Lightroom will open a browser window where you’ll log into Facebook and confirm that Lightroom has permission to access your account. Once you approve it, you’ll receive a code or a confirmation, and Lightroom will recognize your identity from that point forward. You only do this once.
Setup button clicked, authorization dialogue box open
Click the “Setup” button next to the Facebook service. A dialog box will open prompting you to authorize Lightroom to connect to your Facebook account. If you’re doing this for the first time, click the “Authorize” button. Lightroom will open a browser window where you’ll log into Facebook and confirm that Lightroom has permission to access your account. Once you approve it, you’ll receive a code or a confirmation, and Lightroom will recognize your identity from that point forward. You only do this once.
Step 3: Write Your Caption in the Description Field
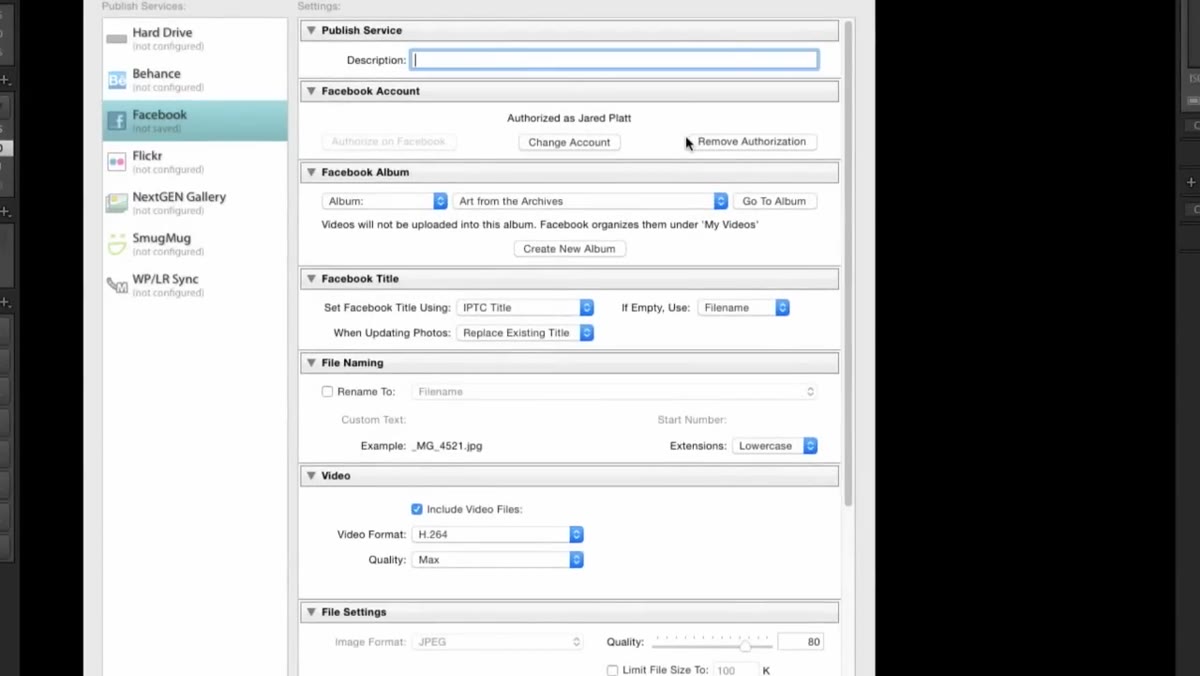 Description field in Facebook publish dialog with caption being typed
Back in the setup dialog, you’ll see a description field near the top. This is where you write the caption that will accompany your photo on Facebook. Type whatever you’d write if you were posting directly on the platform. Keep it natural. Nobody needs to know you wrote it from inside Lightroom. This caption gets attached to the image at the time of publishing, so finalize it before you hit publish.
Description field in Facebook publish dialog with caption being typed
Back in the setup dialog, you’ll see a description field near the top. This is where you write the caption that will accompany your photo on Facebook. Type whatever you’d write if you were posting directly on the platform. Keep it natural. Nobody needs to know you wrote it from inside Lightroom. This caption gets attached to the image at the time of publishing, so finalize it before you hit publish.
Step 4: Choose Your Target Album or Timeline
 Album selector showing Facebook albums and timeline option
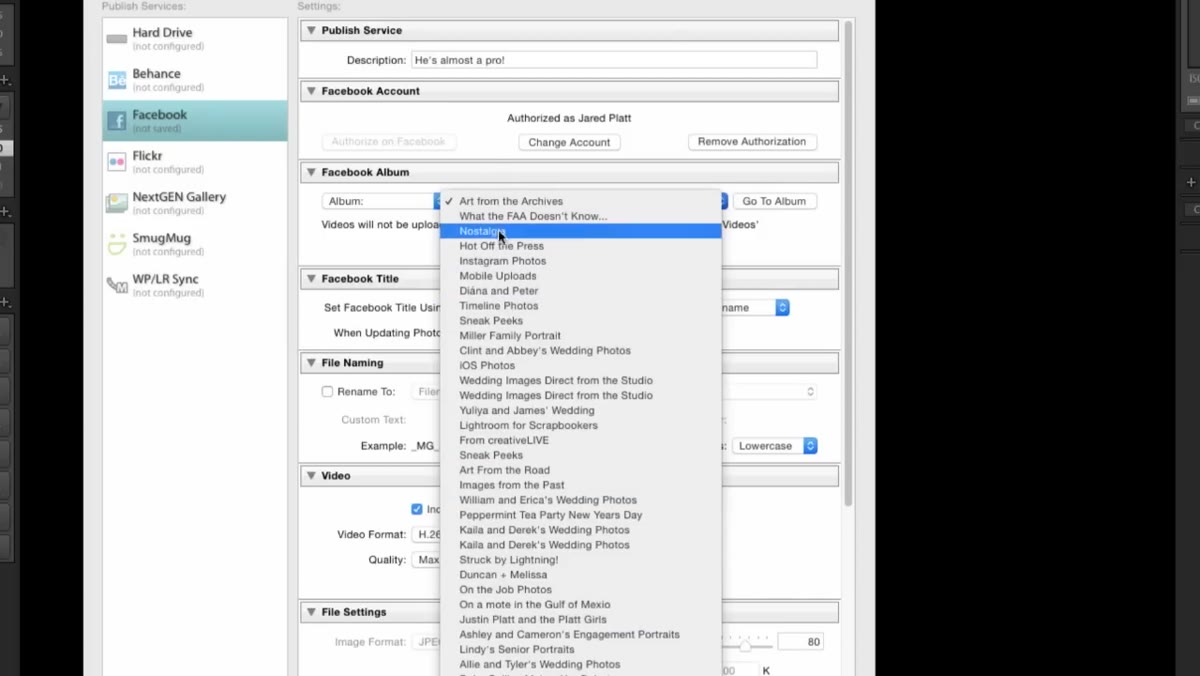
Below the description field, you’ll see a dropdown or list showing all the albums currently on your Facebook account. You can send the image to any existing album, or select your timeline if you just want it to appear as a standard post. Platt points out that you can also create a new album from within this same dialog. For most quick shares, selecting your timeline works fine. For client galleries or themed photo sets, targeting a specific album keeps things organized on both ends.
Album selector showing Facebook albums and timeline option
Below the description field, you’ll see a dropdown or list showing all the albums currently on your Facebook account. You can send the image to any existing album, or select your timeline if you just want it to appear as a standard post. Platt points out that you can also create a new album from within this same dialog. For most quick shares, selecting your timeline works fine. For client galleries or themed photo sets, targeting a specific album keeps things organized on both ends.
Step 5: Leave the File Size Settings Alone
 File settings section showing 960 pixel default for Facebook
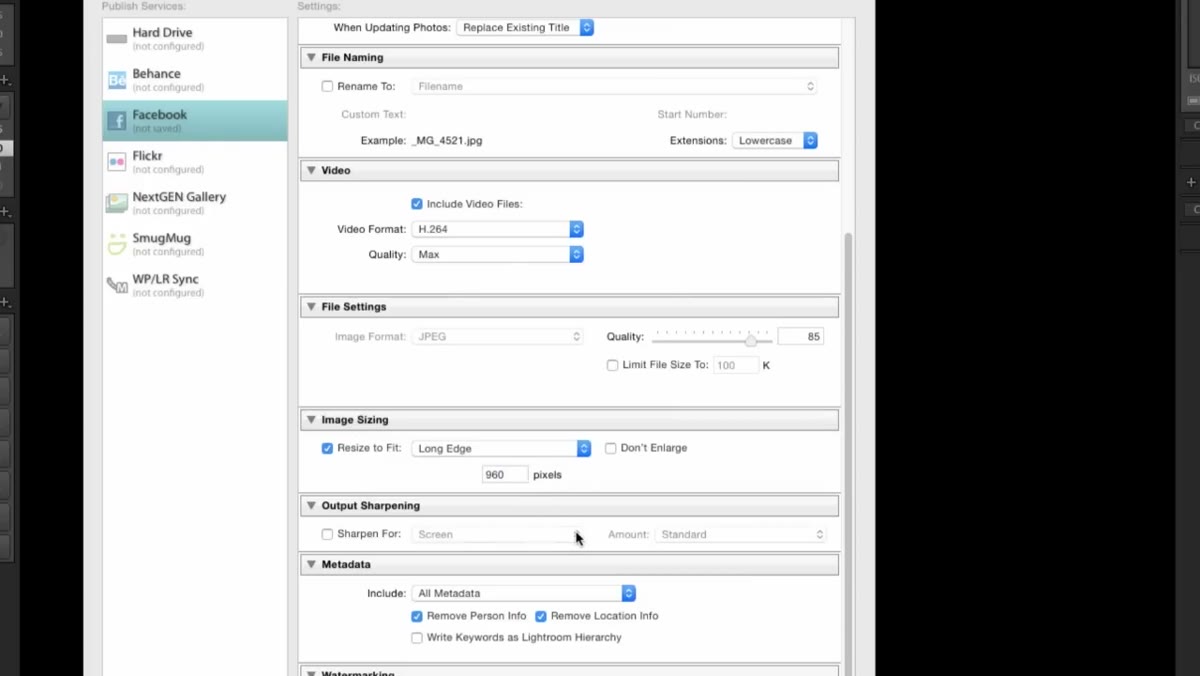
One of the most useful things Platt mentions, and one that trips up a lot of beginners, is that you don’t need to resize or convert the image for Facebook. The service is pre-configured for Facebook’s preferred image size of 960 pixels. Resist the urge to dig into the file settings and change things. The default is already optimized. Adjusting it manually is more likely to introduce problems than improve quality.
File settings section showing 960 pixel default for Facebook
One of the most useful things Platt mentions, and one that trips up a lot of beginners, is that you don’t need to resize or convert the image for Facebook. The service is pre-configured for Facebook’s preferred image size of 960 pixels. Resist the urge to dig into the file settings and change things. The default is already optimized. Adjusting it manually is more likely to introduce problems than improve quality.
Step 6: Add a Watermark If You Need One
 Watermark section with text and graphic watermark options visible
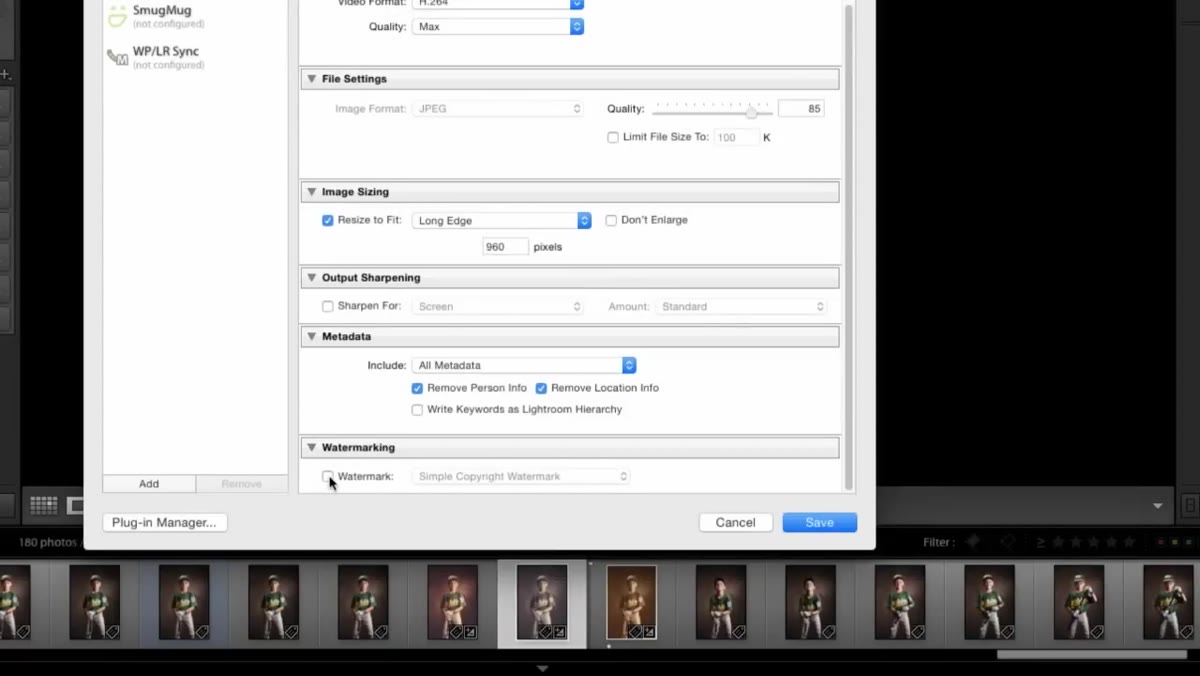
At the bottom of the dialog, there’s a watermarking section. If you want your name or logo on the image before it goes to Facebook, enable the watermark option and either choose an existing watermark preset or create a new one. Lightroom lets you pick between a text watermark, where you type your name or website, and a graphic watermark, where you upload a logo file. You can also control the size and position of the watermark within this same interface. It’s a clean, visual editor and doesn’t require any outside tools.
Watermark section with text and graphic watermark options visible
At the bottom of the dialog, there’s a watermarking section. If you want your name or logo on the image before it goes to Facebook, enable the watermark option and either choose an existing watermark preset or create a new one. Lightroom lets you pick between a text watermark, where you type your name or website, and a graphic watermark, where you upload a logo file. You can also control the size and position of the watermark within this same interface. It’s a clean, visual editor and doesn’t require any outside tools.
Step 7: Save Your Settings as a Preset
 Save current settings as preset option at the bottom of dialog
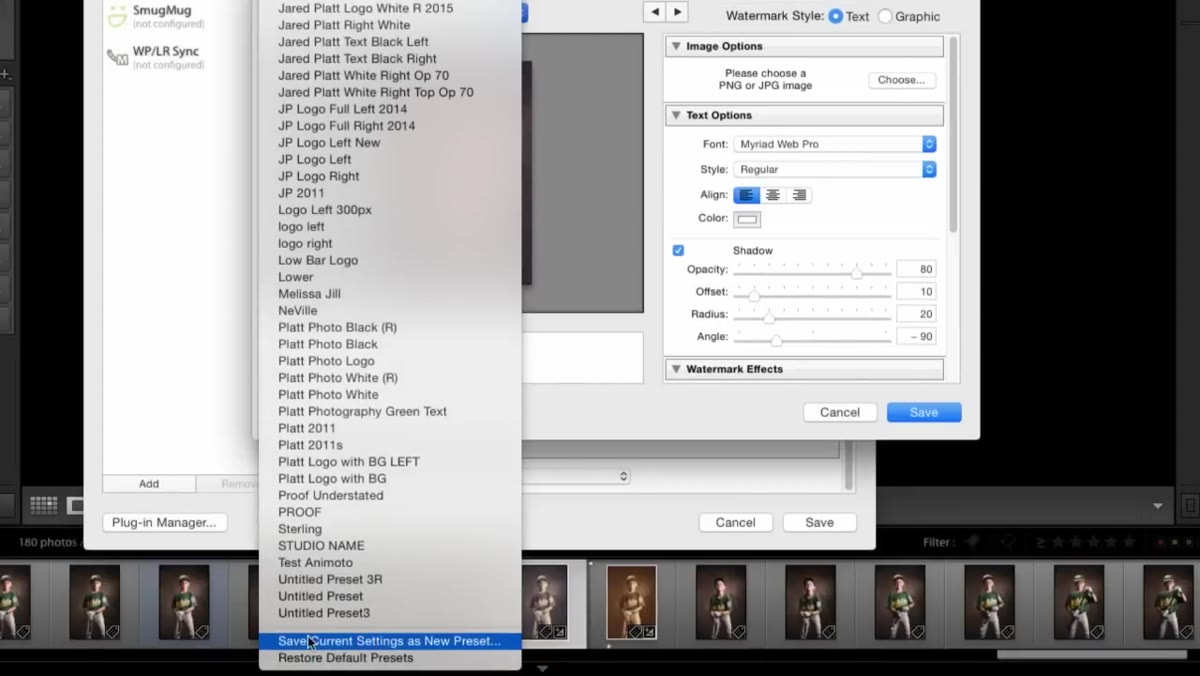
Once everything is configured the way you want it, save those settings as a preset using the option at the bottom of the dialog. Give it a name you’ll actually remember. I name mine after songs, which is a habit I’m not going to defend. From this point on, your saved preset will appear in the dropdown at the top of the dialog, and you can apply all your preferred settings in one click for future publishes. You won’t need to reconfigure the album, watermark, or any other settings the next time.
Save current settings as preset option at the bottom of dialog
Once everything is configured the way you want it, save those settings as a preset using the option at the bottom of the dialog. Give it a name you’ll actually remember. I name mine after songs, which is a habit I’m not going to defend. From this point on, your saved preset will appear in the dropdown at the top of the dialog, and you can apply all your preferred settings in one click for future publishes. You won’t need to reconfigure the album, watermark, or any other settings the next time.
Step 8: Drag Your Photo In and Hit Publish
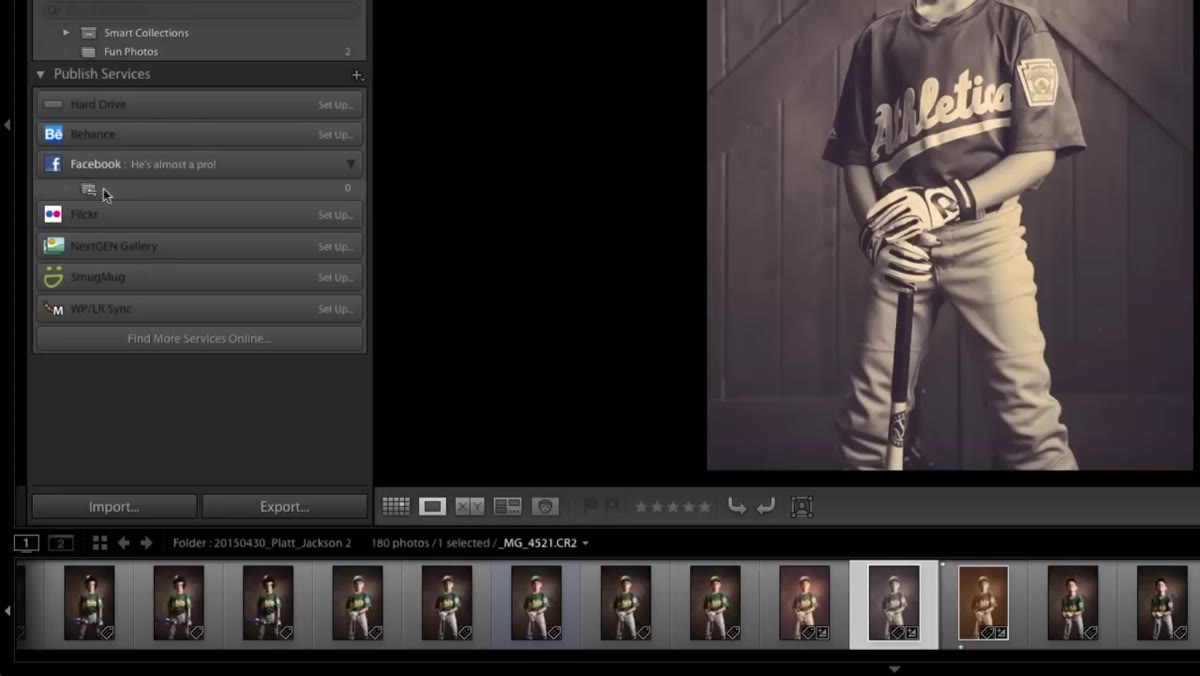 Photo being dragged into publish collection, publish button at top
Close or confirm the dialog, then go back to your Library grid. Drag the photo you want to share into the Facebook publish collection in the left panel. You’ll see a “Photos to Publish” count update. Then click the “Publish” button at the top of the panel. Lightroom handles the upload in the background and posts the image directly to Facebook. You never opened a browser. You never left your workspace.
Photo being dragged into publish collection, publish button at top
Close or confirm the dialog, then go back to your Library grid. Drag the photo you want to share into the Facebook publish collection in the left panel. You’ll see a “Photos to Publish” count update. Then click the “Publish” button at the top of the panel. Lightroom handles the upload in the background and posts the image directly to Facebook. You never opened a browser. You never left your workspace.
One Thing I’d Add: Use This for Client Previews, Not Just Personal Sharing
Platt frames this feature around sharing with friends and family, which is a perfectly valid use case. But I’ve found it even more useful as a low-friction way to share work-in-progress previews with clients who are already on Facebook. I’ll set up a private Facebook album, add the client to it, and use Lightroom’s publish service to drop selects in there as I cull through a session. The client gets a near-real-time look at what’s coming, and I never had to export a single JPEG manually or navigate a single upload screen. For anyone who shoots events, portraits, or anything with a client relationship involved, this workflow is worth setting up before your next shoot.
The bigger lesson from Platt’s walkthrough isn’t really about Facebook specifically. It’s that Lightroom contains a lot of tools that photographers skip over because they don’t look exciting. Publishing services aren’t glamorous. But they quietly eliminate some of the most repetitive parts of the job, and that time adds up faster than any new preset pack ever will.
Watch the full tutorial on YouTube to see Platt run through the entire sequence live, including the moment he publishes in real time.
Comments (3)
Great breakdown. The step-by-step approach really helps.
The before and after really sells it. Incredible difference.
This is fantastic. I've been recommending this approach to my readers too.
Leave a Comment