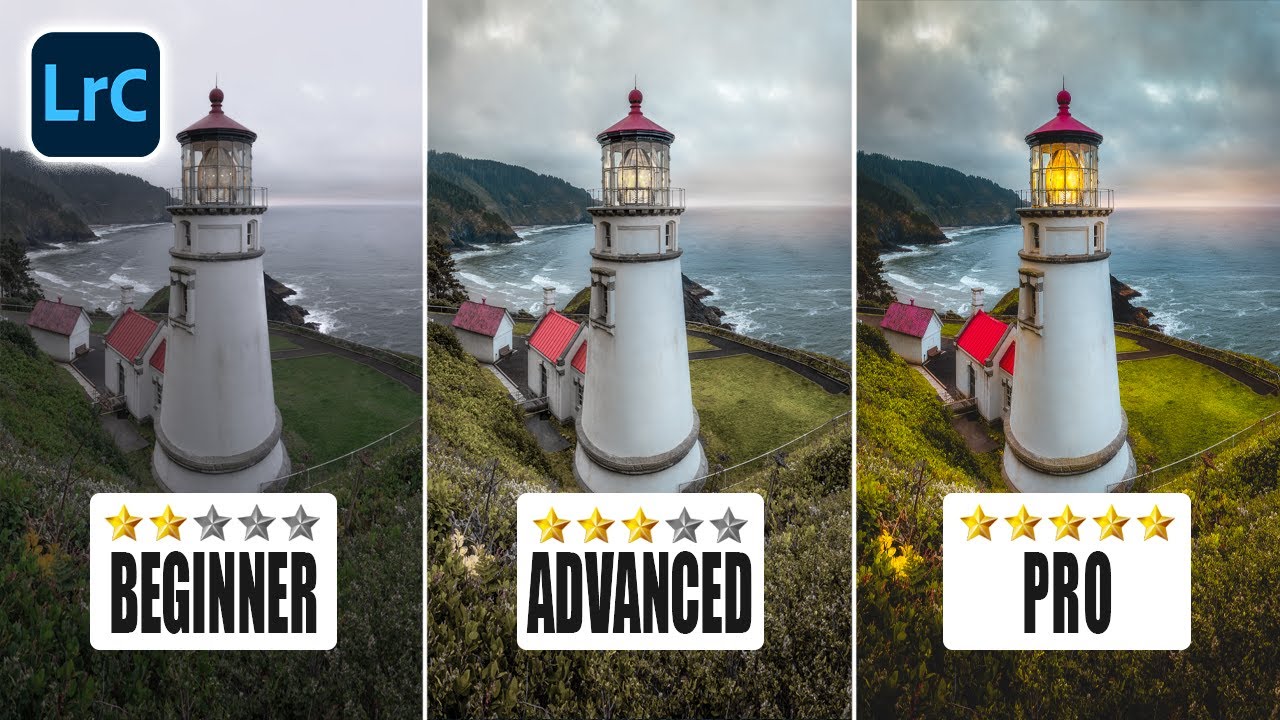
There’s a specific kind of frustration that comes from looking at a landscape photo and knowing something is off, but not being able to name it. I ran into this constantly early on, editing press shots for my band because nobody else was going to do it. The sun in a shot would look harsh and stamped-on, like someone pasted a bright circle onto the sky rather than actually photographing one. The light felt fake even when the original scene was beautiful. What I was missing wasn’t a better camera or a better location. I was missing a technique.
In this Mark Denney tutorial, Watch the full tutorial on YouTube, he breaks down five tricks that working photographers use to create effects that look natural but are anything but. The one that stopped me mid-scroll was his sun glow technique using Lightroom’s radial gradient. It’s deceptively simple, it works in maybe three minutes, and once you see the before-and-after you’ll start noticing its absence in every flat landscape edit you’ve ever made.
The core idea is that sunlight in the real world doesn’t have a hard edge. It blooms outward, softens details, opens up shadows, and pushes warm color into the atmosphere around it. A raw file rarely captures all of that naturally. This technique rebuilds it in post, and the settings Denney uses are specific enough that you can replicate them shot to shot without guessing.
Step 1: Open the Radial Gradient Tool in the Develop Module
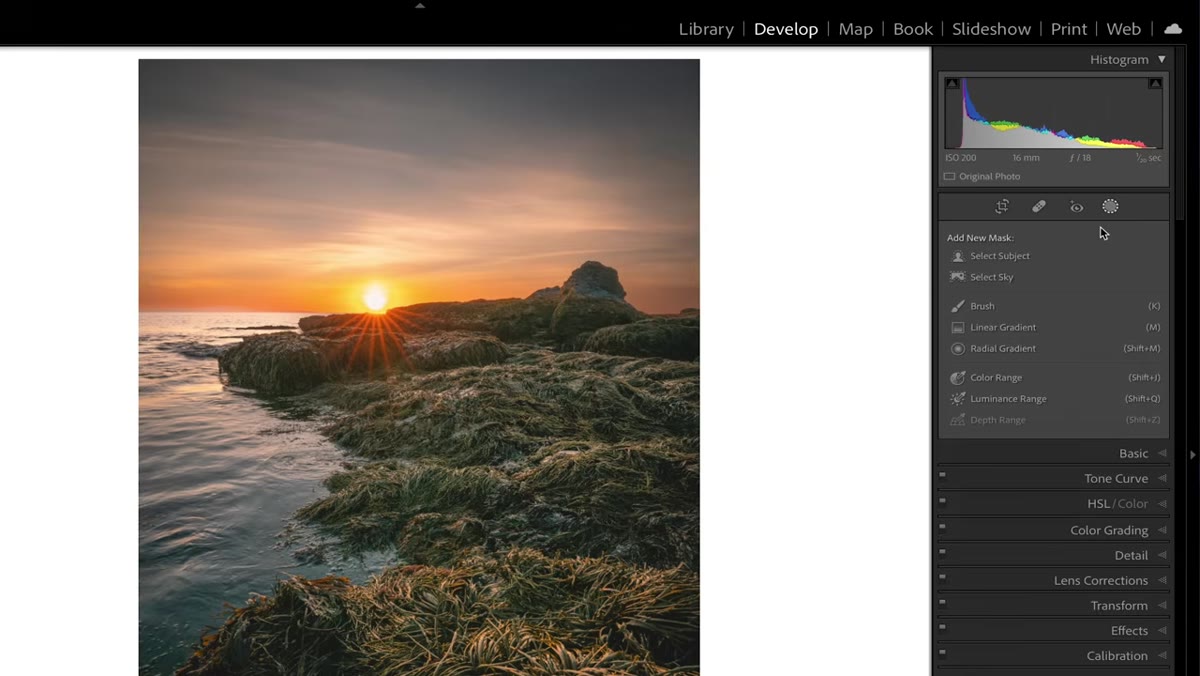 Radial gradient tool selected in the Lightroom filter section
Make sure you’re in the Develop module, then navigate to the filter toolbar near the top of the editing panel. Select the Radial Gradient (sometimes called the Radial Filter in older versions of Lightroom). This is your canvas for the entire effect. The radial gradient lets you apply localized adjustments that fall off from a center point outward, which is exactly the behavior you want to mimic how light spreads from a light source.
Radial gradient tool selected in the Lightroom filter section
Make sure you’re in the Develop module, then navigate to the filter toolbar near the top of the editing panel. Select the Radial Gradient (sometimes called the Radial Filter in older versions of Lightroom). This is your canvas for the entire effect. The radial gradient lets you apply localized adjustments that fall off from a center point outward, which is exactly the behavior you want to mimic how light spreads from a light source.
Step 2: Draw a Large Gradient Centered on the Sun
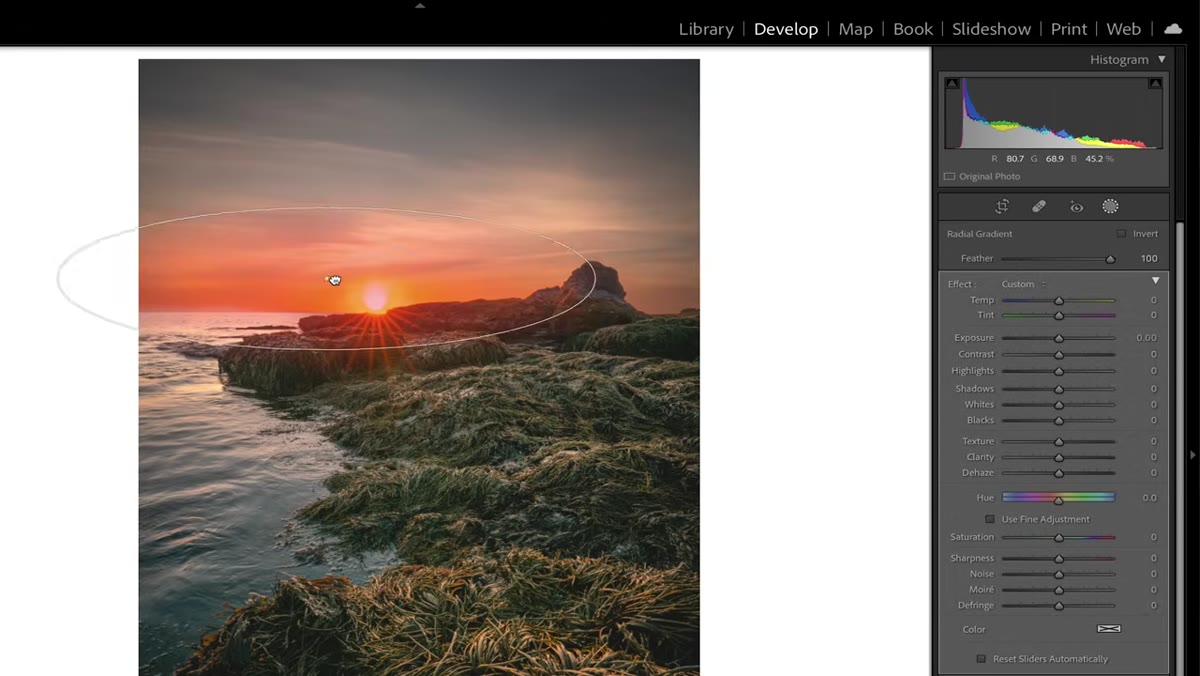 Large radial gradient drawn over sun area in landscape photo
Click and drag to draw a large radial gradient directly over the sun in your image. The key placement detail: center the gradient on the sun itself, not near it. That center point is where your adjustments will be strongest, and they’ll fade outward from there, which naturally mimics the way atmospheric light behaves. The size should be generous. You want the gradient to bleed well into the surrounding sky and any landscape elements nearby. Don’t be timid with the radius.
Large radial gradient drawn over sun area in landscape photo
Click and drag to draw a large radial gradient directly over the sun in your image. The key placement detail: center the gradient on the sun itself, not near it. That center point is where your adjustments will be strongest, and they’ll fade outward from there, which naturally mimics the way atmospheric light behaves. The size should be generous. You want the gradient to bleed well into the surrounding sky and any landscape elements nearby. Don’t be timid with the radius.
Once you’ve placed it, set the feather to zero. This sounds counterintuitive, but Denney’s method relies on the gradient shape itself to create the softness rather than the feather slider. It gives you more control over the actual falloff behavior.
Step 3: Increase the Temperature for Warm Sunlight
 Temperature slider being pushed warmer inside radial gradient settings
With the gradient selected, pull the temperature slider to the right. Sunlight is warm, and your edit should reflect that. The exact value depends on your image, but you’re looking for a shift that reads as golden-hour warmth rather than orange overload. Start conservatively, then keep pushing until the center of the gradient starts to feel like it has actual heat radiating from it. This single adjustment does more for the believability of the effect than almost anything else in the stack.
Temperature slider being pushed warmer inside radial gradient settings
With the gradient selected, pull the temperature slider to the right. Sunlight is warm, and your edit should reflect that. The exact value depends on your image, but you’re looking for a shift that reads as golden-hour warmth rather than orange overload. Start conservatively, then keep pushing until the center of the gradient starts to feel like it has actual heat radiating from it. This single adjustment does more for the believability of the effect than almost anything else in the stack.
Step 4: Bring Down Texture and Dehaze for Atmospheric Softness
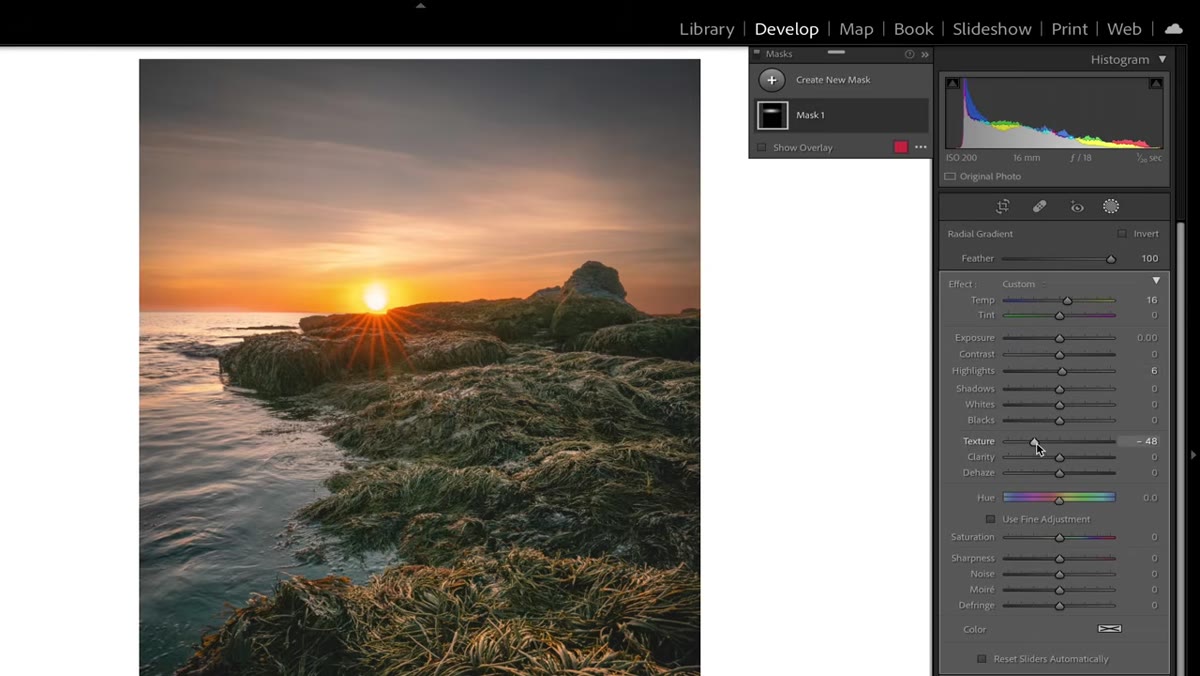 Negative texture and negative dehaze applied inside radial gradient panel
This is the part of the technique most people skip, and it’s the reason their sun glows still look a little crunchy. Pull the Texture slider into negative territory, then push Dehaze significantly into the negative range as well. Negative dehaze adds haze back into the image, which in a localized area around the sun reads as atmospheric scatter. It’s the visual equivalent of moisture and particles in the air catching the light. Done in isolation with a radial gradient, it creates a soft, foggy bloom that looks genuinely photographic rather than digitally applied.
Negative texture and negative dehaze applied inside radial gradient panel
This is the part of the technique most people skip, and it’s the reason their sun glows still look a little crunchy. Pull the Texture slider into negative territory, then push Dehaze significantly into the negative range as well. Negative dehaze adds haze back into the image, which in a localized area around the sun reads as atmospheric scatter. It’s the visual equivalent of moisture and particles in the air catching the light. Done in isolation with a radial gradient, it creates a soft, foggy bloom that looks genuinely photographic rather than digitally applied.
Watch what the dehaze slider does in real time by rocking it back and forth. The difference is immediately obvious and a little shocking the first time you see it work.
Step 5: Add Positive Clarity to Boost Local Luminance
 Clarity slider pushed positive inside the radial gradient adjustment
Here’s a move I hadn’t thought to combine with the softening steps above: push Clarity into positive territory at the same time. Positive clarity in Lightroom increases local contrast, but it also has a luminance-boosting side effect that makes the area feel brighter without actually blowing out highlights. Used alongside negative texture and dehaze, it creates a glow that has weight to it rather than looking washed out. Denney pushes it fairly high here, and the result is a center point that feels intensely bright in a way that reads as natural rather than overexposed.
Clarity slider pushed positive inside the radial gradient adjustment
Here’s a move I hadn’t thought to combine with the softening steps above: push Clarity into positive territory at the same time. Positive clarity in Lightroom increases local contrast, but it also has a luminance-boosting side effect that makes the area feel brighter without actually blowing out highlights. Used alongside negative texture and dehaze, it creates a glow that has weight to it rather than looking washed out. Denney pushes it fairly high here, and the result is a center point that feels intensely bright in a way that reads as natural rather than overexposed.
Step 6: Lift the Shadows and Adjust Blacks for Ambient Fill
 Shadows and blacks sliders adjusted inside radial gradient panel
Real sunlight doesn’t just create bright spots. It spills into shadow areas around the light source and opens them up. To simulate this, bring the Shadows slider up inside your radial gradient. You’re not trying to crush detail or create a flat look. You’re telling the viewer that this part of the scene is flooded with enough light that the shadows can’t fully form. Lift the Blacks slider slightly as well. These two adjustments together reinforce the illusion that the entire region is saturated with light rather than just sitting next to a bright circle.
Shadows and blacks sliders adjusted inside radial gradient panel
Real sunlight doesn’t just create bright spots. It spills into shadow areas around the light source and opens them up. To simulate this, bring the Shadows slider up inside your radial gradient. You’re not trying to crush detail or create a flat look. You’re telling the viewer that this part of the scene is flooded with enough light that the shadows can’t fully form. Lift the Blacks slider slightly as well. These two adjustments together reinforce the illusion that the entire region is saturated with light rather than just sitting next to a bright circle.
Fine-tune Contrast at this stage. A small amount of contrast keeps the effect from going muddy, but too much will fight against the softness you built in the previous steps.
One Thing I’d Add From My Own Workflow
Denney’s technique is complete as presented, but I’ve started stacking a second, smaller radial gradient directly on top of the first one. The inner gradient is tighter, gets an extra push of warmth and a stronger dehaze hit, and represents the hot core of the sun itself. The outer gradient handles the atmospheric bloom. This two-layer approach gives you more precise control over the intensity falloff and makes the effect work better on wider-angle shots where the sun is smaller relative to the frame. It also lets you dial back the outer gradient without losing the punch at the center, which is useful when the effect starts to read as heavy on certain sky tones.
If you’re a Capture One loyalist, yes, you can approximate this with a radial mask and the same adjustment logic. But the Dehaze tool in Lightroom is doing something specific here that I haven’t been able to replicate with the same speed on the other side of the fence.
The single most important takeaway from Denney’s approach is that believable light effects aren’t built from one big move. They’re built from several smaller adjustments that each add a different quality of light: warmth, softness, luminance, ambient fill. Stack them in the right order and the result stops looking like an edit and starts looking like weather.
Watch the full tutorial on YouTube to see all five of Mark Denney’s tricks demonstrated on actual images, including techniques beyond the sun glow covered here.
Comments
Leave a Comment