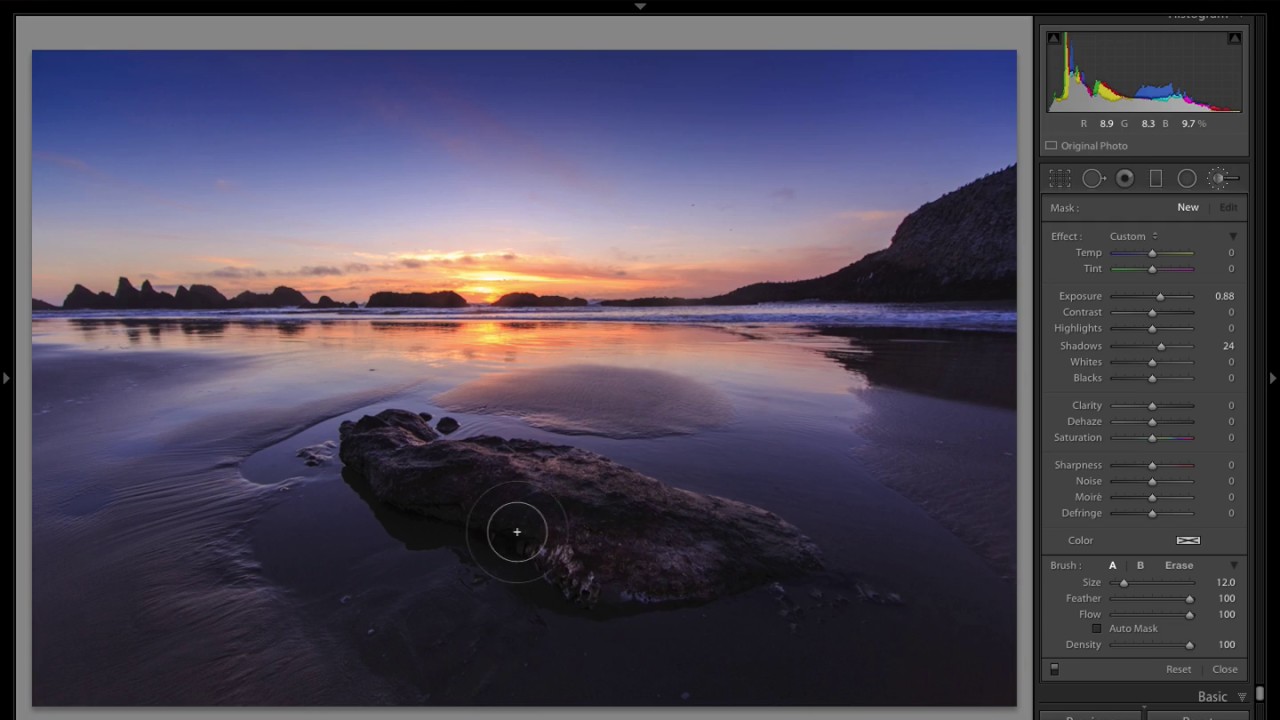
There’s a specific kind of frustration I know well: you shoot a landscape at golden hour, the light is incredible, and then you pull the RAW file up in Lightroom and it looks like a screenshot from Google Maps. Flat, weirdly curved, corners darkening like something went wrong with the sensor. That gap between what your eyes saw and what the file shows is where most people either give up or start yanking sliders randomly and wonder why nothing looks right.
I’ve been editing photos long enough to know that the fix is almost never a single dramatic move. It’s a sequence. Get the foundation right, then build. That’s exactly what Scott Kelby demonstrates in this KelbyOne tutorial, and even if you’ve been using Lightroom for years, the order of operations he uses is worth paying attention to. Watch the full tutorial on YouTube if you want to follow along with the actual footage. What follows is my breakdown of every move he makes and why it works.
Step 1: Enable Lens Profile Corrections First
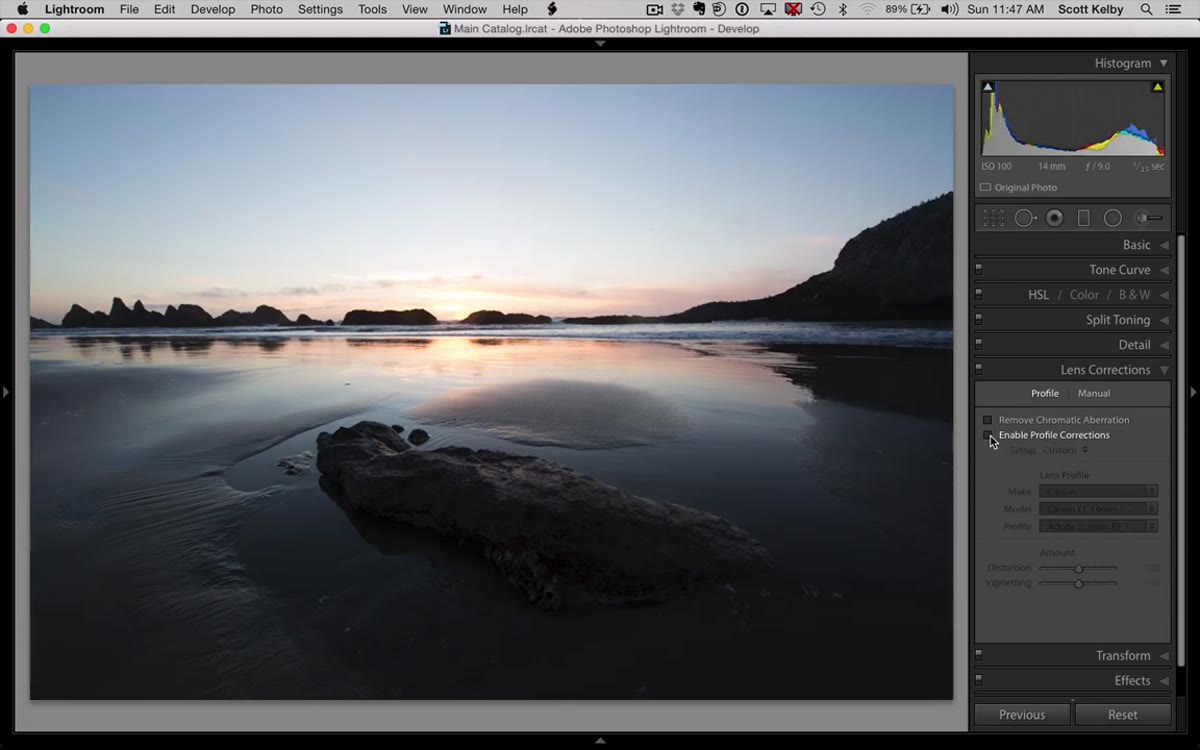 Toggling lens profile corrections on and off
Before you touch exposure, white balance, or anything else, go to the Lens Corrections panel and turn on “Enable Profile Corrections.” This is the step most beginners skip entirely because the effect looks subtle in isolation. Don’t skip it.
Toggling lens profile corrections on and off
Before you touch exposure, white balance, or anything else, go to the Lens Corrections panel and turn on “Enable Profile Corrections.” This is the step most beginners skip entirely because the effect looks subtle in isolation. Don’t skip it.
Lightroom reads the EXIF data from your file and pulls a correction profile for your specific lens from its database. In the tutorial, the shot was taken with a 14mm Canon wide-angle, and you can see the difference clearly when Kelby toggles the correction on and off. The corners brighten, and that barrel distortion, where the horizon line bows outward like the earth is showing off its curvature, flattens out. The distortion correction slider can be pushed further to the right if Lightroom’s automatic fix doesn’t fully flatten the horizon. For wide-angle landscape work, this is almost always necessary.
Step 2: Apply a Camera Profile in the Camera Calibration Panel
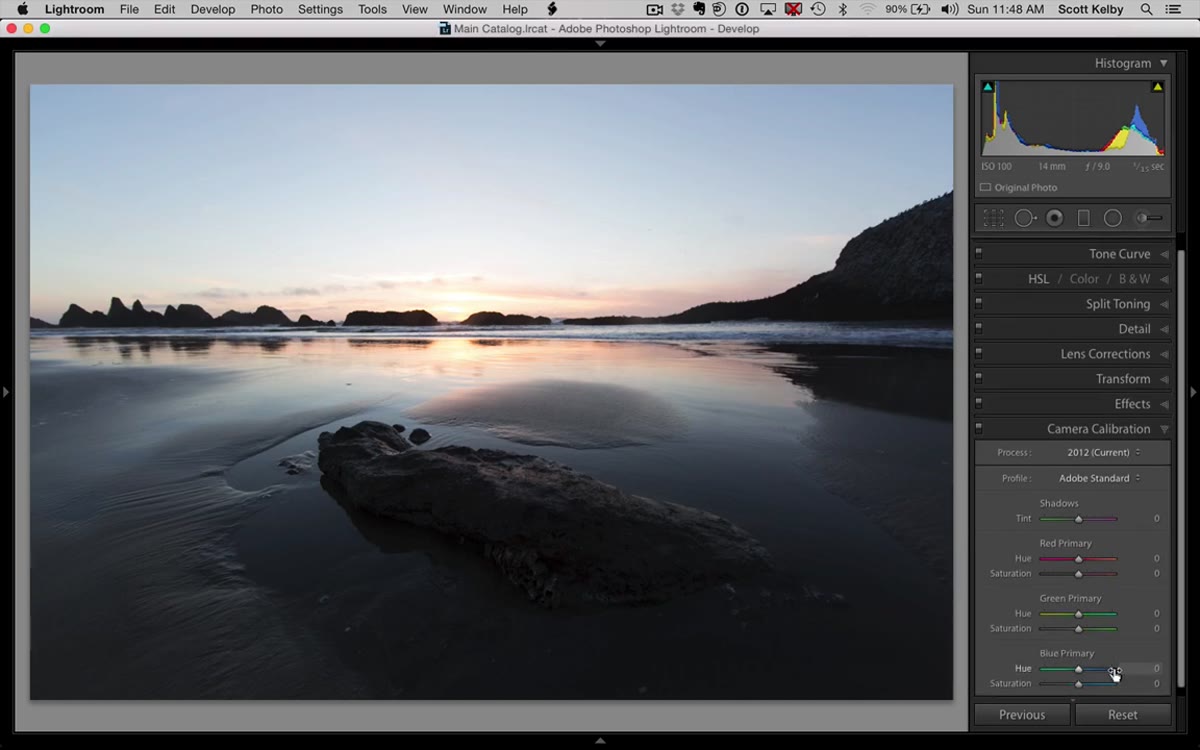 Switching from Adobe Standard to Camera Landscape profile
Once lens corrections are in place, scroll down to the Camera Calibration panel (or in newer versions of Lightroom, look for “Profile” near the top of the Develop module). The default profile Adobe Standard is intentionally conservative. It renders color in a flat, neutral way so you have room to work, but it can make your starting point look lifeless.
Switching from Adobe Standard to Camera Landscape profile
Once lens corrections are in place, scroll down to the Camera Calibration panel (or in newer versions of Lightroom, look for “Profile” near the top of the Develop module). The default profile Adobe Standard is intentionally conservative. It renders color in a flat, neutral way so you have room to work, but it can make your starting point look lifeless.
For landscape images, switch the profile to Camera Landscape. The change is immediate and pretty dramatic, richer greens, more depth in the sky, better contrast throughout the scene. Kelby’s point here is sharp: two clicks in and the photo already looks significantly better before a single manual adjustment. If you’re shooting portraits, try Camera Portrait. Architecture might benefit from Camera Faithful. The right profile depends on the subject, but the habit of checking this early should be consistent.
Step 3: Drag Highlights to Recover Sky Detail
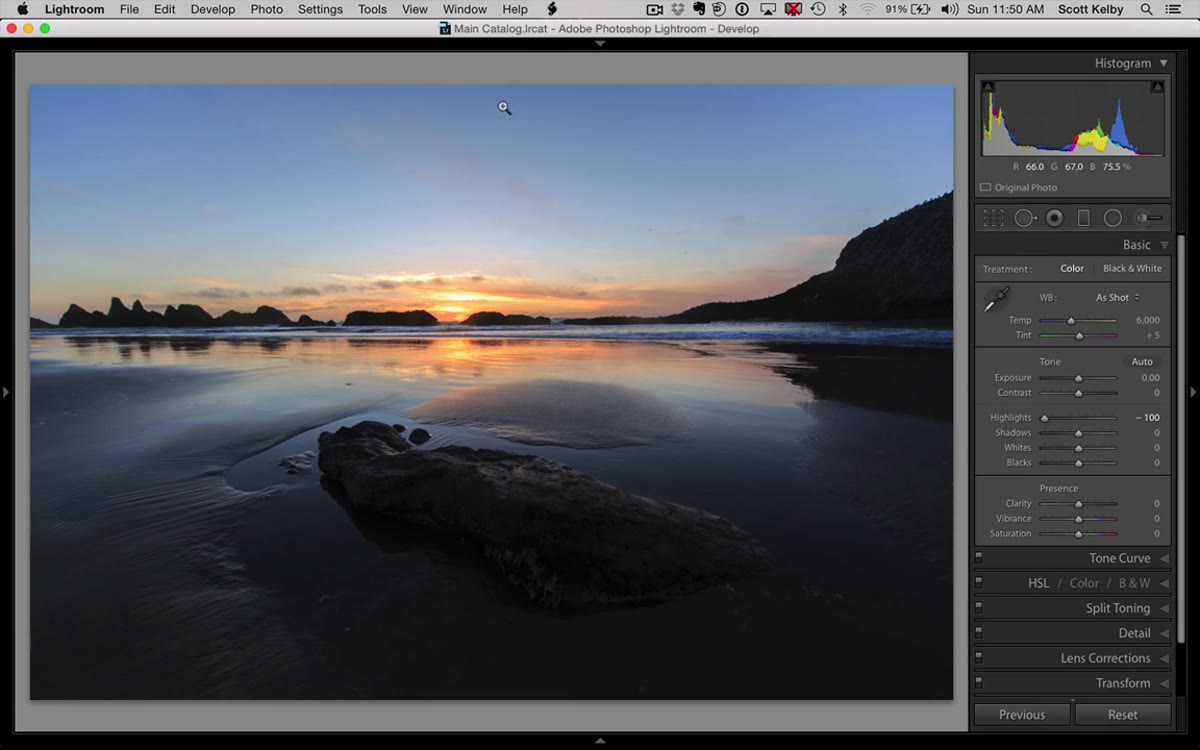
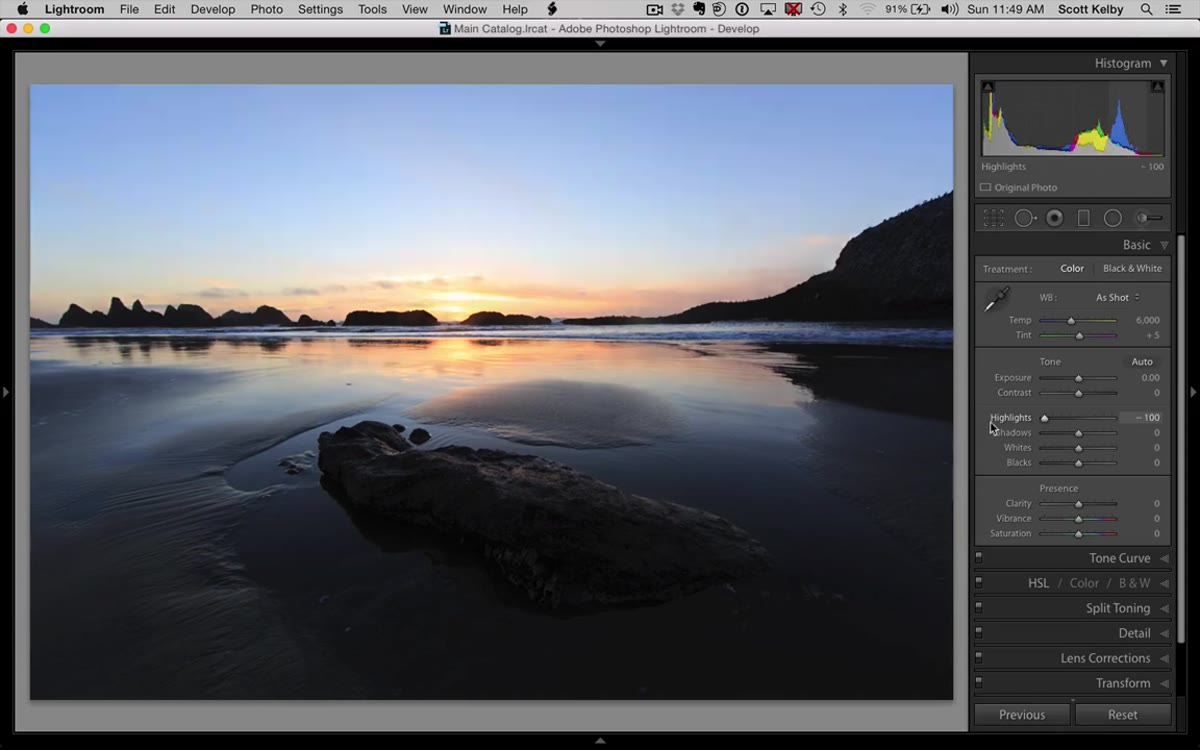 Highlights slider dragged to -100 revealing cloud detail
Now you can head to the Basic panel. For outdoor shots with a bright or blown-out sky, Kelby’s go-to move is pulling the Highlights slider all the way to the left, often to -100. This recovers detail in overexposed areas, particularly cloud texture and tonal gradation in the sky, without doing much to the midtones or shadows.
Highlights slider dragged to -100 revealing cloud detail
Now you can head to the Basic panel. For outdoor shots with a bright or blown-out sky, Kelby’s go-to move is pulling the Highlights slider all the way to the left, often to -100. This recovers detail in overexposed areas, particularly cloud texture and tonal gradation in the sky, without doing much to the midtones or shadows.
The result in this image is significant. What was a near-white, featureless sky opens up to show cloud structure and depth. The key thing to understand is that Highlights recovery only works if the data is actually there in the RAW file. If the sky is pure white and fully clipped, even -100 can’t invent information. This is an argument for shooting RAW always and for exposing slightly to the right in camera but not blowing out the highlights entirely.
Step 4: Open Up Shadows for Balance
 Shadows slider raised to brighten foreground elements
After pulling the Highlights down, the image may look a little heavy in the darker areas by comparison. Lifting the Shadows slider brings back foreground detail and creates a more balanced exposure across the whole frame. Kelby doesn’t push this to extremes. The goal is to reveal what’s there, not make the shadows look gray and flat.
Shadows slider raised to brighten foreground elements
After pulling the Highlights down, the image may look a little heavy in the darker areas by comparison. Lifting the Shadows slider brings back foreground detail and creates a more balanced exposure across the whole frame. Kelby doesn’t push this to extremes. The goal is to reveal what’s there, not make the shadows look gray and flat.
The relationship between the Highlights and Shadows sliders is one of the most useful in Lightroom. Dragging them in opposite directions compresses the dynamic range of a scene in a way that feels natural rather than HDR-processed. Think of it as doing in post what the camera couldn’t do in a single exposure.
Step 5: Add a Graduated Filter to Darken the Sky
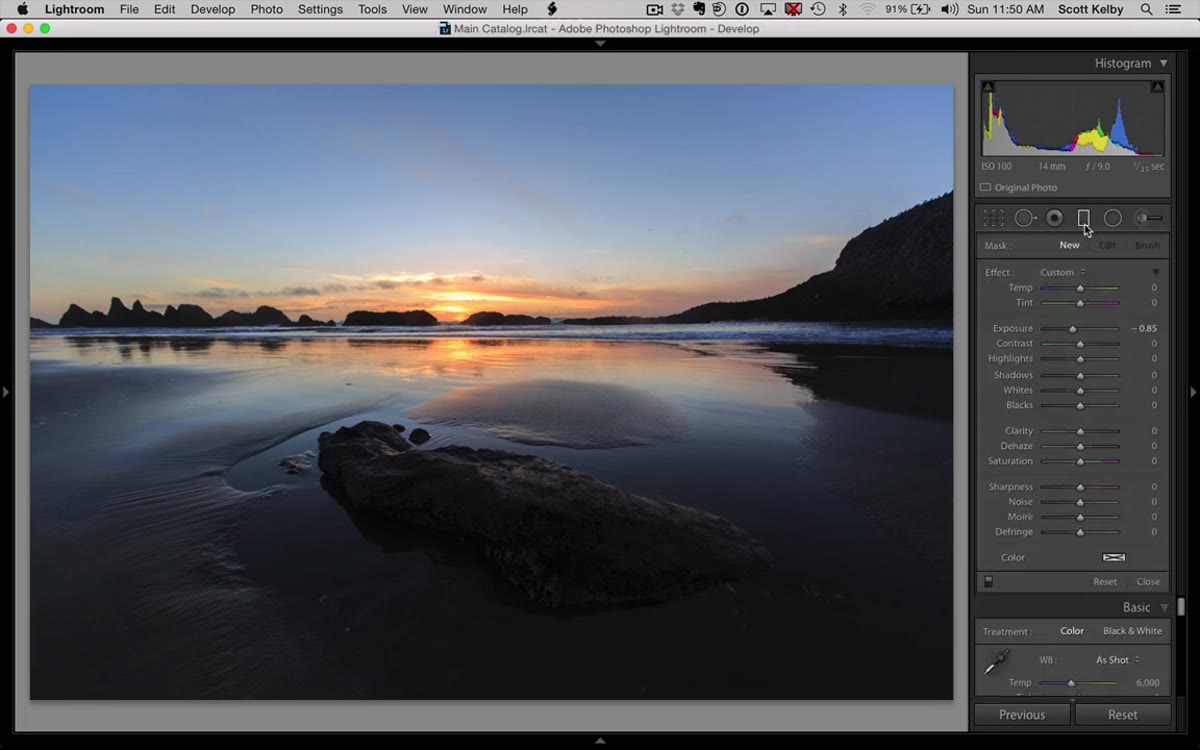 Graduated filter dragged from top of frame downward
Even after recovering highlights, the sky in a landscape can still feel too bright relative to the land. The fix is a graduated filter, the digital version of the physical neutral density grad filters that landscape photographers use on location. In Lightroom, click the Graduated Filter tool in the toolbar above the panels on the right side.
Graduated filter dragged from top of frame downward
Even after recovering highlights, the sky in a landscape can still feel too bright relative to the land. The fix is a graduated filter, the digital version of the physical neutral density grad filters that landscape photographers use on location. In Lightroom, click the Graduated Filter tool in the toolbar above the panels on the right side.
Set the Exposure somewhere around -0.75 to -1.0 to start, then click and drag from the top of the frame downward. The gradient applies full exposure reduction at the top and fades to nothing by the point where you stop dragging. For most landscapes you want to stop roughly at the horizon line, though you can adjust the gradient handles after the fact. The result is a sky that feels darker and more dramatic without looking artificially burned in.
My Own Addition: Set This as a Starting Preset for Landscapes
I’ve built this exact sequence, lens correction on, Camera Landscape profile, highlights pulled to -100, shadows lifted to +40, into a starting preset I use on almost every outdoor RAW file. I named it after a Wilco song, which is a habit I can’t seem to break.
The point is that these aren’t creative choices that change image to image. They’re infrastructure. Getting them applied automatically when you import means you’re always starting from a clean, corrected, profile-accurate file rather than a flat, distorted one. In Lightroom, you can set a preset to apply on import in the Preferences under the File Handling tab. Once you’ve confirmed this workflow works for your camera and lens combination, automate it. Save your creative energy for the decisions that actually vary.
The single most important thing Kelby demonstrates here is that your editing order matters as much as the edits themselves. Fix the lens before you judge the composition. Set the profile before you judge the color. Recover the sky before you reach for the tone curve. The image you’re looking at when you start adjusting is either working with you or against you, and these early steps make sure it’s working with you.
Watch the full tutorial on YouTube to see Scott walk through the entire edit in real time. He covers additional moves beyond what I’ve broken down here, and watching the before/after toggles in motion makes the impact of each step much clearer than screenshots alone can show.
Comments (4)
Would love to see a follow-up going deeper into this topic.
Really solid breakdown. This pairs perfectly with the photography work I've been writing about.
I've watched a dozen tutorials on this and yours is the clearest by far.
Simple but effective. Sometimes that's all you need.
Leave a Comment