
My catalog is a crime scene. Not in an artistic way. I mean there are PSDs in there from 2015 that I abandoned mid-edit, TIFFs that got generated when I round-tripped a photo to Photoshop once and never looked at it again, and at least three different versions of the same bad HDR shot that I should have deleted the same night I made it. Sound familiar? This is one of those problems that sneaks up on you slowly, gigabyte by gigabyte, until suddenly your drive is nearly full and you have no idea why.
In this Matt Kloskowski tutorial, he walks through a method I genuinely wish I had known about years ago. It uses tools that are already sitting inside Lightroom Classic. No third-party apps, no digging through Finder or File Explorer folder by folder. Just a filter workflow that surfaces every PSD, TIFF, or other generated file in your catalog so you can make smart decisions about what stays and what gets deleted. Watch the full tutorial on YouTube if you want to see it in action before reading through the steps below.
I’ve run this process on my own catalog a few times now. The first time I did it, I freed up over four gigabytes just from PSDs I didn’t know were still hanging around. Here’s exactly how to do it.
Step 1: Navigate to “All Photographs” in the Catalog Panel
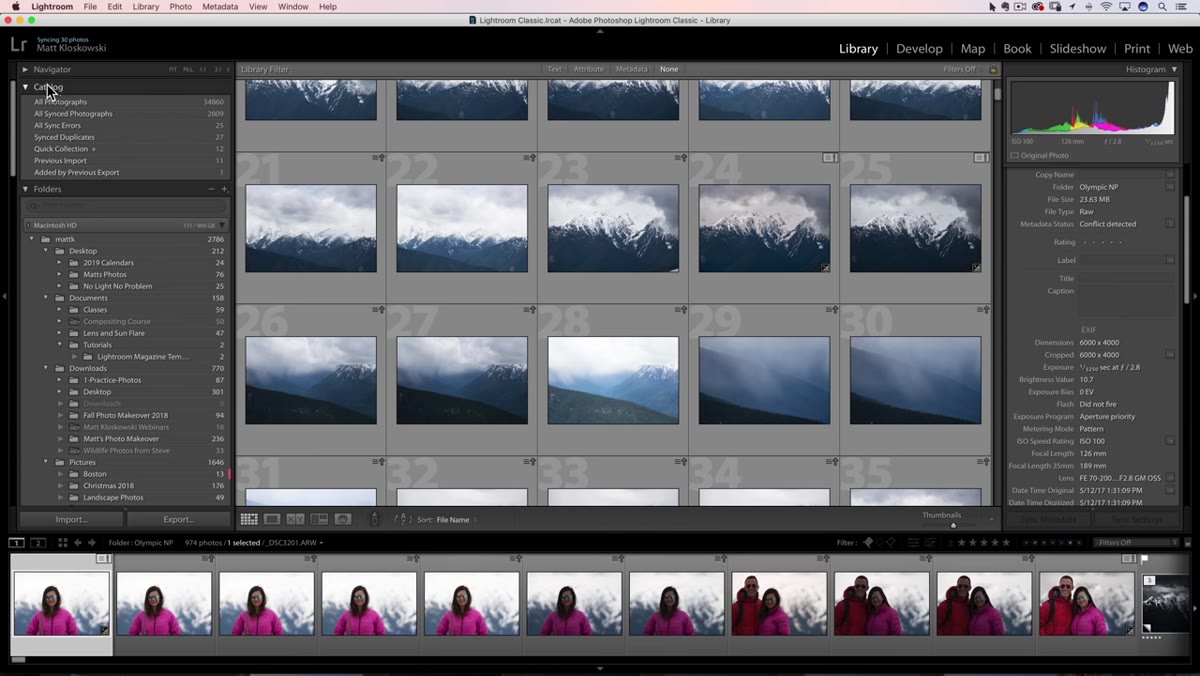 Catalog panel with All Photographs selected in Library module
Start in the Library module. On the left side of your screen, look past the Folders panel and find the Catalog panel near the top. Inside it, you’ll see an option called “All Photographs.” Click it. This is the move that most people skip, and it’s the reason the search you’re about to run actually works across your entire catalog rather than just the folder you currently have open.
Catalog panel with All Photographs selected in Library module
Start in the Library module. On the left side of your screen, look past the Folders panel and find the Catalog panel near the top. Inside it, you’ll see an option called “All Photographs.” Click it. This is the move that most people skip, and it’s the reason the search you’re about to run actually works across your entire catalog rather than just the folder you currently have open.
If you try to filter from inside a specific folder, you’ll only see what’s in that folder. “All Photographs” shows everything Lightroom is tracking, regardless of where it lives on your drive. In Matt’s catalog, that was around 35,000 images. In mine it’s closer to 28,000. Either way, this is the view you need.
Step 2: Open the Filter Bar
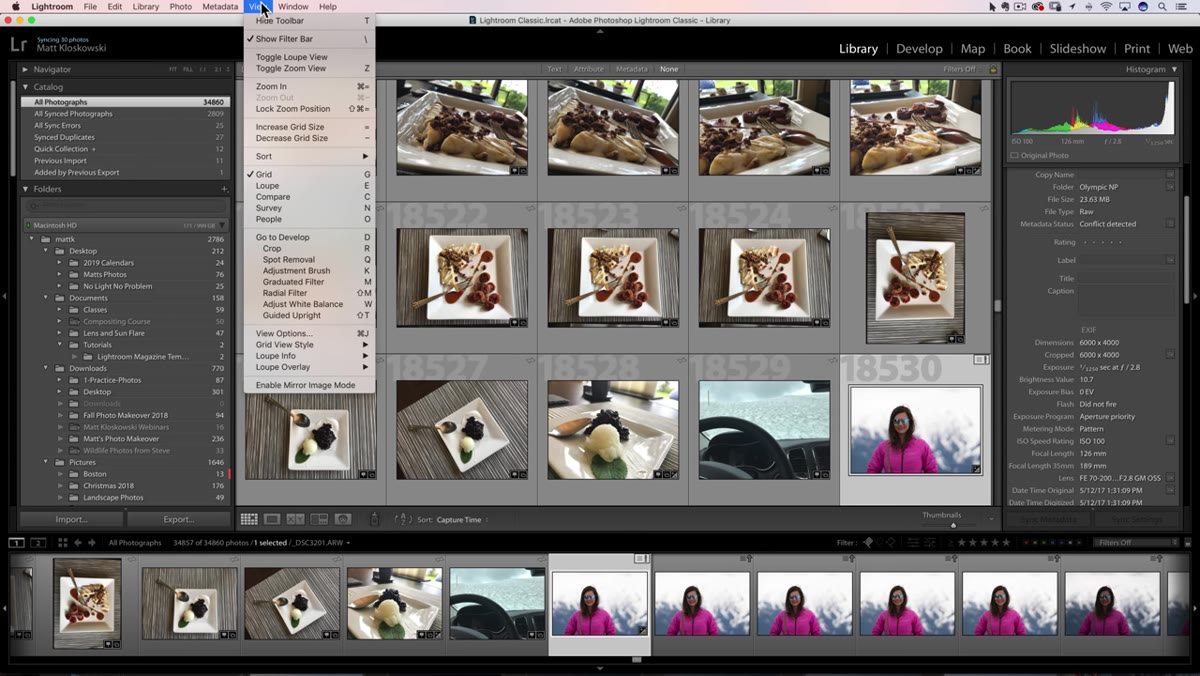 Filter bar visible at top of grid with Text, Attribute, Metadata options
With “All Photographs” selected, go to the View menu at the top of the screen and choose “Show Filter Bar.” A bar will appear along the top of your image grid showing three filter options: Text, Attribute, and Metadata. If it was already visible, nothing changes. If it wasn’t, it is now. This bar is where the actual search happens.
Filter bar visible at top of grid with Text, Attribute, Metadata options
With “All Photographs” selected, go to the View menu at the top of the screen and choose “Show Filter Bar.” A bar will appear along the top of your image grid showing three filter options: Text, Attribute, and Metadata. If it was already visible, nothing changes. If it wasn’t, it is now. This bar is where the actual search happens.
A lot of Lightroom users know this bar exists for star ratings and color labels, but the Metadata tab is where the genuinely powerful filtering lives. We’re headed there next.
Step 3: Click the Metadata Tab
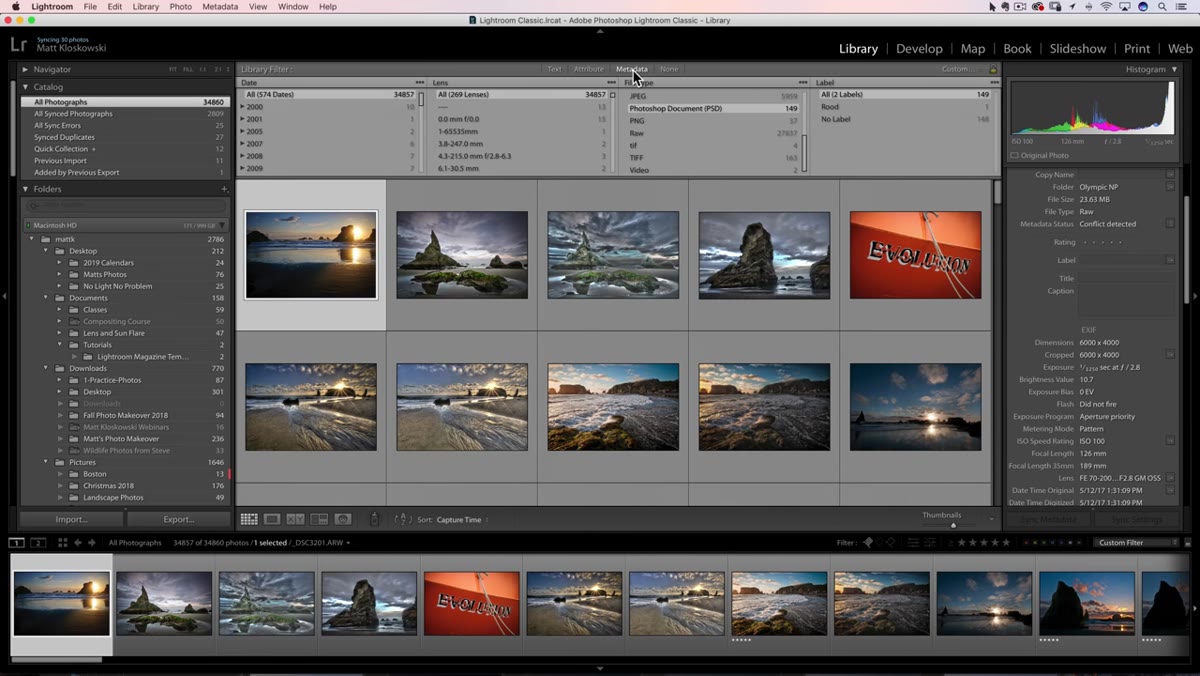 Metadata filter tab selected, multiple column filters visible
Click “Metadata” in the filter bar. You’ll see a set of column filters appear, each showing a different category of information about your photos. By default these might be showing things like Date, Camera, or Lens. You need one of them to show “File Type,” and it probably isn’t showing that yet.
Metadata filter tab selected, multiple column filters visible
Click “Metadata” in the filter bar. You’ll see a set of column filters appear, each showing a different category of information about your photos. By default these might be showing things like Date, Camera, or Lens. You need one of them to show “File Type,” and it probably isn’t showing that yet.
Click the header of any one of these columns to get a dropdown of filter category options. Scroll through the list until you find “File Type” and select it. That column will now display a breakdown of every file type currently in your catalog, along with a count for each one.
Step 4: Filter by File Type (PSD or TIFF)
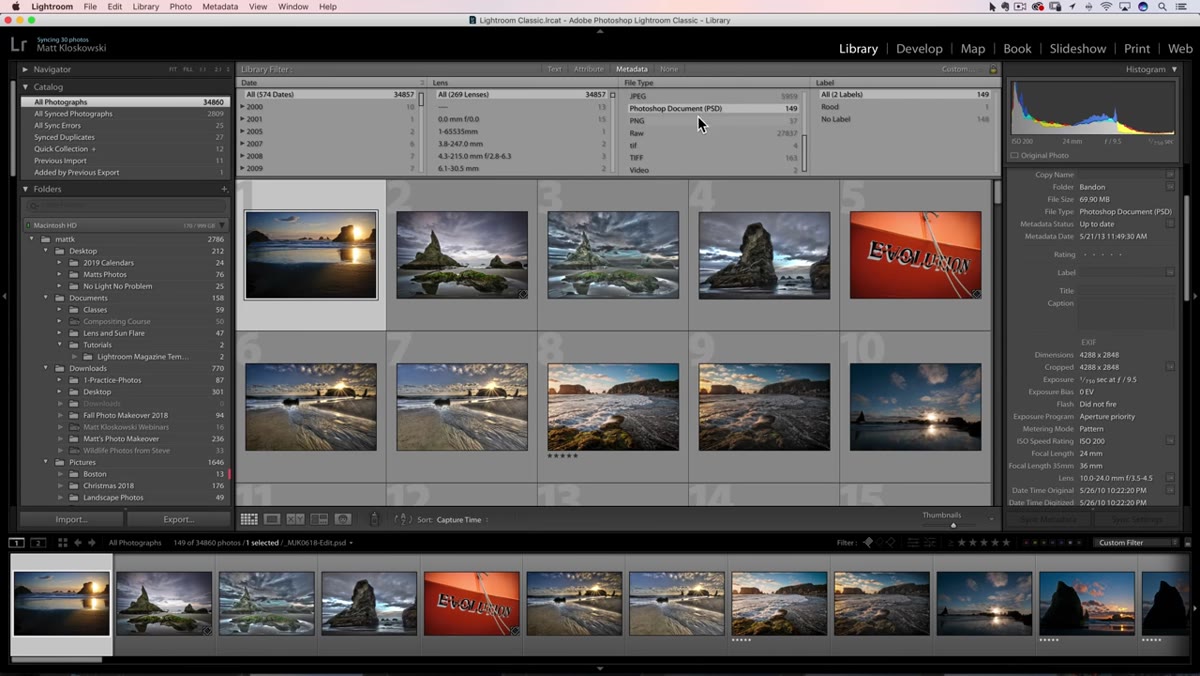 File Type column showing PSD selected with photo count visible
Once the File Type column is active, you’ll see entries like JPEG, RAW, PSD, TIFF, and possibly others depending on your workflow. Click “PSD” to filter your entire catalog down to just those files. Lightroom will immediately show you every PSD it knows about, with a count in the column header. Matt found 149 in his catalog. I had 112 the first time I ran this.
File Type column showing PSD selected with photo count visible
Once the File Type column is active, you’ll see entries like JPEG, RAW, PSD, TIFF, and possibly others depending on your workflow. Click “PSD” to filter your entire catalog down to just those files. Lightroom will immediately show you every PSD it knows about, with a count in the column header. Matt found 149 in his catalog. I had 112 the first time I ran this.
If your Lightroom-to-Photoshop preferences are set to generate TIFFs instead of PSDs, click TIFF. You can only select one file type at a time in this column, so run the process once for each type you want to clean up. This is also worth doing for DNG files if you batch-converted a bunch of originals and then kept the raws too, since duplicates add up fast.
Step 5: Review the Results and Select What You Want to Delete
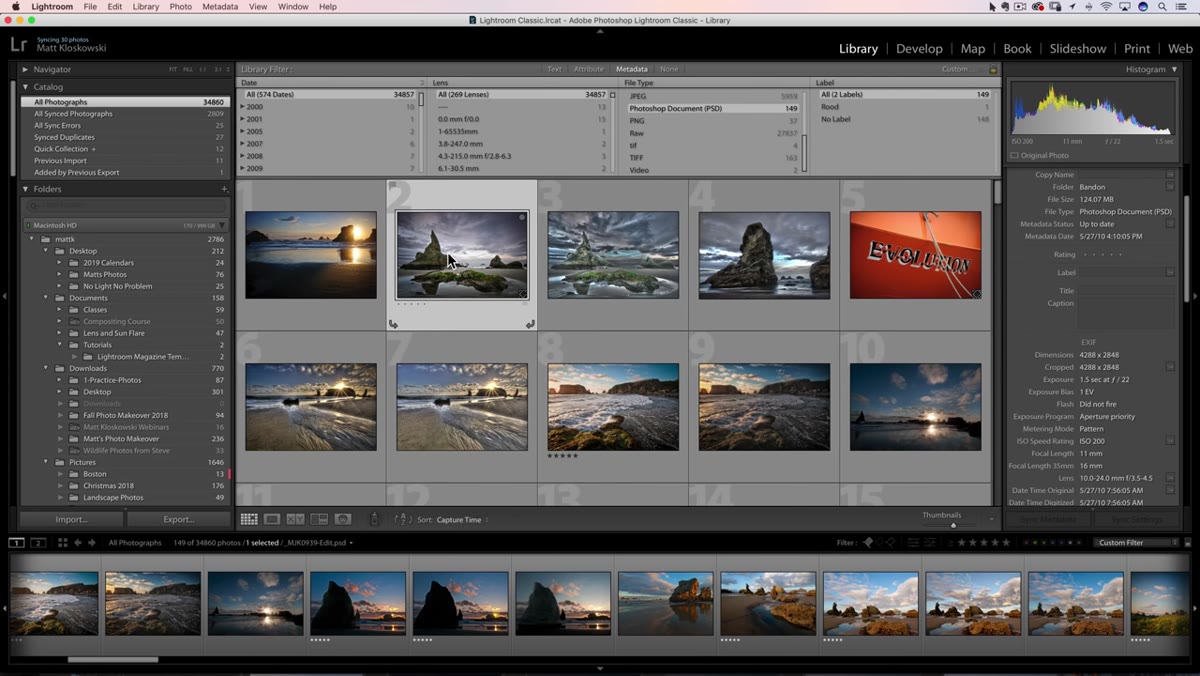 Grid view showing multiple PSD files selected with Command-click
Now you get to do the uncomfortable thing: actually look at these files. Scroll through the grid. Some of them you’ll want to keep. A lot of them you probably won’t. The goal here isn’t to nuke everything, it’s to identify the ones that exist only because Lightroom generated them during an edit you abandoned.
Grid view showing multiple PSD files selected with Command-click
Now you get to do the uncomfortable thing: actually look at these files. Scroll through the grid. Some of them you’ll want to keep. A lot of them you probably won’t. The goal here isn’t to nuke everything, it’s to identify the ones that exist only because Lightroom generated them during an edit you abandoned.
To select multiple files, hold Command on a Mac or Control on a PC and click each one you want to remove. You can scroll through the whole grid while holding that key and just keep clicking. There’s no need to select them in order or in sequence. Build your selection until you’ve flagged everything that should go.
One Thing I’d Add: Check Your Versions
Matt doesn’t specifically call this out in the tutorial, but once you’re looking at your PSDs in this filtered view, check for duplicates with numbered suffixes. You’ll often see “filename.psd,” “filename-2.psd,” and “filename-3.psd” sitting side by side. These usually happen when you’ve sent the same photo to Photoshop more than once, or when you’ve used the same source file to demonstrate something in a class or tutorial. I teach Lightroom pretty regularly and this is exactly how my catalog got so cluttered. One image, three edit attempts, three separate 80MB files just waiting.
The filter view makes these duplicates easy to spot because all versions of the same shot end up grouped near each other. It’s one of the few times the grid view actually makes auditing your catalog feel manageable rather than overwhelming.
The single biggest takeaway here is that “All Photographs” plus the Metadata filter is one of the most underused tools in Lightroom Classic. Most people treat the Filter Bar like it’s only for culling selects, but it’s also a catalog auditing tool. Running this PSD and TIFF sweep a couple times a year is now part of how I keep my drives from quietly filling up with files I don’t care about anymore.
Watch the full tutorial on YouTube to see Matt walk through the deletion step and hear his thoughts on the specific types of files most likely to be taking up space in a long-term Lightroom catalog.
Comments
Leave a Comment