
There’s a certain irony in spending more time waiting for Lightroom to load a photo than you spent actually taking it. I’ve been there more times than I’d like to admit. Early in my editing career, I chalked slow performance up to some cosmic tax on creative work. Turns out, most of it was self-inflicted. A few wrong settings, an underpowered drive, and a catalog stored in the worst possible location will bring even a capable machine to its knees.
In this Matt Kloskowski tutorial on Watch the full tutorial on YouTube, Matt cuts through the usual vague advice and gets specific about what’s actually dragging Lightroom Classic down. This is the kind of video where you’ll nod along to the first few points and then hit one that makes you immediately open Lightroom to fix something. That happened to me around the preview settings section. More on that in a minute.
What I appreciate about Matt’s approach is that he doesn’t treat his audience like they’re running a potato from 2009. He acknowledges that Adobe has done real work improving performance over the past few years, which means if your system meets the requirements and Lightroom still feels slow, something specific is wrong. Let’s walk through it.
Step 1: Check Your System Against Minimum Requirements
 Text on screen listing minimum system requirement advice
This one sounds obvious, but Matt makes a point worth internalizing: if you’re running right at the minimum system specs Adobe lists, you should expect minimum performance. Not great performance. Minimum. That’s not a Lightroom problem, that’s just how software works across the board. Before you change a single Lightroom setting, Google Adobe’s current minimum requirements for Lightroom Classic and compare them honestly against your machine. If your RAM is just barely clearing the bar, that’s your first upgrade to consider.
Text on screen listing minimum system requirement advice
This one sounds obvious, but Matt makes a point worth internalizing: if you’re running right at the minimum system specs Adobe lists, you should expect minimum performance. Not great performance. Minimum. That’s not a Lightroom problem, that’s just how software works across the board. Before you change a single Lightroom setting, Google Adobe’s current minimum requirements for Lightroom Classic and compare them honestly against your machine. If your RAM is just barely clearing the bar, that’s your first upgrade to consider.
Step 2: Take Your Hard Drive Speed Seriously
 Matt discussing hard drive speed and catalog placement
Where you store your Lightroom catalog and your actual photo files matters more than most people realize. Matt recommends keeping your catalog on the same machine that’s running Lightroom, ideally on a fast internal drive. If your photos live on an external hard drive, the speed of that drive directly affects how quickly Lightroom can access and render them. An old spinning hard drive running at 4200 RPM, or something connected over a legacy USB standard, creates a real bottleneck. If you’re doing serious editing volume, an SSD-based external is worth every penny.
Matt discussing hard drive speed and catalog placement
Where you store your Lightroom catalog and your actual photo files matters more than most people realize. Matt recommends keeping your catalog on the same machine that’s running Lightroom, ideally on a fast internal drive. If your photos live on an external hard drive, the speed of that drive directly affects how quickly Lightroom can access and render them. An old spinning hard drive running at 4200 RPM, or something connected over a legacy USB standard, creates a real bottleneck. If you’re doing serious editing volume, an SSD-based external is worth every penny.
Step 3: Keep at Least 20% of Your Drive Free
 Matt explaining free hard drive space and performance impact
This one catches people off guard. Lightroom constantly swaps data in and out of your drive as you work. If your drive is nearly full, that process grinds. Matt uses a vivid example: imagine a one-terabyte drive with 990 gigabytes used. That remaining sliver of space isn’t enough for Lightroom to breathe. A good rule of thumb is keeping at least 20% of your drive free at all times. If you’re hovering below that, archive some files or upgrade your storage before expecting any real speed improvement.
Matt explaining free hard drive space and performance impact
This one catches people off guard. Lightroom constantly swaps data in and out of your drive as you work. If your drive is nearly full, that process grinds. Matt uses a vivid example: imagine a one-terabyte drive with 990 gigabytes used. That remaining sliver of space isn’t enough for Lightroom to breathe. A good rule of thumb is keeping at least 20% of your drive free at all times. If you’re hovering below that, archive some files or upgrade your storage before expecting any real speed improvement.
Step 4: Choose “Embedded and Sidecar” at Import
 Import dialog open showing preview options in top right
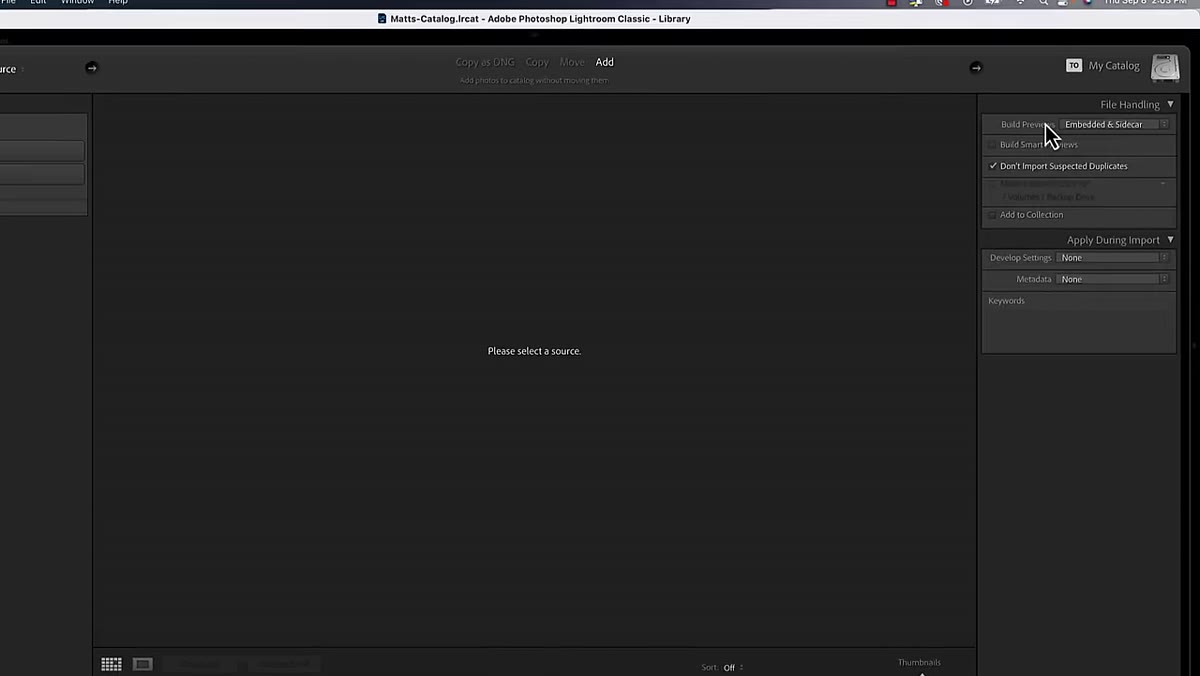
Here’s the one that changed my workflow when I first came across it, and it’s the centerpiece of Matt’s performance advice for the review stage. When you bring photos into Lightroom, the import dialog has a preview options menu in the upper right. Most people ignore it or leave it on whatever it defaulted to. Matt recommends selecting “Embedded and Sidecar” here.
Import dialog open showing preview options in top right
Here’s the one that changed my workflow when I first came across it, and it’s the centerpiece of Matt’s performance advice for the review stage. When you bring photos into Lightroom, the import dialog has a preview options menu in the upper right. Most people ignore it or leave it on whatever it defaulted to. Matt recommends selecting “Embedded and Sidecar” here.
What this does is tell Lightroom to use the JPEG preview that’s already baked into your raw file by your camera. Your camera generated that preview the moment you pressed the shutter. Lightroom doesn’t have to build anything. It just reads what’s already there, which means you get fast, usable previews almost immediately after import.
Step 5: Use the Library Module for Initial Photo Review
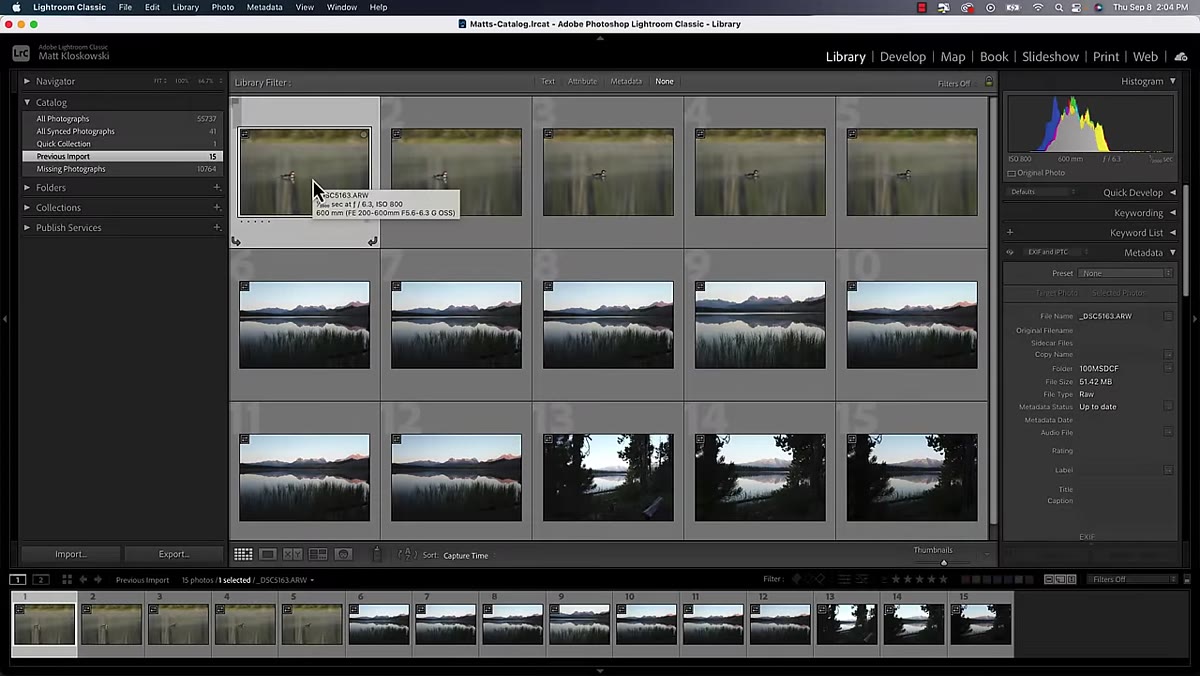 Library module open with embedded preview badges visible
Once your photos are imported with embedded previews, Matt’s advice is to do all your initial culling and review work inside the Library module rather than jumping straight into Develop. The embedded JPEG preview is large enough to fill most of your screen, and because Lightroom isn’t processing the raw file at all during this stage, flipping through images with the arrow keys becomes nearly instant. Even with hundreds of photos, you can move through them at a pace that actually keeps up with your eyes.
Library module open with embedded preview badges visible
Once your photos are imported with embedded previews, Matt’s advice is to do all your initial culling and review work inside the Library module rather than jumping straight into Develop. The embedded JPEG preview is large enough to fill most of your screen, and because Lightroom isn’t processing the raw file at all during this stage, flipping through images with the arrow keys becomes nearly instant. Even with hundreds of photos, you can move through them at a pace that actually keeps up with your eyes.
You’ll notice small badges in the corner of your thumbnails that indicate preview type. If you hover over them, Lightroom will tell you it’s showing an embedded preview. That’s a good sign. It means you’re working efficiently. Flag your keepers, reject the obvious misses, and only then move into Develop where Lightroom needs to do the heavier processing work on the actual raw data.
One Thing I’d Add: Where You Store Your Catalog Is a Long-Term Decision
Matt covers catalog placement in broad strokes, and I want to make it concrete for anyone who’s been copying their catalog around between drives. Pick one location and keep it there. Ideally on your fastest internal drive, close to your operating system. Moving a catalog doesn’t just risk corruption if something goes wrong mid-transfer. It also breaks relative paths to your files if you’re not careful, which creates a whole separate nightmare of missing photos and exclamation marks across your grid.
I learned this the hard way when I was editing press photos for my old band and managed to move my catalog to a slow external drive to free up space on my laptop. Lightroom became almost unusable for anything above a basic star rating. Once I moved it back to the internal SSD and rebuilt my previews, it was a different application. The catalog belongs on your fastest, most stable drive, full stop.
The single most important takeaway from Matt’s tutorial is this: most Lightroom slowdowns are environmental, not software bugs. Before you blame Lightroom, look at your hardware, your drive speed, your available storage space, and your import settings. Changing the preview option to “Embedded and Sidecar” alone can make the culling stage feel dramatically faster, especially if you’re shooting high-volume sessions.
Watch the full tutorial on YouTube to see Matt walk through each of these settings live inside Lightroom Classic. He covers additional details that are worth seeing in context, especially the visual difference between preview types in the Library module.
Comments (3)
Would love to see a follow-up going deeper into this topic.
Been doing this wrong for years apparently. Thanks for the wake-up call.
Really solid breakdown. This pairs perfectly with the workflows work I've been writing about.
Leave a Comment