I’ll be honest with you: I spent the first two years of my Lightroom life doing everything the slow way. Clicking through menus, hunting for tools, dragging panels around like I was rearranging furniture. It wasn’t until I started watching other working photographers share their actual workflows that I realized how much time I was bleeding out of every editing session. The fixes were almost embarrassingly simple once I saw them.
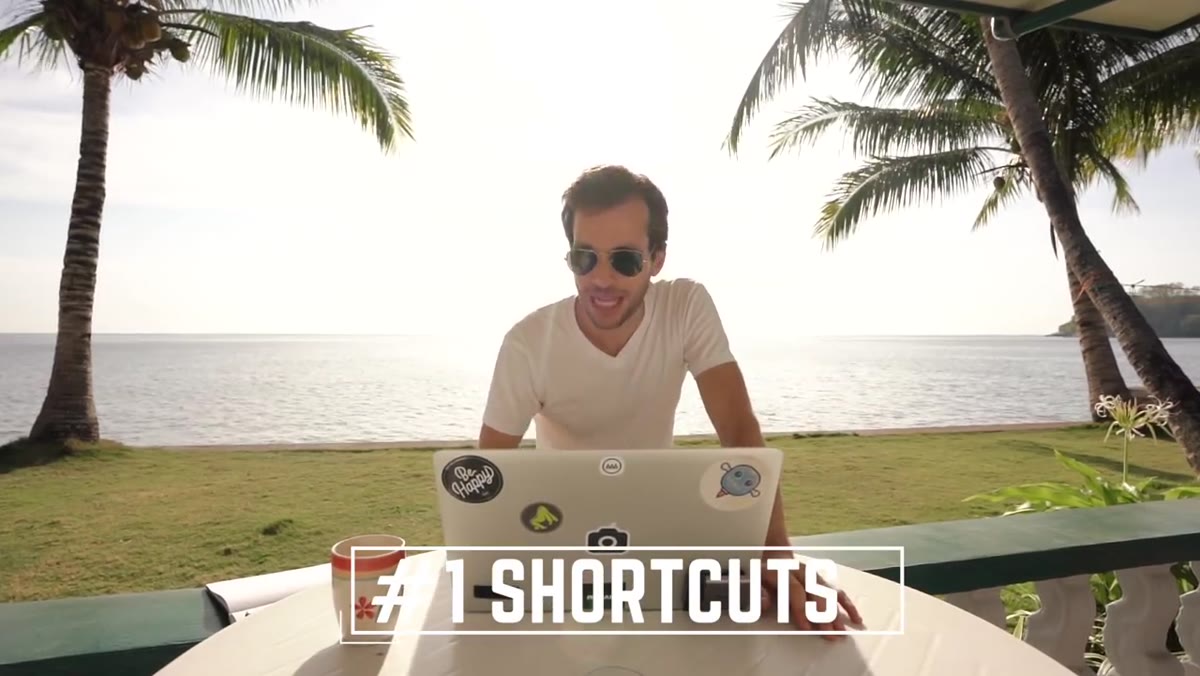
That’s what Pierre T. Lambert’s tutorial delivers. Filmed while he was jet-lagged on a tiny island in the Philippines, which is either the most charismatic filming setup I’ve ever seen or proof that good content doesn’t need a perfect environment, the video packs seven genuine workflow upgrades into a tight runtime. Watch the full tutorial on YouTube – but if you want the techniques broken down step by step so you can follow along inside Lightroom right now, keep reading.
These aren’t beginner tips in the condescending sense. They’re the kind of thing a working professional discovers and immediately thinks: how did I not know that sooner?
Step 1: Navigate Your Library Without Touching the Mouse
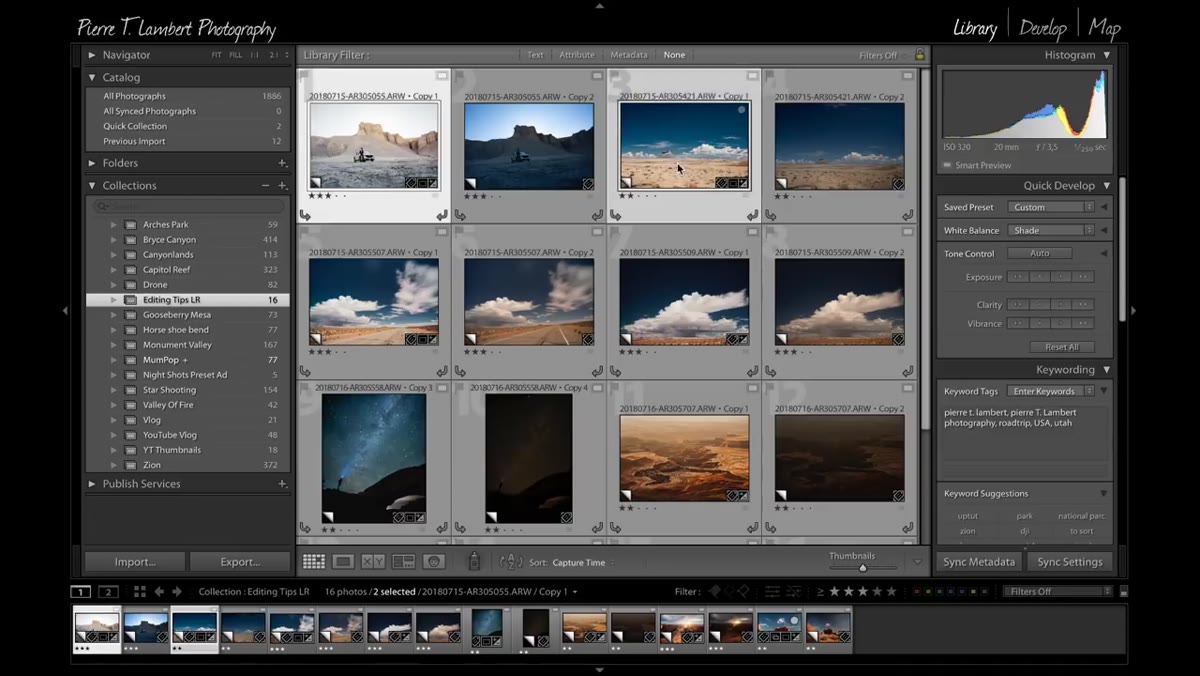
 Lightroom Library module showing grid of thumbnail images
The Library module is your home base, but most people navigate it like they’re using a trackpad on a bad day. Press G to jump to the grid view of your images instantly, from anywhere in Lightroom. Once you’re there, press E to expand a single image into a larger loupe view without leaving the Library module. You keep all your metadata and panel info on the sides, and you get a much better look at what you’re actually selecting.
Lightroom Library module showing grid of thumbnail images
The Library module is your home base, but most people navigate it like they’re using a trackpad on a bad day. Press G to jump to the grid view of your images instantly, from anywhere in Lightroom. Once you’re there, press E to expand a single image into a larger loupe view without leaving the Library module. You keep all your metadata and panel info on the sides, and you get a much better look at what you’re actually selecting.
For culling sessions, this alone cuts significant time. I use G and E constantly when I’m sorting through a shoot, toggling between the grid and a closer look without ever reaching for a menu.
Step 2: Compare Multiple Images Side by Side
 Two or three photos displayed side by side in Library compare view
When you’re trying to choose between similar shots, whether for a client delivery or your own portfolio edit, the comparison view is essential. Select two or more images in the Library grid, then press N to enter Survey mode. Lightroom tiles your selected photos side by side on screen so you can evaluate them simultaneously.
Two or three photos displayed side by side in Library compare view
When you’re trying to choose between similar shots, whether for a client delivery or your own portfolio edit, the comparison view is essential. Select two or more images in the Library grid, then press N to enter Survey mode. Lightroom tiles your selected photos side by side on screen so you can evaluate them simultaneously.
This is genuinely useful when presenting options to clients. Instead of flipping back and forth between images and losing your mental reference point, you see everything at once. You can click on any image to deselect and remove it from the comparison as you narrow down your picks. It’s a fast, visual way to make decisions you’d otherwise second-guess.
Step 3: Jump Straight to the Develop Module
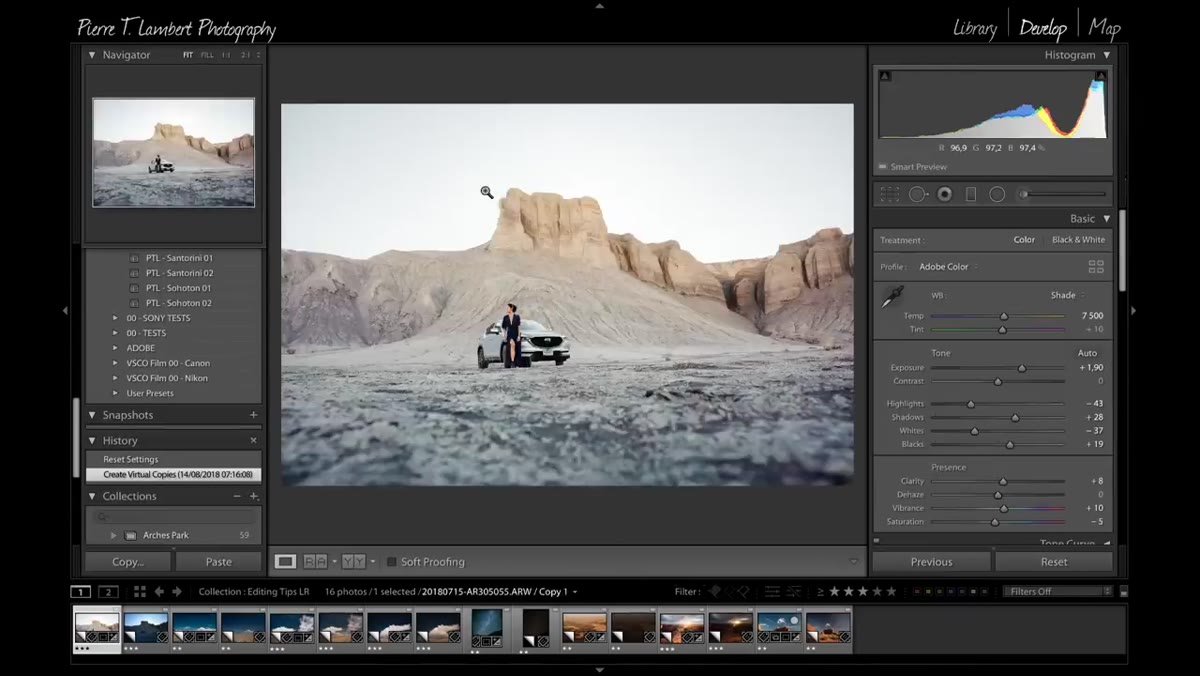 Develop module opening with editing panel visible on right
Stop clicking the word “Develop” at the top of the screen. Press D and you’re there immediately. That’s the whole tip, and it’s one of those things where once it’s in your muscle memory, going back to clicking feels genuinely painful.
Develop module opening with editing panel visible on right
Stop clicking the word “Develop” at the top of the screen. Press D and you’re there immediately. That’s the whole tip, and it’s one of those things where once it’s in your muscle memory, going back to clicking feels genuinely painful.
Once you’re in Develop, do your editing, and when you want to see the final result at full size without any panels cluttering your view, press F for full screen. The image fills your monitor completely. Press F again to return to the editing view. I use this constantly as a gut-check before I finalize anything, because small panels and a compressed preview can hide issues that become obvious at full scale.
Step 4: Reveal Exactly Where a Local Adjustment is Applied
 Red overlay mask revealing gradient filter area on a photo
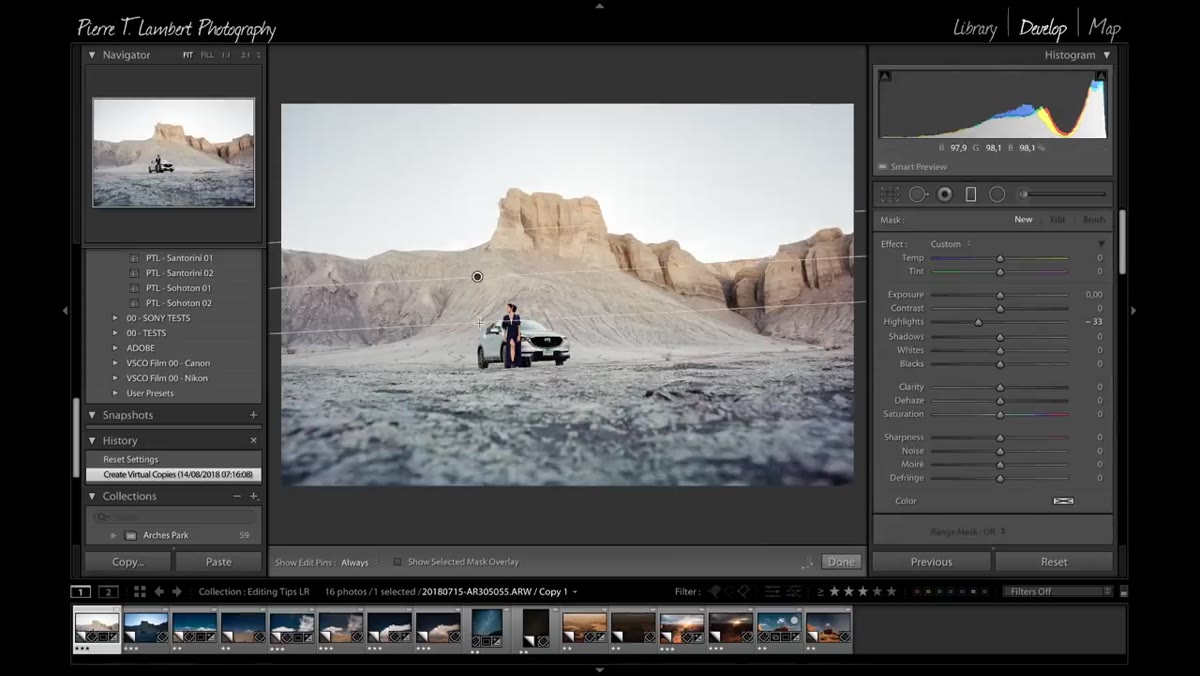
This one stopped me cold the first time I saw it. If you’re working with any local adjustment tool, a gradient filter, a radial filter, or an adjustment brush, and you want to see precisely which pixels are being affected, press O. Lightroom overlays a colored mask directly on your image showing the exact area of the adjustment.
Red overlay mask revealing gradient filter area on a photo
This one stopped me cold the first time I saw it. If you’re working with any local adjustment tool, a gradient filter, a radial filter, or an adjustment brush, and you want to see precisely which pixels are being affected, press O. Lightroom overlays a colored mask directly on your image showing the exact area of the adjustment.
Before I knew this shortcut, I was guessing. I’d apply a gradient, wonder if it was bleeding into an area I didn’t want affected, and just hope for the best. Now I press O, confirm the coverage, adjust the feathering if needed, and move on. It’s especially useful for brush adjustments where the painted area can get messy around complex edges. This is one of those features that feels like it should be taught on day one.
Step 5: Create Virtual Copies to Test Multiple Looks
 Two versions of the same image side by side in Library grid with copy badge
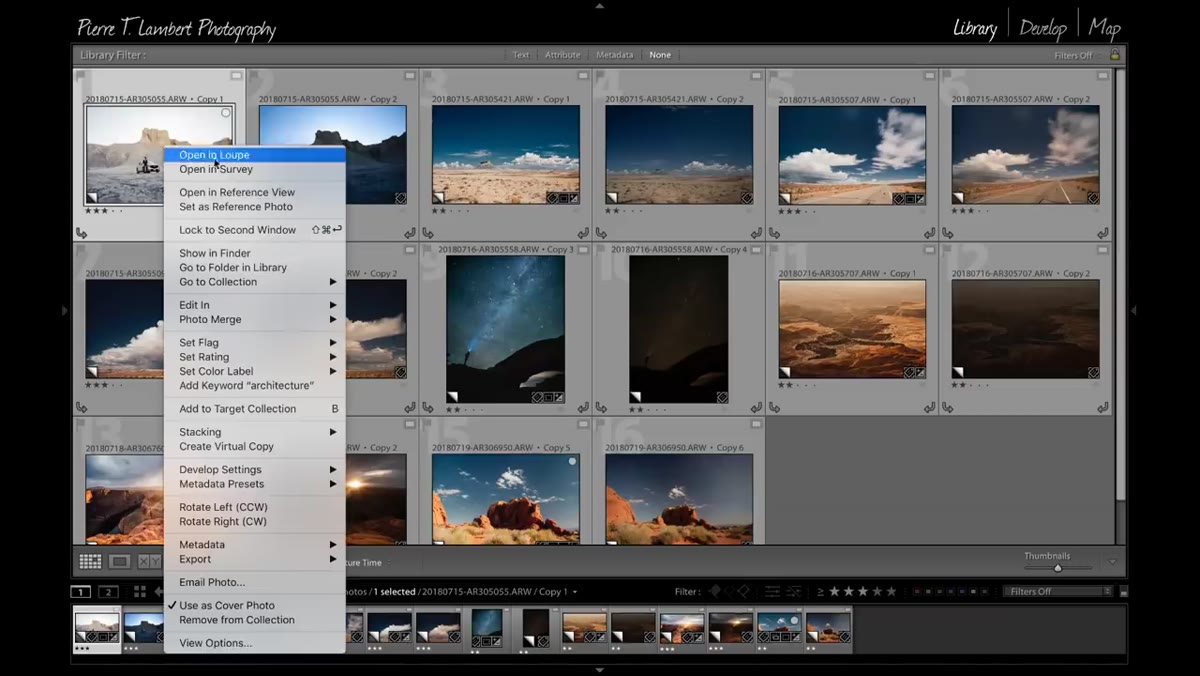
Virtual copies are one of Lightroom’s most underused features. Right-click any image in your Library and choose Create Virtual Copy, or use the shortcut Ctrl+Apostrophe on Windows, Cmd+Apostrophe on Mac. Lightroom creates what appears to be a duplicate image in your catalog, but it references the exact same original file on your hard drive. No extra disk space used.
Two versions of the same image side by side in Library grid with copy badge
Virtual copies are one of Lightroom’s most underused features. Right-click any image in your Library and choose Create Virtual Copy, or use the shortcut Ctrl+Apostrophe on Windows, Cmd+Apostrophe on Mac. Lightroom creates what appears to be a duplicate image in your catalog, but it references the exact same original file on your hard drive. No extra disk space used.
The point is that you can apply a completely different set of edits to each copy. Pierre mentions creating up to seven or eight virtual copies of a single image to test different treatments before committing. I do the same thing when I’m developing a new preset, which, yes, I name after songs. I’ll have four or five versions of a test image sitting in the grid, each with different tonal approaches, and I’ll use the N key from Step 2 to compare them all at once. It’s a genuinely fast way to make creative decisions without permanently altering anything.
What I’d Add From My Own Workflow
The O key overlay tip from Step 4 changed something specific for me beyond just checking gradient placement. I use it now when I’m painting exposure adjustments around a subject’s face, because the brush can pick up stray strokes on hair or background without you realizing it. Pressing O mid-brush, before you even finish the adjustment, lets you catch those mistakes immediately rather than after you’ve already moved on.
The other thing I’ll add: virtual copies pair really well with Lightroom’s snapshot feature inside the Develop module. Snapshots let you save multiple edit states for a single image without creating separate catalog entries. If virtual copies are for comparing totally different creative directions, snapshots are for saving waypoints within a single direction. Use both together and you get a non-destructive workflow that gives you genuine flexibility all the way up to export.
The single biggest takeaway here is that Lightroom rewards people who learn its keyboard shortcuts. Every tip in this tutorial is about removing friction between you and your creative decisions. The tools were already there. The shortcuts just get you to them faster.
Pierre T. Lambert filmed this while running on no sleep in the Philippines and still managed to pack more practical value into one video than most editing courses do in an hour. That’s worth your time.
Watch the full tutorial on YouTube to see all seven tips demonstrated on actual images, including the ones I didn’t cover here.
Comments (2)
Applied this to my portfolio shots and the improvement is noticeable.
This is fantastic. I've been recommending this approach to my readers too.
Leave a Comment