I was editing a landscape shot from a recent trip out to Percy Priest Lake last month, and I hit the same wall I always hit. The sky mask looked clean at 100% zoom. The transition into the treeline looked fine in the overview. Then I exported it, pulled it up on my monitor, and there it was: that halo. That slightly unnatural, slightly glowing edge where my sky adjustment bled into the trees. I’ve been working around this limitation for years, adding extra gradient masks, lowering opacity, stacking intersections. It works, but it feels like fixing a leaky faucet with duct tape.
Then I watched Mark Denney’s recent tutorial on two new masking tools Adobe quietly added inside Adobe Camera Raw, and I had one of those moments where I genuinely said something out loud to my empty apartment. (ISO, my cat, did not care.)
The Core Problem With Lightroom Masking Before This
Lightroom’s masking tools have gotten genuinely impressive over the last few years. Select Sky, Select Subject, the AI-powered edge detection – these were real upgrades. But the weak link was always what happened at the boundary. You could get a precise selection, but blending that selection into the rest of the image in a way that felt organic was its own separate fight.
The two specific pain points: feathering local adjustments to blend more naturally across a scene, and controlling the falloff of color and tone inside a masked area so edits didn’t feel stamped on. Adobe has now addressed both of these directly in Camera Raw, and the implementation is smarter than I expected.
How Mask Feathering Actually Works Now
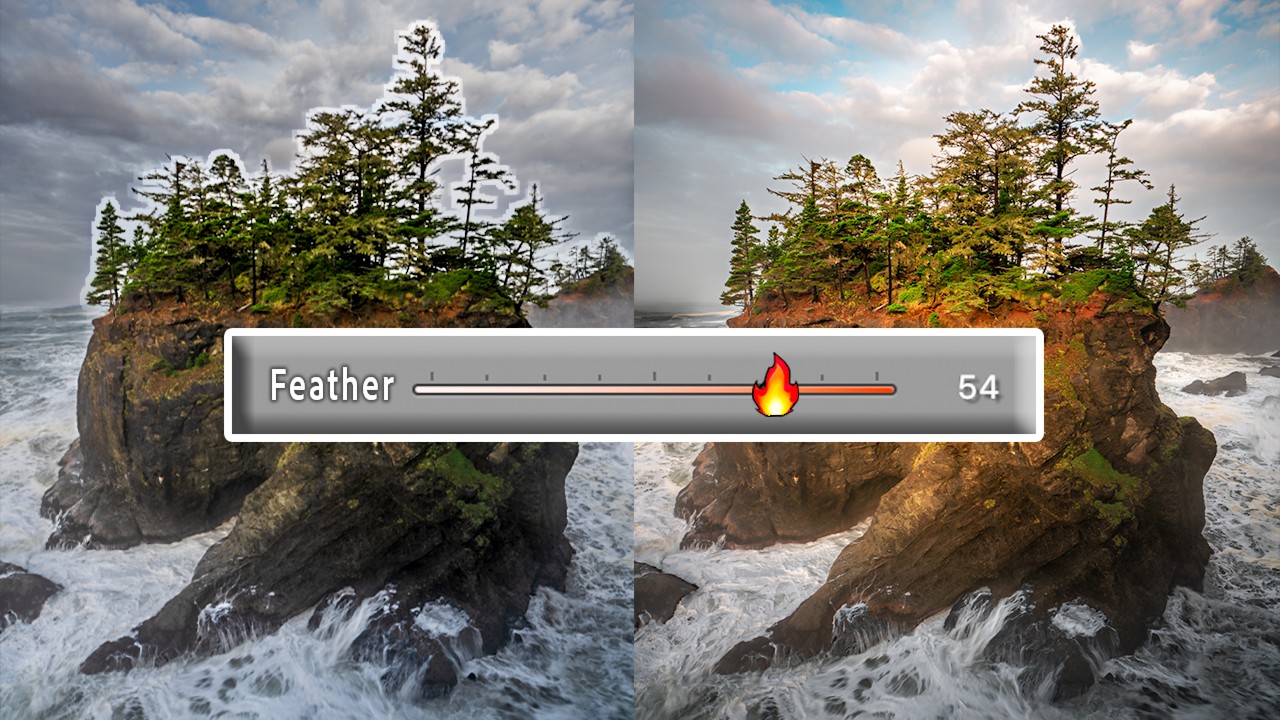
The first new tool is an updated feathering control that works on a per-mask basis rather than being baked into the brush settings. In Mark’s walkthrough, he demonstrates applying a Select Sky mask to a landscape with complex tree edges, then using the new feather slider to control how gradually the mask transitions at its boundary.
Here’s what’s different from the old feather behavior: instead of just softening the entire mask edge uniformly, the new control is more responsive to the actual content of the mask. The result is that edges around organic shapes like trees and mountains blend more convincingly because the falloff follows the contour rather than expanding outward in a flat ring.
Mark shows this by pulling the feather slider from 0 up to around 50 on a sky mask, then toggling the mask overlay to compare. The transition zone widens, but it does so in a way that holds onto the branch detail rather than turning that area into a murky in-between zone. For sky replacements or heavy sky grading work, this alone saves a significant amount of cleanup time.
The Gradient Mask Range Tool (This Is the One You Actually Wanted)
The second addition is the one that photographers have been asking about for years: the ability to use a luminance or color range restriction inside a gradient or radial mask. Mark calls this out specifically as one of the most requested masking features, and after spending time with it, I agree it changes the workflow in a meaningful way.
Here’s how to use it. Create a linear gradient mask over your sky area. Then, inside the masking panel, look for the new Refine option that lets you add a luminance range to the existing gradient. You’re essentially telling Lightroom: apply this gradient, but only to pixels within this brightness range. You set the luminance range with a two-handled slider. Drag the shadow handle up and the mask automatically releases the darker pixels, which are usually your trees and foreground, while keeping the selection on the brighter sky tones.
Mark recommends starting with a fairly wide range and narrowing it gradually while watching the mask overlay. The transition smoothness controls at either end of the range slider determine how abrupt or gradual the falloff is between what’s selected and what isn’t. He sets these transition handles at roughly a quarter of the total range to start, which gives a natural blend without losing too much of the actual sky selection.
Combined with the improved feathering, you can now build a sky adjustment that holds clean at the edges and also doesn’t accidentally crush your treeline into the same color grade. That’s not a small thing.
Where I’d Push This Further (and Where It Has Limits)
I tested both tools on a set of photos from an evening shoot near the Cumberland River, and the results were strong for standard sky-to-landscape transitions. Where I’d extend Mark’s approach: for heavily backlit scenes, I found that adding a color range restriction on top of the luminance range gave me even more surgical control. You can stack both inside the same mask refinement, and for golden hour shots where the warm sky tones bleed into the tops of trees, restricting by both luminance and the specific warm hue helped me separate them in a way neither tool alone could do cleanly.
The limitation worth naming: these tools are currently inside Adobe Camera Raw, which means you’re accessing them through the Camera Raw filter in Photoshop or through Lightroom Classic’s “Open in Camera Raw” workflow. As of this writing, the implementation inside the native Lightroom masking panel is not fully mirrored. If you work entirely inside Lightroom Classic’s develop module without touching Camera Raw, your experience may vary. Worth checking your version.
One Workflow Shift Worth Making
The single most useful thing I took from this tutorial is the habit of reaching for the luminance range restriction before reaching for the brush to clean up a gradient edge. It’s faster, it’s nondestructive, and the result usually looks better than hand-painted corrections around complex organic edges.
Watch Mark Denney’s full video for the visual demonstration – seeing the mask overlay respond in real time is the clearest way to understand exactly where to set those transition handles.
Comments
Leave a Comment