Video Tutorials
Adobe Finally Fixed the Masking Problem That Was Driving Me Crazy
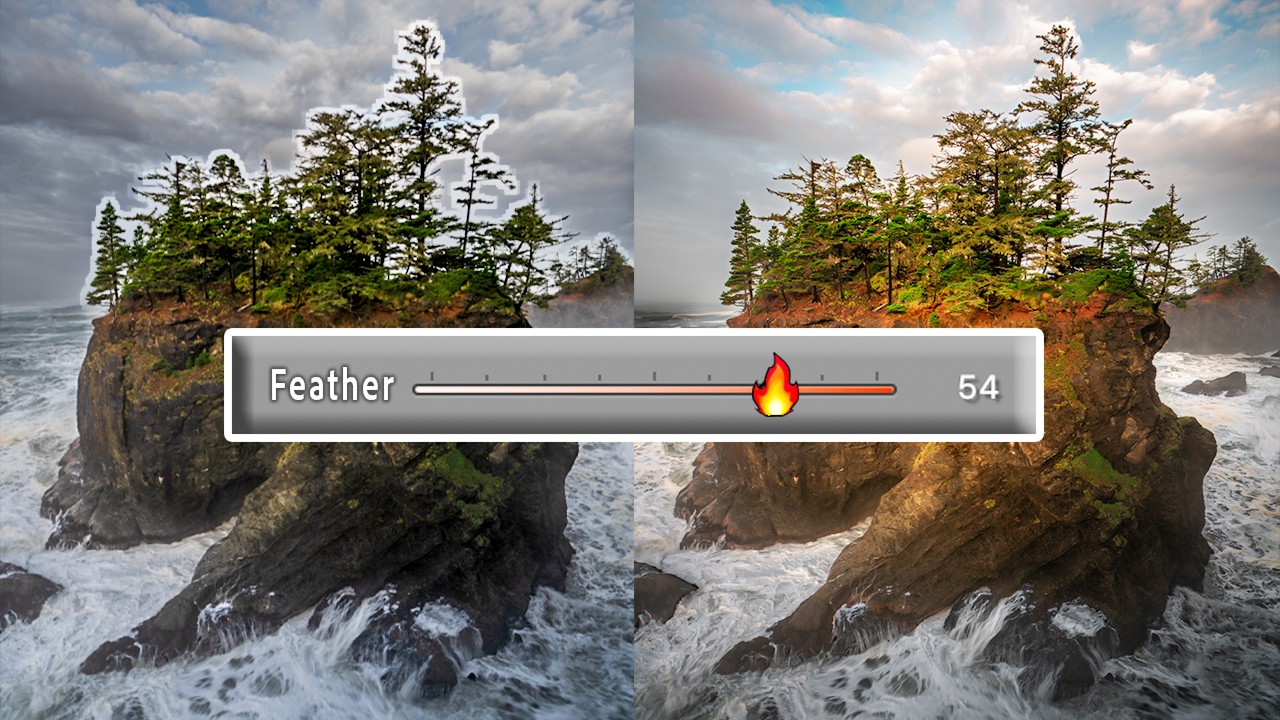
I was editing a landscape shot from a recent trip out to Percy Priest Lake last month, and I hit the same wall I always hit. The sky mask looked clean at 100% zoom. The transition into the treeline looked fine in the overview. Then I exported it, pulled it up on my monitor, and there it was: that halo. That slightly unnatural, slightly glowing edge where my sky adjustment bled into the trees.