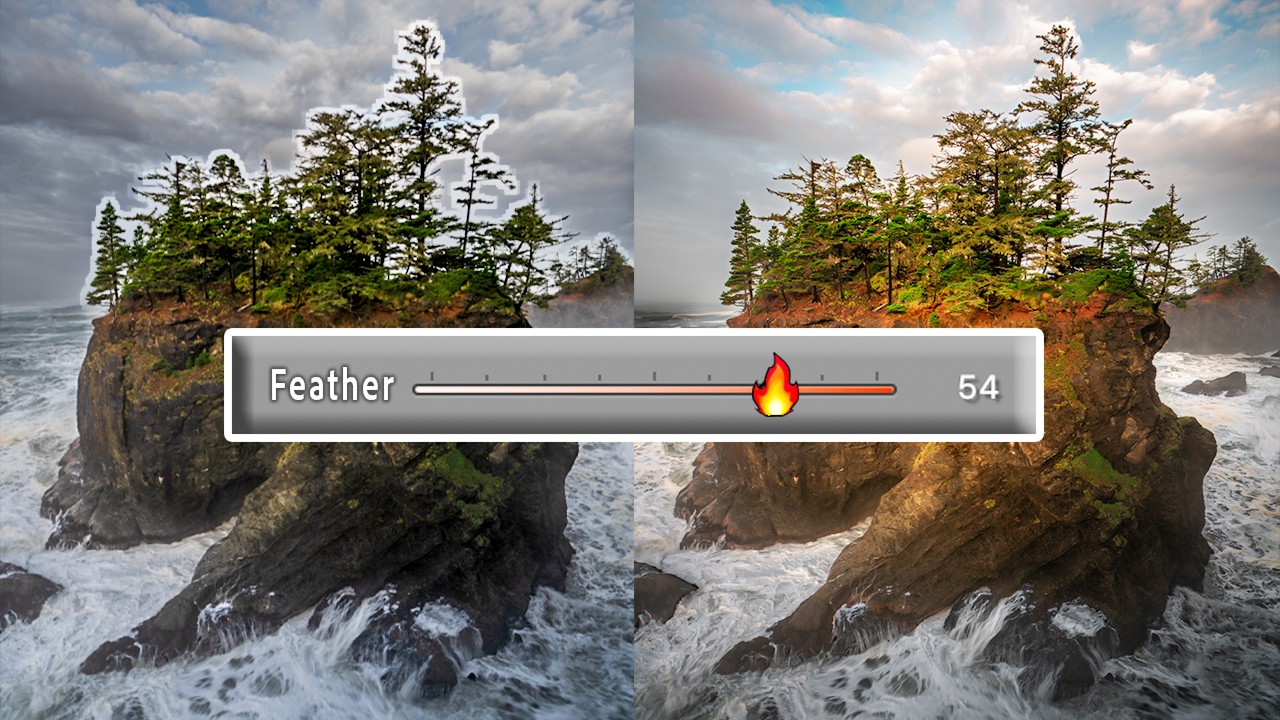
Color grading has always felt like one of those tools that’s 90% of the way there. The ability to push your highlights toward gold, nudge your shadows into teal, or breathe some cinematic warmth into your midtones is genuinely powerful. I use it on almost every landscape and portrait edit I touch. But for years, there’s been this maddening ceiling on what it can do: color grading applies globally, across the entire image, based on tonal values alone. You can’t tell Lightroom to tint only the sky without also tinting every other bright area in the frame. If you’ve ever tried to warm up a blown-out sunrise and watched your white water, your snow, or your subject’s shirt turn the same shade of orange, you know exactly what I mean.
In this Mark Denney tutorial, he walks through a Norway landscape image where this exact problem shows up. The sky needs more warmth, but the foreground waterfall is just as bright as the sky, so a global highlights tint hits both equally. His workaround used to be a separate gradient or luminance mask, but even those approaches are imprecise. What he found buried inside a recent Adobe Camera Raw update is something a lot of us have been requesting for a long time: color grading controls that live inside a mask. Watch the full tutorial on YouTube
This is one of those updates that sounds minor until you actually use it in a real edit, and then it feels obvious that it should have existed from the beginning.
Step 1: Understand the Limitation You’re Working Around
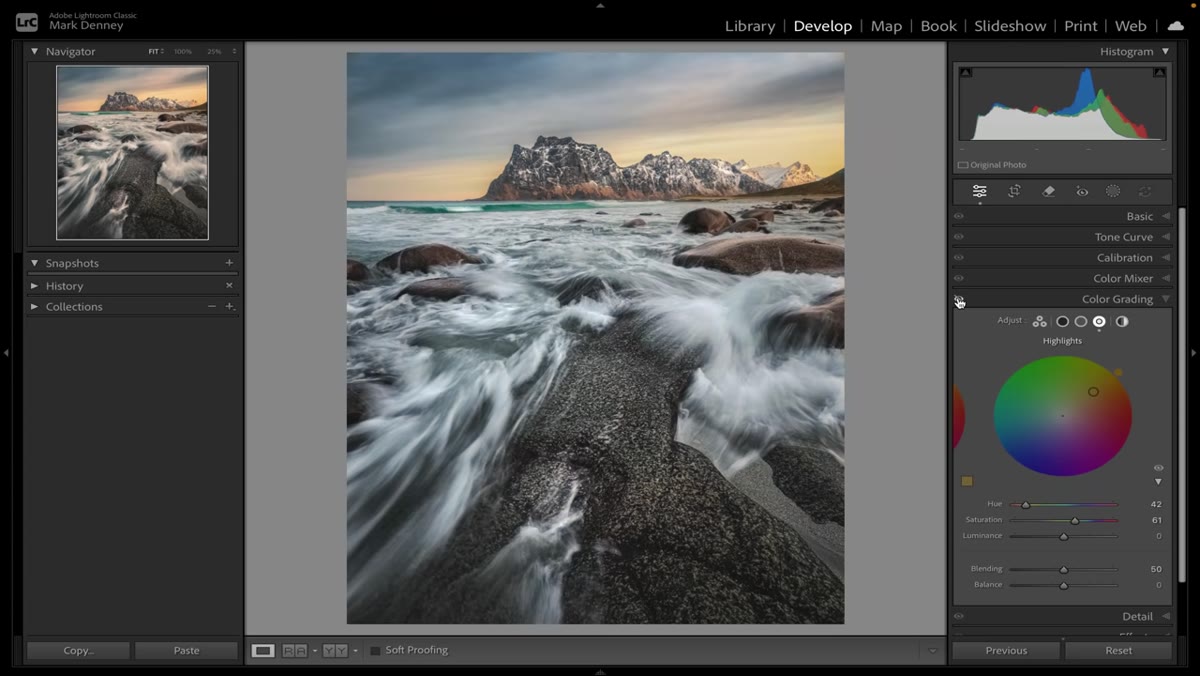 Color grading panel applied globally, tinting water and sky equally
Before jumping into the fix, it’s worth being clear about the problem. Open any landscape image with a bright sky and bright foreground elements. Go into the Color Grading panel and dial in a warm tint on the highlights. Toggle it on and off. If your image has anything bright in the foreground, that element is going to pick up the same tint as your sky. That’s not a bug, it’s just how global tonal-based grading works: it reads luminosity, not content. The sky and the waterfall both register as highlights, so both get tinted.
Color grading panel applied globally, tinting water and sky equally
Before jumping into the fix, it’s worth being clear about the problem. Open any landscape image with a bright sky and bright foreground elements. Go into the Color Grading panel and dial in a warm tint on the highlights. Toggle it on and off. If your image has anything bright in the foreground, that element is going to pick up the same tint as your sky. That’s not a bug, it’s just how global tonal-based grading works: it reads luminosity, not content. The sky and the waterfall both register as highlights, so both get tinted.
Mark’s Norway image is a perfect case study here. The highlight tint he applies makes the sky feel richer and more dramatic, but it also turns the cascading white water in the foreground into a warm, orange mess. The effect he wants is targeted. The tool he has is not.
Step 2: Open Your File in Adobe Camera Raw
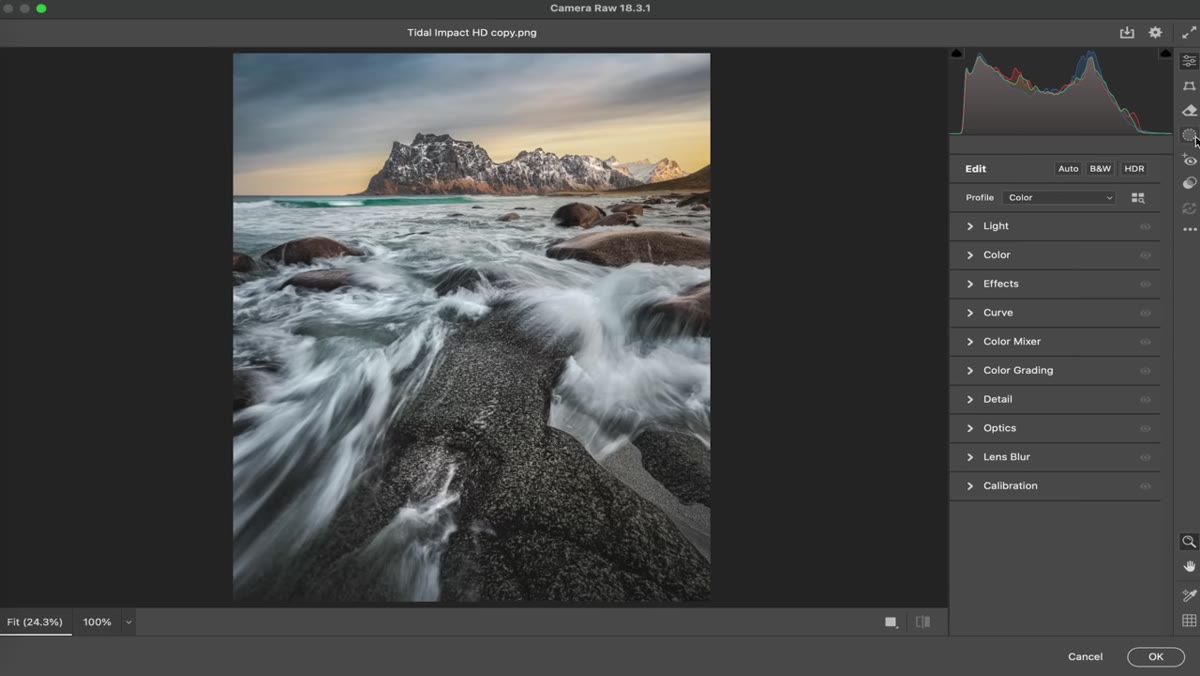 Camera Raw interface open, masking panel visible in sidebar
Camera Raw is the key piece of this workflow. If you’re a Lightroom user who has never touched Camera Raw, don’t let that stop you. The interface is nearly identical to Lightroom’s Develop module. You can access it by opening a raw file directly in Photoshop, or by going through Lightroom and choosing to edit in Photoshop, then working within the Camera Raw filter. The layout, sliders, and panel structure will feel immediately familiar.
Camera Raw interface open, masking panel visible in sidebar
Camera Raw is the key piece of this workflow. If you’re a Lightroom user who has never touched Camera Raw, don’t let that stop you. The interface is nearly identical to Lightroom’s Develop module. You can access it by opening a raw file directly in Photoshop, or by going through Lightroom and choosing to edit in Photoshop, then working within the Camera Raw filter. The layout, sliders, and panel structure will feel immediately familiar.
The reason you need Camera Raw specifically is that Adobe has not yet brought this new masking-plus-color-grading integration into Lightroom proper. It lives in Camera Raw right now. Whether that changes in a future update remains to be seen, but for now, this is where the new capability sits.
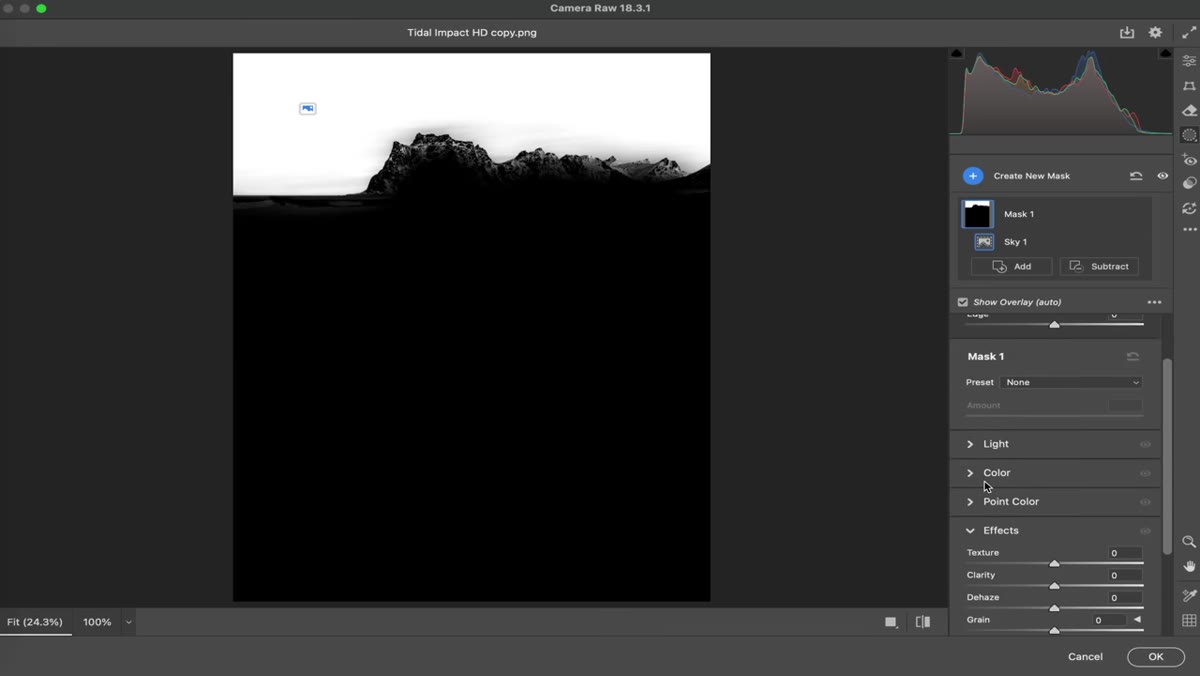
Step 3: Create a Sky Mask
 Sky selection active in Camera Raw masking panel, overlay visible
Go to the masking panel in Camera Raw and select “Select Sky.” Adobe’s AI-based sky selection works well on most landscape images and takes only a second or two to generate. You’ll see the familiar red overlay (or whatever overlay color you have set) appear across the sky region.
Sky selection active in Camera Raw masking panel, overlay visible
Go to the masking panel in Camera Raw and select “Select Sky.” Adobe’s AI-based sky selection works well on most landscape images and takes only a second or two to generate. You’ll see the familiar red overlay (or whatever overlay color you have set) appear across the sky region.
Check the edges of your selection, particularly around tree lines, mountain ridges, or anything with fine detail. If the selection is rough, you can use the Subtract tool to clean it up. For most open skies, though, the automatic selection is accurate enough to work with directly.
Step 4: Locate the Color Grading Controls Inside the Mask
 Color grading panel visible within mask adjustment panel in Camera Raw
This is where things get interesting. With your sky mask active and your mask adjustments panel open, scroll down through the available sliders. In the updated version of Camera Raw, you’ll find a Color Grading section nested directly inside the mask panel. This is the new addition. Previously, this panel didn’t exist inside local adjustments at all.
Color grading panel visible within mask adjustment panel in Camera Raw
This is where things get interesting. With your sky mask active and your mask adjustments panel open, scroll down through the available sliders. In the updated version of Camera Raw, you’ll find a Color Grading section nested directly inside the mask panel. This is the new addition. Previously, this panel didn’t exist inside local adjustments at all.
You now have access to the same highlights, midtones, and shadows color wheels that exist in the global Color Grading panel, but they only affect the pixels inside your active mask. The sky. Nothing else.
Step 5: Apply a Targeted Tint to the Sky
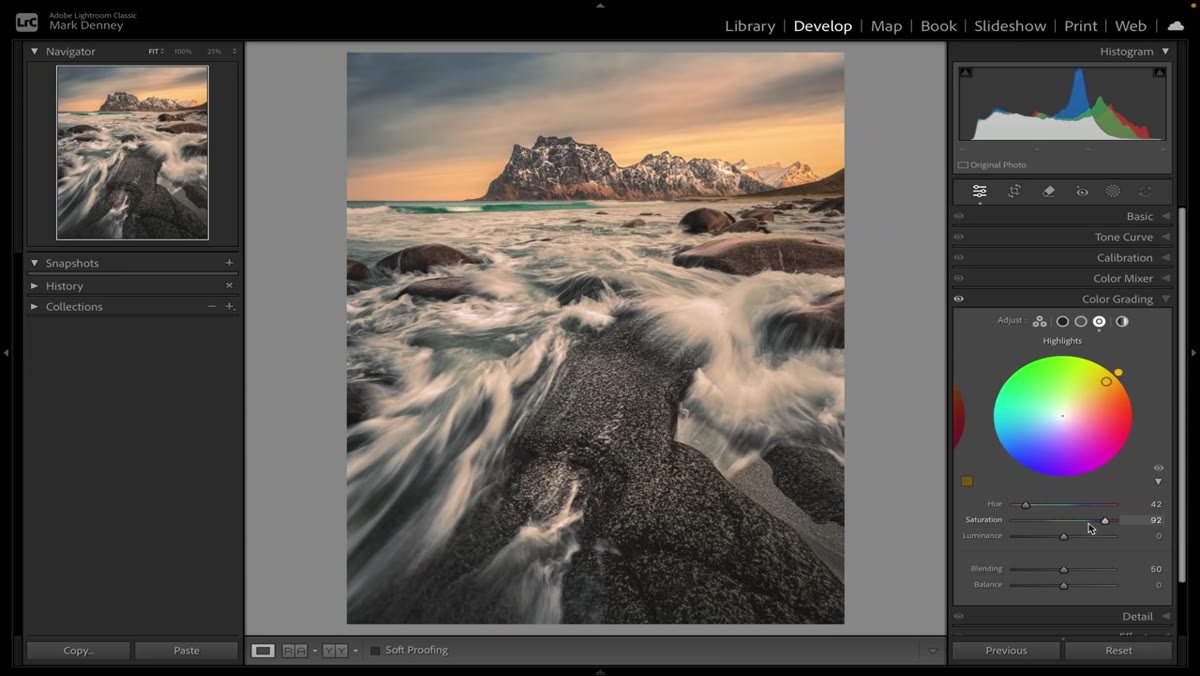 Color grading wheel being adjusted with warm tone applied to highlights only
Click the Highlights tab within the mask’s color grading controls. Drag the color picker toward whatever tone suits your image. For a sunrise or golden hour shot, pulling toward orange or amber adds richness without looking painted. For a blue-hour or overcast edit, a slight cool push toward cyan or lavender can feel atmospheric rather than artificial.
Color grading wheel being adjusted with warm tone applied to highlights only
Click the Highlights tab within the mask’s color grading controls. Drag the color picker toward whatever tone suits your image. For a sunrise or golden hour shot, pulling toward orange or amber adds richness without looking painted. For a blue-hour or overcast edit, a slight cool push toward cyan or lavender can feel atmospheric rather than artificial.
The key difference from before: toggling this tint on and off now shows the change isolated entirely to the sky. Your foreground, your water, your bright clothing, none of it moves. The tint is spatially contained by the mask boundaries, not just tonally filtered. That’s the breakthrough.
Step 6: Fine-Tune the Luminance Range if Needed
 Luminance range slider visible below mask, narrowing selection to bright sky tones
If you want even more precision, use the Luminance Range slider within the mask settings to narrow which tones within the sky selection actually receive the grade. If your sky contains both very bright areas near the sun and darker areas toward the horizon, you can restrict the tint to only the brightest portions of the sky mask. Layering mask type plus luminance range gives you a level of specificity that used to require multiple adjustment layers in Photoshop.
Luminance range slider visible below mask, narrowing selection to bright sky tones
If you want even more precision, use the Luminance Range slider within the mask settings to narrow which tones within the sky selection actually receive the grade. If your sky contains both very bright areas near the sun and darker areas toward the horizon, you can restrict the tint to only the brightest portions of the sky mask. Layering mask type plus luminance range gives you a level of specificity that used to require multiple adjustment layers in Photoshop.
What I’d Add From My Own Workflow
This technique pairs especially well with a secondary mask on the shadows. After you’ve graded the sky highlights, create a second mask selecting the foreground or shadows, and apply a complementary but distinct grade there. Warm highlights in the sky, cooler or more neutral shadows in the water. That contrast between warm and cool is what gives landscape images a sense of depth and dimension that feels natural rather than filtered.
I’d also suggest saving your masked color grade as a preset once you find a combination that works for a specific shooting environment. I have a handful of these saved out now for golden hour shoreline work, and being able to apply them as starting points has cut my color grading time significantly.
The single most valuable shift here is conceptual: color grading is no longer a global operation with workarounds. It’s a precise, maskable adjustment like everything else in your panel. That changes how you can think about color from the start of an edit rather than the end.
Watch the full tutorial on YouTube to see Mark walk through this on his actual Norway image, including how the before and after looks in practice.
Comments (6)
The tip about lightrooms quietly dropped two was the missing piece for me. Thank you.
Excellent tutorial. I'd add that from a lighting standpoint, this technique is incredibly versatile.
This is exactly what I needed today. Been struggling with this for weeks.
Would love to see a follow-up going deeper into this topic.
Printing this out and pinning it next to my monitor. That good.
The tip about lightrooms quietly dropped two was the missing piece for me. Thank you.
Leave a Comment