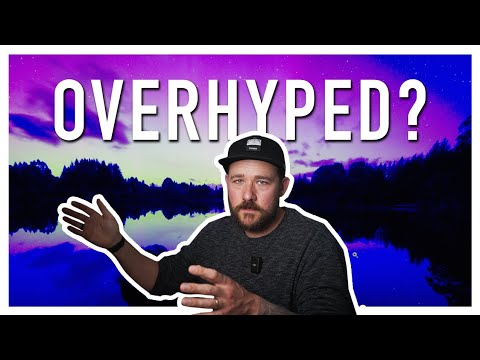
There’s a specific kind of dread that hits when you open a raw file the morning after a shoot and realize you were working at ISO 12,800 in near-total darkness. I know that feeling well. It’s the same feeling I had the first time I edited press shots for my band under a single kitchen light with a copy of Lightroom I barely understood. High ISO noise isn’t just an aesthetic problem. It’s a credibility problem. It can take an otherwise compelling image and make it feel like something pulled off a 2009 flip phone.
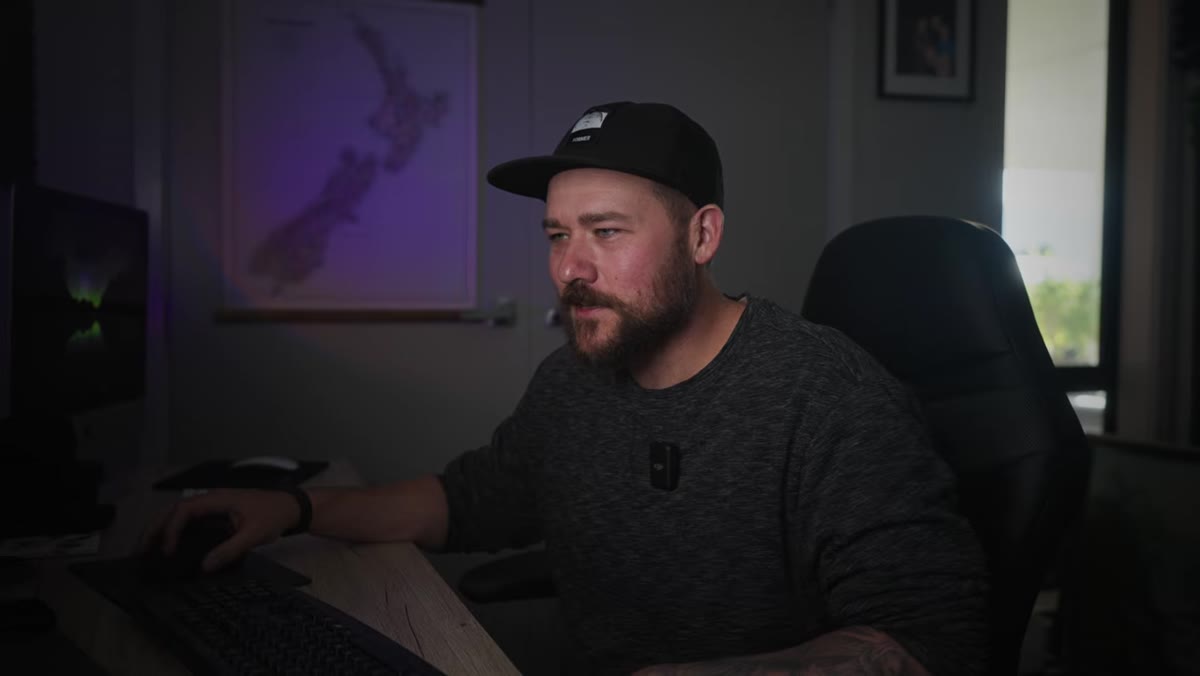
That’s exactly the situation photographer William Patino walked into when he captured an Aurora Australis with his family in the foreground. In this Watch the full tutorial on YouTube he doesn’t just show a polished before-and-after. He shows the messy middle, including one genuinely alarming result from his first attempt. That honesty is what makes the walkthrough worth your time. Adobe’s new AI-powered Denoise tool inside Camera Raw (and by extension Lightroom, since they share the same processing engine) promises a lot. Let’s look at how to actually use it and what to realistically expect.
Step 1: Start With the Raw File in Adobe Camera Raw or Lightroom
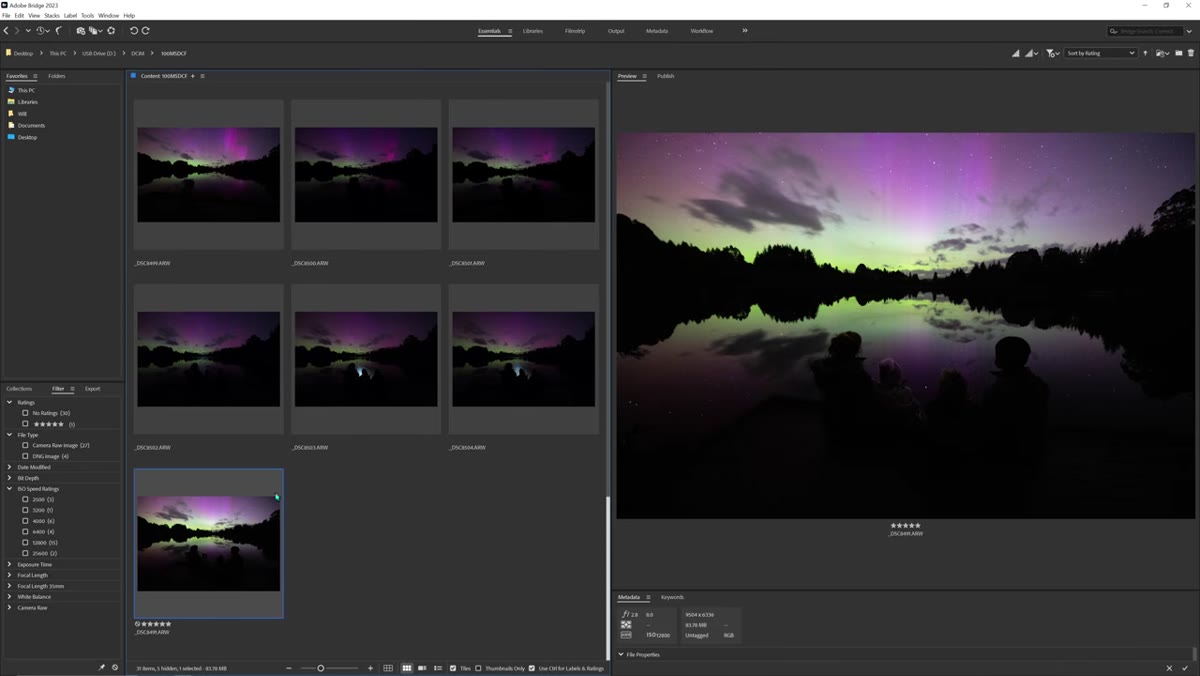 Adobe Camera Raw open with dark aurora raw file
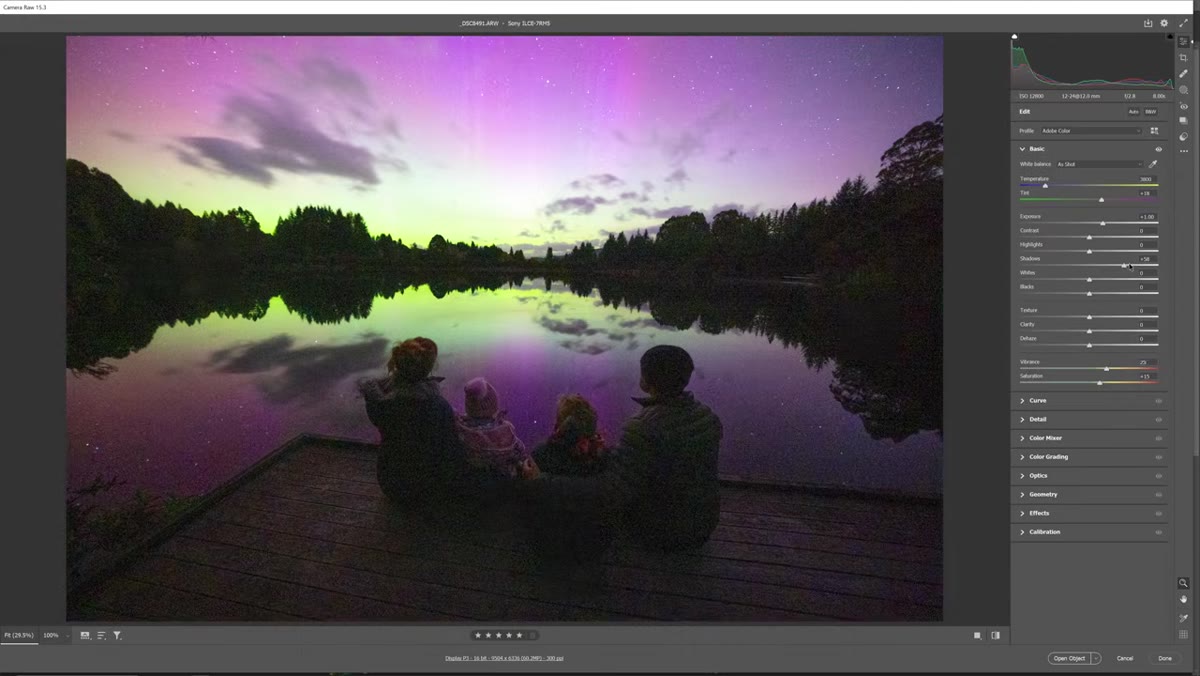
Open your raw file in Adobe Camera Raw via Adobe Bridge, or bring it straight into Lightroom’s Develop module. The interface is functionally identical for this workflow. Patino’s starting image is extremely dark, a single exposure with no compositing. Before touching the Denoise tool, it helps to understand what you’re working with. A file this dark, shot at ISO 12,800, is going to have both luminance noise and color noise baked into every shadow region.
Adobe Camera Raw open with dark aurora raw file
Open your raw file in Adobe Camera Raw via Adobe Bridge, or bring it straight into Lightroom’s Develop module. The interface is functionally identical for this workflow. Patino’s starting image is extremely dark, a single exposure with no compositing. Before touching the Denoise tool, it helps to understand what you’re working with. A file this dark, shot at ISO 12,800, is going to have both luminance noise and color noise baked into every shadow region.
If your file looks similarly dark, don’t panic yet. The whole point of shooting raw is that there’s more recoverable information in those shadows than the histogram suggests. The Denoise tool needs something to work with, so you don’t want to apply it to a completely unprocessed file and expect miracles.
Step 2: Apply Basic Exposure Adjustments First
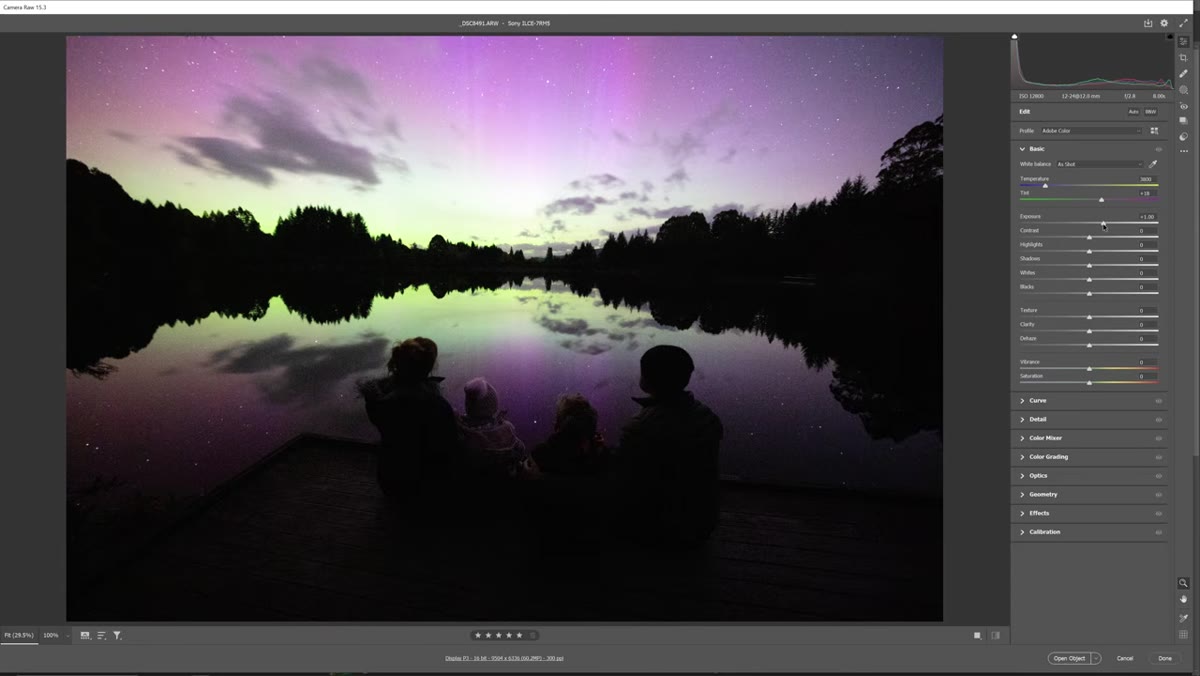 Exposure slider raised approximately one stop in Camera Raw
Before running the AI tool, Patino pulls the exposure up roughly one stop and lifts the shadows slider significantly. This matters because the Denoise algorithm reads the pixel data that’s actually visible after your basic adjustments. If the file is still buried in darkness, the tool has less context to work from. He also adds a touch of vibrance and saturation to start revealing the color in the aurora.
Exposure slider raised approximately one stop in Camera Raw
Before running the AI tool, Patino pulls the exposure up roughly one stop and lifts the shadows slider significantly. This matters because the Denoise algorithm reads the pixel data that’s actually visible after your basic adjustments. If the file is still buried in darkness, the tool has less context to work from. He also adds a touch of vibrance and saturation to start revealing the color in the aurora.
Keep these adjustments moderate at this stage. You’re not finishing the image here. You’re lifting the image enough so the AI has a clear picture of what detail actually exists. Think of it like turning on the lights before asking someone to find something in a room.
Step 3: Navigate to the Detail Tab and Find Denoise
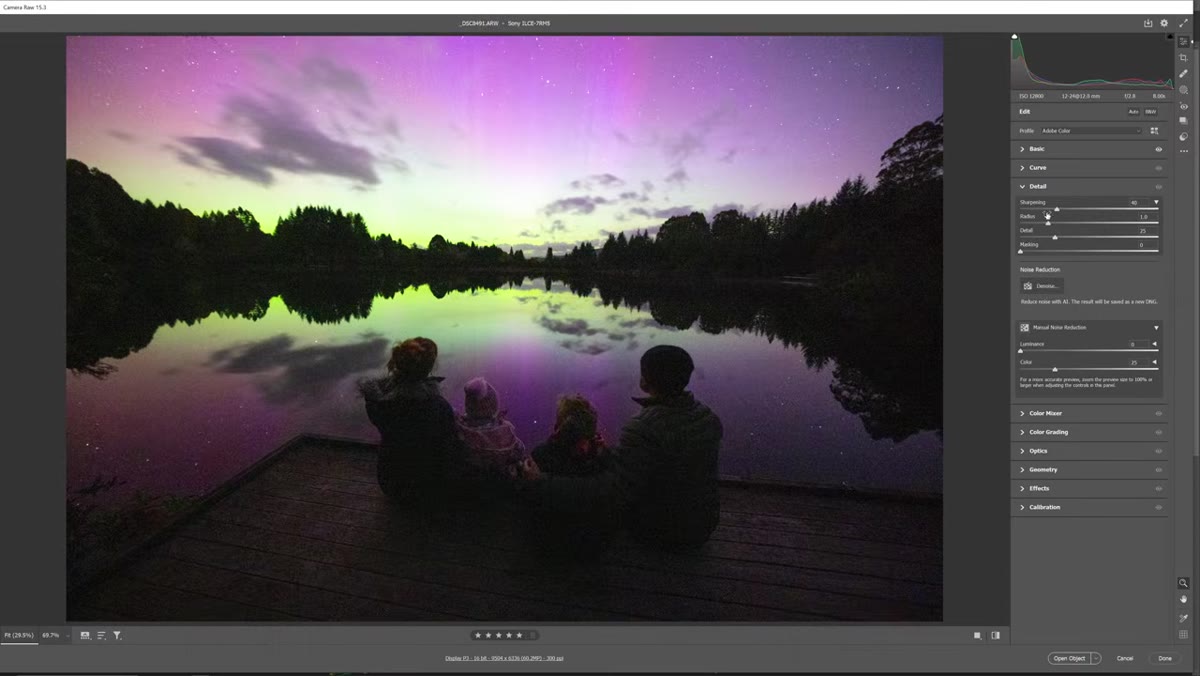 Detail tab open showing Denoise AI option in Camera Raw
In Adobe Camera Raw, scroll down to the Detail tab. That’s where Adobe has placed the new AI Denoise option, labeled clearly as “Reduce Noise with AI.” In Lightroom, the equivalent lives in the Detail panel under the same Denoise section. Once you click it, a preview dialog opens automatically. The tool locks the preview onto a high-frequency area of your image, typically something with fine texture like stars, fabric, or hair, so you get an honest preview of what it will do to detail.
Detail tab open showing Denoise AI option in Camera Raw
In Adobe Camera Raw, scroll down to the Detail tab. That’s where Adobe has placed the new AI Denoise option, labeled clearly as “Reduce Noise with AI.” In Lightroom, the equivalent lives in the Detail panel under the same Denoise section. Once you click it, a preview dialog opens automatically. The tool locks the preview onto a high-frequency area of your image, typically something with fine texture like stars, fabric, or hair, so you get an honest preview of what it will do to detail.
This placement in the Detail tab makes sense. It’s sitting alongside the manual Noise Reduction sliders you may already use, and it doesn’t replace them. Think of AI Denoise as a first-pass heavy lifter, with the manual luminance and color sliders still available for fine-tuning afterward.
Step 4: Use the Amount Slider and Preview Before Committing
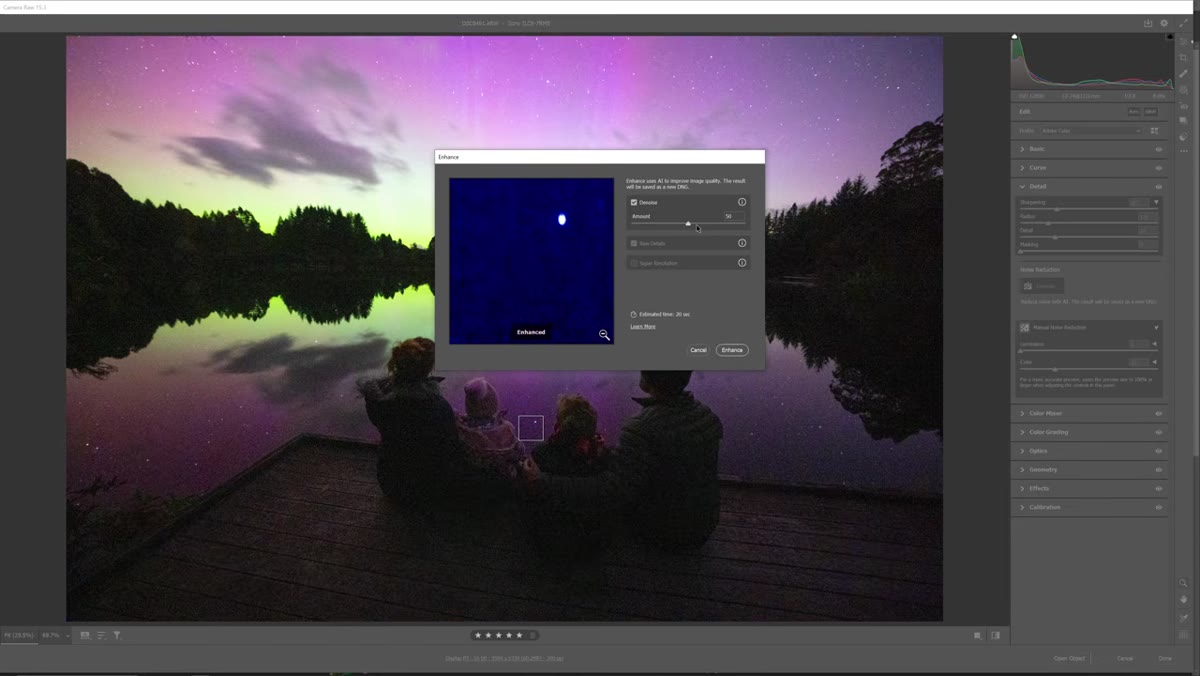 Denoise preview panel with Amount slider and before/after toggle
The preview dialog includes a toggle to flip between before and after, plus an Amount slider that controls how aggressively the AI processes the image. The default sits around 50. Patino nudges it up to 60 percent. You can zoom the preview out to read the whole frame, or zoom in tight on problem areas like faces or star fields.
Denoise preview panel with Amount slider and before/after toggle
The preview dialog includes a toggle to flip between before and after, plus an Amount slider that controls how aggressively the AI processes the image. The default sits around 50. Patino nudges it up to 60 percent. You can zoom the preview out to read the whole frame, or zoom in tight on problem areas like faces or star fields.
Sliding left reduces the effect significantly. Sliding right pushes the smoothing harder. At maximum values, the result can veer into over-processed territory fast, which Patino’s first attempt makes painfully clear. The dialog also shows an estimated processing time. On Patino’s machine, 60 percent at this resolution took roughly 20 seconds.
Step 5: Understand the Output – It Creates a New DNG
 New DNG file created in Adobe Bridge after Denoise is applied
This is the part that catches people off guard. When you apply AI Denoise, the tool doesn’t modify your original raw file. It renders a brand-new DNG file alongside the original. That DNG is what gets opened for further editing. The upside is that your original raw file stays completely untouched. The downside is that your file management gets more complicated fast, especially if you’re processing a large shoot.
New DNG file created in Adobe Bridge after Denoise is applied
This is the part that catches people off guard. When you apply AI Denoise, the tool doesn’t modify your original raw file. It renders a brand-new DNG file alongside the original. That DNG is what gets opened for further editing. The upside is that your original raw file stays completely untouched. The downside is that your file management gets more complicated fast, especially if you’re processing a large shoot.
Name your files carefully before you start this workflow. In Lightroom, the new DNG will appear in your catalog automatically. In Bridge and Camera Raw, you’ll see it appear in the same folder as the source file. Treat it as your working master from this point forward.
Step 6: Evaluate the Result Honestly – And Try Again If Needed
 Heavily over-processed first result compared to second attempt
Patino’s first result looks like an early Instagram filter had a breakdown. Everything is overly smoothed, waxy, and surreal in the worst way. His fix is straightforward: cancel, go back to the original, lift the shadows a bit more before re-applying, and run the Denoise again. His theory is that the file was too dark on the first pass for the AI to accurately read the scene content.
Heavily over-processed first result compared to second attempt
Patino’s first result looks like an early Instagram filter had a breakdown. Everything is overly smoothed, waxy, and surreal in the worst way. His fix is straightforward: cancel, go back to the original, lift the shadows a bit more before re-applying, and run the Denoise again. His theory is that the file was too dark on the first pass for the AI to accurately read the scene content.
The second attempt produces a dramatically different and actually usable result. The takeaway here isn’t that the tool is unreliable. It’s that input quality matters. If you’re going to run AI processing, give the algorithm enough exposed information to make good decisions.
What I’d Add: Manual Noise Reduction Still Earns Its Place
After running AI Denoise, I always go back into the manual Noise Reduction sliders and check the color noise setting specifically. AI tools handle luminance noise well, but color noise, those random red and green flecks in shadows, sometimes survives the process with a slightly different character than the tool expects. A small bump to the Color slider in the manual section, usually between 25 and 40, cleans that up without softening the detail the AI just worked hard to preserve.
Also worth noting: if you’re shooting portraits at high ISO and using this tool, pay close attention to skin texture in the preview. The Amount slider at 60 percent works well for landscapes and astrophotography. For faces, I’d pull it back to 40 to 50 and watch what happens to pores and fine hair. AI Denoise is impressive, but it rewards a careful eye more than a quick click.
The biggest thing this tutorial confirms is that Adobe’s AI Denoise is genuinely capable, but it’s not a one-click rescue button. It’s a context-sensitive tool that responds to how well you’ve prepared the file before running it. Give it a properly exposed, shadow-lifted image and it can pull off something that would have taken a stack of exposures or hours of manual work just a few years ago.
Watch the full tutorial on YouTube to see both the failed first attempt and the successful second pass side by side. Seeing what can go wrong, and why, is honestly more useful than a highlight reel.
Comments (2)
Wow, I had no idea you could do this. Mind blown.
Well explained. I think my audience would really benefit from this — mind if I link to it?
Leave a Comment