Every December I end up with the same problem. I have a folder full of my favorite shots from the year, a vague intention to do something meaningful with them, and then somehow a generic wall calendar from a gas station ends up in my kitchen anyway. Sound familiar?
This year I finally did something about it, and the fix came from a surprisingly underused corner of Lightroom. In this Matt Kloskowski tutorial, he walks through how to use Lightroom’s Print Module to combine a free calendar template JPEG with your own photography into a shareable, printable image. Watch the full tutorial on YouTube — it runs fast and gets straight to it. But if you want the slow-down, settings-and-all breakdown, keep reading.
What caught my attention is how clever the approach is. The Print Module gets ignored by most Lightroom users because they either don’t own a printer or assume it’s only useful for gallery prints. But it’s actually a flexible layout tool, and when you pair it with a pre-made calendar JPEG, you get a custom photo calendar without paying for an app or fighting with a design program you barely know.
Step 1: Download the Calendar Template and Import It Into Lightroom
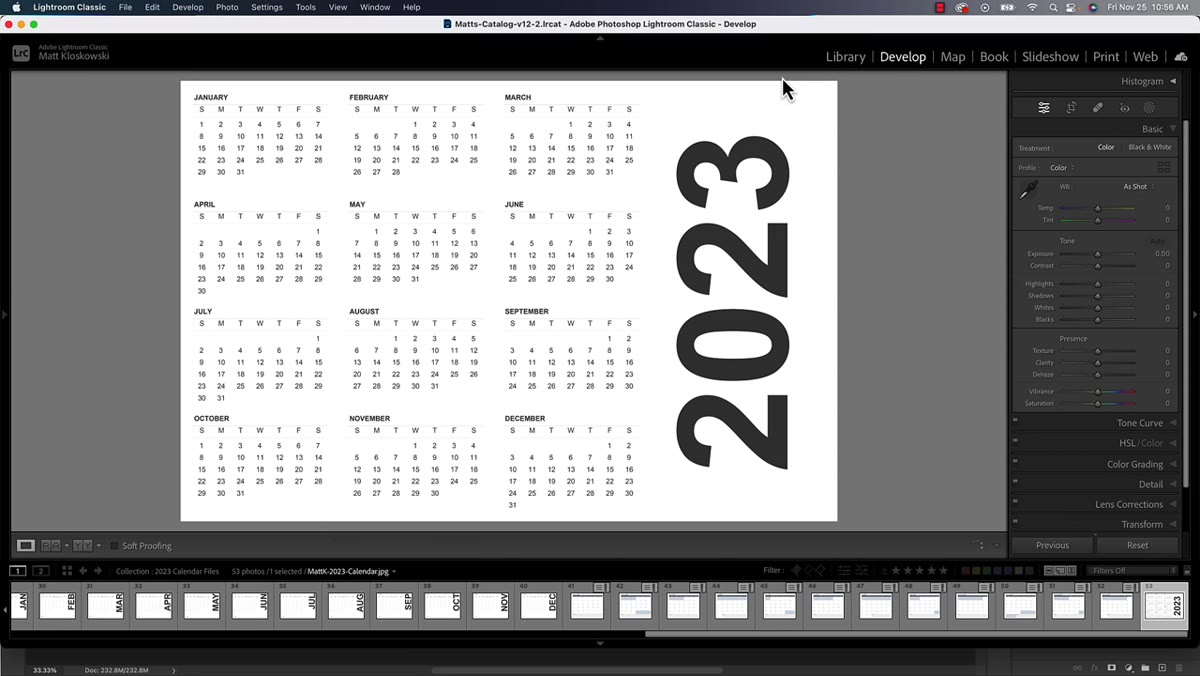 Lightroom library showing imported calendar JPEG in filmstrip
Matt releases free calendar templates annually, and the version he covers here puts all twelve months on a single page, which is a genuinely useful format. Download the template JPEG and save it somewhere sensible on your hard drive. It does not need to go into any special folder. Lightroom handles JPEGs the same way it handles any raw file, so just use File > Import and bring it in like any other image.
Lightroom library showing imported calendar JPEG in filmstrip
Matt releases free calendar templates annually, and the version he covers here puts all twelve months on a single page, which is a genuinely useful format. Download the template JPEG and save it somewhere sensible on your hard drive. It does not need to go into any special folder. Lightroom handles JPEGs the same way it handles any raw file, so just use File > Import and bring it in like any other image.
Once it’s in Lightroom, take a second to also identify which photo or photos you want to pair with it. You’re going to want both the calendar JPEG and your chosen photo accessible at the same time, so do a little planning before you start dragging things around.
Step 2: Create a Collection That Contains Both Files
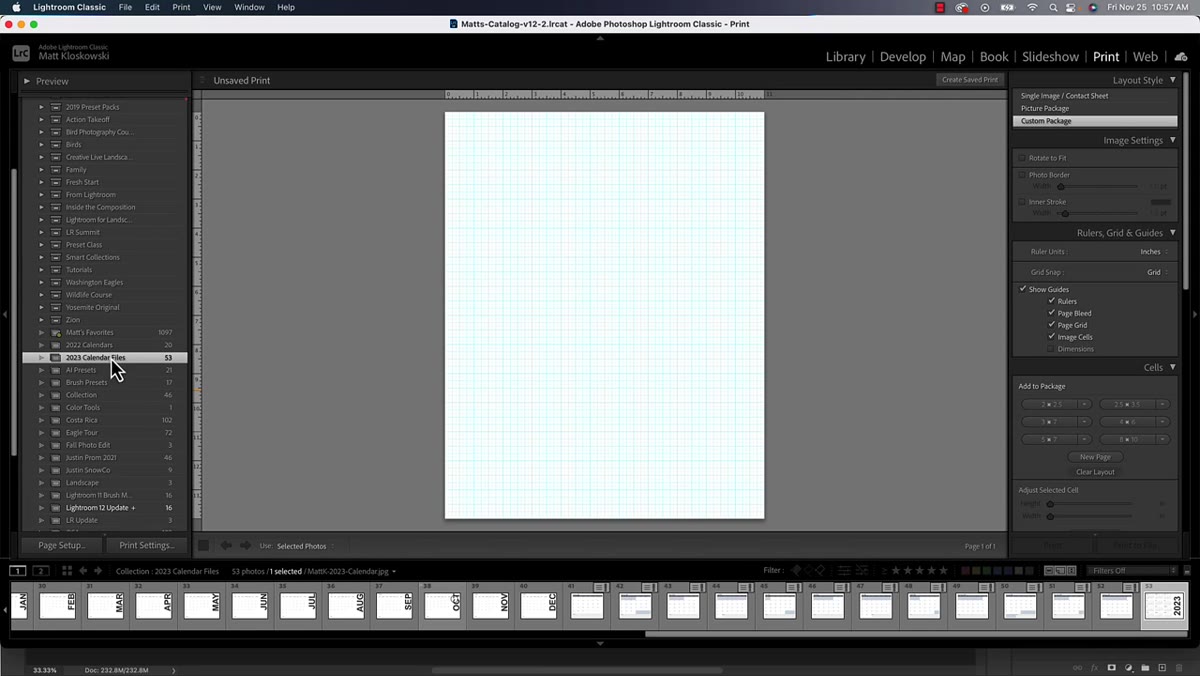 Lightroom Collections panel showing calendar and photo together
Here is a small workflow detail that saves a lot of frustration. Before you head into the Print Module, create a new Collection and add both your calendar template JPEG and your chosen photo to it. This keeps you from having to jump between folders mid-layout, which breaks your focus and can cause Lightroom to lose track of what you’re working with in the filmstrip.
Lightroom Collections panel showing calendar and photo together
Here is a small workflow detail that saves a lot of frustration. Before you head into the Print Module, create a new Collection and add both your calendar template JPEG and your chosen photo to it. This keeps you from having to jump between folders mid-layout, which breaks your focus and can cause Lightroom to lose track of what you’re working with in the filmstrip.
Right-click in the Collections panel, choose Create Collection, and then drag both images into it. Now everything you need is in one place. This is the kind of thing that seems optional until the first time you skip it and spend ten minutes hunting for your photo while your layout is half-built.
Step 3: Set Up Your Page in the Print Module
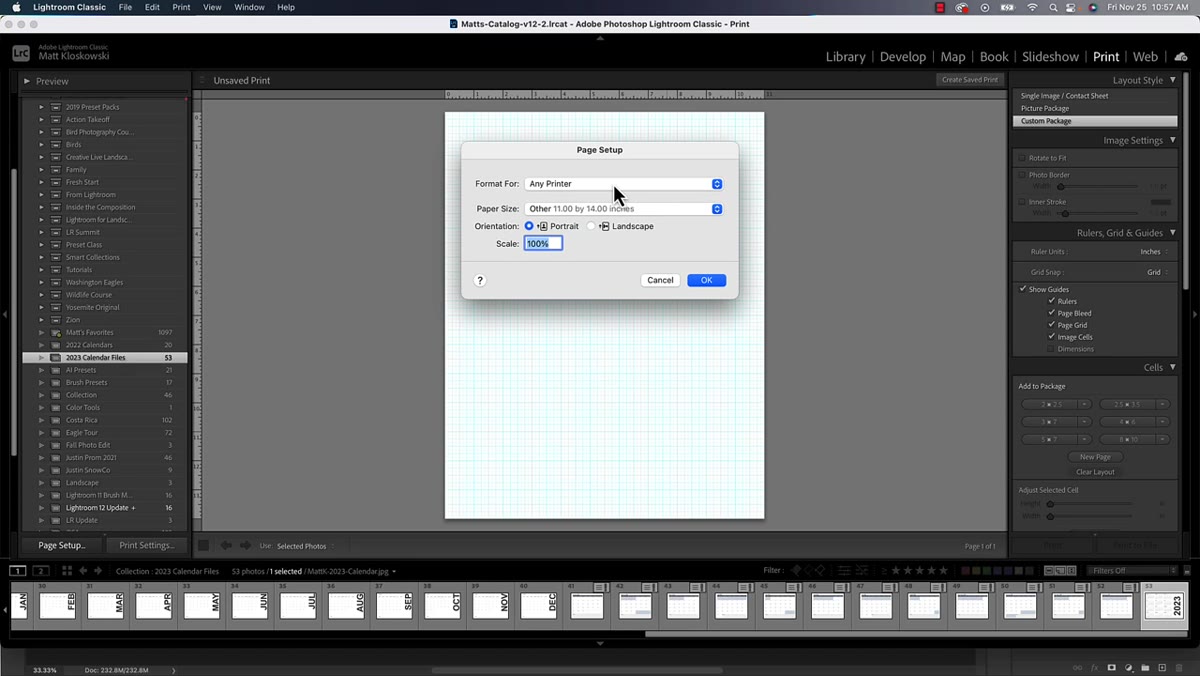 Print Module open with Page Setup dialog visible
Switch over to the Print Module using the module picker at the top of the screen. The first thing you need to do is hit Page Setup in the lower left. This defines the size of your canvas, and if you have a printer installed, you’ll see your standard paper sizes. If you don’t have a printer connected, look for a Custom Paper Size option in the dropdown, which lets you define the dimensions manually.
Print Module open with Page Setup dialog visible
Switch over to the Print Module using the module picker at the top of the screen. The first thing you need to do is hit Page Setup in the lower left. This defines the size of your canvas, and if you have a printer installed, you’ll see your standard paper sizes. If you don’t have a printer connected, look for a Custom Paper Size option in the dropdown, which lets you define the dimensions manually.
Think of this as setting your canvas. If you want a standard 8.5 x 11 wall print, choose that. If you’re going purely digital to share online, you can set a custom square or landscape size. Whatever you choose here becomes the boundary everything else fits inside.
Step 4: Place and Lock the Calendar JPEG First
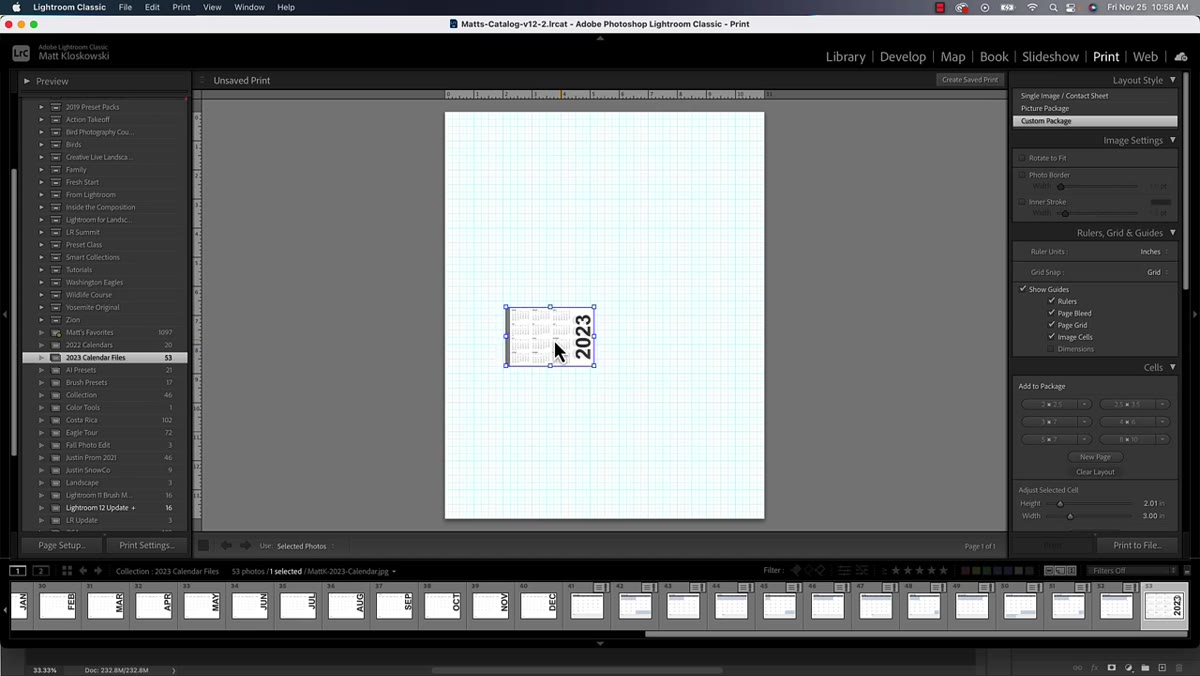 Calendar JPEG being dragged from filmstrip onto print canvas
Drag the calendar JPEG from the filmstrip at the bottom of the screen onto the canvas. You’ll see it appear as a cell inside the layout. From there, grab the corner handles and resize it to the position you want it to occupy, typically along the bottom third or one side of the page.
Calendar JPEG being dragged from filmstrip onto print canvas
Drag the calendar JPEG from the filmstrip at the bottom of the screen onto the canvas. You’ll see it appear as a cell inside the layout. From there, grab the corner handles and resize it to the position you want it to occupy, typically along the bottom third or one side of the page.
Before you resize, go to the Cells panel on the right side and check the option called Lock Photo Aspect Ratio. This keeps the calendar grid from getting stretched or distorted as you drag. The calendar’s proportions are fixed by design, so respect them. Get the calendar placed and sized first, and treat that placement as your anchor. Everything else in the layout has to work around it.
Step 5: Add Your Photo and Fill the Remaining Space
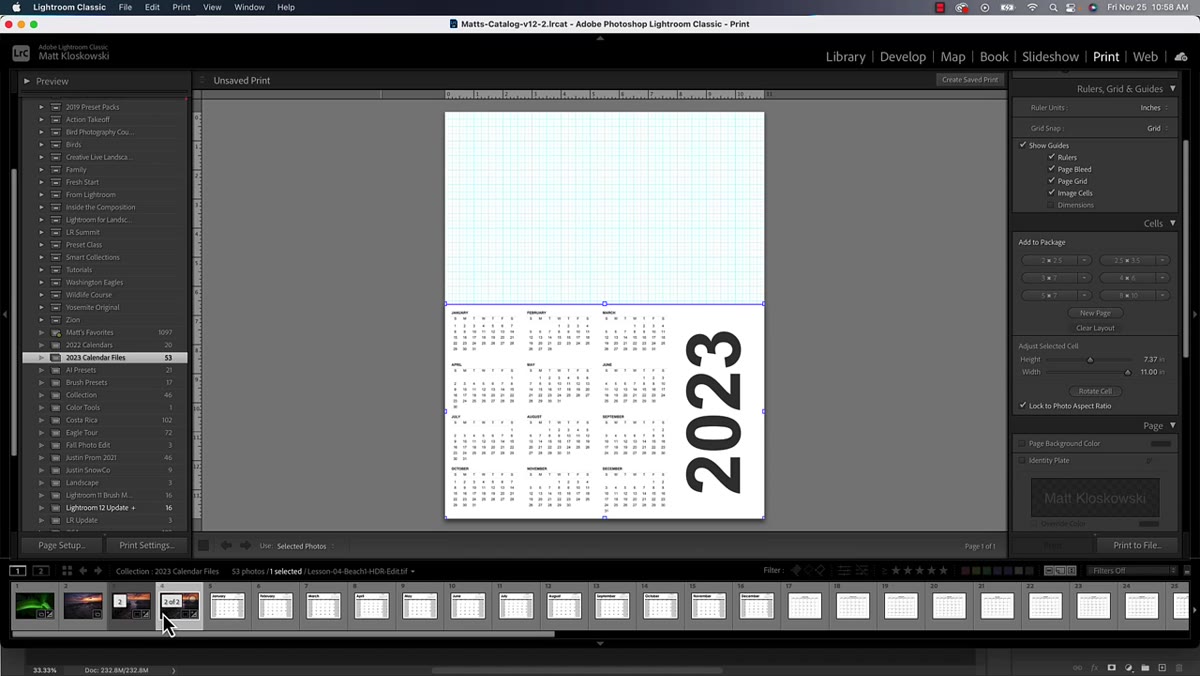 Photo being dragged into remaining canvas space above calendar
Now drag your chosen photo from the filmstrip onto the remaining open area of the canvas. Here is where you flip the approach: go back to the Cells panel and turn Lock Photo Aspect Ratio off. Your photo almost certainly won’t match the exact shape of the space left over after the calendar takes its portion, and that is fine. Your job is to fill the available space, not to preserve the original crop.
Photo being dragged into remaining canvas space above calendar
Now drag your chosen photo from the filmstrip onto the remaining open area of the canvas. Here is where you flip the approach: go back to the Cells panel and turn Lock Photo Aspect Ratio off. Your photo almost certainly won’t match the exact shape of the space left over after the calendar takes its portion, and that is fine. Your job is to fill the available space, not to preserve the original crop.
Once the photo cell is roughly in position, hold Command on a Mac or Control on a PC and click inside the cell to drag the image around within its frame. This lets you reposition which part of the photo is visible without resizing the cell itself. Use it to center a face, shift a horizon, or move a focal point away from an edge.
Step 6: Export as JPEG or Send to Print
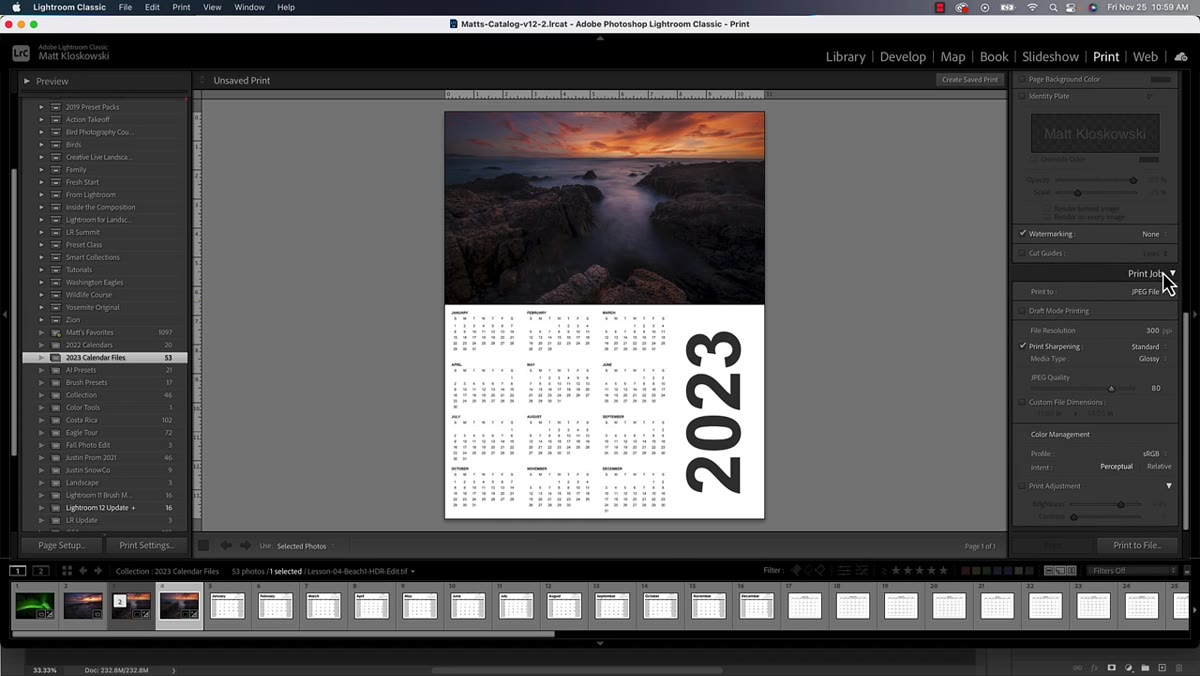 Print Job panel open in lower right with output options visible
When the layout looks right, scroll down to the Print Job panel on the lower right side of the Print Module. If you want a physical print, you would send it directly to your printer from here. But if you want a digital file to share, post, or take to a print shop, look for the Print to File button. This outputs a high-resolution JPEG of your entire layout, calendar and photo combined, exactly as it appears on screen.
Print Job panel open in lower right with output options visible
When the layout looks right, scroll down to the Print Job panel on the lower right side of the Print Module. If you want a physical print, you would send it directly to your printer from here. But if you want a digital file to share, post, or take to a print shop, look for the Print to File button. This outputs a high-resolution JPEG of your entire layout, calendar and photo combined, exactly as it appears on screen.
Set your resolution before you export. For print, 300 PPI is standard. For screen sharing only, 150 PPI is usually plenty. Name the file, choose your destination folder, and you’re done.
My Add-On: Edit the Photo Before You Build the Layout
One thing Matt doesn’t go deep on in this particular video, but that I’d strongly recommend based of my own experience, is finishing your photo edits in the Develop Module before you ever open the Print Module. The Print Module doesn’t give you editing tools. What you see is what you get.
I usually run a quick tone and color pass, check the white balance, and apply whatever preset feels right for the mood of the image before I even think about layout. If the photo is going to anchor a whole year of calendar pages on someone’s wall, it should look its best. Think of the Develop Module as your pre-production and the Print Module as your final assembly.
The biggest thing this tutorial reminded me of is that Lightroom already has the tools to do more than most people use it for. The Print Module is sitting there, completely underused, and it’s genuinely capable of producing calendar layouts that look intentional and personal without a separate design application.
Give the technique a try with one of Matt’s free templates and a photo you’re actually proud of. Watch the full tutorial on YouTube for the full walkthrough, especially if you want to see the cell-dragging and resizing steps in motion.
Comments (3)
Applied this to my portfolio shots and the improvement is noticeable.
This should be required reading for anyone starting out.
Great article! I actually covered something related on my site — the gear angle is really complementary to this.
Leave a Comment