Every time Adobe drops an update, I do the same thing: open the release notes, skim for anything that affects my actual workflow, and ignore the rest. Most updates are minor. But the February 2020 update to Lightroom Classic was one I kept coming back to, because it quietly fixed something that had been annoying me for years. I shoot with two different Sony bodies depending on the job, and getting each one to open with sensible default settings has always involved too many steps and too much memory for what those steps even were.
Watch the full tutorial on YouTube
In this Matt Kloskowski tutorial covering Lightroom Classic version 9.2, he walks through the two main additions in this update: a properly surfaced system for camera-specific default settings, and a new sync FAQ link built right into the interface. Neither feature is flashy, but both are the kind of thing that saves you fifteen minutes of frustration on a Tuesday afternoon when you just want to edit photos. Here is how each one works, and what I actually think about them.
Step 1: Update Lightroom Classic to Version 9.2
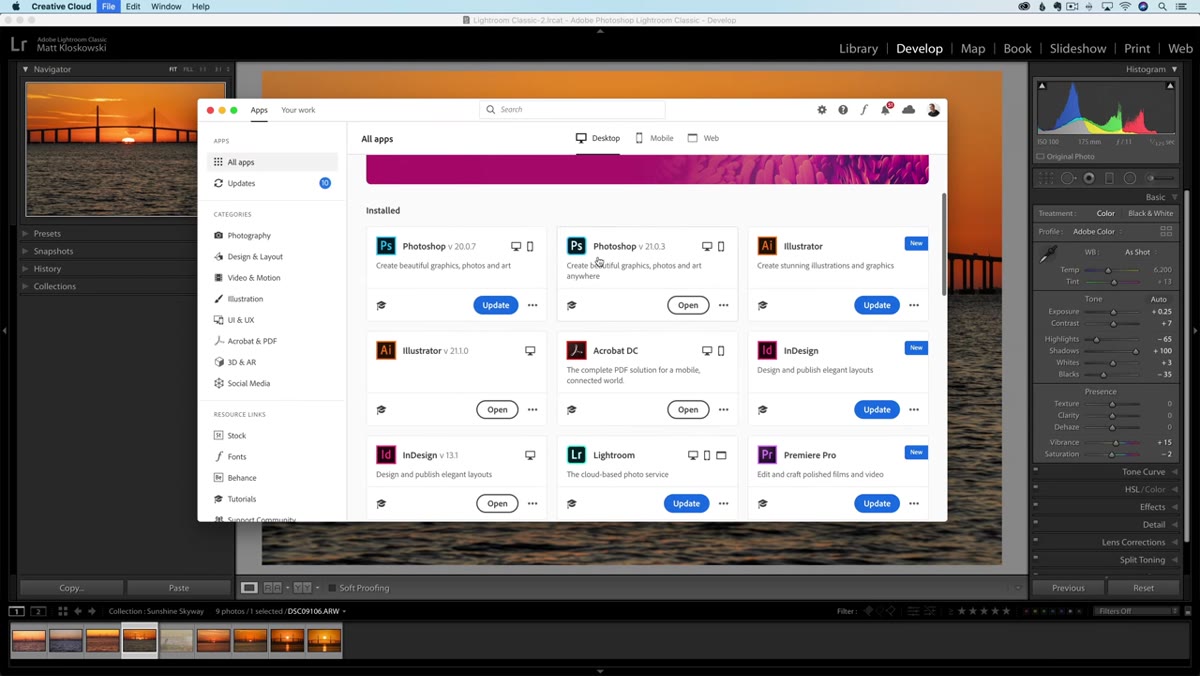 Adobe Creative Cloud updater showing Lightroom Classic 9.2
Open your Adobe Creative Cloud app before anything else. The February 2020 update brings Lightroom Classic to version 9.2, and there is also a small Photoshop update bundled alongside it. Hover over the Lightroom Classic entry in your Creative Cloud updater and confirm you are on 9.2 before proceeding. If you are on the cloud-based version of Lightroom (not Classic), there is a corresponding update there too.
Adobe Creative Cloud updater showing Lightroom Classic 9.2
Open your Adobe Creative Cloud app before anything else. The February 2020 update brings Lightroom Classic to version 9.2, and there is also a small Photoshop update bundled alongside it. Hover over the Lightroom Classic entry in your Creative Cloud updater and confirm you are on 9.2 before proceeding. If you are on the cloud-based version of Lightroom (not Classic), there is a corresponding update there too.
When you first launch Lightroom Classic after updating, a welcome window will appear listing all the new features. It is worth reading through, but this article covers the two changes that will actually affect your day-to-day editing.
Step 2: Open the Presets Tab in Lightroom Preferences
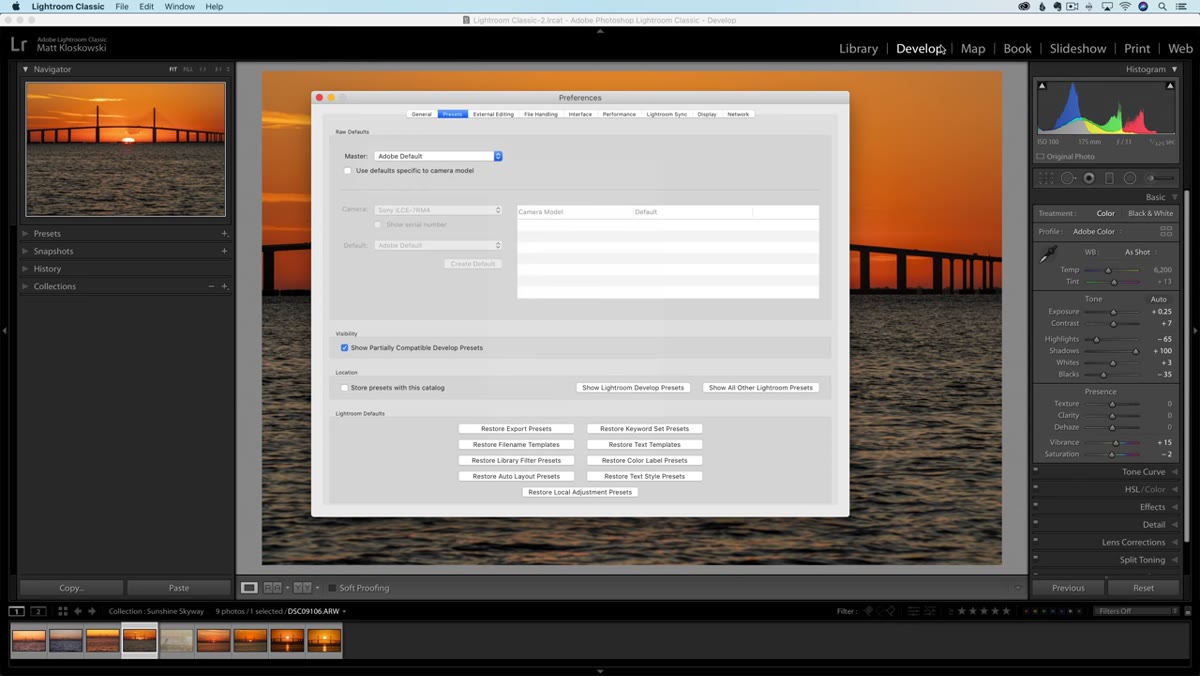
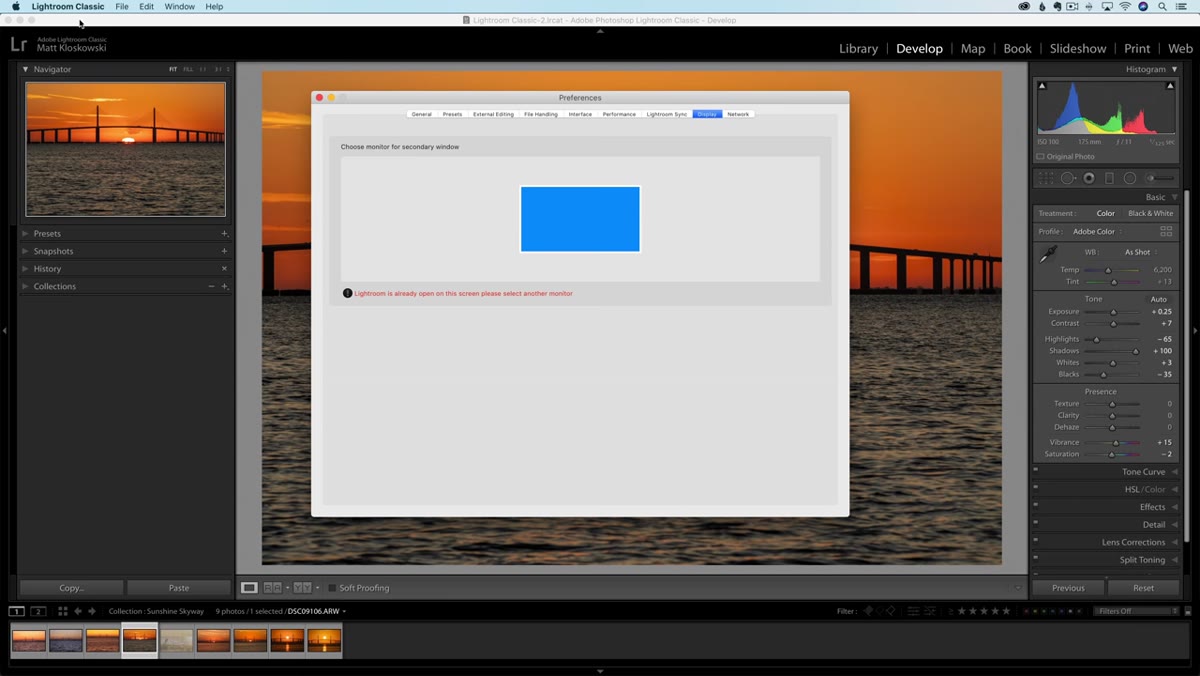 Lightroom Preferences window open on the Presets tab
Navigate to your Lightroom preferences. On a Mac, that is the Lightroom menu at the top left. On a PC, it is under the Edit menu. Once you are in Preferences, click the second tab from the left, labeled Presets. This is where the most significant change in this update lives.
Lightroom Preferences window open on the Presets tab
Navigate to your Lightroom preferences. On a Mac, that is the Lightroom menu at the top left. On a PC, it is under the Edit menu. Once you are in Preferences, click the second tab from the left, labeled Presets. This is where the most significant change in this update lives.
You will see a section called RAW Defaults. This controls what settings get applied to a RAW file the moment it lands in Lightroom. Previously, getting to this kind of control required knowing an obscure keyboard shortcut or menu path that most photographers never stumbled across. Adobe has now moved it somewhere you can actually find it.
Step 3: Understand the RAW Default Options
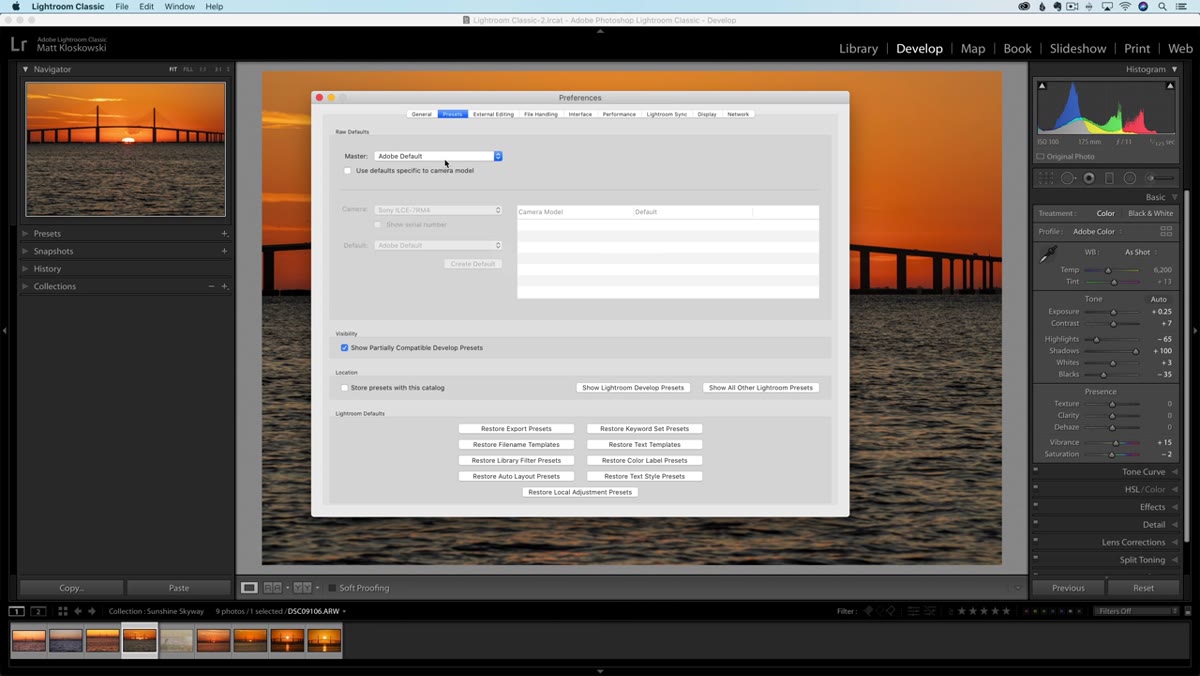 RAW Defaults dropdown showing Adobe Default and Camera Settings options
The RAW Defaults dropdown gives you a few choices. The first is Adobe Default, which zeroes out all your sliders, applies a small amount of sharpening, a touch of noise reduction, and uses the Adobe Color profile. That has been the standard starting point for RAW files in Lightroom for years.
RAW Defaults dropdown showing Adobe Default and Camera Settings options
The RAW Defaults dropdown gives you a few choices. The first is Adobe Default, which zeroes out all your sliders, applies a small amount of sharpening, a touch of noise reduction, and uses the Adobe Color profile. That has been the standard starting point for RAW files in Lightroom for years.
The second option is Camera Settings. If you shoot with a camera that has creative profiles baked in, like a Sony with a Landscape profile selected in-camera, Lightroom will now recognize and apply that profile automatically when you import. It will not capture minor in-camera tweaks, but the overall creative profile will come through. This is useful if you shoot JPEG alongside RAW and want your RAW files to at least start from the same visual ballpark as your camera’s rendering.
Step 4: Apply a Develop Preset as Your Default
 Preset dropdown in RAW Defaults showing a custom develop preset selected
Beyond Adobe Default and Camera Settings, you can assign a full Develop module preset as your global RAW default. Build your preset in the Develop module the way you normally would, save it, and it will appear in this dropdown. Every RAW file you import will then open with those settings already applied.
Preset dropdown in RAW Defaults showing a custom develop preset selected
Beyond Adobe Default and Camera Settings, you can assign a full Develop module preset as your global RAW default. Build your preset in the Develop module the way you normally would, save it, and it will appear in this dropdown. Every RAW file you import will then open with those settings already applied.
This is where the workflow benefit becomes real. I have a preset I use as a starting point for most of my landscape work. Instead of applying it manually after import, I can set it here and let Lightroom handle it automatically. One less step every single time.
Step 5: Set Camera-Specific or Serial-Number-Specific Defaults
 Camera model and serial number fields under RAW Defaults settings
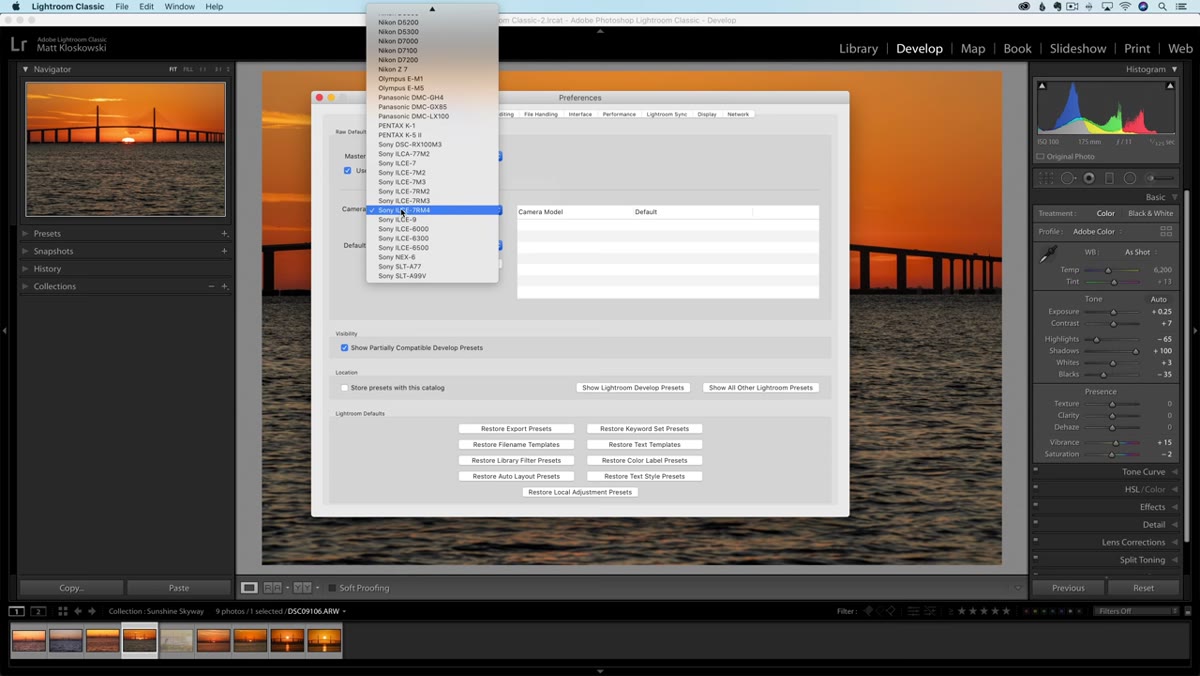
This is the part I had genuinely been waiting for. Below the global RAW default, you can define separate defaults for specific camera models and even specific camera serial numbers. So if you shoot wildlife with one body and landscapes with another, you can configure each one independently.
Camera model and serial number fields under RAW Defaults settings
This is the part I had genuinely been waiting for. Below the global RAW default, you can define separate defaults for specific camera models and even specific camera serial numbers. So if you shoot wildlife with one body and landscapes with another, you can configure each one independently.
For example: a Sony a9 shooting fast action at high ISO benefits from stronger noise reduction and more aggressive sharpening out of the gate. A Sony a7R IV shooting landscapes at base ISO does not need that same treatment. With camera-specific defaults, you set it once per body and Lightroom just handles it. The settings are also visible whenever you come back to this screen, which solves a problem the old hidden version of this feature always had. You would set something a year ago, forget what it was, and have no easy way to check.
Step 6: Use the New Sync FAQ Link
 Lightroom Classic interface showing the Sync FAQ link in the top corner
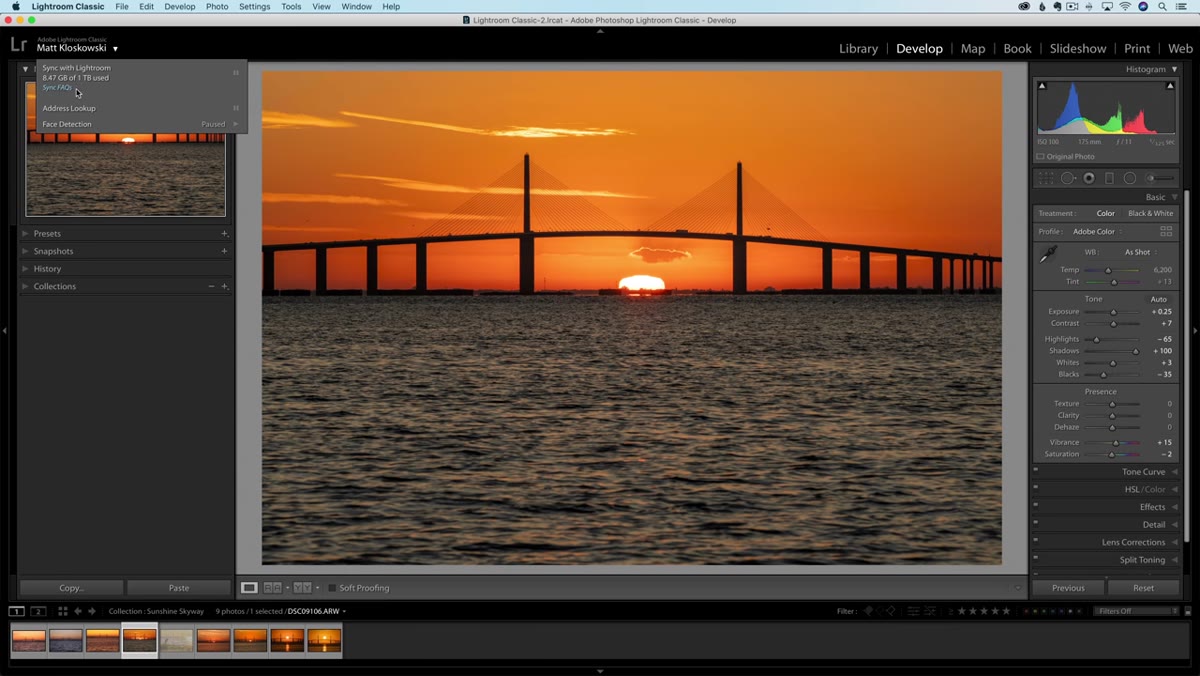
The second addition in this update is less of a feature and more of a lifeline. If you are logged into Lightroom Classic using an Adobe subscription and have syncing turned on, you will now see a Sync FAQ link in the top left area of the interface. Click it and it takes you directly to Adobe’s support documentation on syncing between Lightroom Classic and the cloud.
Lightroom Classic interface showing the Sync FAQ link in the top corner
The second addition in this update is less of a feature and more of a lifeline. If you are logged into Lightroom Classic using an Adobe subscription and have syncing turned on, you will now see a Sync FAQ link in the top left area of the interface. Click it and it takes you directly to Adobe’s support documentation on syncing between Lightroom Classic and the cloud.
Syncing between Lightroom Classic and the cloud-based Lightroom apps has historically caused a lot of confusion, especially around collections versus albums and which edits travel where. If you have ever lost an hour troubleshooting why a mobile edit did not show up in your catalog, this link is at least a faster path to answers. It is not a fix, but it acknowledges the confusion exists.
What I Would Add From My Own Experience
The camera-specific defaults feature is genuinely powerful, but it only works as well as the presets you feed into it. A sloppy starting preset applied to every image from a given camera is still a sloppy starting point at scale. Before you lock in a camera default, spend time on a representative set of images from that body and dial in settings you would be happy to see on ninety percent of your shots. I name my presets after songs (a habit I cannot explain and will not defend), but the naming is less important than the testing.
One more thing worth knowing: setting a camera default does not permanently alter your RAW files. If you import something and the default feels wrong for that shoot, you can reset or apply any other preset manually. The default is just the starting line, not a locked decision.
The single most important shift in Lightroom Classic 9.2 is that camera-specific defaults moved from a hidden, forgettable setting into a proper, visible workflow tool. If you shoot with more than one camera body, or if you want to stop manually applying the same starting preset to every import, spend fifteen minutes setting this up. It is one of those small changes that compounds every single time you sit down to edit.
Watch the full tutorial on YouTube to see Matt walk through each setting live with real examples from his own library.
Comments
Leave a Comment