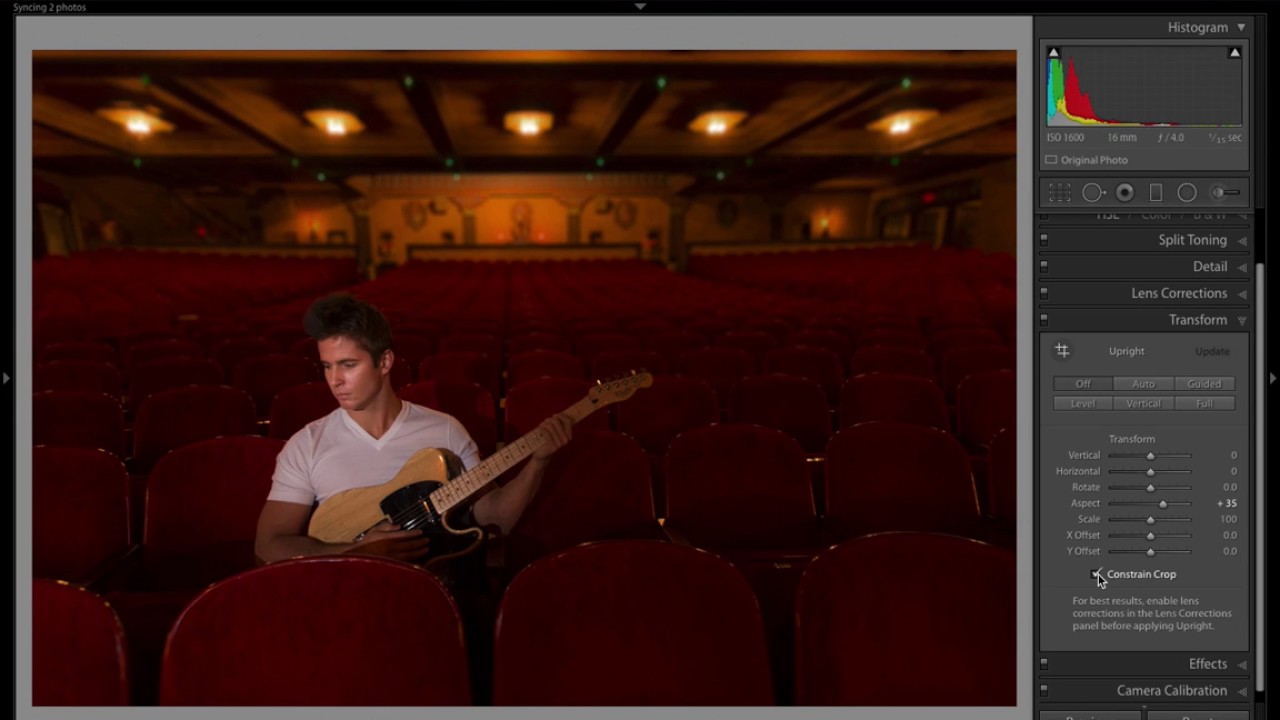
There’s a photo sitting in my archive that I’ve never been able to fully save. Shot at a wide-angle event, subject slightly off-center, background sharp enough to read the exit signs behind him. The image has real potential, but it has always looked like a snapshot instead of a portrait. For years I told myself I’d fix it in Photoshop. I never did, because the masking alone felt like a weekend project.
Then I watched this KelbyOne tutorial from Scott Kelby, and I realized the fix was sitting inside Lightroom the whole time. Watch the full tutorial on YouTube before or after you read this. It’s short, practical, and the kind of tip that changes how you think about what Lightroom’s local adjustment tools can actually do.
The core idea is surprisingly simple: Lightroom’s Graduated Filter can reduce clarity and sharpness in a targeted zone, and if you stack duplicates of that same filter on top of each other, the blur compounds. You end up with something that reads like genuine optical blur from a wide-open aperture. It doesn’t fake every property of real bokeh, but it’s convincing enough to change the entire mood of a portrait.
Step 1: Open the Graduated Filter and Zero Everything Out
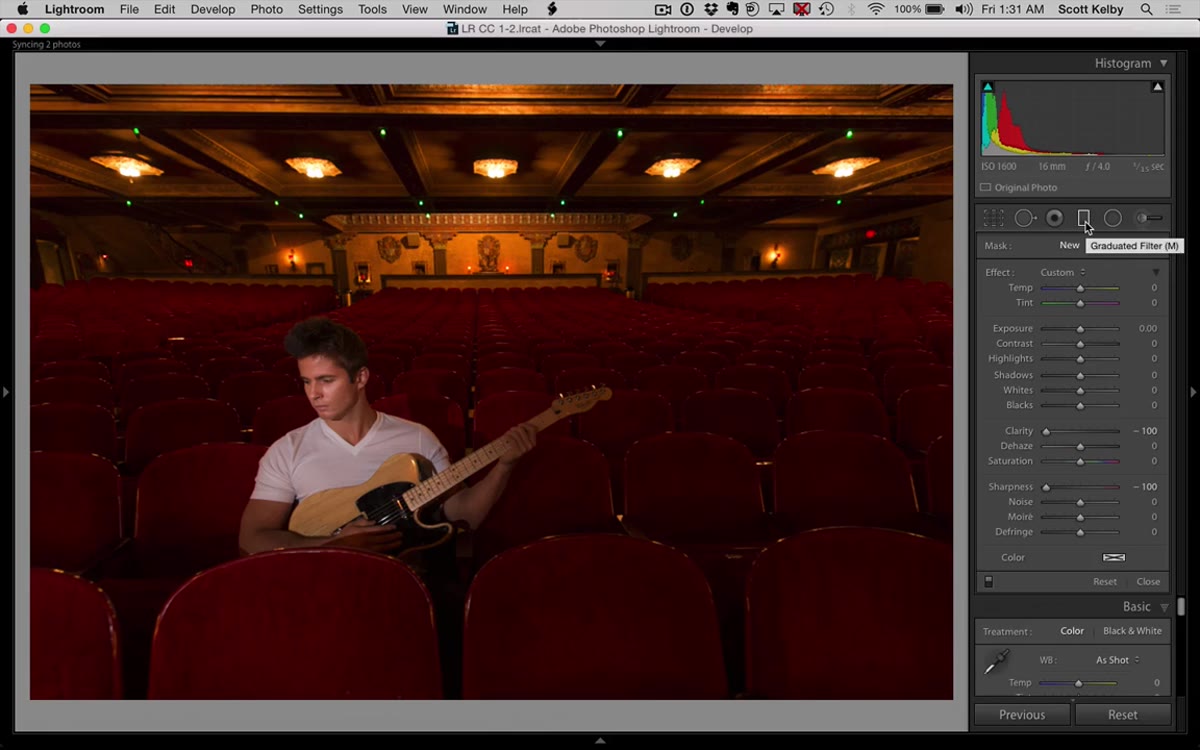 Graduated Filter panel open with all sliders at zero
Start in the Develop module with your portrait open. Grab the Graduated Filter tool from the toolbar below the histogram. Before you do anything else, make sure all the sliders in the panel are at zero. If you’ve used this tool recently, there’s a good chance some values are still hanging around from a previous edit. Don’t skip this check. A leftover exposure or color shift in the filter will corrupt the whole effect.
Step 2: Set Clarity and Sharpness to -100
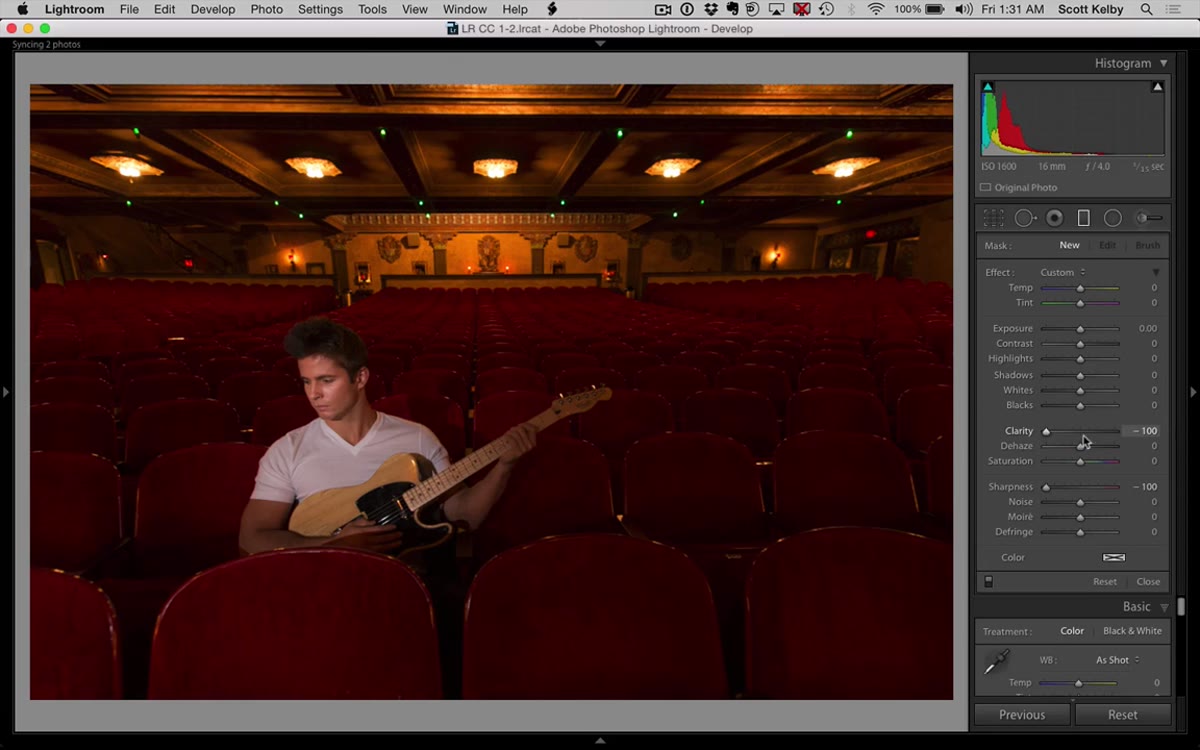 Clarity slider at minus 100 and Sharpness slider at minus 100
With a clean slate, pull Clarity all the way down to -100, then do the same with Sharpness. These two settings together are what creates the softening effect. Clarity at -100 reduces local contrast and makes the image feel hazy. Sharpness at -100 strips edge definition. Neither one alone is enough to sell the blur, but together they lay the foundation for the stacking trick that comes next.
Step 3: Drag the Filter Down from the Top of the Frame
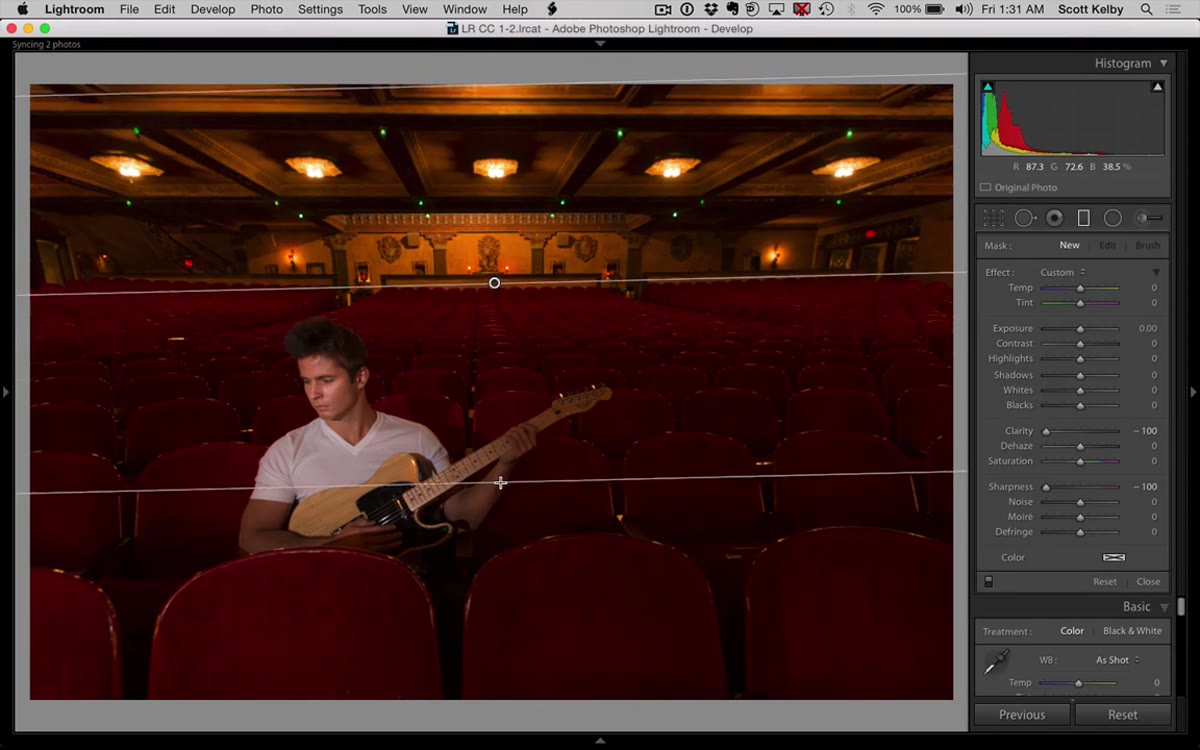 Graduated filter dragged from top down toward subject
Click at the top of the image and drag the filter downward, stopping just before your subject’s head. The graduated filter works by applying full strength at the starting edge and fading to zero at the ending edge, so the transition zone matters. You want maximum blur in the background and a clean falloff before it touches your subject. After dragging, hit your backslash key to toggle before and after. You should see a slight softening in the background. It’s subtle at this stage, which is intentional.
Step 4: Use the Brush Erase Mode to Protect Your Subject
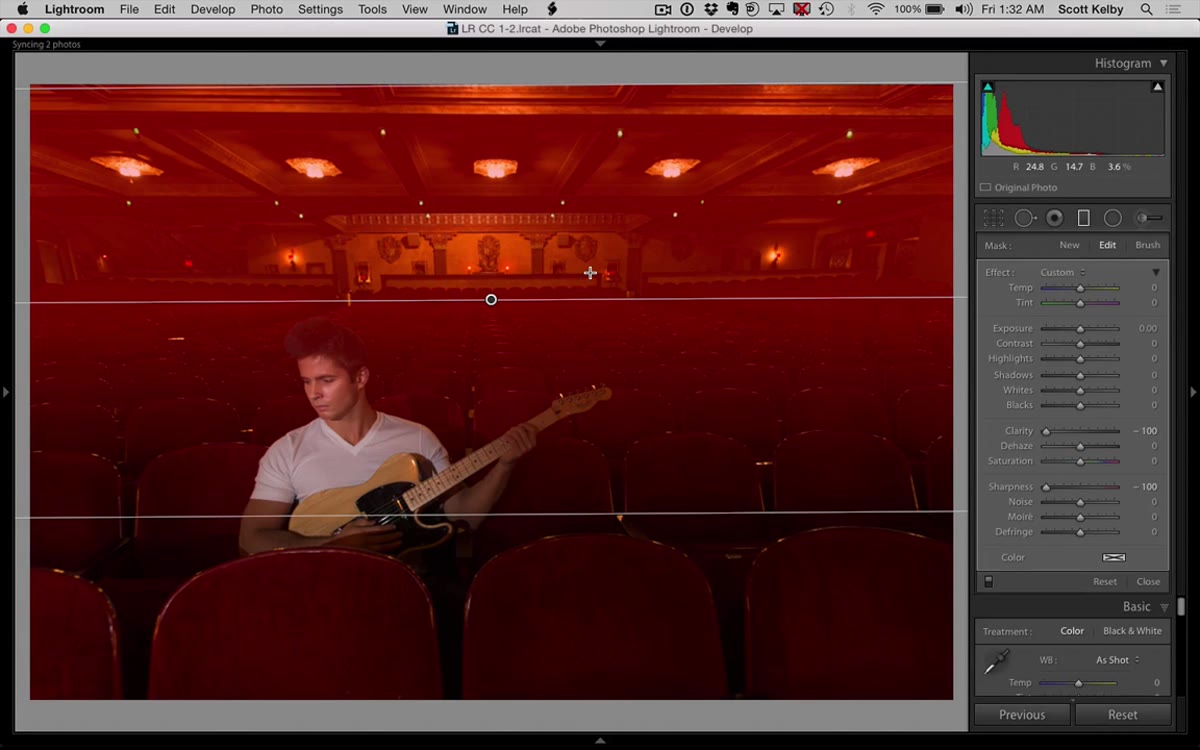 Red mask overlay showing coverage over subject area
Press O to reveal the mask overlay. If the red tint is bleeding over your subject, you need to erase it off them. Click the Brush option inside the Graduated Filter panel, then switch to Erase mode, or just hold Option on a Mac or Alt on Windows. Paint over your subject and any seats or objects close to them that should stay sharp. The goal is to keep the blur strictly in the zone behind the subject. Press O again to hide the mask when you’re done.
Step 5: Right-Click the Filter Pin and Duplicate It
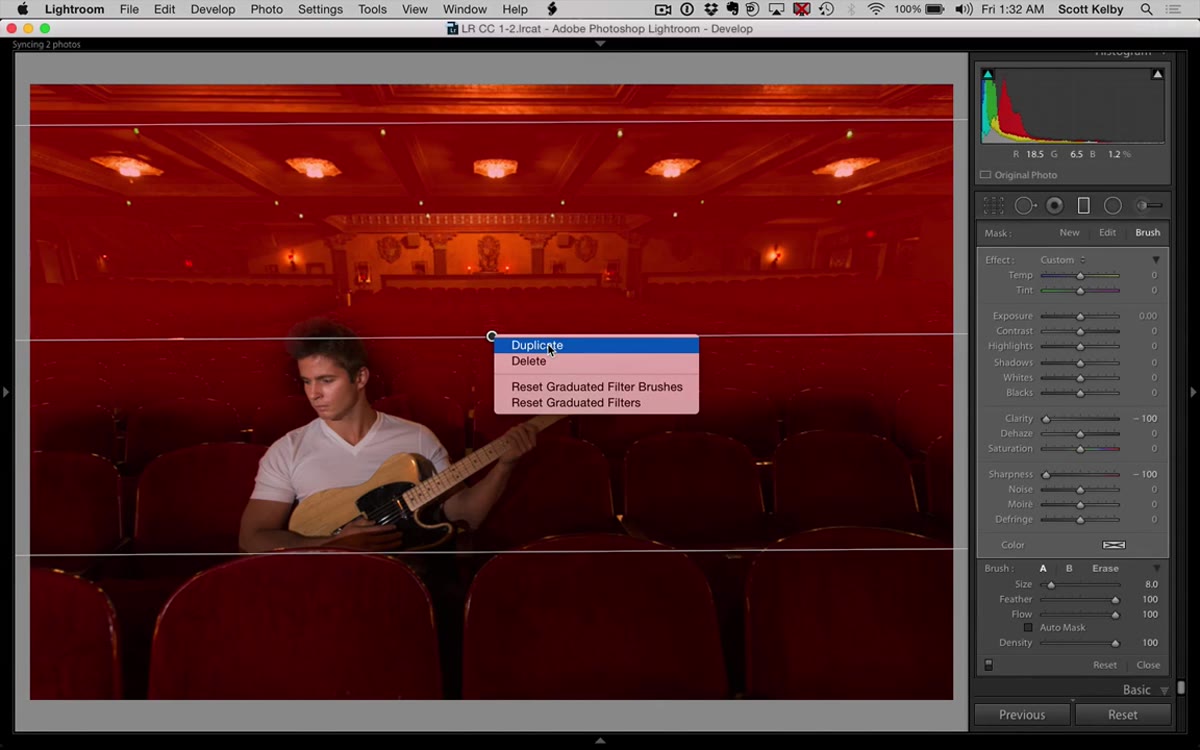 Right-click context menu showing Duplicate option on filter pin
This is where the technique gets genuinely clever. Right-click directly on the filter’s center pin on the canvas, and choose Duplicate from the context menu. Lightroom creates an exact copy of the filter, complete with the erased mask you painted. The blur doubles instantly. Right-click and duplicate again. Then again. Kelby does four passes total for the top blur, and by the third or fourth duplicate, the background softening starts to look like it was shot with a 50mm lens at f/1.8 instead of a 16mm at a closed aperture. The cumulative effect is what sells it.
Step 6: Add a Second Graduated Filter from the Bottom
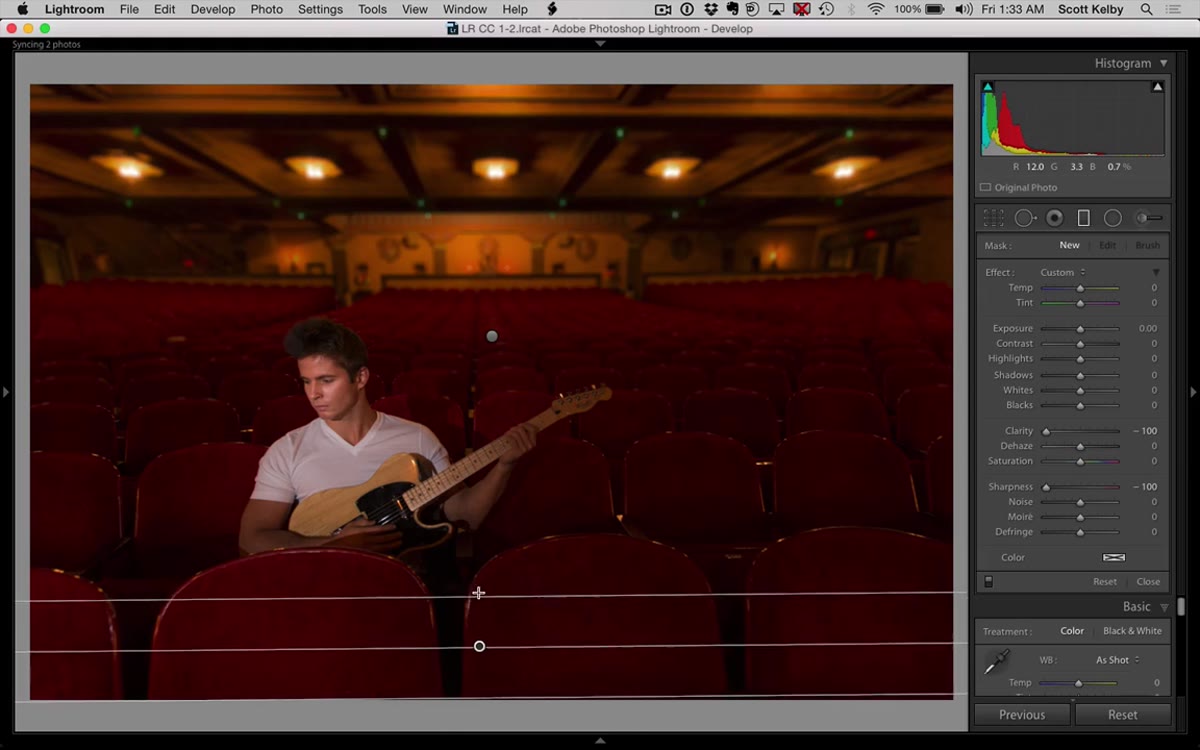 Second graduated filter dragged upward from the bottom of the frame
Real lens blur doesn’t just happen behind a subject. When you’re shooting with a fast lens at close range, the foreground falls out of focus too. To sell the illusion, click New in the filter panel and drag a second graduated filter upward from the bottom of the frame. Keep the transition zone compact so the blur stays near the bottom edge. Duplicate this one two or three times as well. The result is blur at both the top and bottom of the frame, with your subject sitting sharp in the middle. That’s exactly what a wide-open portrait lens would produce.
A Caveat Worth Knowing Before You Commit
This technique works beautifully on backgrounds with lights, texture, or crowd detail. Those are the kinds of elements that look naturally soft when de-focused. It works less convincingly on plain walls or simple gradients, where the softening just looks like a filter rather than optics. I’ve also found it helps to slightly reduce overall sharpness on the subject using a separate local adjustment brush, just enough to keep them from looking artificially crisp against the blurred background. Real lenses never produce absolute sharpness either, so splitting the difference closes the gap between the effect and the real thing. And if your original shot was wide-angle like the one in Kelby’s example, check your Lens Corrections panel afterward. Wide lenses distort subjects who are off-center, and fixing that with a quick lens profile correction is the difference between a convincing portrait and one that still feels “off” despite the blur.
The single most important thing this tutorial taught me is that stacking is a legitimate tool, not a workaround. Lightroom’s local adjustments have intensity limits by design, but nothing stops you from applying the same adjustment multiple times. Duplicating filters is essentially the same logic as running multiple passes with a healing brush, and once you start thinking that way, a lot of previously impossible Lightroom edits become possible.
Watch the full tutorial on YouTube and pay attention to how quickly Kelby works. The whole technique takes about three minutes in real time, which means there’s no reason to shelve those wide-angle portraits anymore.
Comments (2)
I've been looking for exactly this kind of tutorial. Perfect timing.
This is fantastic. I've been recommending this approach to my readers too.
Leave a Comment