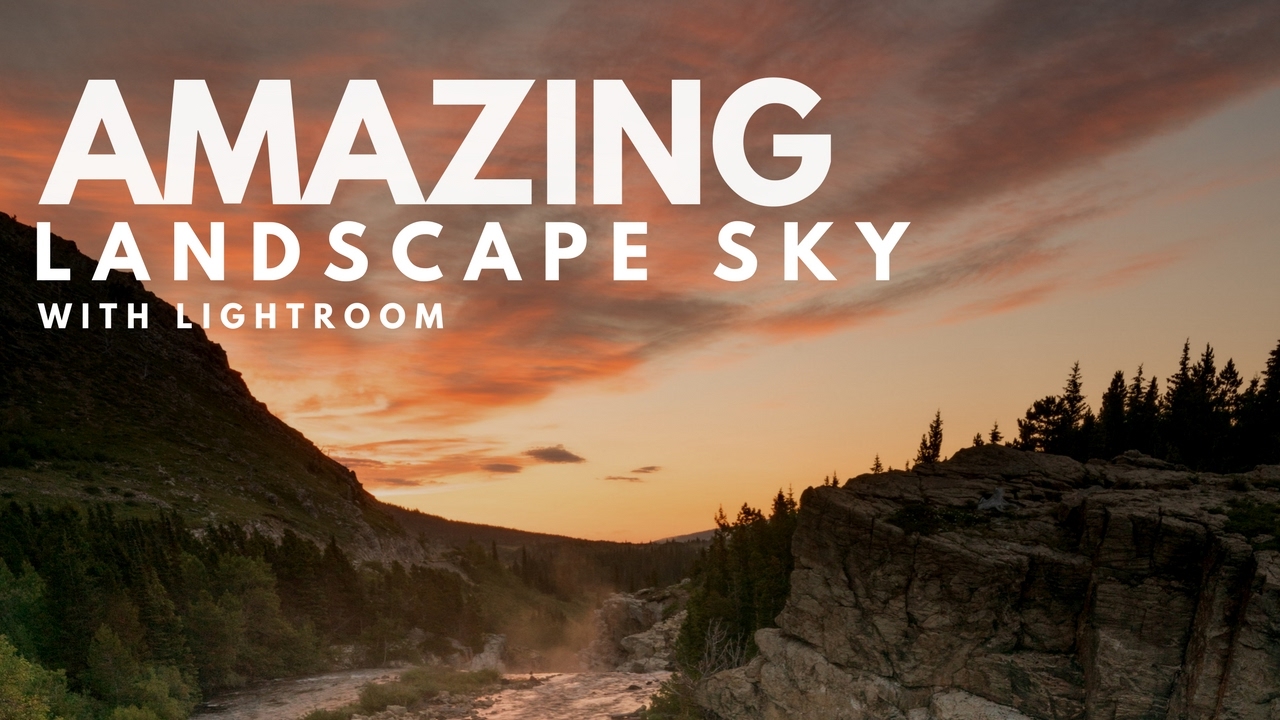
There’s a photo sitting in my Lightroom catalog right now - shot at Percy Warner Park last fall, golden hour, the kind of light that makes you feel like you earned something. The foreground is perfect. The sky is a white, featureless void. I exposed for the trees, and the sky paid the price. If you shoot landscapes, you’ve been here. Your eyes handle that contrast between a bright sky and a shadowed foreground without thinking about it. Your camera doesn’t. It makes a choice, and you live with the consequences unless you know how to fix it in post.
In this Matt Kloskowski tutorial - Watch the full tutorial on YouTube - Matt walks through a graduated filter technique in Lightroom that goes a step further than what most people do. The common approach is to drag the highlights down and call it a day. The problem with that, as Matt explains, is that hammering the highlights too hard makes the bright parts of your sky look strange - not dark, just wrong, like the color and tone have been squeezed out of them. His method uses a combination of sliders that gives you a recovered sky without wrecking the rest of the image.
What makes this technique worth your time is the shadow slider twist at the end. That one move solves a problem that physical graduated neutral density filters can’t solve at all. A glass filter darkens everything it covers, full stop. Lightroom lets you darken the sky and simultaneously lift the dark areas underneath - which is a genuinely different kind of control.
Step 1: Open the Graduated Filter Tool
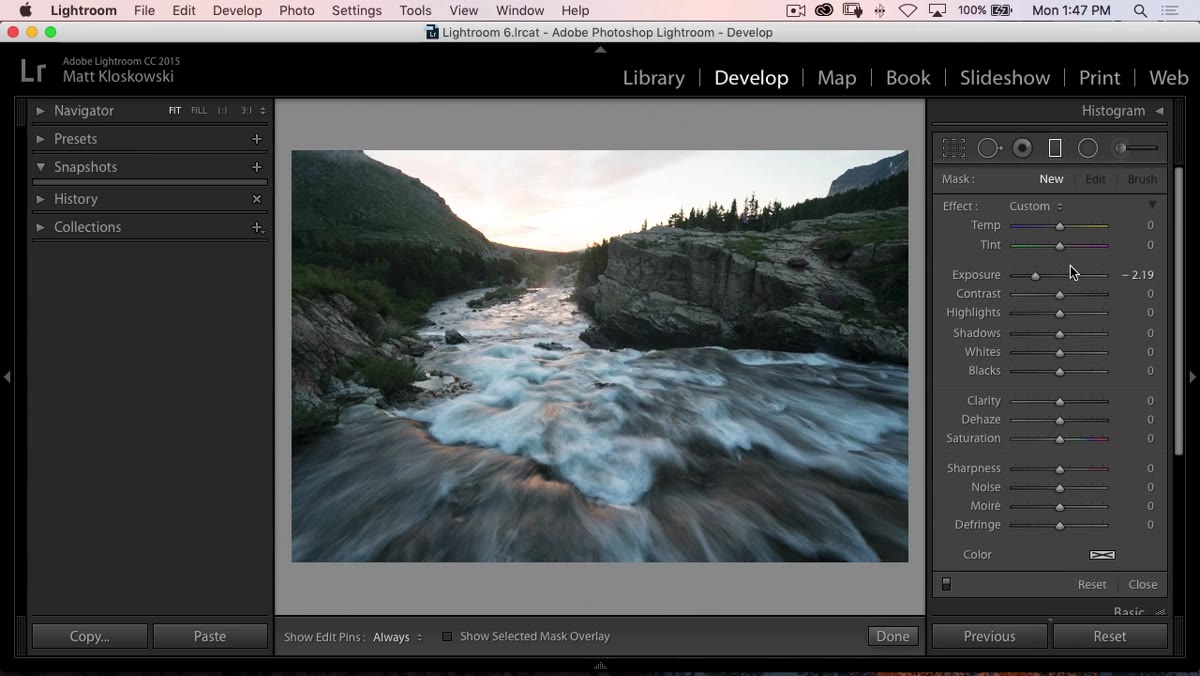 Graduated filter icon selected in Lightroom’s toolbar
In Lightroom Classic, the graduated filter lives in the toolbar just below the histogram in the Develop module - it looks like a rectangle with a gradient. Click it. This is the tool that mimics a physical graduated ND filter but with the flexibility to change your mind after the fact. If you applied this at the camera level and later decided the transition was in the wrong spot, you’d be stuck. Here, you can move it, resize it, or delete it entirely.
Graduated filter icon selected in Lightroom’s toolbar
In Lightroom Classic, the graduated filter lives in the toolbar just below the histogram in the Develop module - it looks like a rectangle with a gradient. Click it. This is the tool that mimics a physical graduated ND filter but with the flexibility to change your mind after the fact. If you applied this at the camera level and later decided the transition was in the wrong spot, you’d be stuck. Here, you can move it, resize it, or delete it entirely.
Step 2: Bring the Exposure Slider Down Before You Draw
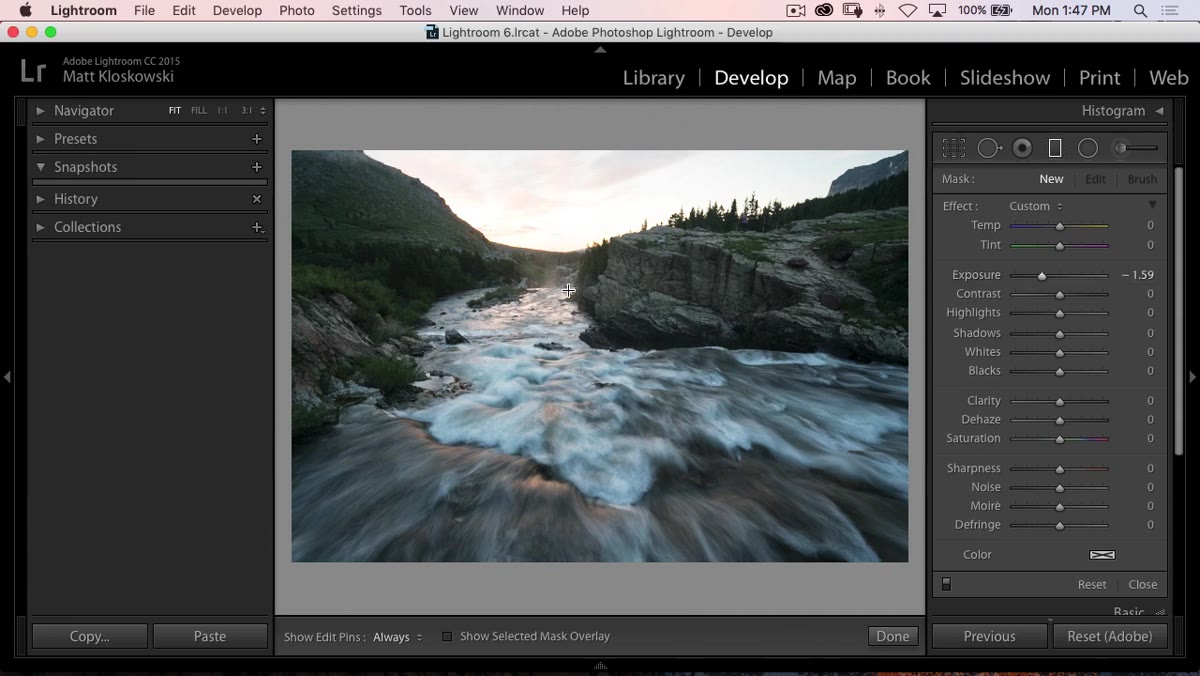 Exposure slider being pulled down in graduated filter panel
Before you drag the filter onto the image, pull the Exposure slider down in the graduated filter panel. Matt’s approach is to set the value first so you can see the effect live as you draw. How far down depends on your image, but start somewhere around -1.0 to -1.5 stops and adjust from there. This is doing the heavy lifting for sky recovery - it’s a broad tonal change that brings your highlight detail back in a way that feels natural rather than squeezed.
Exposure slider being pulled down in graduated filter panel
Before you drag the filter onto the image, pull the Exposure slider down in the graduated filter panel. Matt’s approach is to set the value first so you can see the effect live as you draw. How far down depends on your image, but start somewhere around -1.0 to -1.5 stops and adjust from there. This is doing the heavy lifting for sky recovery - it’s a broad tonal change that brings your highlight detail back in a way that feels natural rather than squeezed.
The reason you lean on exposure here instead of highlights is tonal range. Highlights targets only the brightest parts of the tonal curve. Exposure brings the whole sky down together, which preserves the relationship between the brighter and slightly-less-bright parts of the sky. The result looks more like a correctly exposed frame.
Step 3: Click and Drag the Filter From the Top of the Sky Downward
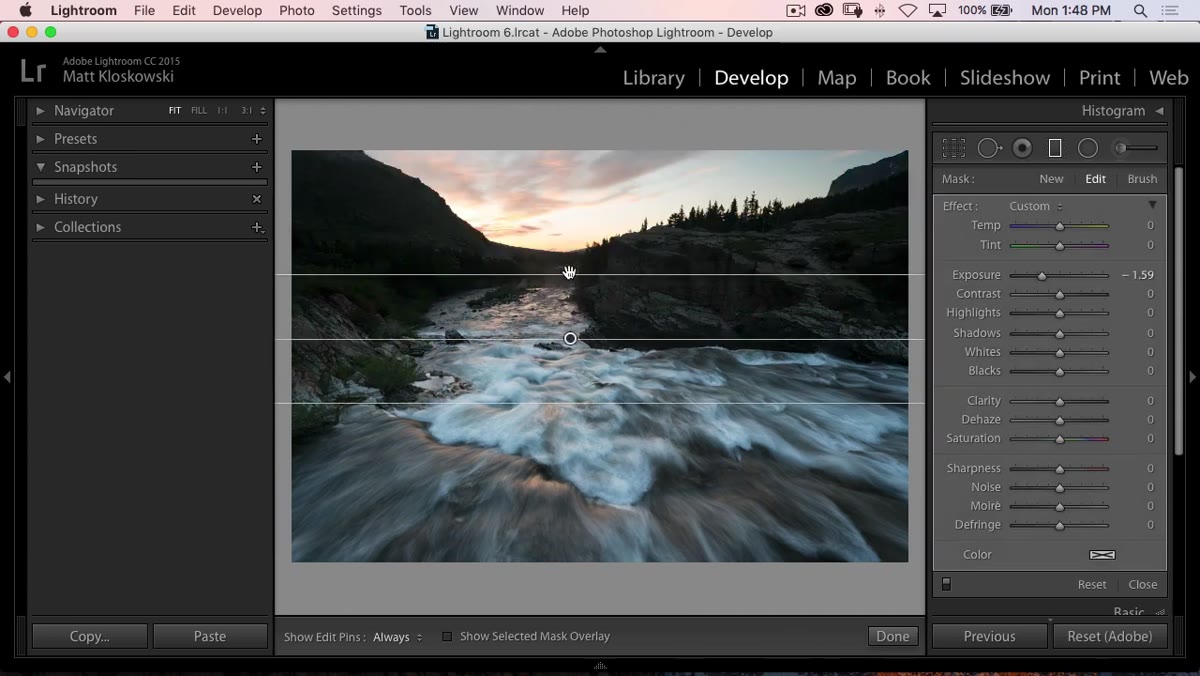 Graduated filter being dragged from top of image over the sky
Click at the top of your frame and drag downward. Lightroom draws three horizontal lines - the top line is where full effect begins, the bottom line is where it fades to nothing, and the middle line is the center point you can grab and reposition. You want the full effect concentrated on the sky and the fade-out happening around the horizon line. Hold Shift while dragging to keep the gradient perfectly vertical.
Graduated filter being dragged from top of image over the sky
Click at the top of your frame and drag downward. Lightroom draws three horizontal lines - the top line is where full effect begins, the bottom line is where it fades to nothing, and the middle line is the center point you can grab and reposition. You want the full effect concentrated on the sky and the fade-out happening around the horizon line. Hold Shift while dragging to keep the gradient perfectly vertical.
Get it roughly right, but don’t obsess over placement yet. You can grab the center line and slide it up or down after the fact, and you can rotate the gradient by hovering near the outer lines until you get a rotation cursor.
Step 4: Fine-Tune With a Small Highlight Adjustment
 Highlights slider being adjusted slightly in graduated filter panel
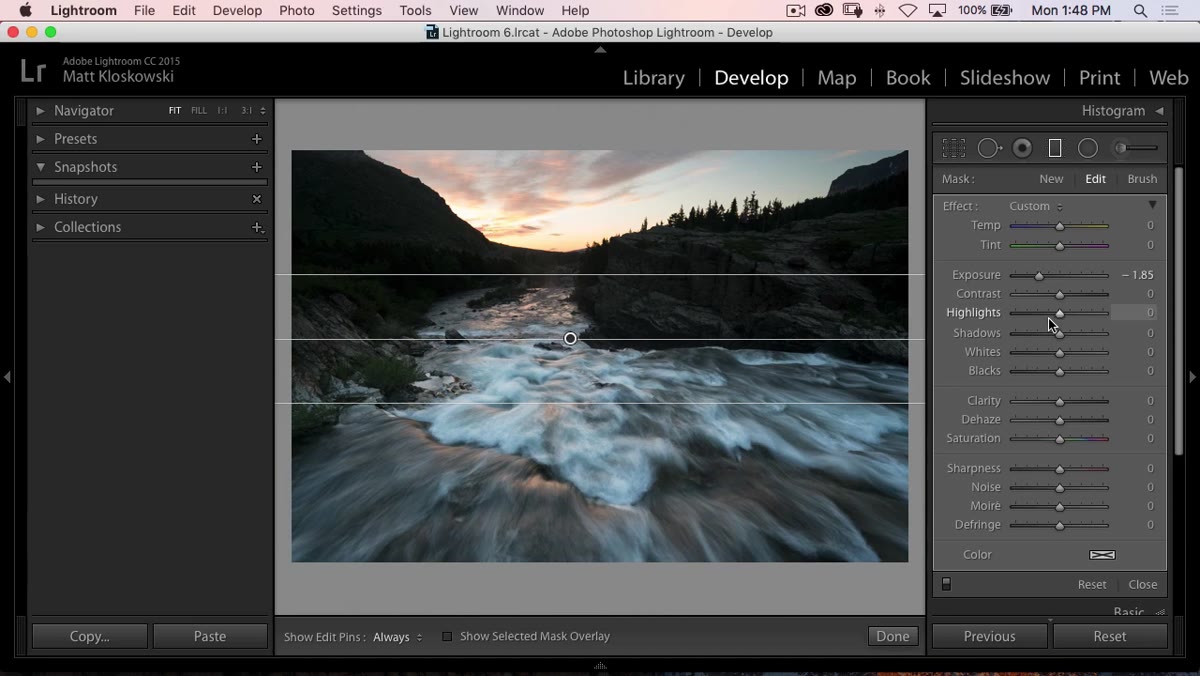
Once your exposure reduction is in place, you can nudge the Highlights slider to target the very brightest parts of the sky. Matt’s point here is the word “nudge” - a small move, not a dramatic one. If you drag highlights down hard, you’ll start to see that funky, flat look he describes, where the bright clouds or sun area loses its sense of light entirely. Think of this as a finishing touch, not a foundation. A small negative value like -20 to -40 is usually enough.
Highlights slider being adjusted slightly in graduated filter panel
Once your exposure reduction is in place, you can nudge the Highlights slider to target the very brightest parts of the sky. Matt’s point here is the word “nudge” - a small move, not a dramatic one. If you drag highlights down hard, you’ll start to see that funky, flat look he describes, where the bright clouds or sun area loses its sense of light entirely. Think of this as a finishing touch, not a foundation. A small negative value like -20 to -40 is usually enough.
Step 5: Raise the Shadows Slider to Recover the Foreground
 Shadows slider being raised inside the graduated filter adjustment
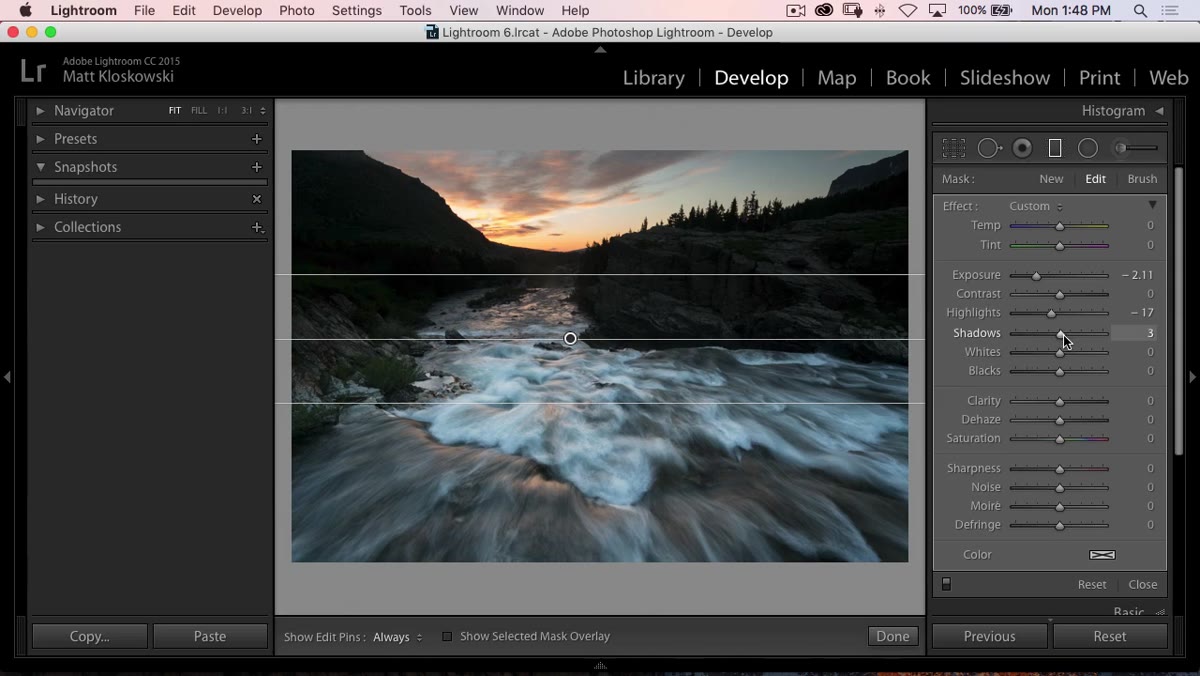
This is the step that makes the technique. Because your graduated filter is covering both the sky and part of the foreground, the exposure reduction is also darkening trees, rocks, hills - whatever sits near the horizon in your frame. Dragging the Shadows slider up inside the same graduated filter adjustment counteracts this.
Shadows slider being raised inside the graduated filter adjustment
This is the step that makes the technique. Because your graduated filter is covering both the sky and part of the foreground, the exposure reduction is also darkening trees, rocks, hills - whatever sits near the horizon in your frame. Dragging the Shadows slider up inside the same graduated filter adjustment counteracts this.
The reason it works without ruining your sky is that the sky isn’t a shadow. Shadows targets the dark tonal range, and your sky is sitting in the midtones and highlights. So raising shadows lights up your foreground detail without pushing your sky back up to blown-out territory. One slider pull, two problems solved.
My Extension: Watch Your Horizon Transition on Busy Treelines
The one place this technique needs a second look is when your horizon isn’t a clean horizontal line. If you’ve got trees with irregular silhouettes or rock formations poking up into the sky, the graduated filter doesn’t know that. It covers everything in a smooth band, which means the tips of those trees might pick up a slight darkening that looks a little flat compared to your recovered foreground.
My fix is to add a second adjustment - a brush set to a small positive exposure value - and paint lightly over just the upper portions of any foreground elements that cross the gradient boundary. It takes maybe two minutes, and it keeps the image looking internally consistent. You won’t always need it, but on shots with tall trees breaking the skyline, it makes a real difference. The graduated filter does 90% of the work. The brush cleans up the edges.
The core lesson here is that the shadow slider inside a graduated filter isn’t just a bonus control - it’s what separates a digitally-processed-looking sky recovery from one that holds together as a complete image. The filter darkens the whole zone. Shadows gives the foreground its dimension back. Used together, they get you to a result that would take significantly longer with any other approach.
Watch the full tutorial on YouTube to see Matt walk through the before and after on an actual landscape image - the toggle comparison at the end of the video is worth seeing to understand how significant the cumulative effect of these small moves really is.
Comments (1)
Great breakdown. The step-by-step approach really helps.
Leave a Comment