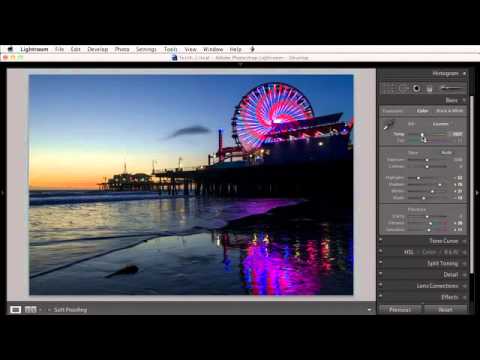
There’s a specific kind of frustration that only photographers know: you’ve got a landscape shot where the sky looks exactly right, but the foreground is too cool, or you’ve nailed the warmth in the ground and the sky looks like it was shot through a yellow window. You move the temperature slider left and the foreground dies. You move it right and the sky turns the color of old mustard. For years I just accepted that this was a Photoshop problem, something to mask out in layers and blend manually. Turns out Lightroom had a better answer, and I didn’t know about it until I watched this KelbyOne tutorial. Watch the full tutorial on YouTube
In this KelbyOne tutorial, the instructor walks through a feature that was introduced in Lightroom 4 beta: the ability to apply white balance changes selectively using the Adjustment Brush and the Graduated Filter. Not just exposure or clarity. Actual temperature and tint adjustments, painted or gradated onto specific parts of an image. It sounds small. It isn’t.
The example in the video is a travel or landscape photo where the sky carries too much warmth and yellow, while the horizon and foreground have a richness that would be destroyed if you cooled the whole image down. That is my life every time I shoot during golden hour in Tennessee. The technique below follows the video closely, with some extra context from my own use of it.
Step 1: Identify the White Balance Problem in Your Image
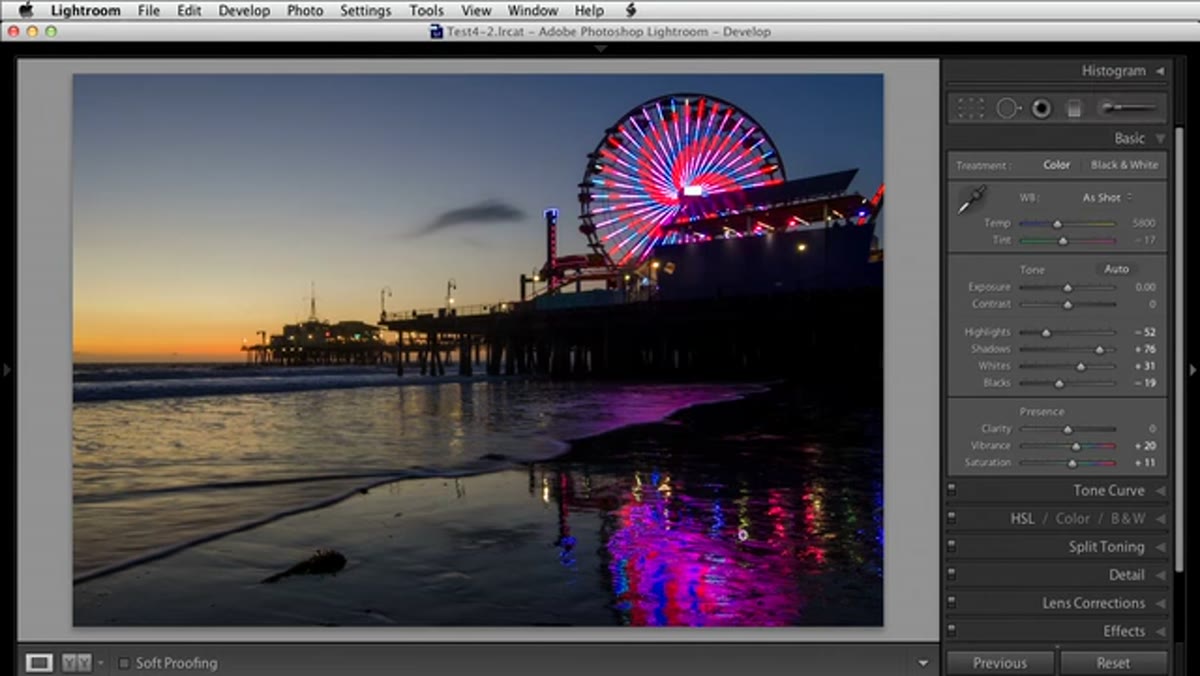 Landscape photo shown at “As Shot” white balance in Develop module
Start in the Develop module with your image set to “As Shot” so you’re seeing exactly what the camera captured. Look at the image in zones. Ask yourself whether the sky and the foreground are fighting each other temperature-wise. In the tutorial’s example, the blue sky has a yellow cast that reads as warm and slightly off, while the area below the horizon has a rich warmth that actually looks good. These are two separate problems in one frame, and they need two separate solutions.
Landscape photo shown at “As Shot” white balance in Develop module
Start in the Develop module with your image set to “As Shot” so you’re seeing exactly what the camera captured. Look at the image in zones. Ask yourself whether the sky and the foreground are fighting each other temperature-wise. In the tutorial’s example, the blue sky has a yellow cast that reads as warm and slightly off, while the area below the horizon has a rich warmth that actually looks good. These are two separate problems in one frame, and they need two separate solutions.
This diagnostic step matters more than people give it credit for. If you just drag the temperature slider around hoping something clicks, you’re going to keep making one zone right and one zone wrong. Decide which zone you want to protect and which one you want to fix. In most landscape situations, I protect the foreground warmth and fix the sky.
Step 2: Check What a Global White Balance Adjustment Does
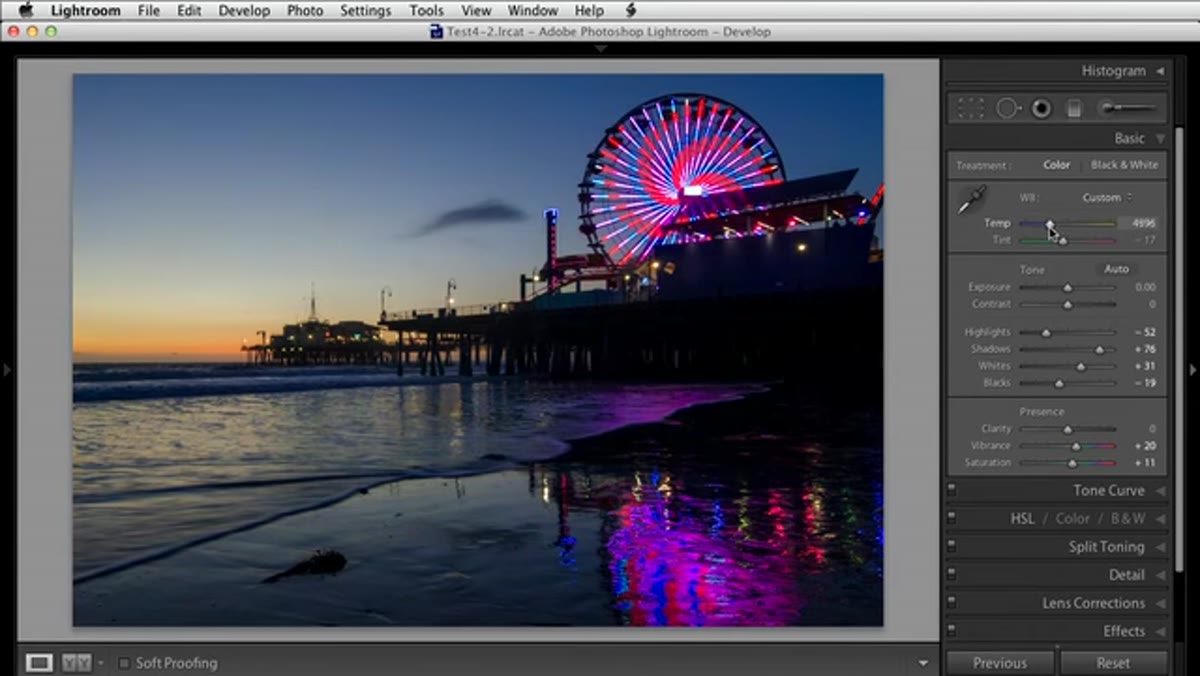 Temperature slider being moved left, cooling entire image
Before you touch any local adjustment tools, move the main Temperature slider in the Basic panel toward cool. Watch what happens to the foreground. This is intentionally showing you the problem, not solving it. The sky gets closer to the crisp blue you want, but the foreground loses its warmth and goes flat and cold. This is exactly why a global adjustment fails here.
Temperature slider being moved left, cooling entire image
Before you touch any local adjustment tools, move the main Temperature slider in the Basic panel toward cool. Watch what happens to the foreground. This is intentionally showing you the problem, not solving it. The sky gets closer to the crisp blue you want, but the foreground loses its warmth and goes flat and cold. This is exactly why a global adjustment fails here.
Now move it the other way, toward warm. The foreground looks great again. The sky turns muddy. Neither position is correct for the whole image. Once you’ve confirmed that the global slider can’t solve this alone, leave it wherever it looked best for your foreground, or simply return it to “As Shot.” The real fix happens in the next step.
Step 3: Open the Graduated Filter
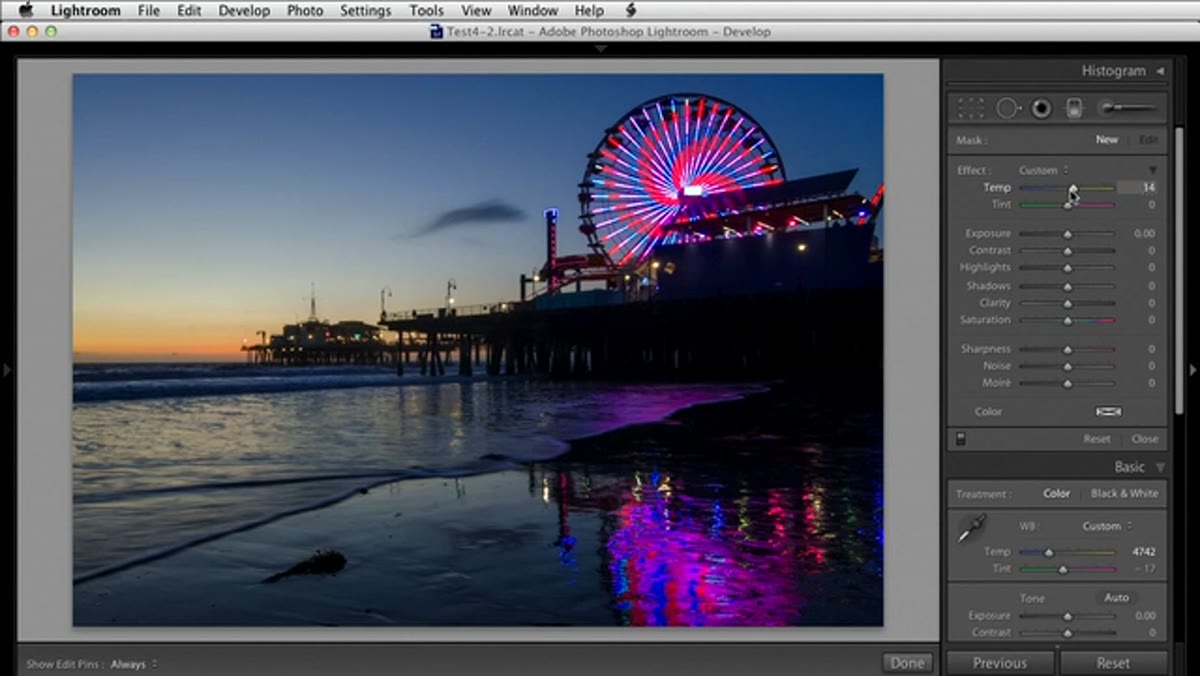 Graduated Filter panel open, Temperature slider at default zero
Click the Graduated Filter icon in the panel row above the Basic controls. It looks like a rectangle with a gradient. When the panel opens, you’ll see a set of sliders, and yes, Temperature and Tint are now in there. By default, Temperature will be sitting at zero, meaning no change applied. This is your starting point.
Graduated Filter panel open, Temperature slider at default zero
Click the Graduated Filter icon in the panel row above the Basic controls. It looks like a rectangle with a gradient. When the panel opens, you’ll see a set of sliders, and yes, Temperature and Tint are now in there. By default, Temperature will be sitting at zero, meaning no change applied. This is your starting point.
If you don’t see Temperature and Tint in your Graduated Filter panel and you’re on an older version of Lightroom, this is why updating matters. This feature was not always there. On current versions of Lightroom Classic and Lightroom CC, it’s present and ready to use.
Step 4: Dial In a Cooler Temperature Value
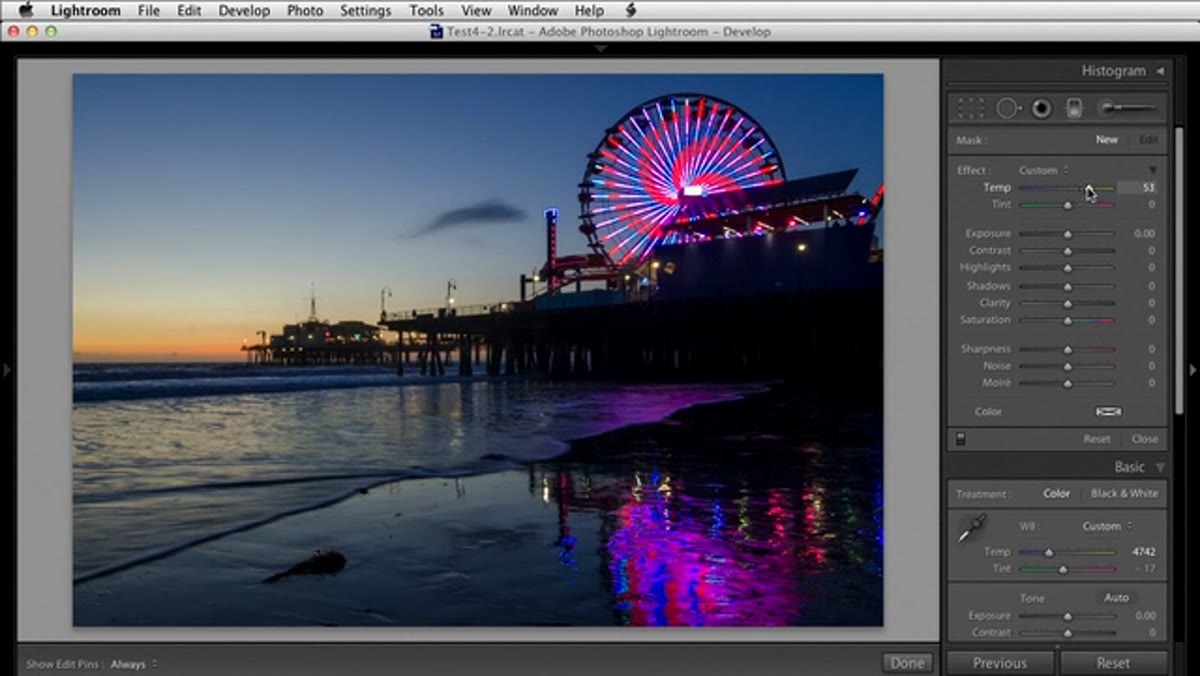 Temperature slider in Graduated Filter dragged toward the cool/blue side
Drag the Temperature slider inside the Graduated Filter panel toward the left, toward cooler, blue tones. You don’t need to be precise yet. Crank it far enough that you know you’ll see a visible change when you draw the gradient. The exact value depends on how warm your sky reads to begin with, but something in the range of -20 to -40 is a reasonable starting point for a shot with noticeable yellow in the sky.
Temperature slider in Graduated Filter dragged toward the cool/blue side
Drag the Temperature slider inside the Graduated Filter panel toward the left, toward cooler, blue tones. You don’t need to be precise yet. Crank it far enough that you know you’ll see a visible change when you draw the gradient. The exact value depends on how warm your sky reads to begin with, but something in the range of -20 to -40 is a reasonable starting point for a shot with noticeable yellow in the sky.
You’re setting the effect value before drawing the gradient, which is the most efficient workflow. You can always come back and adjust this value after you see how the gradient lands.
Step 5: Draw the Gradient from Bottom to Sky
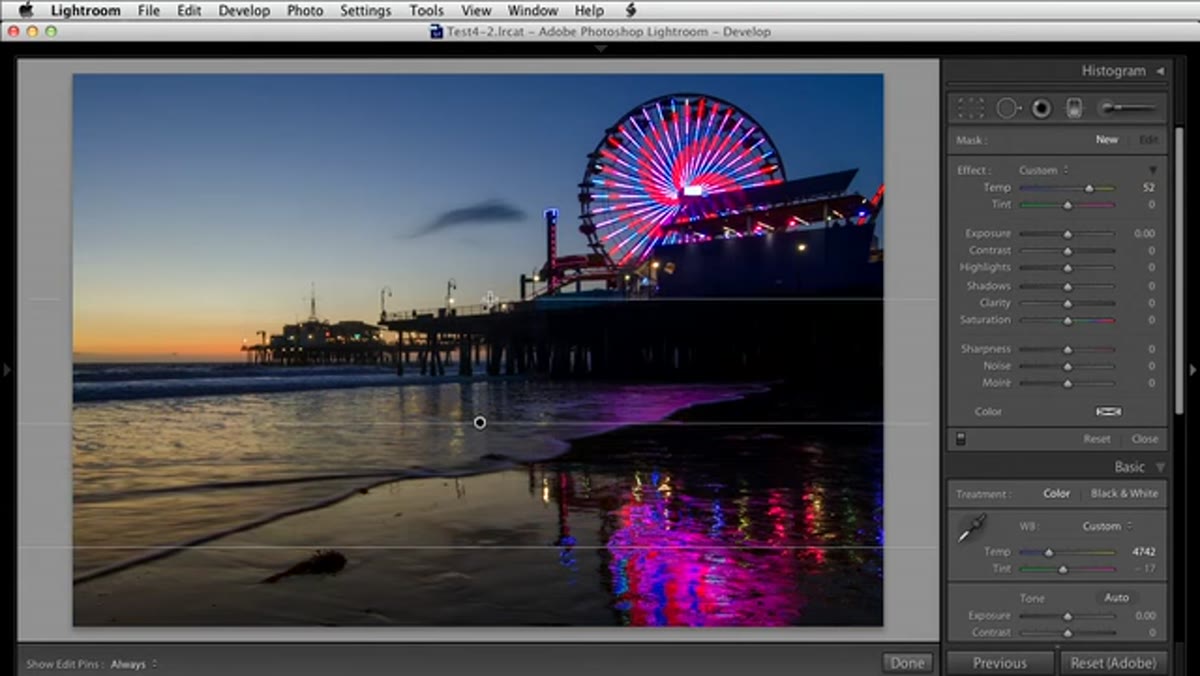 Graduated Filter being dragged upward from lower portion of image into sky
Click near the bottom of the image and drag upward into the sky. The graduated filter will apply your cooling effect most strongly at the top of the gradient and fade it out toward where you started the drag. The goal is to cool the sky while leaving the foreground untouched, or at least much less affected.
Graduated Filter being dragged upward from lower portion of image into sky
Click near the bottom of the image and drag upward into the sky. The graduated filter will apply your cooling effect most strongly at the top of the gradient and fade it out toward where you started the drag. The goal is to cool the sky while leaving the foreground untouched, or at least much less affected.
Don’t be afraid to drag the gradient up further into the sky than feels comfortable. The tutorial makes a good point here: skies often get warmer as they approach the horizon, so letting the gradient bleed down slightly into the upper portion of that warmer transition zone actually gives you a more natural result than a hard stop.
Step 6: Toggle the Filter On and Off to Check Your Work
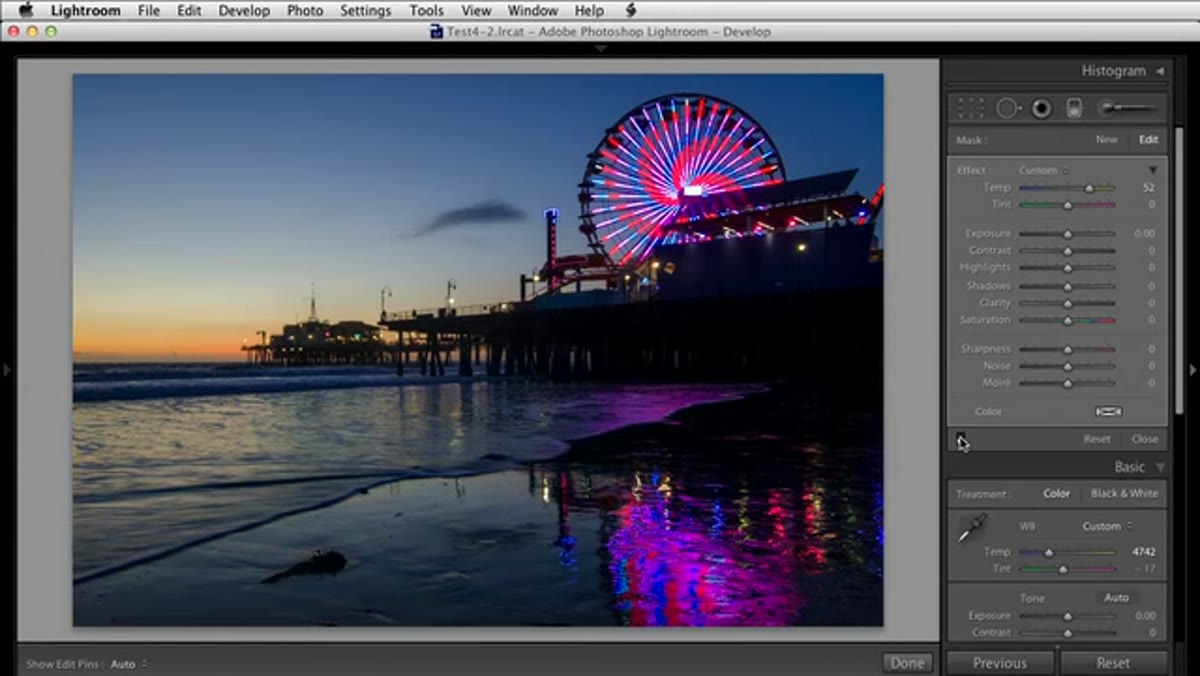 Toggle switch being turned on and off to compare before and after
Use the toggle switch at the bottom of the panel to flip between your original and the corrected version. This before-and-after comparison is the fastest way to check whether the fix reads as natural or as obviously processed. The sky should look crisper and bluer. The foreground should look unchanged or nearly so.
Toggle switch being turned on and off to compare before and after
Use the toggle switch at the bottom of the panel to flip between your original and the corrected version. This before-and-after comparison is the fastest way to check whether the fix reads as natural or as obviously processed. The sky should look crisper and bluer. The foreground should look unchanged or nearly so.
If the foreground is being affected more than you’d like, grab the gradient’s center line and drag it upward to push the effect higher into the frame. If the sky still looks too warm, drag the Temperature slider further into the cool range.
Where I Take This Further: Stacking It With the Adjustment Brush
The graduated filter is the clean, fast version of this fix. But sometimes the sky isn’t uniform, and a straight-line gradient doesn’t cut it. In those cases I use the Adjustment Brush with the same Temperature approach to hand-paint cooling onto specific areas of the sky, like a bright patch near the horizon or a section that the gradient missed because the horizon line isn’t flat.
The trick I’ve picked up is to do the graduated filter pass first to handle 80 percent of the problem, then switch to the brush for the detail work. Trying to do the whole thing with the brush is slow and usually less smooth-looking. Think of the graduated filter as your broad stroke and the brush as your cleanup tool. Same Temperature slider, same logic, just a different application method.
The single most important thing this tutorial taught me is that white balance doesn’t have to be a global decision. You’re not locked into one temperature for the entire frame. The graduated filter and adjustment brush in Lightroom let you treat different zones of an image as separate white balance environments, which changes how you approach mixed-light scenes entirely.
Watch the full tutorial on YouTube to see the instructor walk through the before-and-after comparison live. Seeing the toggle in action makes the effect click in a way that screenshots can’t quite replicate.
Comments
Leave a Comment