Most of my editing life happens in Lightroom. That’s no secret. But every so often a client sends over a JPEG that was shot in the wrong white balance, or I’m working on a composite where the color just feels a little… cooked. Too warm, slightly green, something’s off and I can’t quite name it. That’s when it’s worth stepping into Photoshop and using the Camera Raw filter as a correction tool, not just a RAW developer.
In this Aaron Nace (PHLEARN) tutorial from his 30 Days of Photoshop series, he walks through a clean, non-destructive color correction workflow that handles both RAW files and JPEGs. Watch the full tutorial on YouTube if you want to see it in action alongside this walkthrough. What I like about his approach is that it’s not just “drag the temperature slider until it looks right.” There’s actual logic behind it, and once you internalize that logic, you stop guessing.
The sample image he uses is a JPEG that reads slightly warm. Not broken, just a little off. That’s actually a harder problem than a severely color-shifted image, because the correction has to be subtle enough that it doesn’t swing past neutral and end up looking overcorrected. Here’s how he does it.
Step 1: Convert Your Layer to a Smart Object
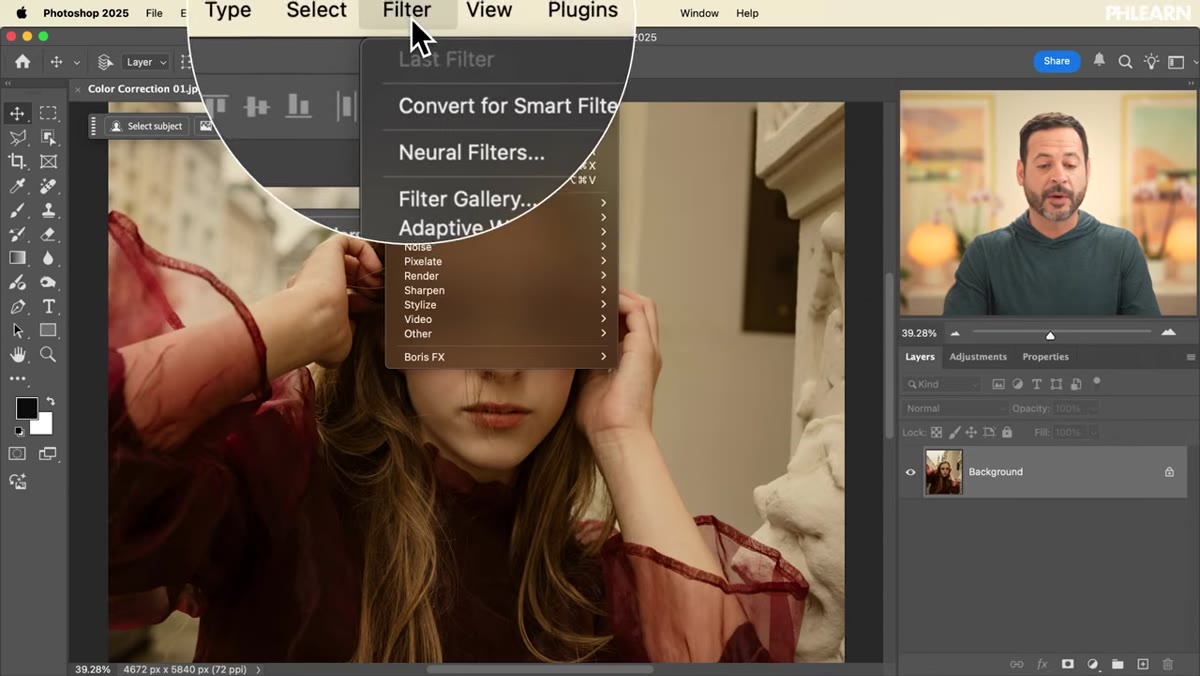 Converting background layer to Smart Object via Filter menu
Before touching any color settings, right-click your background layer in the Layers panel and choose “Convert to Smart Object,” or go to Filter and select “Convert for Smart Filters.” Either path gets you there. You’ll see a small icon appear on the layer thumbnail confirming the conversion.
This step matters more than it might seem. By working on a Smart Object, you can go back into your Camera Raw settings at any point and adjust them without permanently baking the correction into the pixels. It’s the same non-destructive instinct that drives most of my Lightroom work, just applied inside Photoshop.
Step 2: Open the Camera Raw Filter
 Navigating to Filter menu then Camera Raw Filter option
Go to Filter, then scroll down to “Camera Raw Filter.” Click it, and Camera Raw opens as an editable dialog on top of your image. If you’re used to opening RAW files directly in Photoshop, this will look identical to that interface. The only difference is you’re applying it to a JPEG or an existing layer rather than a native RAW file.
A quick note Aaron makes here: if you open a RAW photograph directly into Photoshop, Camera Raw launches automatically before you ever see the main workspace. The filter version is just a way to access that same toolset on any image type, at any point in your workflow.
Step 3: Navigate to the Color Section
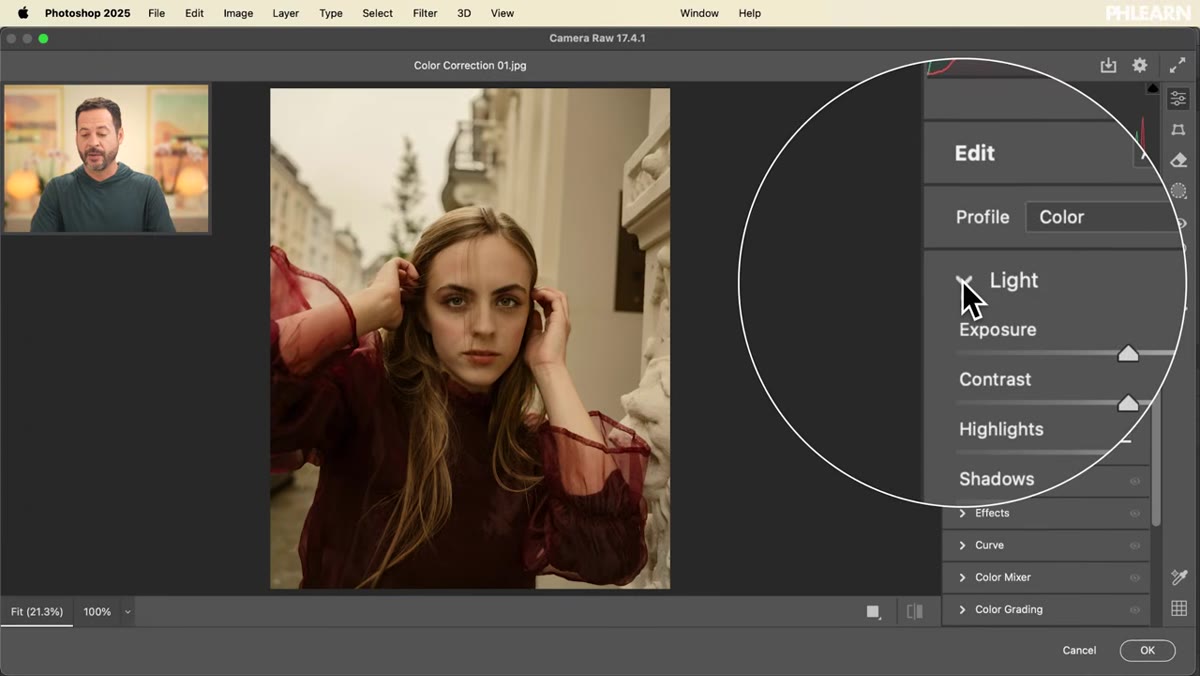 Camera Raw interface with Color panel selected
Inside Camera Raw, find the Color section in the right-hand panel. This is where your white balance controls live. You’ll see a Temperature slider (cool to warm, blue to yellow) and a Tint slider (green to magenta). For RAW files, there’s also a dropdown with presets like Daylight, Shade, Tungsten, and so on. For JPEGs, those presets won’t appear, but the sliders are still fully functional.
The goal of color correction at this stage is to reach a neutral baseline, not to add a creative look. Think of it as clearing the slate. Any stylistic grading happens after the correction is dialed in.
Step 4: Use the White Balance Tool on a Neutral Target
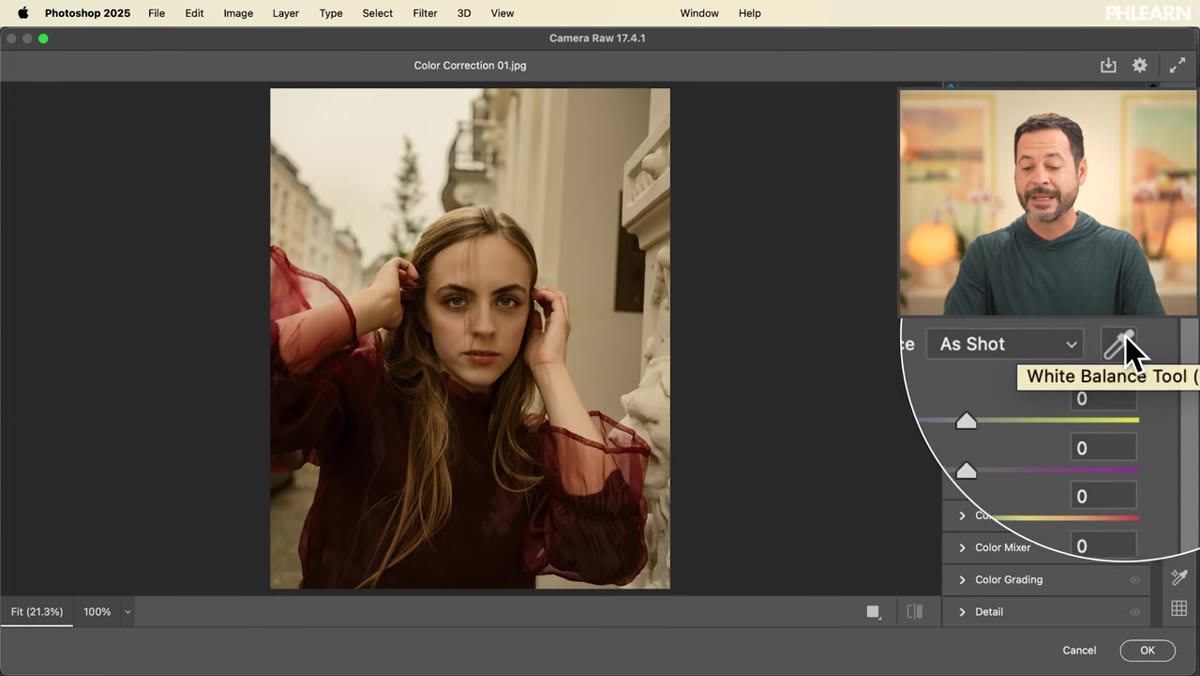 White balance eyedropper tool selected in Camera Raw toolbar
Select the White Balance tool from the Camera Raw toolbar. It looks like an eyedropper. Now click on something in your image that should be neutral gray. Not white, not black, but somewhere in that mid-gray range. A concrete sidewalk, a gray shirt, an overcast sky. Anything that in real life has no color cast at all.
What Camera Raw does when you click is essentially say, “Whatever color this pixel is, I’m going to shift the entire image so that this pixel becomes gray.” If you click on something that actually has color in it, like a red jacket or a green leaf, the whole image gets pulled in the opposite direction and looks wrong. Aaron demonstrates this with a click on a red area and the image goes aggressively cyan. Only click neutrals.
Step 5: Try the Auto White Balance Option
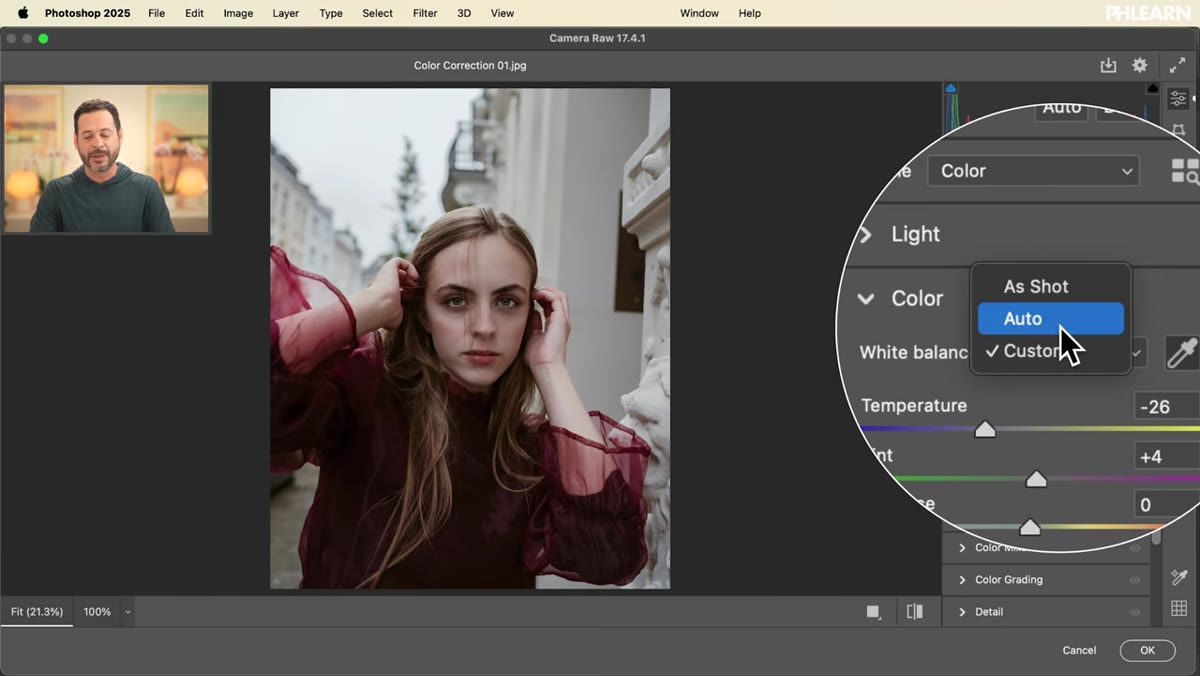 Auto button clicked in Camera Raw Color section
Next to the white balance controls in the Color section, there’s an Auto button. Aaron recommends trying it, and I’d agree. Camera Raw analyzes the image and makes its best guess at a neutral correction. For a lot of shots, especially ones that are mildly off rather than severely wrong, the Auto result is surprisingly close.
Use it as a starting point, not a final answer. After clicking Auto, check the Temperature and Tint values it landed on. If the result looks right to your eye, leave it. If it’s slightly over-corrected, nudge the sliders manually. The Auto function does the heavy lifting; you do the fine-tuning.
A Note on Gray Cards (And Why They’re Worth the Ten Dollars)
Here’s something Aaron mentions that I wish someone had told me earlier in my shooting days. A gray card is a small, calibrated piece of plastic or cardboard that is precisely 18% gray. You have your subject hold it up for one frame at the beginning of a shoot, and then in Camera Raw or Lightroom you click the white balance eyedropper on that card. Done. Perfect white balance, every time, no guessing required.
I started using one after spending way too long trying to match skin tones across a portrait session that was shot half in shade and half in direct sun. The gray card frame becomes your anchor. I keep a small one in my camera bag the same way I keep a lens cloth. It costs almost nothing and saves real time in post.
The single most important idea in this whole technique is the concept of a “target neutral.” Your white balance tool is only as accurate as the reference point you give it. Click on something truly neutral and the correction is logical and precise. Click on the wrong thing and you’re just pushing color around randomly. Find your gray, click your gray, then refine from there.
If you work mostly in Lightroom like I do, you already have access to the same eyedropper tool in the Basic panel. The Camera Raw filter inside Photoshop is the same engine, just accessed differently. Once you understand the logic, it transfers everywhere.
Watch the full tutorial on YouTube to see Aaron walk through the before and after in real time. It’s part of his 30 Days of Photoshop series, and this episode is a solid one to bookmark.
Comments
Leave a Comment