
There is a specific kind of misery that comes from finishing a three-hour portrait session, loading 400 images into Lightroom, and realizing the white balance is wrong on every single one. I’ve been there more times than I want to admit. Early on, when I was editing press shots for my band because we genuinely couldn’t afford to hire someone, I used to fix white balance manually, image by image, like some kind of digital monk. It took forever and the results were inconsistent. Learning to batch this process correctly was one of the single biggest upgrades to my editing workflow.
In a recent episode of The Lightroom Show, Scott Kelby and RC Concepcion walk through exactly how to handle this, both for photographers shooting tethered and those working from a card dump after the fact. Watch the full tutorial on YouTube – but if you want a step-by-step breakdown you can follow alongside your own images, keep reading. There are three distinct techniques here, and each one is worth understanding on its own terms.
Step 1: Photograph a Gray Card at the Start of Your Session
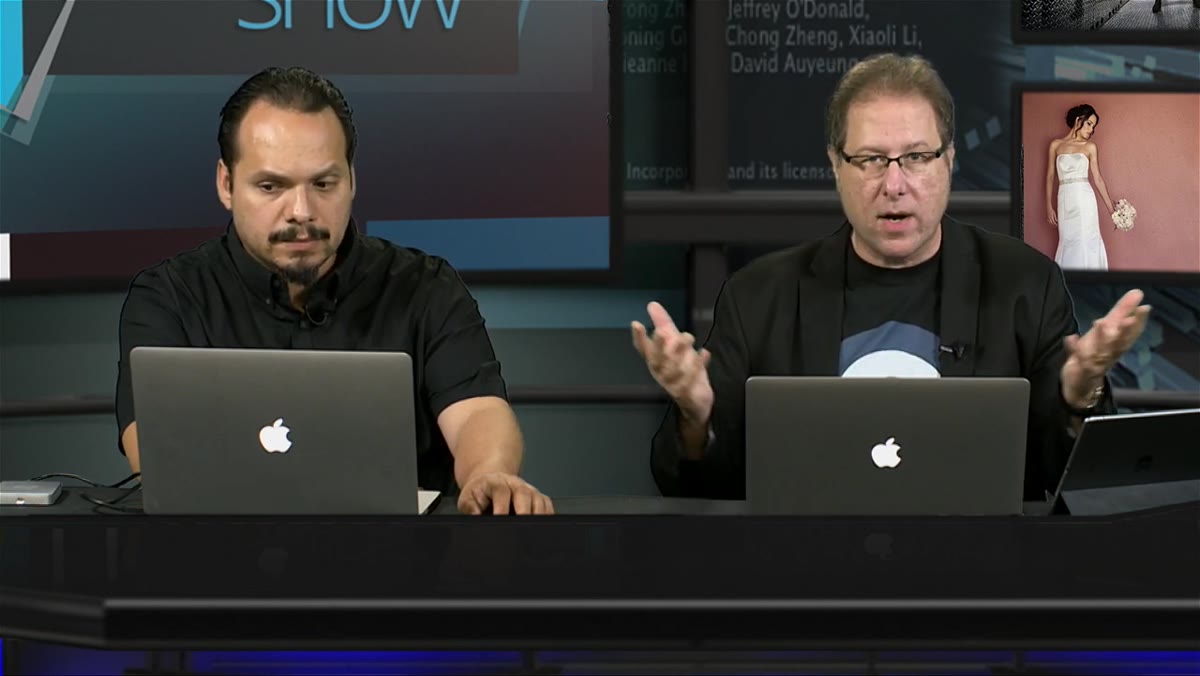 Photographer’s subject holding a gray card on camera
Before you do anything in Lightroom, the fix starts in camera. At the beginning of your shoot, once your lighting is locked in, have your subject hold a gray card and take a single frame. A proper 18% gray card gives Lightroom’s white balance eyedropper a neutral reference point – something that is actually colorless, so the tool can calculate exactly how far off your color temperature is. Gray cards run about ten dollars at any camera shop, and some photography books include a tear-out version in the back. The brand doesn’t matter much. A flat, matte, neutral gray surface is all you need.
Photographer’s subject holding a gray card on camera
Before you do anything in Lightroom, the fix starts in camera. At the beginning of your shoot, once your lighting is locked in, have your subject hold a gray card and take a single frame. A proper 18% gray card gives Lightroom’s white balance eyedropper a neutral reference point – something that is actually colorless, so the tool can calculate exactly how far off your color temperature is. Gray cards run about ten dollars at any camera shop, and some photography books include a tear-out version in the back. The brand doesn’t matter much. A flat, matte, neutral gray surface is all you need.
The key is timing. Take this shot after your lights are set and before you start shooting in earnest. If the lighting changes mid-session – you move a strobe, you go outside – take another gray card shot at that point. Think of it as a checkpoint save.
Step 2: Use the White Balance Eyedropper on the Gray Card Frame
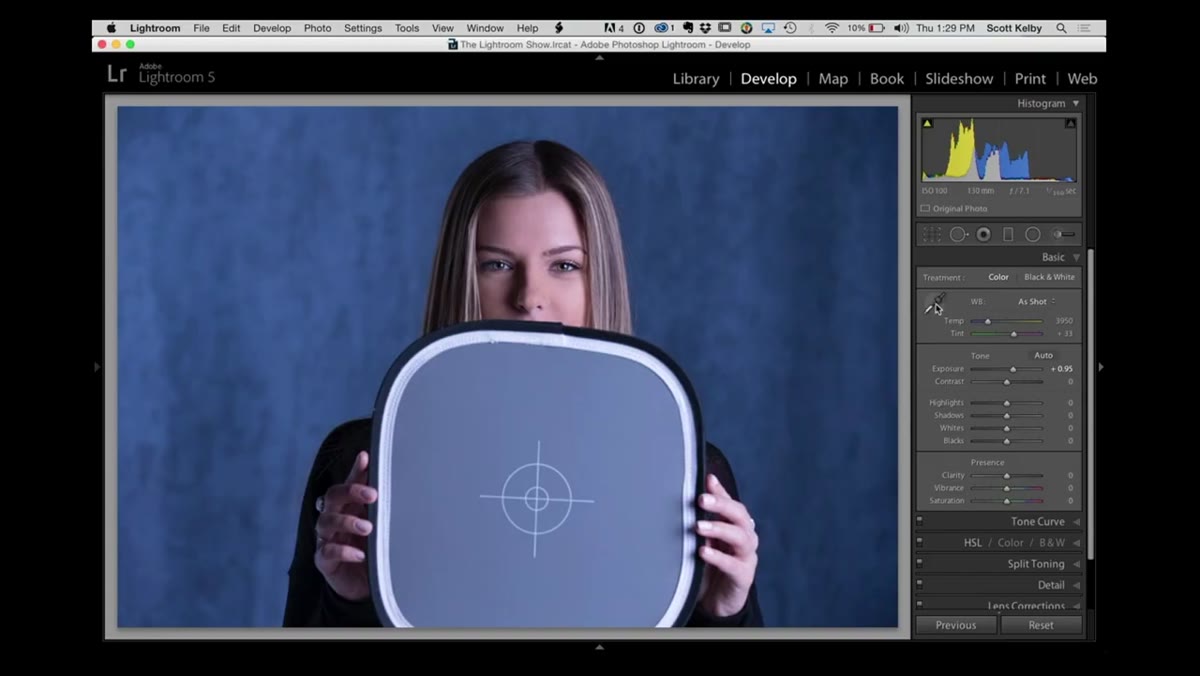 White balance eyedropper tool selected in Lightroom Develop panel
With your gray card image open in Lightroom’s Develop module, grab the White Balance Selector tool – it looks like an eyedropper and lives at the top left of the Basic panel. Click directly on the gray card in the image. Lightroom reads the color of that pixel, determines what “neutral” should look like, and shifts the Temperature and Tint sliders to compensate. One click, and your white balance is mathematically correct for the lighting conditions of that shoot.
White balance eyedropper tool selected in Lightroom Develop panel
With your gray card image open in Lightroom’s Develop module, grab the White Balance Selector tool – it looks like an eyedropper and lives at the top left of the Basic panel. Click directly on the gray card in the image. Lightroom reads the color of that pixel, determines what “neutral” should look like, and shifts the Temperature and Tint sliders to compensate. One click, and your white balance is mathematically correct for the lighting conditions of that shoot.
This single action is the foundation for everything that follows. You’re not guessing at a Kelvin number or dragging sliders until it “looks right.” You’re giving Lightroom a ground truth to work from.
Step 3: Set Tethered Develop Settings to “Same as Previous”
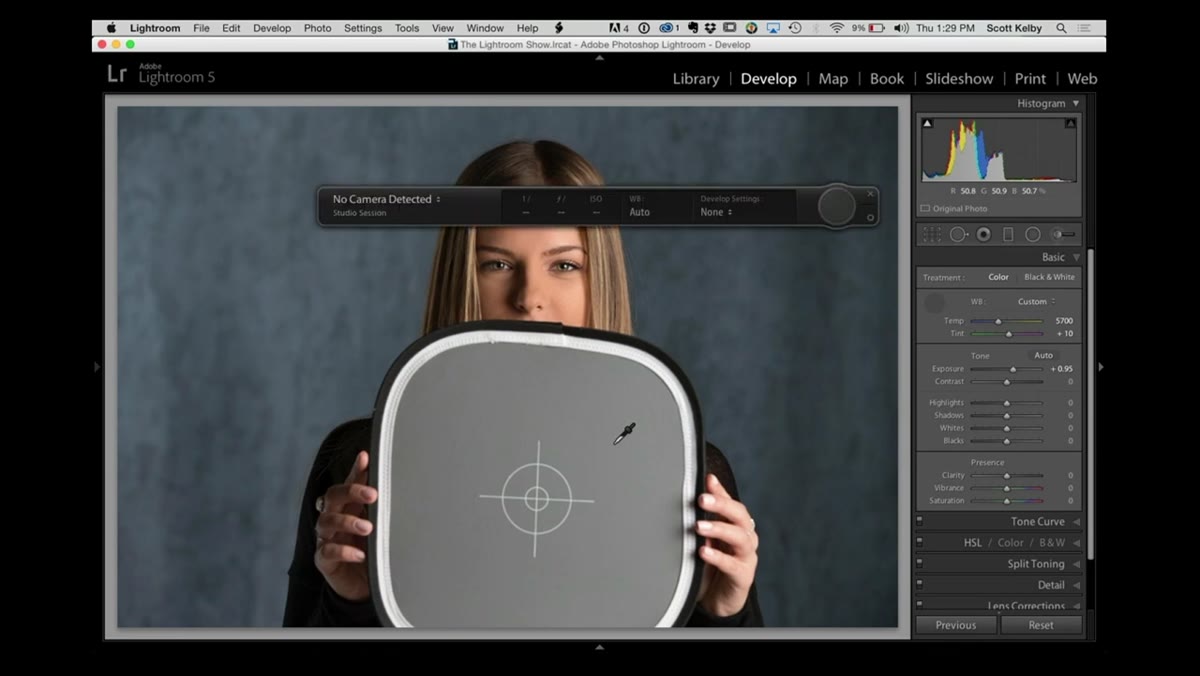 Tethered capture heads-up display showing Develop Settings dropdown
If you’re shooting tethered – meaning your camera is connected directly to your computer and images are landing in Lightroom in real time – this next step is the one that makes the whole system automatic. Open the tethered capture heads-up display (File > Tethered Capture > Start Tethered Capture) and find the Develop Settings dropdown. By default it’s set to None. Change it to “Same as Previous.”
Tethered capture heads-up display showing Develop Settings dropdown
If you’re shooting tethered – meaning your camera is connected directly to your computer and images are landing in Lightroom in real time – this next step is the one that makes the whole system automatic. Open the tethered capture heads-up display (File > Tethered Capture > Start Tethered Capture) and find the Develop Settings dropdown. By default it’s set to None. Change it to “Same as Previous.”
From that point forward, every new image that comes into Lightroom will inherit the develop settings from the last image – including your corrected white balance. You fix it once on the gray card frame, and every subsequent shot is color-corrected the moment it lands. For studio work or any controlled environment where the lighting isn’t changing, this is a genuine game-changer.
Step 4: For Non-Tethered Shoots, Use Auto Sync Instead of Copy-Paste
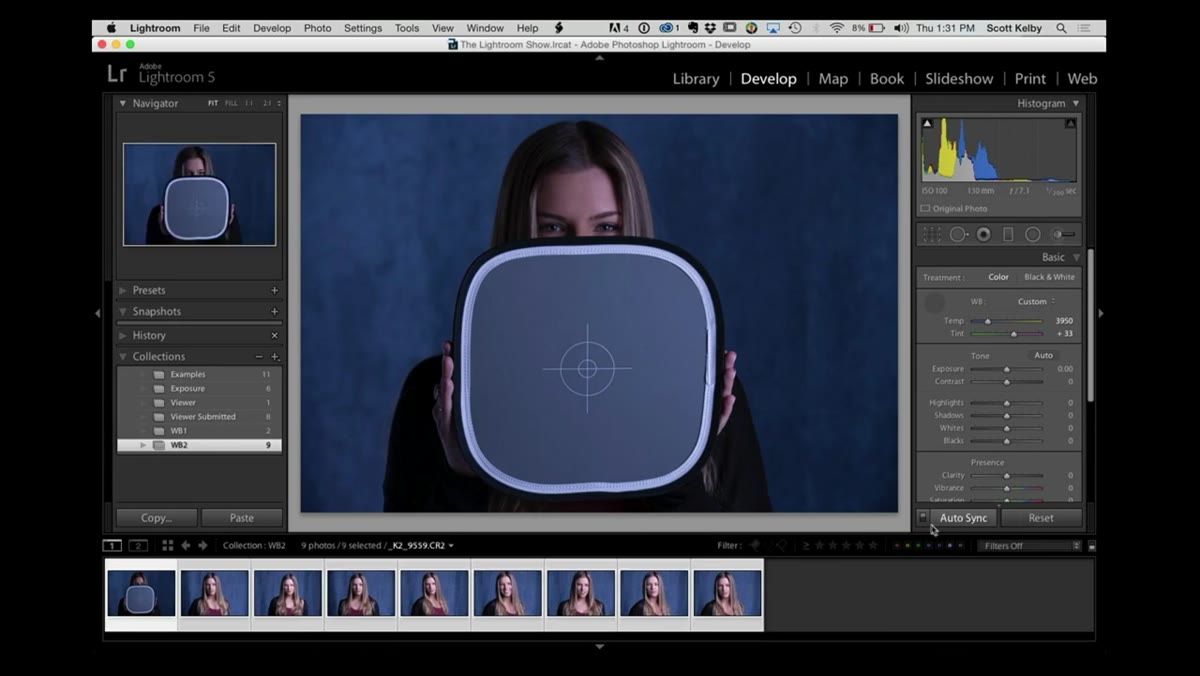 Auto Sync button highlighted in Lightroom with multiple images selected
When you’re not shooting tethered and you’re working from an imported card, the approach changes slightly – but the core idea is the same. Select all the images from that lighting setup in the grid (Grid view in the Library module makes this easy). Then, before you touch the white balance eyedropper, make sure Auto Sync is turned on. It’s the small switch next to the Sync button at the bottom of the right panel in Develop. Flip it on.
Auto Sync button highlighted in Lightroom with multiple images selected
When you’re not shooting tethered and you’re working from an imported card, the approach changes slightly – but the core idea is the same. Select all the images from that lighting setup in the grid (Grid view in the Library module makes this easy). Then, before you touch the white balance eyedropper, make sure Auto Sync is turned on. It’s the small switch next to the Sync button at the bottom of the right panel in Develop. Flip it on.
Auto Sync means that whatever you do to the most-selected image (the one with the brightest thumbnail border) gets applied to all selected images simultaneously. Click the eyedropper on the gray card image with Auto Sync active, and every selected photo is corrected in one move. No copying, no pasting, no dialog box asking you which settings to include. It is cleaner and faster than the Copy-Paste method, which works but adds unnecessary steps.
Step 5: Do a Light Exposure Pass After White Balance Is Locked In
 Highlights slider being pulled down in Lightroom Basic panel
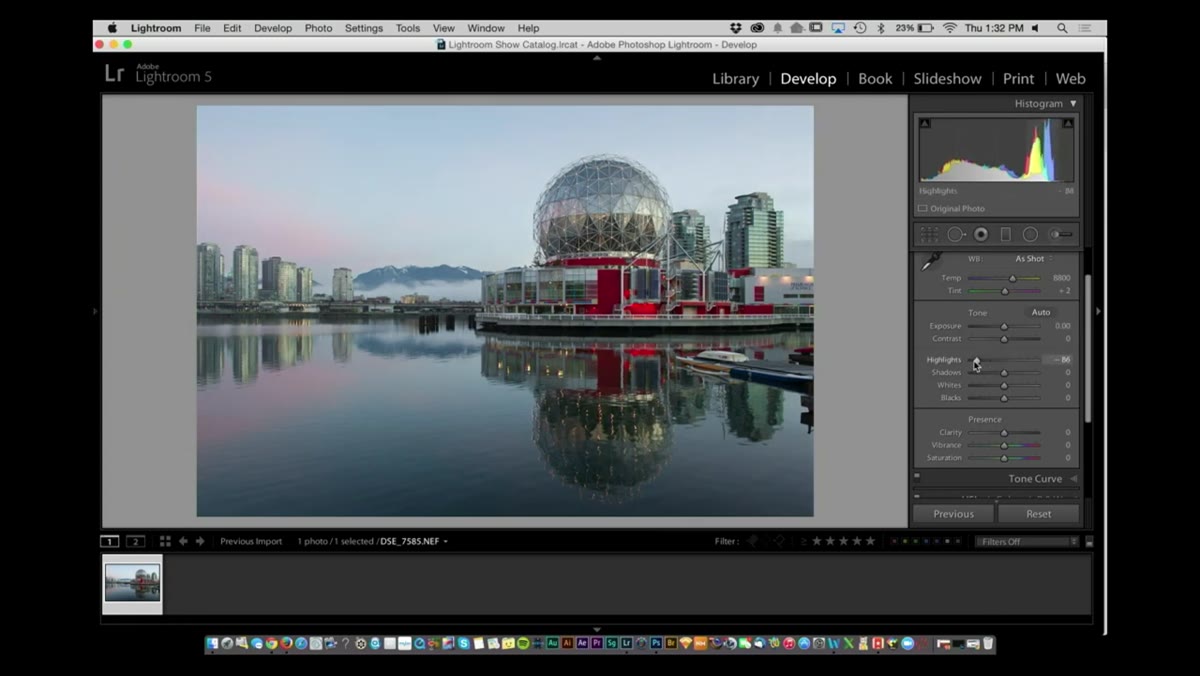
Once your white balance is consistent across the batch, the hosts pivot to a quick refinement pass on a landscape image a viewer submitted. The adjustment is subtle but instructive. If your sky is slightly blown out or lacking detail, pulling the Highlights slider to the left – even just to -30 or -40 – can recover texture and gradation that was invisible at zero. Then, if the overall exposure still reads a touch hot, a small nudge of the Exposure slider (something like -0.15 to -0.25) brings the whole image into balance without darkening the shadows.
Highlights slider being pulled down in Lightroom Basic panel
Once your white balance is consistent across the batch, the hosts pivot to a quick refinement pass on a landscape image a viewer submitted. The adjustment is subtle but instructive. If your sky is slightly blown out or lacking detail, pulling the Highlights slider to the left – even just to -30 or -40 – can recover texture and gradation that was invisible at zero. Then, if the overall exposure still reads a touch hot, a small nudge of the Exposure slider (something like -0.15 to -0.25) brings the whole image into balance without darkening the shadows.
These two moves together are what I’d call a “quiet fix.” Nothing dramatic, nothing that announces itself. The image just looks like it was shot on a better day.
What I Do Differently (And Why It Might Help You Too)
The Auto Sync method is the one I use in almost every session, but I’ve added one small habit on top of it: I rate the gray card frame with a zero-star reject flag immediately after using it. That way, when I export or build a contact sheet, the reference image doesn’t sneak into the delivery. It sounds obvious, but I’ve accidentally sent clients a photo of someone holding a gray card more than once. Flagging it takes two seconds and costs nothing.
I also keep a preset I call “Gray Card Baseline” (named after a Tom Waits track, naturally) that locks in zero adjustments to everything except white balance. Applying it first means the eyedropper is working from a clean slate, with no previous edits muddying the reference read.
The single most valuable thing in this tutorial is the Auto Sync workflow. It collapses what used to be a multi-step process – fix one image, open copy dialog, uncheck everything except white balance, select other images, paste – into a single eyedropper click. If you shoot portraits, events, or anything in a controlled lighting environment, building this habit will pay back the time it takes to learn it within your very first session.
Watch the full tutorial on YouTube to see Scott and RC demonstrate this live, including the tethered workflow in real time.
Comments (1)
I've been looking for exactly this kind of tutorial. Perfect timing.
Leave a Comment