There’s a specific kind of frustration that hits when you nail the light, the moment, the composition - and then get home and realize the building in the background looks like it’s about to tip over. Wide-angle lenses are incredible for landscape and architectural work, but physics doesn’t care about your portfolio. The way light bends through a short focal length creates converging lines and skewed geometry that can turn a strong image into an awkward one. I’ve thrown out more frames than I’d like to admit because I didn’t know how to fix it in post.
That changed when I found the Guided Upright Tool in Lightroom. It’s not brand new at this point, but a lot of photographers still haven’t touched it, which is a shame because it genuinely replaces a lot of expensive workarounds. In this First Man Photography tutorial, Adam walks through exactly how the tool works using two real images - one that needs a dramatic rescue and one that just needs a nudge. Watch the full tutorial on YouTube if you want to follow along, or work through the steps below to get the technique locked in.
The thing I appreciate most about this tutorial is that Adam doesn’t just show you the happy path. He uses a legitimately bad image first - one with severe, obvious perspective problems - so you can see the tool’s full range before applying it to something more polished. That’s good teaching, and it’s why this walkthrough stuck with me.
Step 1: Start in the Develop Module
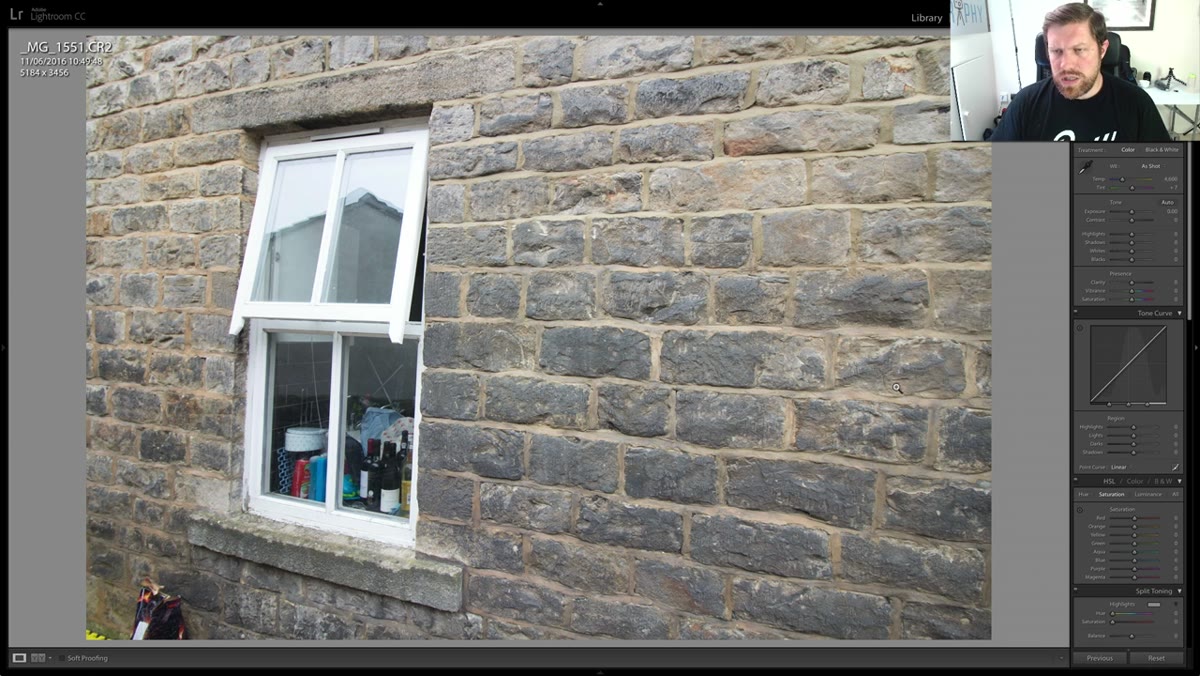 Lightroom Develop module open with a distorted architectural image
Before you touch the Guided Upright Tool, make sure you’re working in the Develop module. Press D on your keyboard if you’re coming from the Library view. This seems obvious, but the Transform panel where Guided Upright lives doesn’t appear anywhere else, and skipping this trips people up more than it should.
Lightroom Develop module open with a distorted architectural image
Before you touch the Guided Upright Tool, make sure you’re working in the Develop module. Press D on your keyboard if you’re coming from the Library view. This seems obvious, but the Transform panel where Guided Upright lives doesn’t appear anywhere else, and skipping this trips people up more than it should.
Step 2: Enable Lens Corrections First
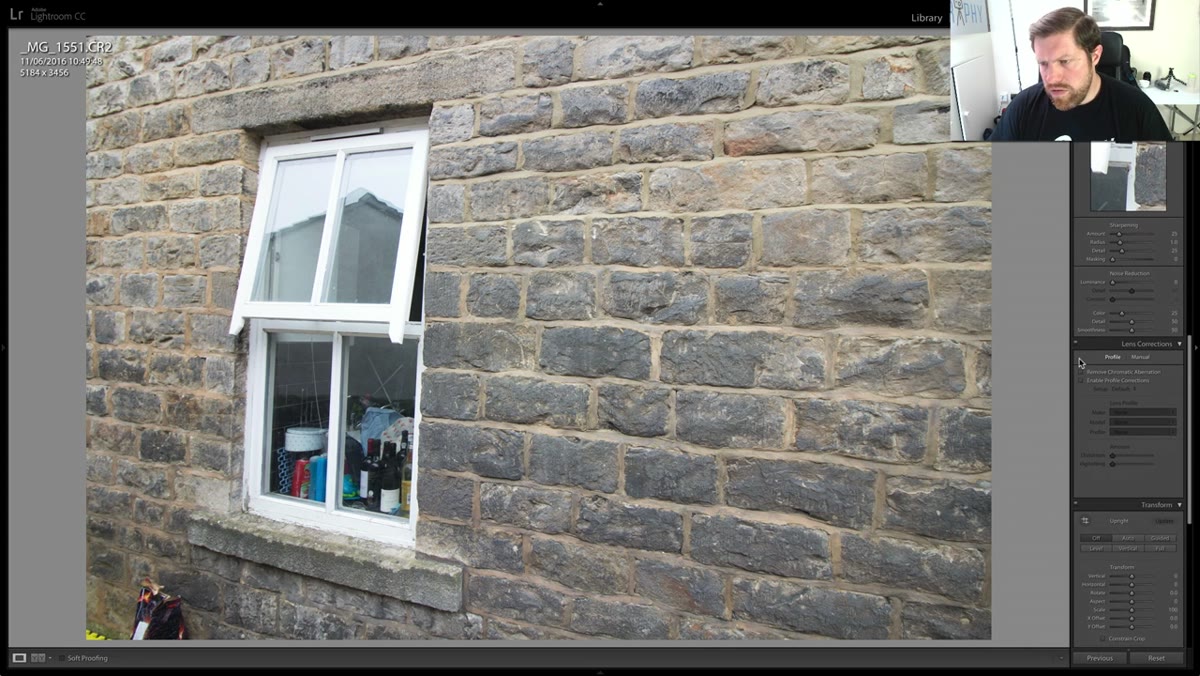 Lens Corrections panel showing Remove Chromatic Aberration and Profile Corrections checkboxes
Scroll down to the Lens Corrections panel and check two boxes: Remove Chromatic Aberration and Enable Profile Corrections. Adam is clear about why this matters - running lens corrections before using Guided Upright gives you consistently better results. The tool is trying to interpret geometry in your image, and a lens-corrected file gives it cleaner data to work with. Think of it as leveling the playing field before you start drawing guides. Don’t skip this step even if the chromatic aberration in your shot looks minor.
Lens Corrections panel showing Remove Chromatic Aberration and Profile Corrections checkboxes
Scroll down to the Lens Corrections panel and check two boxes: Remove Chromatic Aberration and Enable Profile Corrections. Adam is clear about why this matters - running lens corrections before using Guided Upright gives you consistently better results. The tool is trying to interpret geometry in your image, and a lens-corrected file gives it cleaner data to work with. Think of it as leveling the playing field before you start drawing guides. Don’t skip this step even if the chromatic aberration in your shot looks minor.
Step 3: Open the Transform Panel and Select Guided
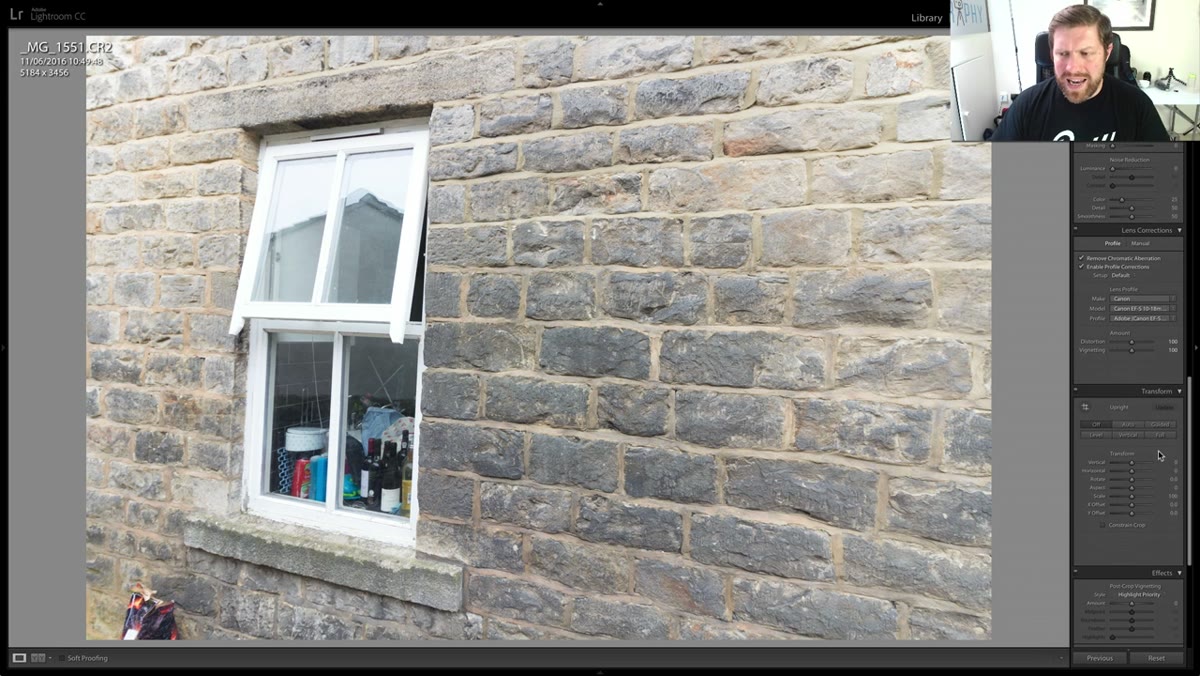 Transform panel expanded with Guided option highlighted
Still in the Develop module, scroll down past Lens Corrections until you reach the Transform panel. If it’s collapsed, click the arrow to expand it. You’ll see several options - Auto, Guided, Level, Vertical, Full. Click Guided. This activates the guide-drawing mode, which lets you manually tell Lightroom which lines in your image should be straight. That manual control is the whole point. The automatic options make educated guesses; Guided lets you be precise.
Transform panel expanded with Guided option highlighted
Still in the Develop module, scroll down past Lens Corrections until you reach the Transform panel. If it’s collapsed, click the arrow to expand it. You’ll see several options - Auto, Guided, Level, Vertical, Full. Click Guided. This activates the guide-drawing mode, which lets you manually tell Lightroom which lines in your image should be straight. That manual control is the whole point. The automatic options make educated guesses; Guided lets you be precise.
Step 4: Draw Your Vertical Guides
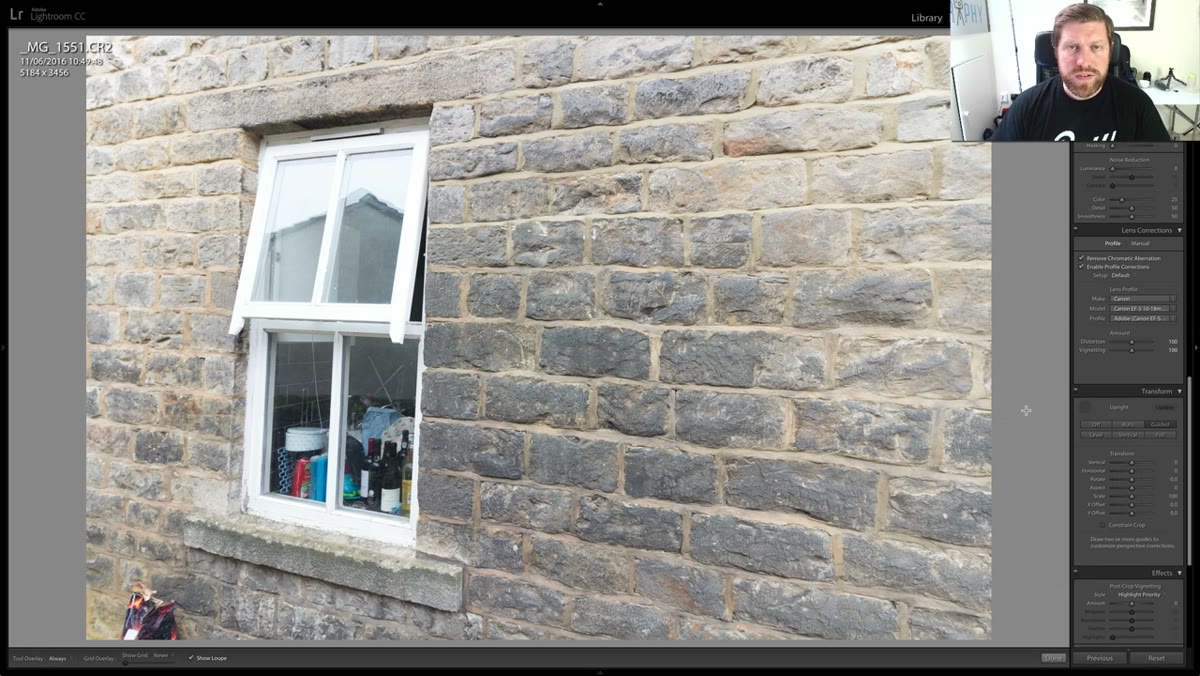 Two vertical guide lines drawn along building edges in the image
With Guided mode active, your cursor becomes a drawing tool. Click and drag along any line in your image that should be perfectly vertical - the edge of a building, a door frame, a window edge. Lightroom displays a small loupe (a magnified pop-up view) as you draw, which helps you snap your guide exactly to the line you’re targeting. Draw two vertical guides. More isn’t always better here - two strong, clearly defined vertical references give the algorithm what it needs without overcomplicating the calculation.
Two vertical guide lines drawn along building edges in the image
With Guided mode active, your cursor becomes a drawing tool. Click and drag along any line in your image that should be perfectly vertical - the edge of a building, a door frame, a window edge. Lightroom displays a small loupe (a magnified pop-up view) as you draw, which helps you snap your guide exactly to the line you’re targeting. Draw two vertical guides. More isn’t always better here - two strong, clearly defined vertical references give the algorithm what it needs without overcomplicating the calculation.
Step 5: Draw Your Horizontal Guides
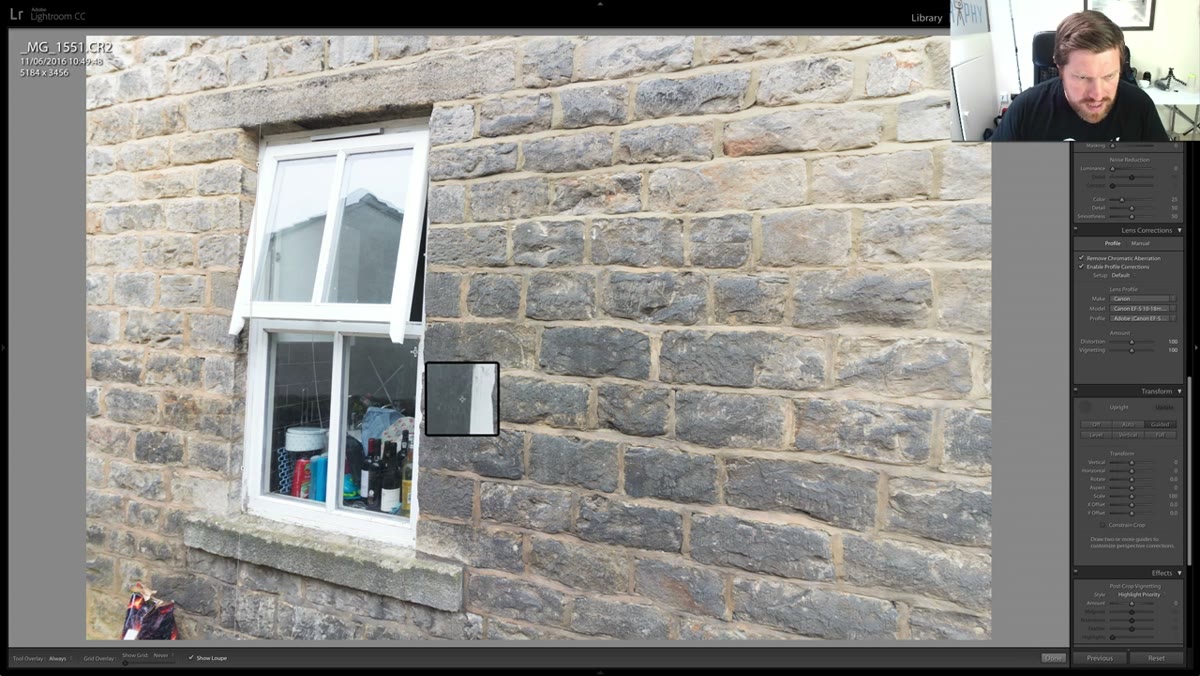 Horizontal guides added across windowsill and architectural lines
After your two verticals, draw two horizontal guides along lines that should be perfectly level - a windowsill, a roofline, a floor edge. The combination of two verticals and two horizontals is where Guided Upright really earns its reputation. Each pair corrects a different axis of distortion, and together they can straighten an image with complex, multi-directional perspective problems. In the tutorial, Adam draws his horizontals along two different elements in the same image because they each have a slightly different tilt - which is exactly the kind of scenario where manual guides beat any automatic correction.
Horizontal guides added across windowsill and architectural lines
After your two verticals, draw two horizontal guides along lines that should be perfectly level - a windowsill, a roofline, a floor edge. The combination of two verticals and two horizontals is where Guided Upright really earns its reputation. Each pair corrects a different axis of distortion, and together they can straighten an image with complex, multi-directional perspective problems. In the tutorial, Adam draws his horizontals along two different elements in the same image because they each have a slightly different tilt - which is exactly the kind of scenario where manual guides beat any automatic correction.
Step 6: Release and Review the Correction
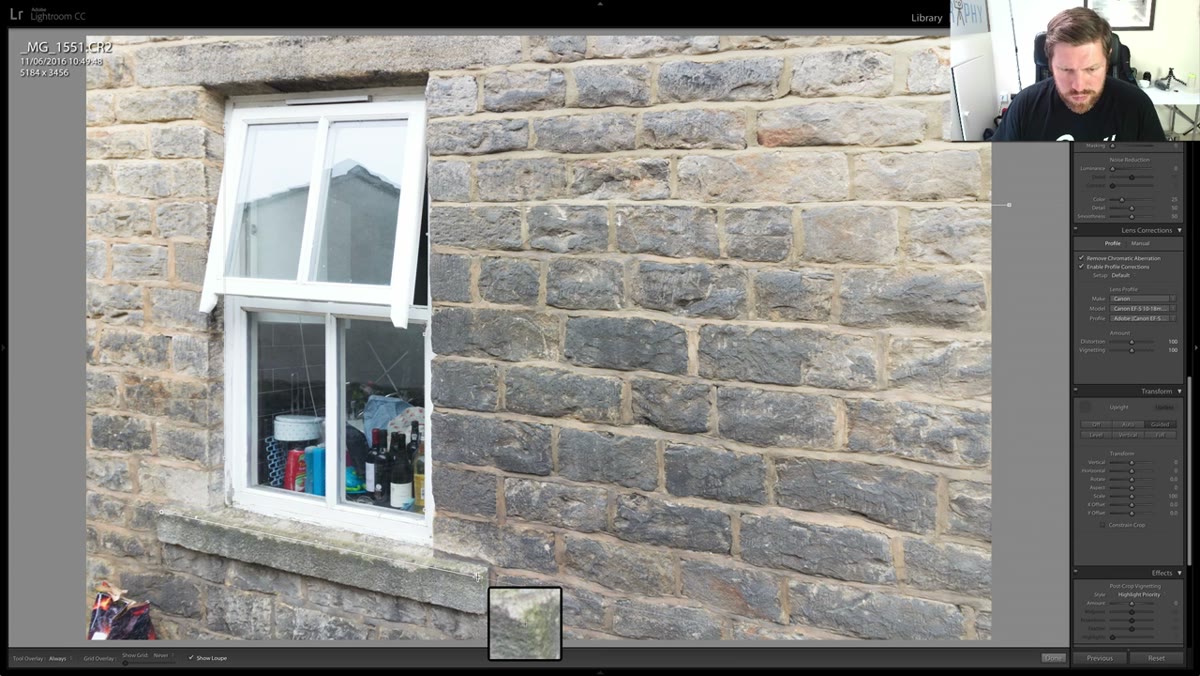 Before and after comparison showing dramatic perspective correction
When you release the last guide, Lightroom recalculates the geometry of the entire image. The result can be pretty dramatic, especially on a severely distorted shot. What you’ll likely notice along with the straighter lines is white space appearing at the edges of the frame - irregular blank areas where Lightroom warped the image but had no pixel data to fill in. That’s normal and expected. Don’t panic. It means the correction is working. On subtle corrections, the white space may be minimal or absent entirely. On heavy corrections, you’ll need to deal with it - which brings us to the next step.
Before and after comparison showing dramatic perspective correction
When you release the last guide, Lightroom recalculates the geometry of the entire image. The result can be pretty dramatic, especially on a severely distorted shot. What you’ll likely notice along with the straighter lines is white space appearing at the edges of the frame - irregular blank areas where Lightroom warped the image but had no pixel data to fill in. That’s normal and expected. Don’t panic. It means the correction is working. On subtle corrections, the white space may be minimal or absent entirely. On heavy corrections, you’ll need to deal with it - which brings us to the next step.
Step 7: Handle the White Space in Photoshop
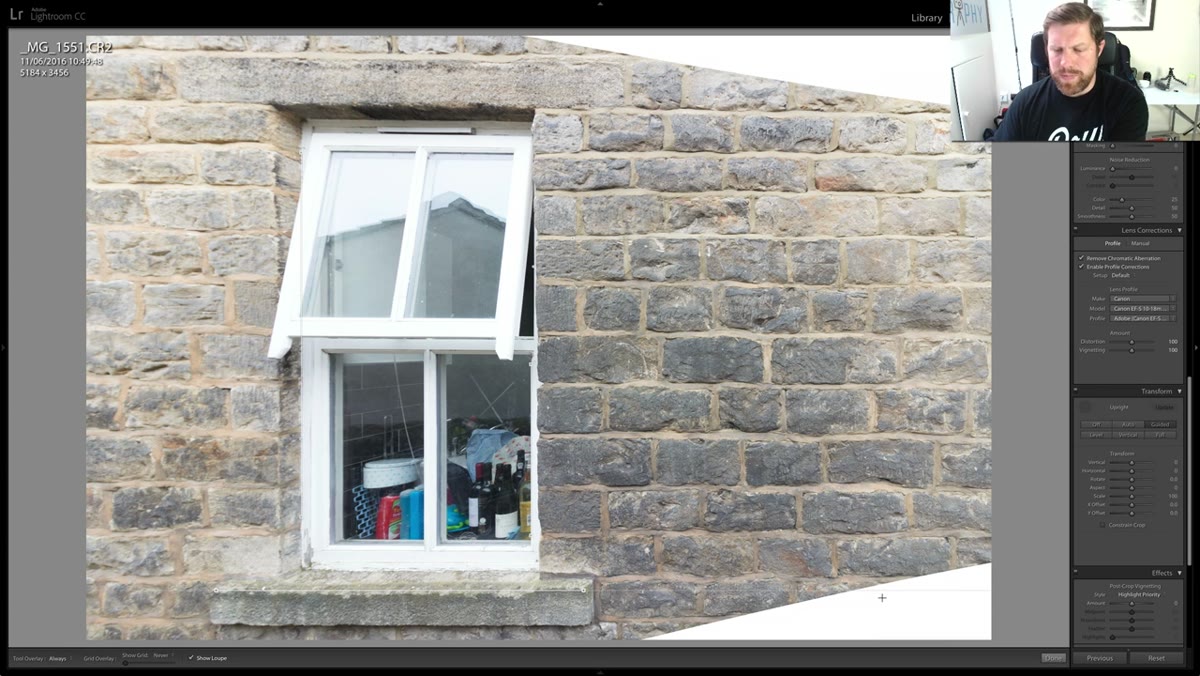 Corrected image showing white edge artifacts from perspective warp
Adam recommends taking the image into Photoshop to clean up any white space left by the correction. The standard move here is Content-Aware Fill - select the white areas with the lasso tool and let Photoshop synthesize plausible detail based on surrounding pixels. For images with consistent textures like sky, grass, or brick, it works remarkably well. For complex edges, you may need to clone or patch manually. Either way, the Lightroom correction gets you 90% of the way there, and a few minutes in Photoshop finishes the job.
Corrected image showing white edge artifacts from perspective warp
Adam recommends taking the image into Photoshop to clean up any white space left by the correction. The standard move here is Content-Aware Fill - select the white areas with the lasso tool and let Photoshop synthesize plausible detail based on surrounding pixels. For images with consistent textures like sky, grass, or brick, it works remarkably well. For complex edges, you may need to clone or patch manually. Either way, the Lightroom correction gets you 90% of the way there, and a few minutes in Photoshop finishes the job.
What I’d Add: Use This Tool Even When You Don’t Think You Need To
The emergency rescue use case is the flashy one, but I’ve found the Guided Upright Tool most valuable on images that look fine at first glance. When you’re shooting at 20mm or wider, almost every frame with a building or structured subject has some degree of perspective creep - you’ve just gotten used to seeing it. I’ve started running Guided Upright as a regular check on architectural and landscape shots, not just the obvious disasters, and the before/after difference on “good” images is often surprising. Two guides on a well-framed shot can quietly transform the image from “pretty good” to “actually sharp and intentional.” It’s one of those tools that improves everything once you stop saving it for emergencies.
The core takeaway from this tutorial is simple: don’t let perspective distortion be the reason a strong photo gets left in the reject pile. The Guided Upright Tool puts precise control in your hands, and combined with a quick Photoshop cleanup, it can genuinely recover images that would otherwise be unusable - or elevate ones that were already working. Four guides, two panels, and a few minutes is all it takes.
Watch the full tutorial on YouTube to see Adam walk through both images in real time - the before/after on the first shot especially is worth seeing with your own eyes.
Comments
Leave a Comment