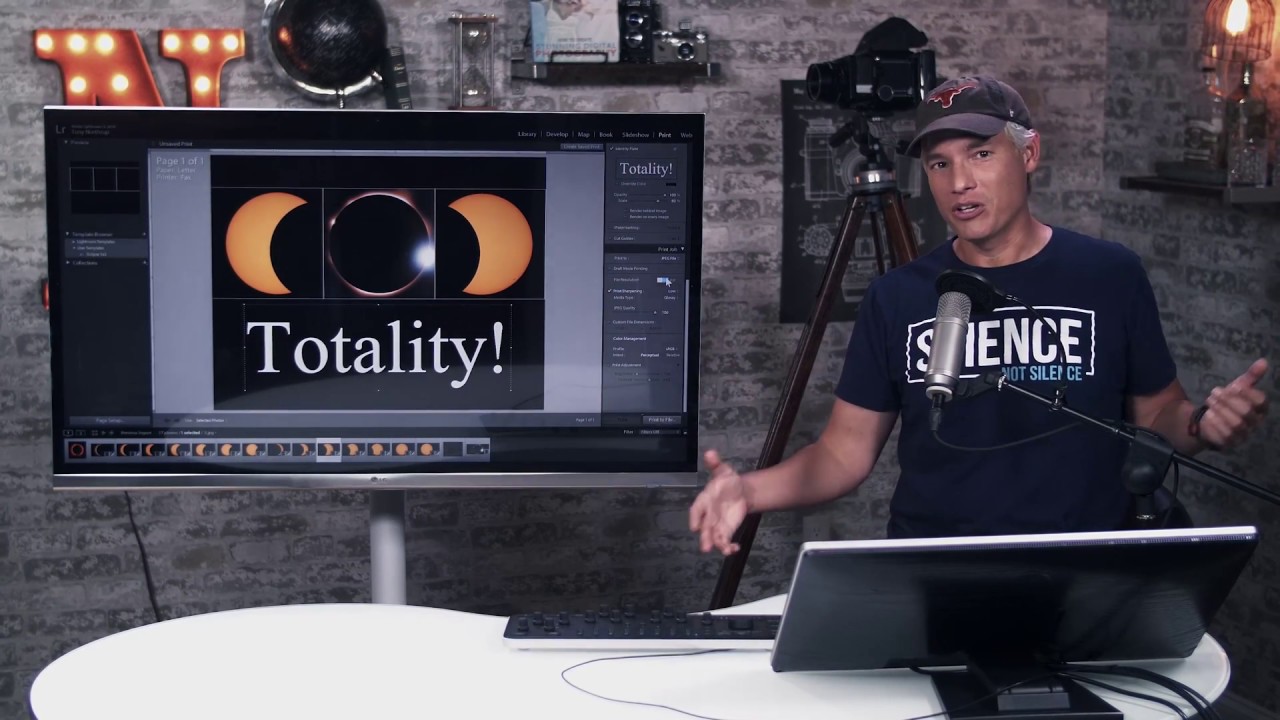
Every couple of years, a celestial event happens and photographers lose their minds trying to figure out what to do with the frames afterward. You captured the totality. You shot the phases. You’ve got a folder full of images that each look decent on their own but feel incomplete sitting side by side in a grid. What you actually want is a single cohesive composite that tells the whole story of that sky in one frame.
That’s the exact problem this tutorial solves. In this Tony & Chelsea Northrup tutorial, Tony walks through a workflow that takes your eclipse sequence and assembles it into a polished, print-ready composite using free Lightroom templates he hosts directly on his own server. No Photoshop. No design skills required. No excuses. I’ve spent enough weekends wrestling composites together manually to know that having a structural template to drop images into is the difference between finishing a project and abandoning it at 11pm with cold coffee and a bad attitude. Watch the full tutorial on YouTube
The workflow lives entirely inside Lightroom’s Develop and Print modules. Tony offers four different template formats: a portrait 8x10 for printing, a wide format showing five images, an even wider seven-image layout, and a square version sized for Instagram. Here’s how it all comes together.
Step 1: Import Your Eclipse Sequence Into Lightroom
 Lightroom library grid showing multiple eclipse image thumbnails
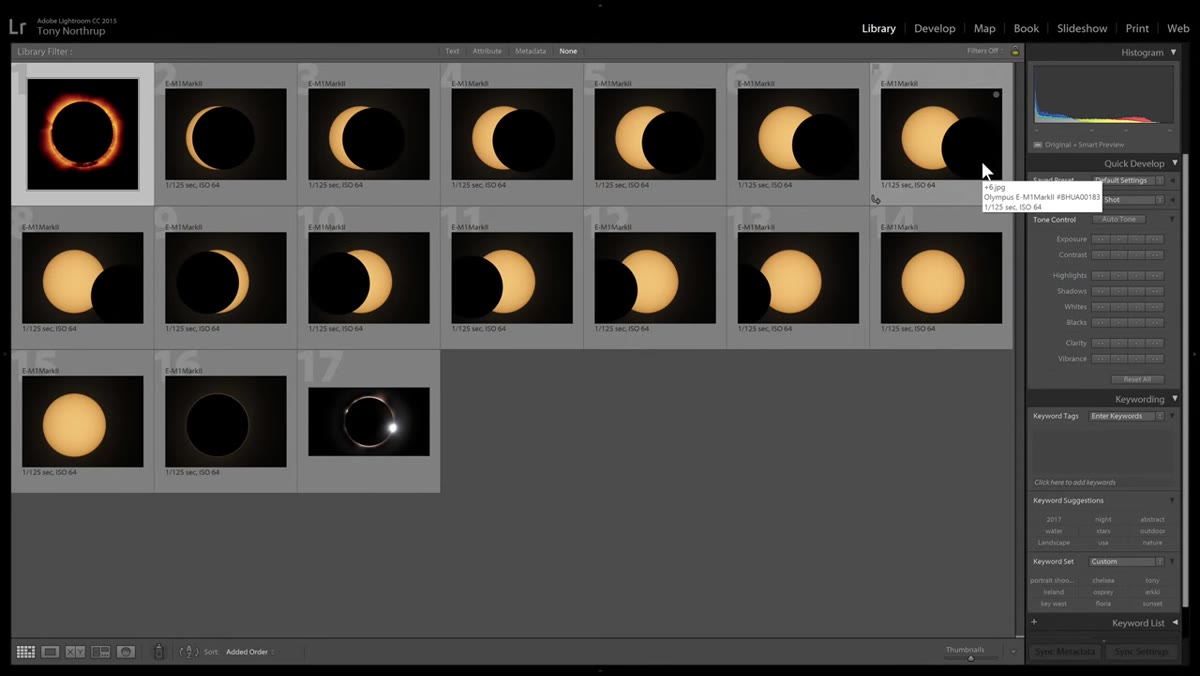
Load all your eclipse phase images into a single Lightroom catalog folder before you do anything else. You want every frame from your sequence visible in the filmstrip so you can work on them as a batch. Tony notes that his demo images are placeholders since he made the tutorial before the eclipse actually occurred, but the workflow applies regardless of whether you have three shots or thirty.
Lightroom library grid showing multiple eclipse image thumbnails
Load all your eclipse phase images into a single Lightroom catalog folder before you do anything else. You want every frame from your sequence visible in the filmstrip so you can work on them as a batch. Tony notes that his demo images are placeholders since he made the tutorial before the eclipse actually occurred, but the workflow applies regardless of whether you have three shots or thirty.
Step 2: Crop One Image and Sync the Crop Across the Entire Batch
 Lightroom Develop module with crop tool active on eclipse photo
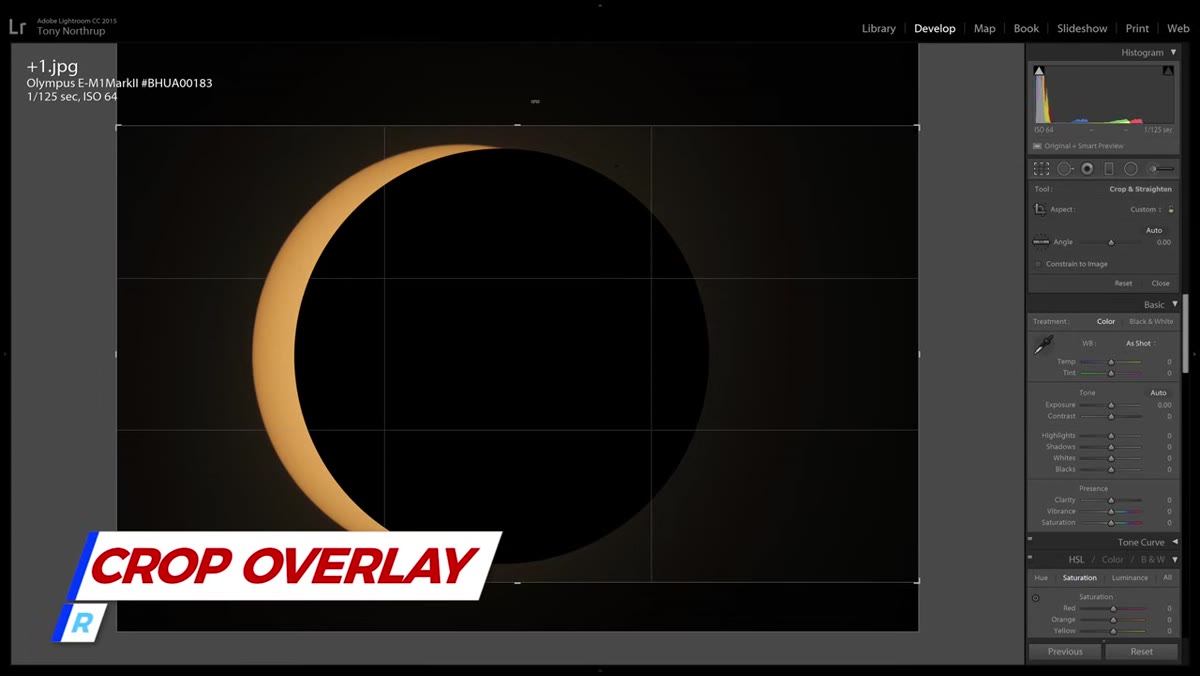
Open one image in the Develop module and apply a vertical crop that places the sun with consistent space above and below it. The goal here is not about composition in the traditional sense. You’re standardizing the height of every image so they sit flush inside the template without awkward gaps. Horizontal positioning gets adjusted later inside the print module, so focus only on vertical framing at this stage.
Lightroom Develop module with crop tool active on eclipse photo
Open one image in the Develop module and apply a vertical crop that places the sun with consistent space above and below it. The goal here is not about composition in the traditional sense. You’re standardizing the height of every image so they sit flush inside the template without awkward gaps. Horizontal positioning gets adjusted later inside the print module, so focus only on vertical framing at this stage.
Once that crop is set, right-click the image in the filmstrip and navigate to Develop Settings, then Copy Settings. In the dialog that appears, deselect everything except Crop and click Copy. Then select all your remaining eclipse images, right-click, and choose Paste Settings. Lightroom applies the identical vertical crop to every frame in seconds. The keyboard shortcut path is Ctrl+Shift+C to copy and Ctrl+Shift+V to paste, which is faster once you’ve done it a few times.
Step 3: Deepen the Blacks So Images Blend Cleanly
 Lightroom Develop panel with Blacks slider pulled left toward negative values
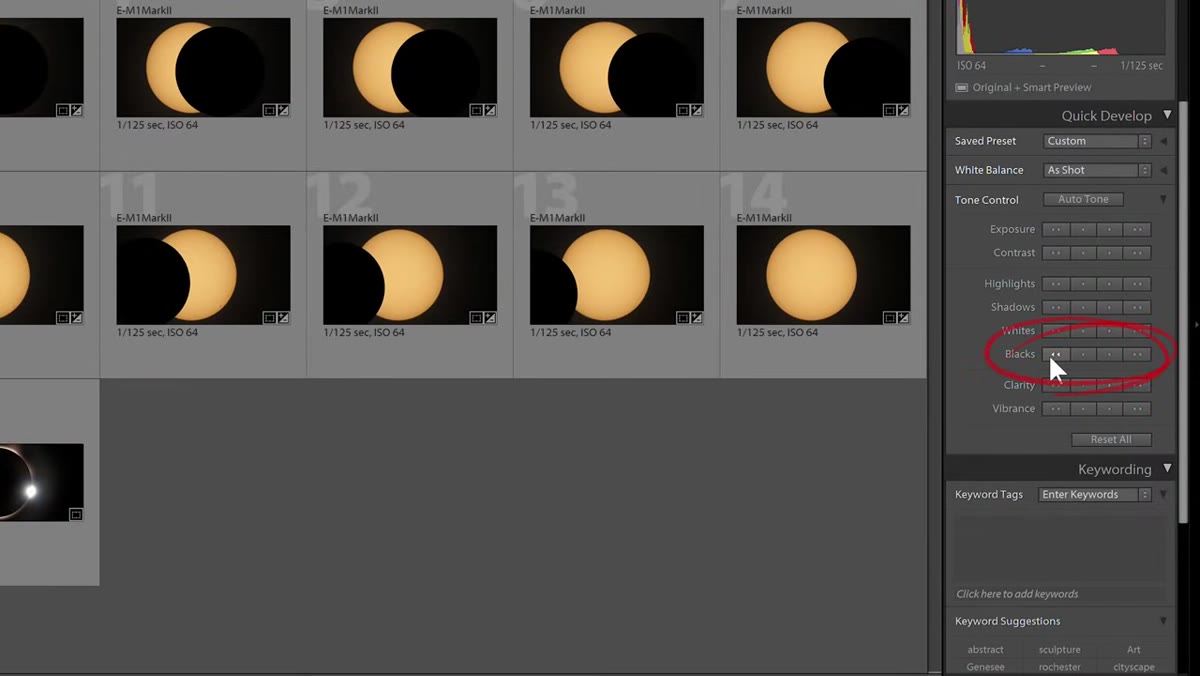
A composite only works visually if the edges of each image aren’t fighting each other. For eclipse photos, the sky should go full black so the frames read as one continuous piece rather than a row of separate rectangles. Open the Develop module on any one image and pull the Blacks slider down until the background sky hits true black. You don’t need to be surgical about it. Aggressive is fine here.
Lightroom Develop panel with Blacks slider pulled left toward negative values
A composite only works visually if the edges of each image aren’t fighting each other. For eclipse photos, the sky should go full black so the frames read as one continuous piece rather than a row of separate rectangles. Open the Develop module on any one image and pull the Blacks slider down until the background sky hits true black. You don’t need to be surgical about it. Aggressive is fine here.
After setting the blacks on that one image, use the same Copy and Paste Settings workflow from Step 2, but this time copy all settings rather than just the crop. Select every other image and paste. Tony uses Ctrl+Shift+C and Ctrl+Shift+V again here. Every frame will now share both the standardized crop and the crushed blacks, which means they’ll stitch together without visible seams inside the template.
Step 4: Import a Free Eclipse Template Into the Print Module
 Lightroom Print module with template browser panel open on left
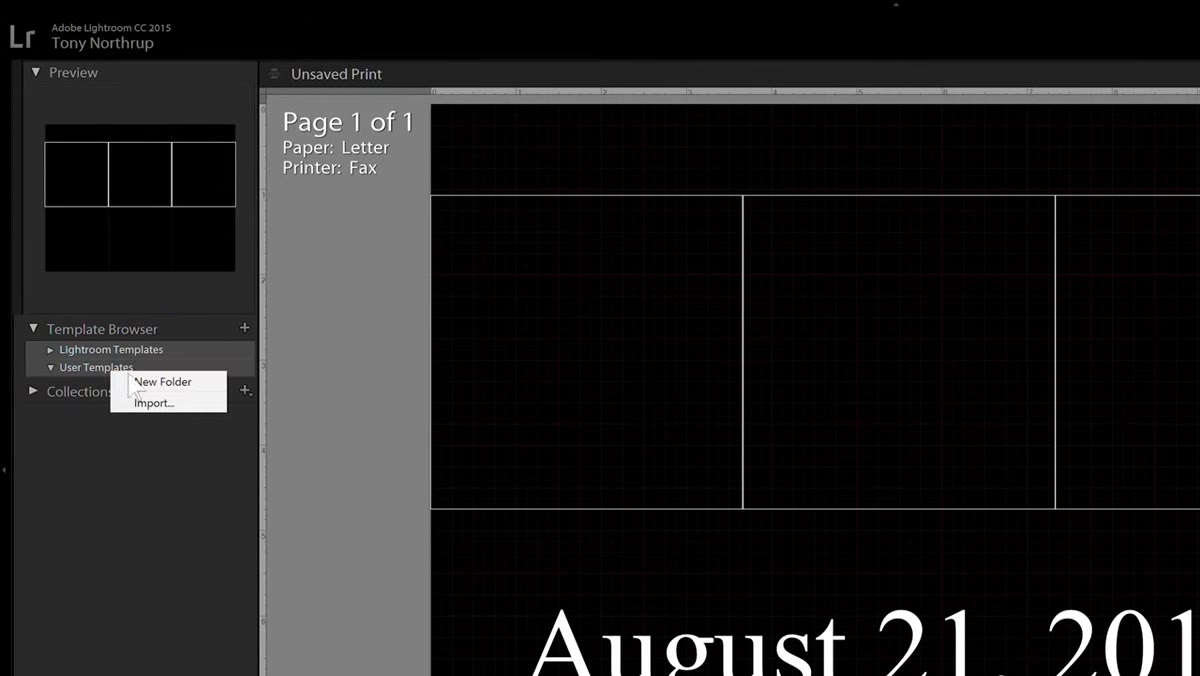
Switch to the Print module using the module selector along the top of the Lightroom interface. In the left panel, find the Template Browser section and right-click on User Templates. Choose Import. This is where Tony’s free templates come in. He hosts them directly on his server, and you import them by typing the full URL into the import field. You must include the HTTP:// prefix or Lightroom won’t recognize it as a web address.
Lightroom Print module with template browser panel open on left
Switch to the Print module using the module selector along the top of the Lightroom interface. In the left panel, find the Template Browser section and right-click on User Templates. Choose Import. This is where Tony’s free templates come in. He hosts them directly on his server, and you import them by typing the full URL into the import field. You must include the HTTP:// prefix or Lightroom won’t recognize it as a web address.
The four template URLs follow this pattern, with the number indicating how many image slots the layout contains. The three-image version is at sdp.io/eclipse3, and similar URLs handle the five-image, seven-image, and square Instagram formats. Once imported, the template appears instantly in the Print module with placeholder cells ready to receive your images.
Step 5: Drag Your Photos Into the Template Cells and Center the Sun
 Print module showing three eclipse image cells with sun visible in each frame
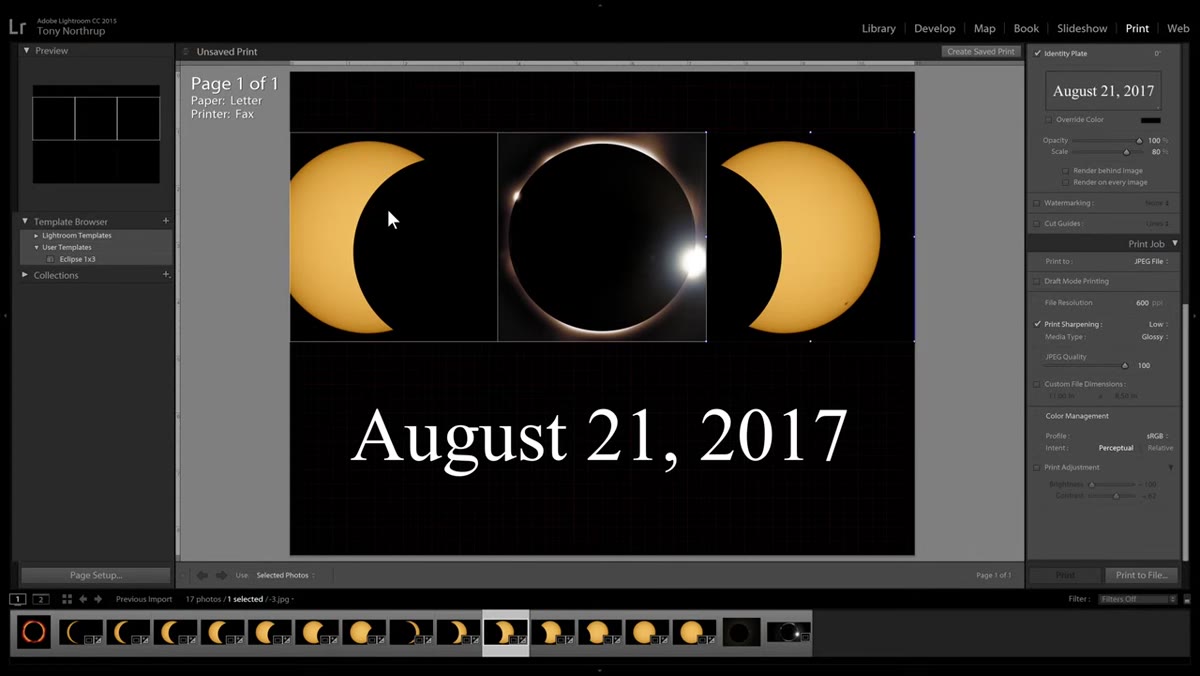
Click a cell inside the template layout and drag one of your eclipse images from the filmstrip at the bottom into it. Repeat for each remaining cell. Tony recommends making sure your totality shot, the full solar corona visible with the moon centered over the sun, anchors the composition. That’s the hero frame.
Print module showing three eclipse image cells with sun visible in each frame
Click a cell inside the template layout and drag one of your eclipse images from the filmstrip at the bottom into it. Repeat for each remaining cell. Tony recommends making sure your totality shot, the full solar corona visible with the moon centered over the sun, anchors the composition. That’s the hero frame.
After placing an image, you may notice the sun isn’t perfectly centered inside its cell. Since the sun moves across the frame between shots, horizontal positioning will vary from image to image. Click inside each cell and drag the image left or right until the sun sits centered. The vertical crop work you did in Step 2 handles the top-to-bottom alignment automatically, so the only manual adjustment here is horizontal.
Step 6: Customize the Text and Export or Print
 Print module showing date text field below the eclipse image strip
The templates include a text element below the image strip, defaulting to the eclipse date. Click directly on that text field inside the Print module to edit it. You can change the date, add a location, swap the font, or adjust sizing. Tony keeps it minimal in the demo, but this is where you can add your name, a location like “Nashville, TN - April 8, 2024,” or anything else that personalizes the final piece.
Print module showing date text field below the eclipse image strip
The templates include a text element below the image strip, defaulting to the eclipse date. Click directly on that text field inside the Print module to edit it. You can change the date, add a location, swap the font, or adjust sizing. Tony keeps it minimal in the demo, but this is where you can add your name, a location like “Nashville, TN - April 8, 2024,” or anything else that personalizes the final piece.
From here, use the Print module’s export options to save the composite as a JPEG, or send it directly to a printer if you want a physical copy. The 8x10 template is sized specifically for standard print dimensions, which makes it easy to order prints without any additional resizing.
One Thing I’d Add: Edit Each Phase Individually Before Syncing
The tutorial’s batch processing approach is efficient and correct for getting consistent crops and blacks fast. But before you paste those black point adjustments across every image, I’d suggest spending a few minutes on each phase shot individually to balance the corona detail and exposure. Eclipse phases vary in brightness depending on how much of the sun is obscured. A paste-all approach can clip highlights in the brighter partial-phase frames if you don’t account for that first. My workflow is to do a per-image exposure pass, then sync only the blacks and crop. It adds maybe ten minutes and the final composite looks noticeably more balanced across all the cells.
The single most important thing Tony demonstrates here is using Lightroom’s Print module as a layout tool rather than just a printing utility. Most photographers never open it. That module is a quiet powerhouse for creating composite templates, contact sheets, and presentation layouts without ever touching InDesign or Photoshop. If your eclipse photos are sitting in a folder waiting to become something, this is the fastest path from raw frames to finished composite.
Watch the full tutorial on YouTube
Comments (2)
My workflow just got 10x faster. Not even kidding.
I tried this on a client project yesterday and the results were way better than expected.
Leave a Comment