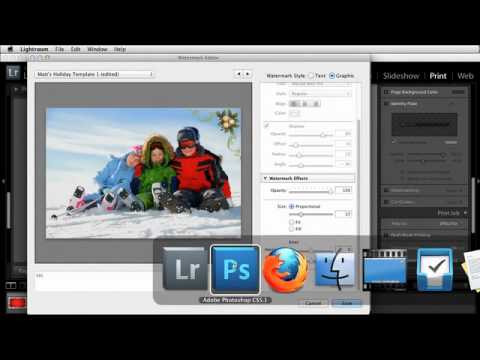
Every December I end up with the same client request: make this portrait feel festive without it looking like a greeting card from 2009. For a long time my answer was a wreath Lightroom border or a cheesy preset with fake snow. Neither felt right. What I actually wanted was a way to drop tasteful supporting graphics around a photo, keeping the image itself as the hero while the decorative elements did quiet, intentional work around it.
That is exactly the problem this KelbyOne tutorial cracks open. Watch the full tutorial on YouTube and you will see Scott walk through a workflow I wish I had figured out three holiday seasons ago. The core idea is deceptively simple: instead of building around a large framing graphic, you pull smaller decorative elements out of a single stock image, clean them up in Photoshop, and bring them into Lightroom as transparent overlays. One stock photo, many usable graphics, zero extra licensing costs.
The technique generalizes far beyond Christmas. Swap the holly for wildflowers, vintage stamps, or watercolor brushstrokes and you have the same workflow working for spring minis, senior sessions, or any branded shoot. That is the part that sold me completely.
Step 1: Find a Stock Image With Multiple Graphics Packed Into It
 Stock graphic sheet showing corner ornaments, bows, and holly
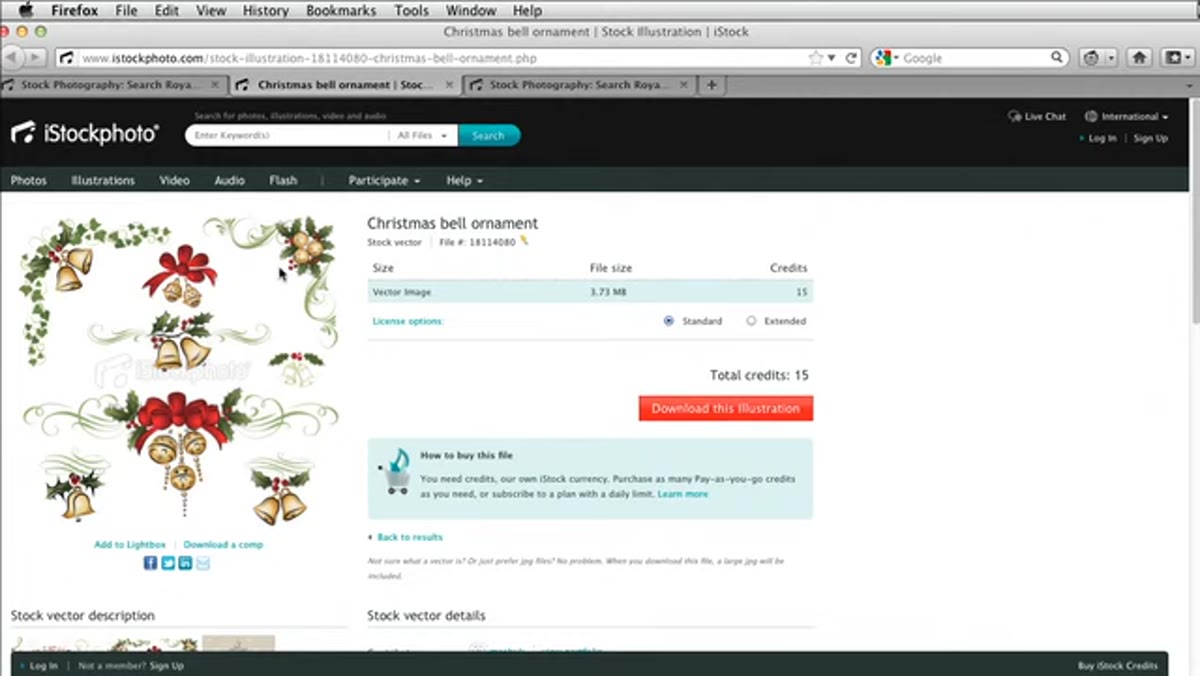
Before you open Photoshop, be strategic about what you download from your stock library. The tutorial demonstrates searching iStock for Christmas graphics and deliberately choosing an image that contains several distinct elements on a single white background, corner flourishes, a bow with bells, holly sprigs. One purchase gives you a whole toolkit rather than a single asset with one possible use. When I do this now, I scan stock results for the busiest, most element-rich sheets I can find. You want variety without clutter, and you want a clean white background so the extraction step stays straightforward.
Stock graphic sheet showing corner ornaments, bows, and holly
Before you open Photoshop, be strategic about what you download from your stock library. The tutorial demonstrates searching iStock for Christmas graphics and deliberately choosing an image that contains several distinct elements on a single white background, corner flourishes, a bow with bells, holly sprigs. One purchase gives you a whole toolkit rather than a single asset with one possible use. When I do this now, I scan stock results for the busiest, most element-rich sheets I can find. You want variety without clutter, and you want a clean white background so the extraction step stays straightforward.
Step 2: Lasso and Isolate Each Graphic in Photoshop
 Loose lasso selection drawn around a single corner ornament
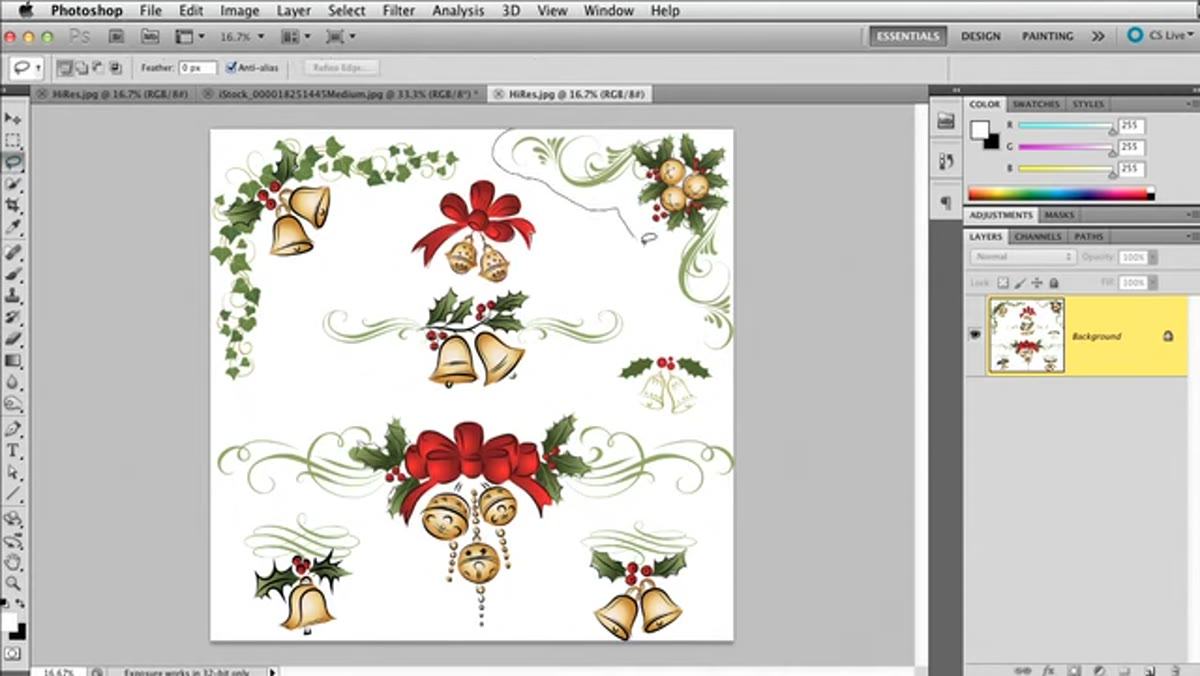
Open your stock image in Photoshop. Grab the Lasso tool and draw a loose, generous selection around whichever graphic element you want to isolate first. Precision does not matter here because you are just cutting it away from its neighbors, not outlining it for a mask. Copy that selection, open a new document via File > New, and paste it in. Then go to Layer > Flatten Image so everything collapses to a single layer. You are setting up a clean, simple file before the real selection work begins.
Loose lasso selection drawn around a single corner ornament
Open your stock image in Photoshop. Grab the Lasso tool and draw a loose, generous selection around whichever graphic element you want to isolate first. Precision does not matter here because you are just cutting it away from its neighbors, not outlining it for a mask. Copy that selection, open a new document via File > New, and paste it in. Then go to Layer > Flatten Image so everything collapses to a single layer. You are setting up a clean, simple file before the real selection work begins.
Step 3: Select the Background With Color Range, Then Invert
 Color Range dialog open with eyedropper on white background
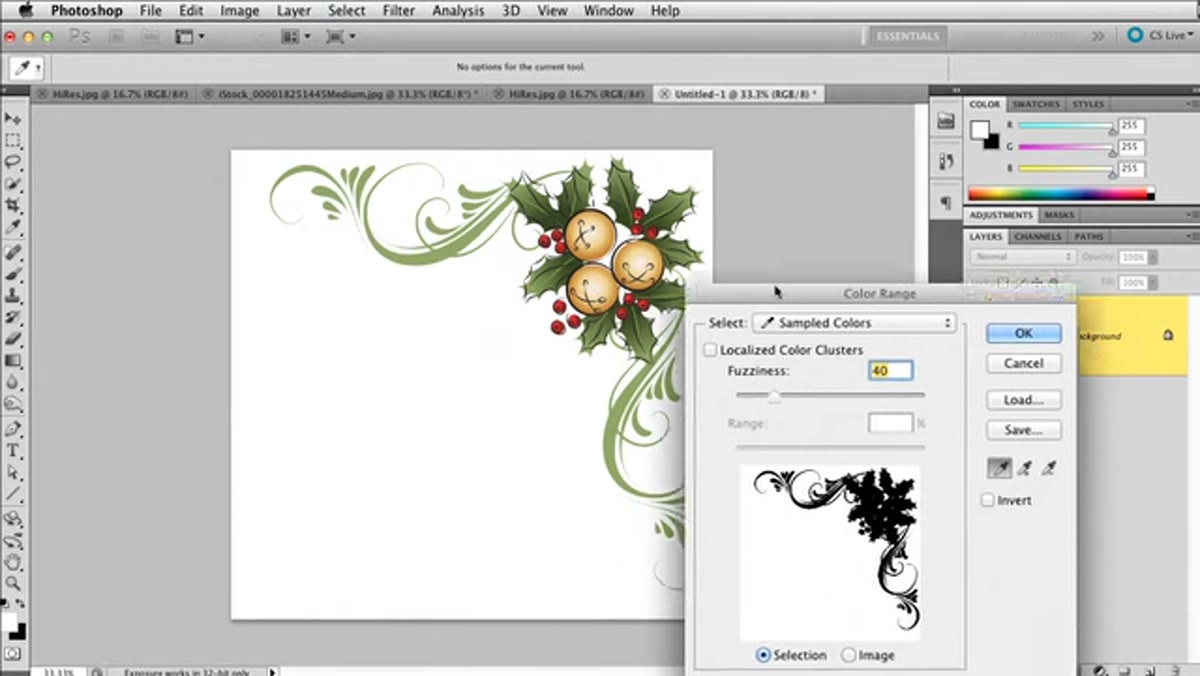
With the flattened graphic in front of you, go to Select > Color Range. Click the eyedropper on the white background of your image. Set the Fuzziness slider to around 40. This value gives you enough tolerance to catch the full white background without biting into the colors of the graphic itself. Hit OK, and Lightroom will show you marching ants around the white area. Now go to Select > Inverse to flip the selection so the graphic itself is what is active. Press Command+J on Mac or Control+J on PC to lift it onto its own transparent layer.
Color Range dialog open with eyedropper on white background
With the flattened graphic in front of you, go to Select > Color Range. Click the eyedropper on the white background of your image. Set the Fuzziness slider to around 40. This value gives you enough tolerance to catch the full white background without biting into the colors of the graphic itself. Hit OK, and Lightroom will show you marching ants around the white area. Now go to Select > Inverse to flip the selection so the graphic itself is what is active. Press Command+J on Mac or Control+J on PC to lift it onto its own transparent layer.
Step 4: Fill With 50% Gray to Reveal the White Fringe
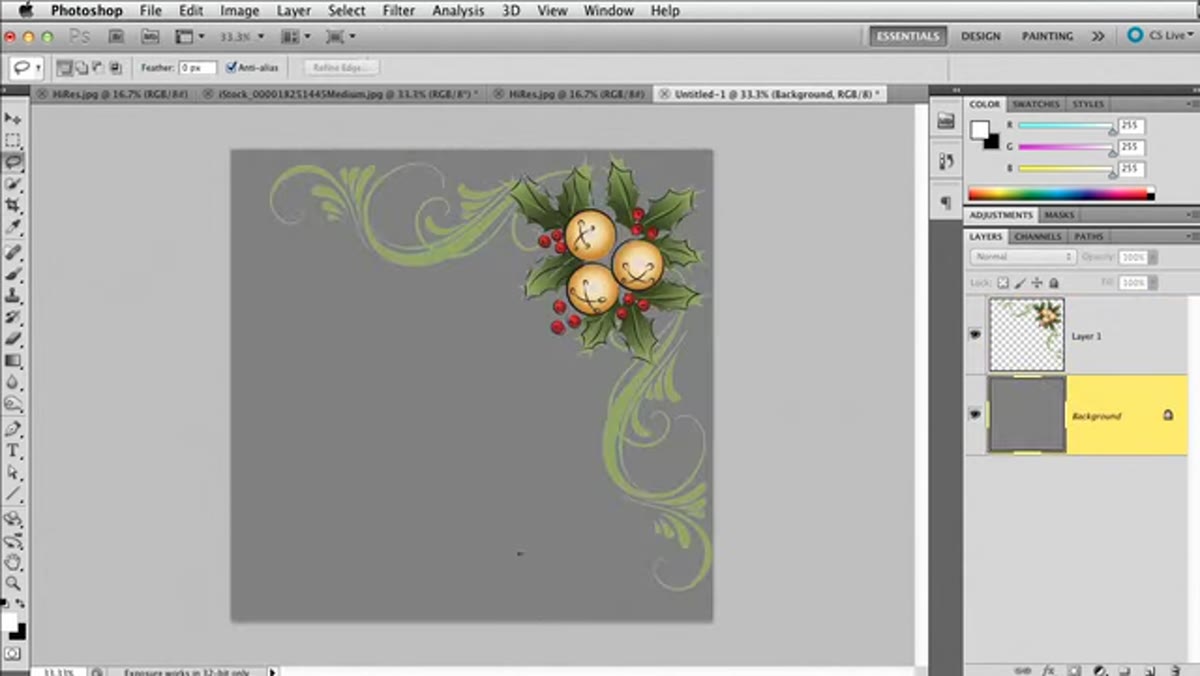 Gray fill layer revealing white edge artifacts around graphic
Here is a diagnostic step that saves you from a lot of frustration later. Click on your background layer and go to Edit > Fill. Choose 50% Gray as the fill content. That neutral tone makes any remaining white fringe around your graphic immediately visible. White edges against white are invisible. Against gray, they announce themselves. Take a good look at what is left before you move on to cleaning it up.
Gray fill layer revealing white edge artifacts around graphic
Here is a diagnostic step that saves you from a lot of frustration later. Click on your background layer and go to Edit > Fill. Choose 50% Gray as the fill content. That neutral tone makes any remaining white fringe around your graphic immediately visible. White edges against white are invisible. Against gray, they announce themselves. Take a good look at what is left before you move on to cleaning it up.
Step 5: Defringe to Kill the White Halo
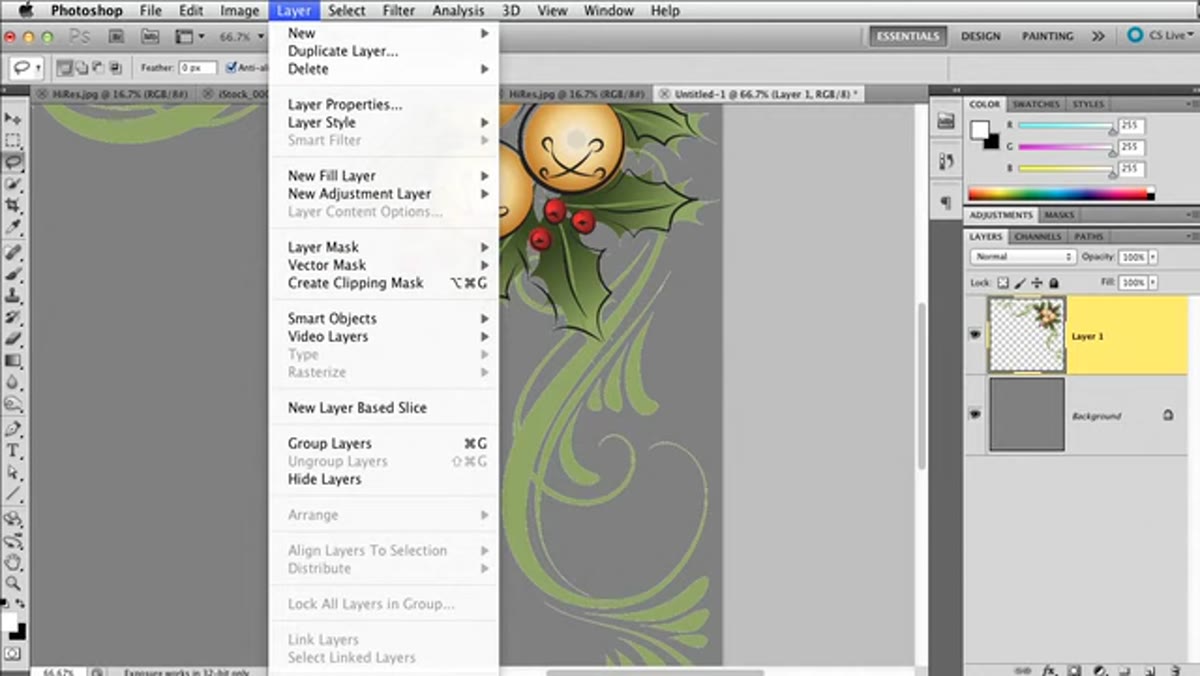 Before and after comparison showing defringe result on ornament edge
Click back on your graphic layer, not the gray background. Go to Layer > Matting > Remove White Matte first. If the result looks clean, great. If you still see a halo, and in the tutorial the Remove White Matte option does not fully solve it, go to Layer > Matting > Defringe instead. A small dialog appears asking for a pixel value. Type 1 and hit Enter. The difference is dramatic. Edges that looked chalky and fake snap into clean, natural-looking curves. Defringe is one of those Photoshop tools I ignored for years and now use constantly.
Before and after comparison showing defringe result on ornament edge
Click back on your graphic layer, not the gray background. Go to Layer > Matting > Remove White Matte first. If the result looks clean, great. If you still see a halo, and in the tutorial the Remove White Matte option does not fully solve it, go to Layer > Matting > Defringe instead. A small dialog appears asking for a pixel value. Type 1 and hit Enter. The difference is dramatic. Edges that looked chalky and fake snap into clean, natural-looking curves. Defringe is one of those Photoshop tools I ignored for years and now use constantly.
Step 6: Delete the Background and Save as Both PNG and JPEG
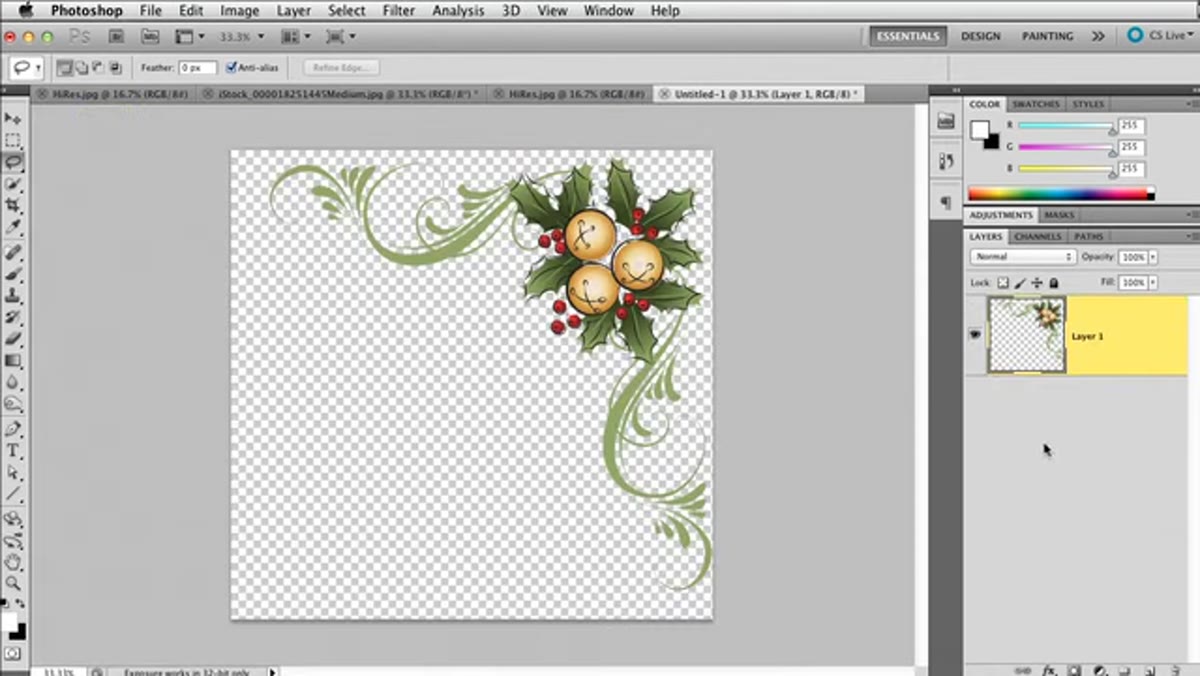 Layers panel showing graphic layer only with transparency checkerboard
Once the fringe is gone, delete the gray background layer so you are left with just your graphic sitting on a transparent checkerboard. Now save twice. Go to File > Save As and save a PNG version, giving it a clear descriptive name. PNG preserves transparency, which is what you need for Lightroom’s watermarking panel and for layering the graphic as an overlay. Then go back and do a second Save As as a JPEG. Lightroom’s Print module cannot use PNGs, but it can use JPEGs. Having both versions means you are covered regardless of which Lightroom module you are working in.
Layers panel showing graphic layer only with transparency checkerboard
Once the fringe is gone, delete the gray background layer so you are left with just your graphic sitting on a transparent checkerboard. Now save twice. Go to File > Save As and save a PNG version, giving it a clear descriptive name. PNG preserves transparency, which is what you need for Lightroom’s watermarking panel and for layering the graphic as an overlay. Then go back and do a second Save As as a JPEG. Lightroom’s Print module cannot use PNGs, but it can use JPEGs. Having both versions means you are covered regardless of which Lightroom module you are working in.
A Note on Building a Reusable Graphic Library
This is where the workflow pays dividends beyond a single project. After going through this process a few times, I now keep a dedicated folder of extracted graphics organized by season and mood. Winter florals, textured borders, hand-lettered elements, ink splatters. Each one saved as both PNG and JPEG, named clearly enough that I can find them without previewing. When a client session comes in that calls for something specific, I am not starting from scratch in Photoshop. I am pulling from a library I built in the background over several months.
One thing the tutorial does not linger on but I will: your gray fill diagnostic in Step 4 is also useful for catching issues with semi-transparent graphic areas. Some illustrated elements have soft edges or watercolor washes that Color Range will partially cut. If you see areas of your graphic looking too thin or cut up, reduce your Fuzziness value and redo the selection. Forty is a starting point, not a rule.
The single most important idea here is that your photo stays the main subject. The graphics are supporting cast. Once I internalized that framing, my holiday work stopped looking like a collision between a portrait and a craft store, and started looking intentional. Extract small, save both formats, and let the image breathe.
Watch the full tutorial on YouTube to see the bow extraction workflow and the Print module placement steps that follow this Photoshop prep.
Comments
Leave a Comment