
There’s a specific kind of frustration that comes from stitching a panorama, getting the exposure perfect, and then realizing the edges are a jagged mess that no crop can cleanly fix. I’ve been there more times than I’d like to admit. For a while, Boundary Warp was the only in-app answer, and while it works decently on wide open landscapes, anything with trees or complex structures at the frame edges starts to look like a funhouse mirror. So when I watched Matt Kloskowski’s walkthrough of the Lightroom 9 November 2019 update, the Fill Edges feature alone made me stop and reopen a panorama I’d basically given up on. Watch the full tutorial on YouTube
This update is technically labeled “Lightroom 9,” but as Matt points out, that’s just Adobe’s annual version number bump. There’s no single massive release. Features roll out throughout the year, and this particular update landed two features worth actually changing your workflow for. One handles a longstanding problem with panoramas. The other saves a surprising amount of time on export. Neither is flashy. Both are genuinely useful.
Step 1: Stitch Your Panorama as Normal
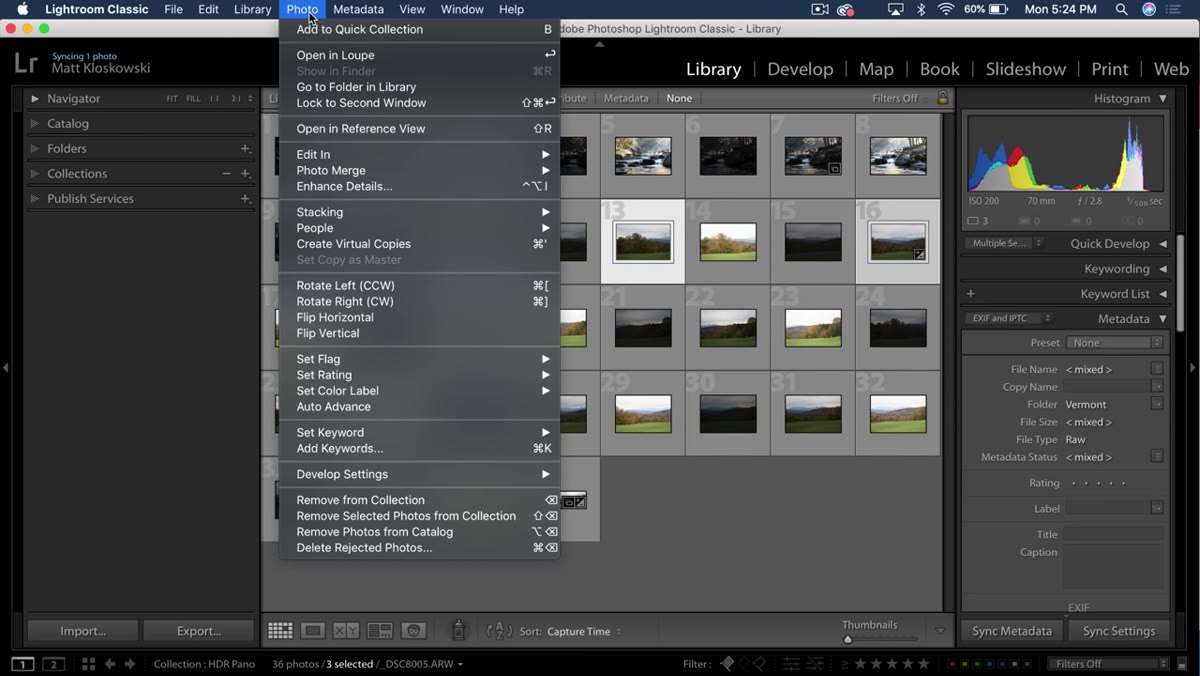 Panorama merge dialog open in Lightroom
Start by selecting your panorama source images in the Library or Develop module. Right-click and choose Photo Merge, then Panorama. Lightroom will process the images and open the Panorama Merge Preview dialog. Nothing here has changed from how you’ve been doing it. Choose your projection type, let the preview render, and get it looking compositionally close to where you want it before moving to the next step.
Panorama merge dialog open in Lightroom
Start by selecting your panorama source images in the Library or Develop module. Right-click and choose Photo Merge, then Panorama. Lightroom will process the images and open the Panorama Merge Preview dialog. Nothing here has changed from how you’ve been doing it. Choose your projection type, let the preview render, and get it looking compositionally close to where you want it before moving to the next step.
The reason you don’t want to skip this stage is that Fill Edges works on whatever geometry Lightroom calculates from your projection choice. Spherical, Cylindrical, and Perspective will each produce different edge shapes, and the content-aware fill has to work harder on some than others. Spend a few seconds picking the projection that minimizes your problem edges before you reach for Fill Edges as a fix.
Step 2: Dial In Boundary Warp First (Then Decide If You Need Fill Edges)
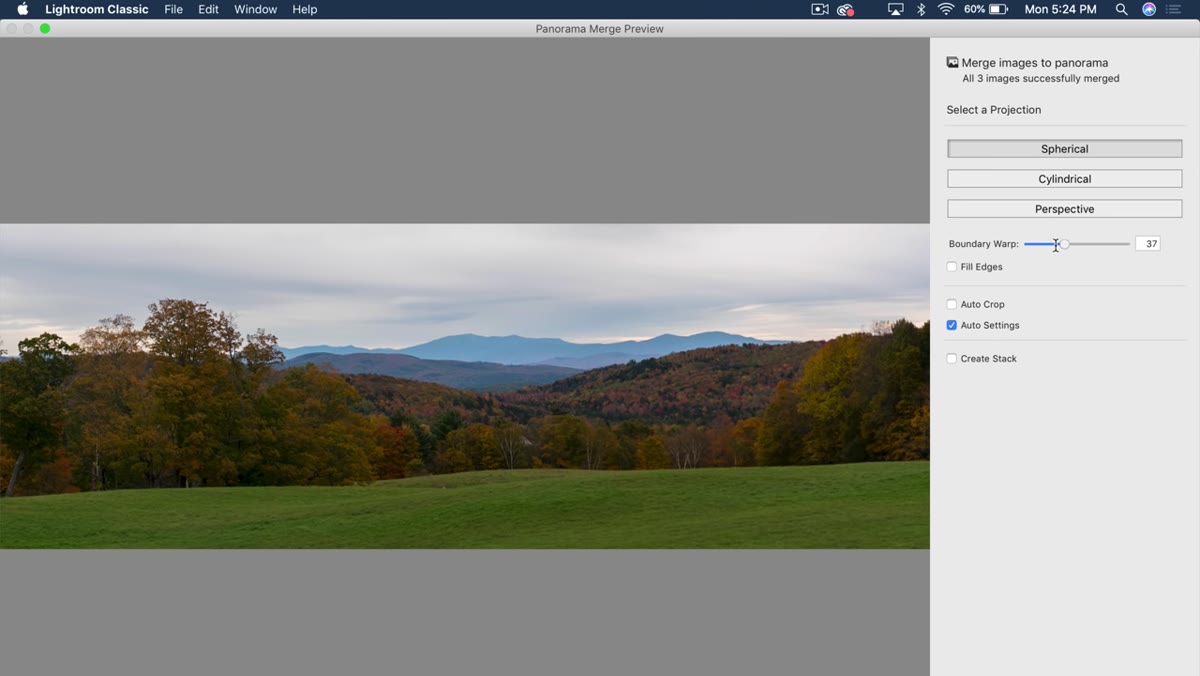 Boundary Warp slider and Fill Edges checkbox in merge dialog
Before enabling Fill Edges, try sliding Boundary Warp toward 100. For a lot of simple landscape panoramas, especially ones where the edges are mostly sky or flat ground, Boundary Warp will stretch the image enough to reach a clean rectangular crop without introducing obvious distortion. It’s still the faster of the two options because it’s a warp calculation rather than a content-generation process.
Boundary Warp slider and Fill Edges checkbox in merge dialog
Before enabling Fill Edges, try sliding Boundary Warp toward 100. For a lot of simple landscape panoramas, especially ones where the edges are mostly sky or flat ground, Boundary Warp will stretch the image enough to reach a clean rectangular crop without introducing obvious distortion. It’s still the faster of the two options because it’s a warp calculation rather than a content-generation process.
Where Boundary Warp breaks down is on anything with strong vertical lines or complex organic shapes at the edges. Trees are the classic example. Warping a pine tree to fill a corner produces a curved, stretched tree that reads as wrong immediately. If you’re in that situation, leave Boundary Warp at zero and move to the next step.
Step 3: Enable Fill Edges
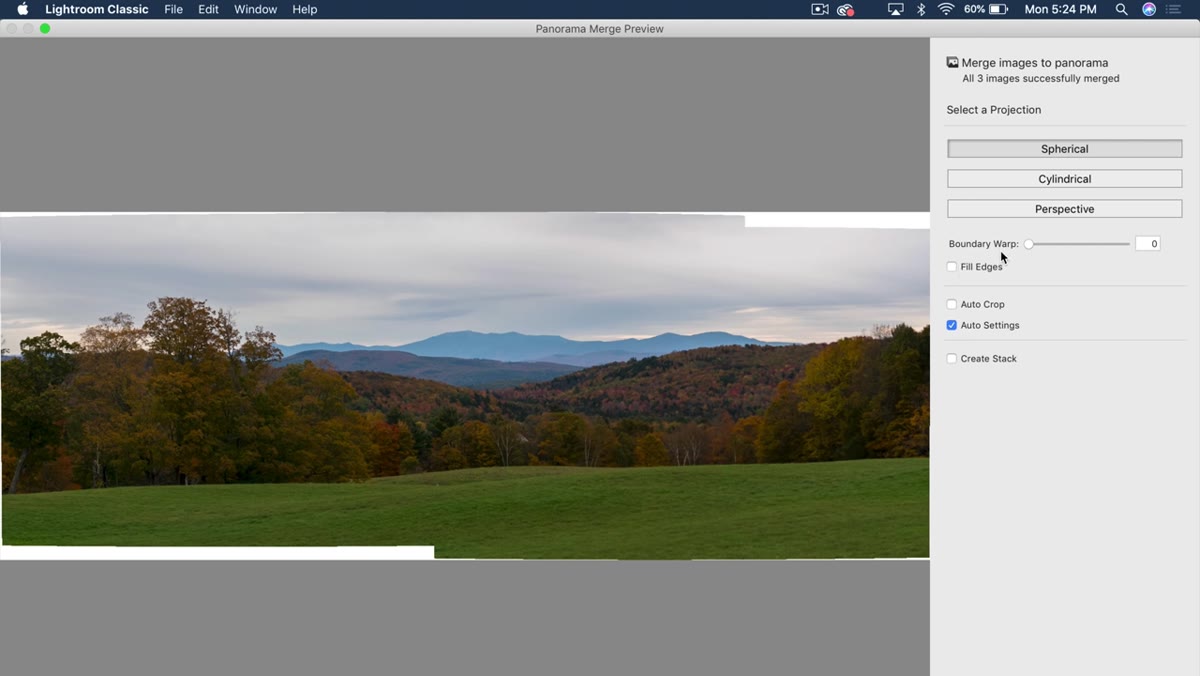 Fill Edges checkbox being checked in the panorama dialog
In the Panorama Merge Preview dialog, you’ll find the Fill Edges checkbox sitting just below the Boundary Warp slider. Check it. Lightroom will take a moment to preview the result, using Photoshop’s content-aware technology to analyze the surrounding pixels and generate new image data to fill the transparent edge areas.
Fill Edges checkbox being checked in the panorama dialog
In the Panorama Merge Preview dialog, you’ll find the Fill Edges checkbox sitting just below the Boundary Warp slider. Check it. Lightroom will take a moment to preview the result, using Photoshop’s content-aware technology to analyze the surrounding pixels and generate new image data to fill the transparent edge areas.
The results are genuinely impressive on most material. Sky fills cleanly. Grass and ground textures blend well. Clouds are usually convincing. Where it gets dicey, as Matt shows in the tutorial, is when the fill has to invent complex organic structures like tree canopies. The technology does a solid job, but on detailed foliage you may see a repeating pattern artifact in one corner. This is not a failure of the feature, it’s the ceiling of what content-aware fill can do with limited surrounding information.
Step 4: Evaluate the Result and Plan Your Cleanup
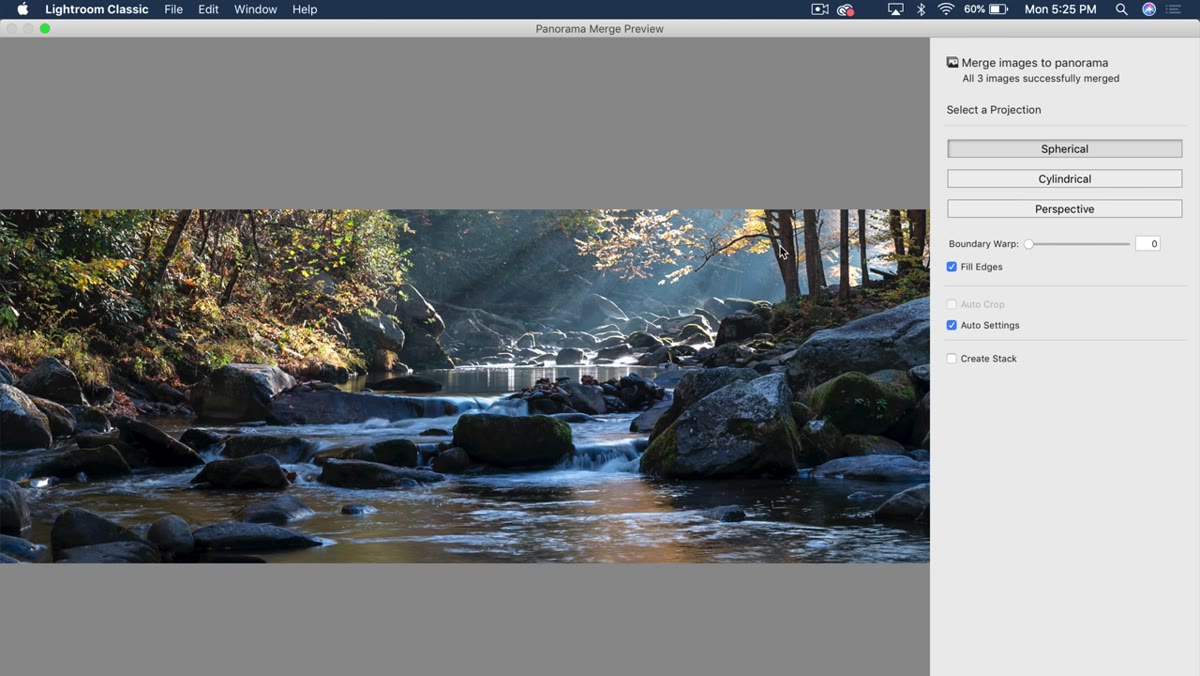 Repeated tree pattern artifact visible in the filled corner
Once the panorama merges, zoom into any corners where complex content was generated. If the fill is clean, you’re done and you just saved yourself a round-trip to Photoshop. If you see a repeating pattern, the most efficient fix is to open the merged DNG in Photoshop and use the Clone Stamp or Healing Brush to break up the repetition. Matt’s estimate of a two-to-three minute job is accurate for most cases. It’s a lot less time than rebuilding the panorama or reshooting.
Repeated tree pattern artifact visible in the filled corner
Once the panorama merges, zoom into any corners where complex content was generated. If the fill is clean, you’re done and you just saved yourself a round-trip to Photoshop. If you see a repeating pattern, the most efficient fix is to open the merged DNG in Photoshop and use the Clone Stamp or Healing Brush to break up the repetition. Matt’s estimate of a two-to-three minute job is accurate for most cases. It’s a lot less time than rebuilding the panorama or reshooting.
The practical hierarchy here: try Boundary Warp first for simple scenes, use Fill Edges for anything with complex edges, and reserve Photoshop cleanup for the small percentage of fills that aren’t quite right. Most panoramas won’t need that third step.
Step 5: Use Multiple Export Presets Simultaneously
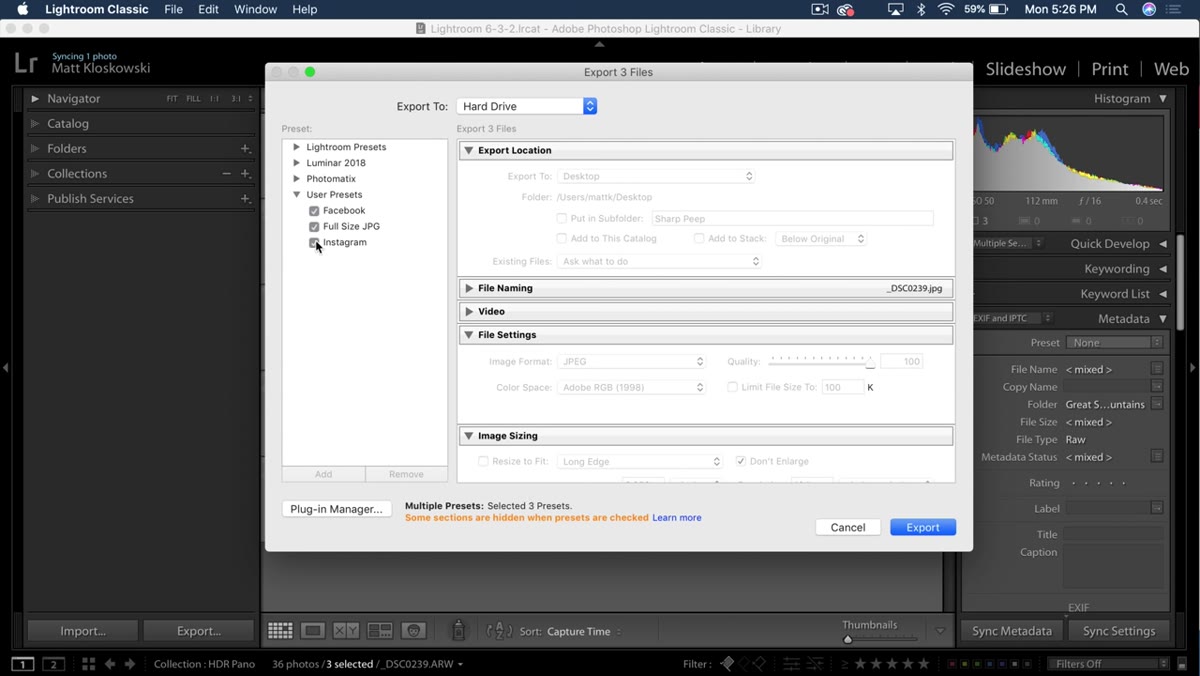 Export dialog showing multiple presets checked at once
This one is less dramatic than Fill Edges but might actually save more cumulative time. Open the Export dialog (File, then Export) and look at your saved preset list in the left panel. In Lightroom 9, you can now check multiple presets at the same time instead of running separate exports for each one.
Export dialog showing multiple presets checked at once
This one is less dramatic than Fill Edges but might actually save more cumulative time. Open the Export dialog (File, then Export) and look at your saved preset list in the left panel. In Lightroom 9, you can now check multiple presets at the same time instead of running separate exports for each one.
If your typical workflow involves exporting a full-resolution file for clients, a compressed web version, and a cropped square for Instagram, you used to run that process three separate times. Now you check all three presets, click Export, and walk away. Lightroom queues all three jobs and handles them in sequence. For photographers who have five or six output presets, this is not a minor convenience. It meaningfully changes how much time you spend waiting on export dialogs.
What I’d Add From My Own Experience
The Fill Edges feature pushed me to go back and revisit a panorama from a mountain trip that had been sitting in a reject folder for months. The edges were bad enough that Boundary Warp had distorted the tree line into something unusable, and I hadn’t wanted to deal with Photoshop at the time. Fill Edges handled about 90 percent of it automatically. The remaining artifact took maybe four minutes in Photoshop to clean up, and the image is now one I actually print.
The multi-export preset feature is something I wish had existed two years earlier. I’d built a whole folder-watching automation workaround to handle multiple output sizes, and this made it irrelevant immediately. If you haven’t organized your export presets yet, this feature is a good reason to finally do it. Set up one preset per destination, label them clearly, and the new multi-select capability becomes part of every shoot.
One note on expectations: Fill Edges is not magic. It’s a very good tool with a specific range of situations where it excels. Keep Photoshop in the workflow for edge cases, and you’ll have a clean path from panorama merge to finished file without wasting time fighting the tool’s limits.
The single most important thing this update changed for me is that panorama work finally feels like it happens inside Lightroom rather than requiring a constant handoff to Photoshop. Fill Edges won’t replace a careful content-aware fill session for a demanding commercial image, but for the vast majority of travel and landscape panoramas, it closes the gap enough to matter. Go watch Matt walk through both features himself.
Watch the full tutorial on YouTube
Comments (2)
Applied this to my portfolio shots and the improvement is noticeable.
This should be required reading for anyone starting out.
Leave a Comment