There’s a conversation I end up having at least once a week, usually in the comments or over email: “Should I switch to Photoshop just to blend exposures?” And honestly, for a long time, my answer was a reluctant “kind of, yeah.” Lightroom has always been the better tool for the actual editing workflow, but the moment someone needs to combine a bright sky shot with a properly exposed foreground, the conversation usually detours into Photoshop, luminosity masks, and about three hours of frustration. That detour has cost a lot of photographers a lot of time.
In this Mark Denney tutorial, he goes after that assumption directly, and honestly, he makes a compelling case. There’s a feature inside Lightroom that does genuine exposure blending from a bracketed set of images, and it’s been sitting there for years, just badly labeled and easy to miss. I’ve been recommending Lightroom to beginners and intermediate shooters for years, and I’ll admit I was underselling it here. Here’s the full walkthrough so you can put it to work immediately.
Step 1: Understand Why Exposure Bracketing Exists
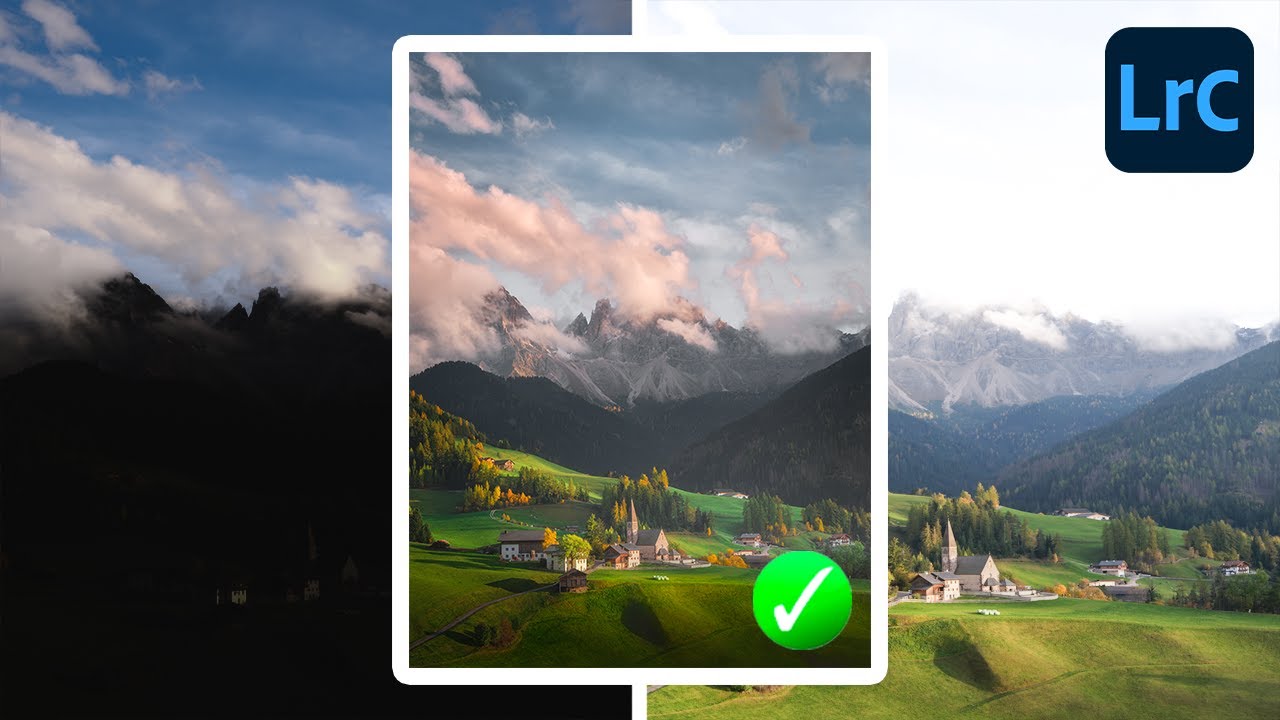
 Two side-by-side Dolomites images showing sky vs foreground tradeoff
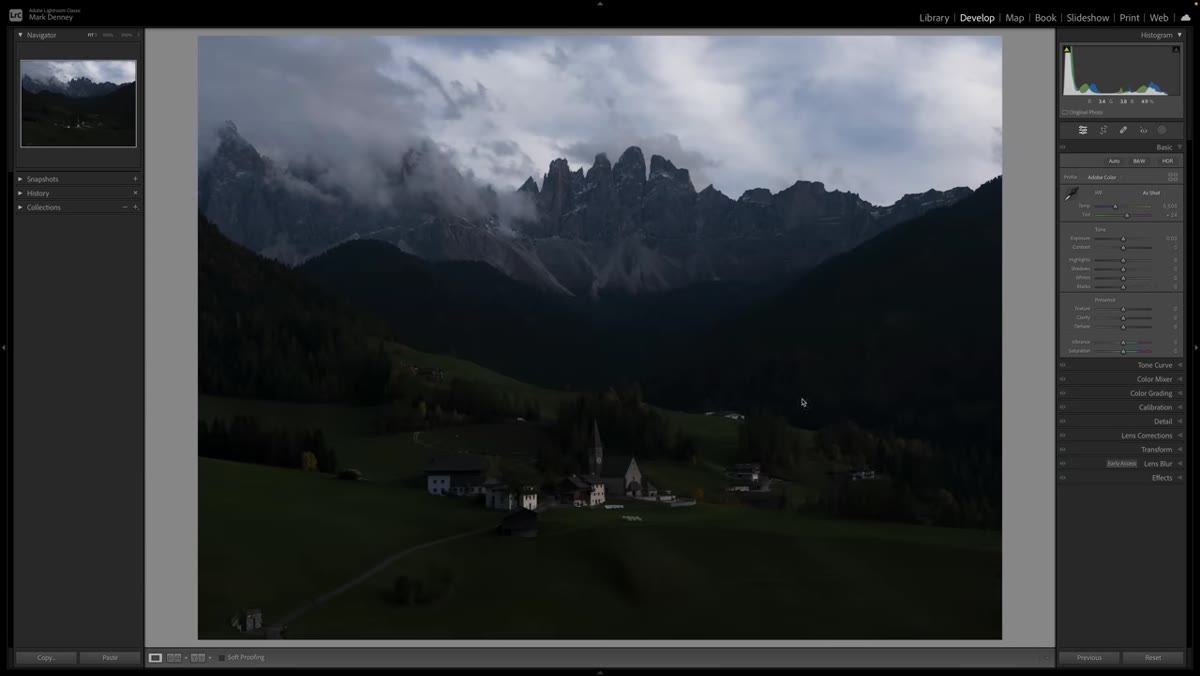
Before touching any software, it helps to understand the actual problem. Your camera has a fixed dynamic range ceiling, and outdoor scenes - especially landscapes with bright skies and shadowy foregrounds - routinely blow past it. When Mark shoots in the Dolomites at 1/50th of a second, the foreground looks gorgeous but the sky turns into a blown-out white mass. Dial the shutter up to 1/150th and the sky recovers beautifully, but the foreground drops into noisy, murky shadow territory.
Two side-by-side Dolomites images showing sky vs foreground tradeoff
Before touching any software, it helps to understand the actual problem. Your camera has a fixed dynamic range ceiling, and outdoor scenes - especially landscapes with bright skies and shadowy foregrounds - routinely blow past it. When Mark shoots in the Dolomites at 1/50th of a second, the foreground looks gorgeous but the sky turns into a blown-out white mass. Dial the shutter up to 1/150th and the sky recovers beautifully, but the foreground drops into noisy, murky shadow territory.
The point of bracketing is simple: you capture multiple frames at different exposures and combine the best parts of each. The challenge has always been the “combine” step. Most people assume that has to happen in Photoshop. It doesn’t.
Step 2: See Why Pushing a Single RAW File Isn’t Enough
 Zoomed-in shadow area showing noise and muddy detail after exposure boost
Mark does something useful here before showing the fix: he shows exactly what happens when you try to rescue a badly exposed single image. Bring the Shadows slider all the way to +100, lift the Blacks, nudge up the Exposure overall - you can get more detail into the frame, but zoom in to any dark area and the image falls apart. Noise, smearing, that washed-out muddy look that no amount of Noise Reduction fully fixes.
Zoomed-in shadow area showing noise and muddy detail after exposure boost
Mark does something useful here before showing the fix: he shows exactly what happens when you try to rescue a badly exposed single image. Bring the Shadows slider all the way to +100, lift the Blacks, nudge up the Exposure overall - you can get more detail into the frame, but zoom in to any dark area and the image falls apart. Noise, smearing, that washed-out muddy look that no amount of Noise Reduction fully fixes.
This isn’t a Lightroom failure specifically. It’s physics. Lifting shadows in post means amplifying the weakest signal your sensor captured, and weak signal always means noise. The cleaner solution is to capture the shadow detail with proper exposure at the time of shooting, which is exactly what bracketing gives you.
Step 3: Shoot Your Bracketed Sequence in the Field
 Two exposure files side by side in Lightroom grid view
This step happens before you open Lightroom, but it determines everything that follows. Shoot at least two exposures for the same scene: one optimized for the sky highlights, one for the foreground and midtones. Keep your camera on a tripod so the frames align. Most modern cameras have a built-in auto-bracket mode that fires multiple frames in sequence automatically - use it. If you’re shooting a scene with moving elements like clouds or water, work quickly between shots so the frames stay compatible for blending.
Two exposure files side by side in Lightroom grid view
This step happens before you open Lightroom, but it determines everything that follows. Shoot at least two exposures for the same scene: one optimized for the sky highlights, one for the foreground and midtones. Keep your camera on a tripod so the frames align. Most modern cameras have a built-in auto-bracket mode that fires multiple frames in sequence automatically - use it. If you’re shooting a scene with moving elements like clouds or water, work quickly between shots so the frames stay compatible for blending.
For the Dolomites shot Mark uses in the tutorial, two exposures is enough: one fast shutter for sky detail, one slower shutter for foreground. You don’t always need three, five, or seven brackets. Match the number of exposures to the actual tonal range of the scene.
Step 4: Select Both Images and Open the HDR Merge Dialog
 Lightroom library showing multiple bracketed images selected
In Lightroom, go to your library or filmstrip and select all the bracketed frames for your scene. With both (or all) images highlighted, go to Photo > Photo Merge > HDR. This is the feature that Mark calls “hidden” and honestly, that’s fair. The naming doesn’t help - “HDR” has baggage from the over-processed, halo-heavy look that was popular around 2010 and still makes photographers cringe. But the tool has evolved significantly since then. What it produces today is a clean, naturally merged DNG file that captures the full tonal range of your bracketed set.
Lightroom library showing multiple bracketed images selected
In Lightroom, go to your library or filmstrip and select all the bracketed frames for your scene. With both (or all) images highlighted, go to Photo > Photo Merge > HDR. This is the feature that Mark calls “hidden” and honestly, that’s fair. The naming doesn’t help - “HDR” has baggage from the over-processed, halo-heavy look that was popular around 2010 and still makes photographers cringe. But the tool has evolved significantly since then. What it produces today is a clean, naturally merged DNG file that captures the full tonal range of your bracketed set.
The keyboard shortcut is Control+H on Windows or Command+H on Mac, which makes the workflow faster once you’ve done it a few times.
Step 5: Configure the Merge Settings
 HDR Merge panel with alignment and deghosting options visible
The HDR Merge dialog gives you a few options worth understanding. Auto Align is the one you want enabled almost every time, even if you shot on a tripod - small vibrations and mirror movement can shift frames slightly, and the alignment algorithm handles that cleanly. Deghost Amount controls how Lightroom handles areas where things moved between frames, like foliage in wind or water. Start with Low or Medium and check the preview. If you have significant movement in the frame, increase it, but watch for artifacts around edges.
HDR Merge panel with alignment and deghosting options visible
The HDR Merge dialog gives you a few options worth understanding. Auto Align is the one you want enabled almost every time, even if you shot on a tripod - small vibrations and mirror movement can shift frames slightly, and the alignment algorithm handles that cleanly. Deghost Amount controls how Lightroom handles areas where things moved between frames, like foliage in wind or water. Start with Low or Medium and check the preview. If you have significant movement in the frame, increase it, but watch for artifacts around edges.
The preview in the dialog gives you a reasonable sense of what the final merge will look like. Once you’re satisfied, click Merge. Lightroom will process the frames and add a new DNG file to your catalog alongside the originals. That merged DNG is what you’ll actually edit.
Step 6: Edit the Merged DNG Normally in the Develop Module
 Merged HDR DNG open in Develop module with expanded histogram
Open your merged DNG in the Develop module and notice two things right away. First, the histogram will look different from a standard RAW - it spans a wider tonal range. Second, your sliders - especially Highlights and Shadows - have dramatically more range to work with. You’re not trying to rescue data that was clipped at capture. You’re working with a file that actually contains the information from multiple exposures, and it shows.
Merged HDR DNG open in Develop module with expanded histogram
Open your merged DNG in the Develop module and notice two things right away. First, the histogram will look different from a standard RAW - it spans a wider tonal range. Second, your sliders - especially Highlights and Shadows - have dramatically more range to work with. You’re not trying to rescue data that was clipped at capture. You’re working with a file that actually contains the information from multiple exposures, and it shows.
From here, edit as you normally would. White balance, exposure, tone curve, color grading - it all behaves like a standard Lightroom workflow. The merge step is the only thing that changed.
My Own Wrinkle: Don’t Skip the Auto Align Even on a Tripod
I’ve been using HDR Merge in Lightroom for a couple of years now, mostly for golden hour landscape work where the sky and foreground contrast is brutal. The one mistake I kept making early on was skipping Auto Align when I was confident my tripod was solid. Don’t do that. Even a well-locked tripod can shift between a 1/150th and a 1/6th second exposure. A few pixels of misalignment produces fringing and ghosting that’s annoying to fix after the fact. Ten extra seconds to let the alignment run is always worth it.
The core takeaway here is that Lightroom’s HDR Merge is a legitimate exposure blending tool, not a legacy gimmick. If you’ve been routing your bracketed shots through Photoshop purely out of habit or assumption, it’s worth testing whether this workflow gets you to the same place faster. For most landscape scenarios, it does.
Watch the full tutorial on YouTube to see Mark walk through the complete before and after with his Dolomites images. Seeing the histogram behavior on the merged DNG compared to the originals alone is worth the watch.
Comments
Leave a Comment