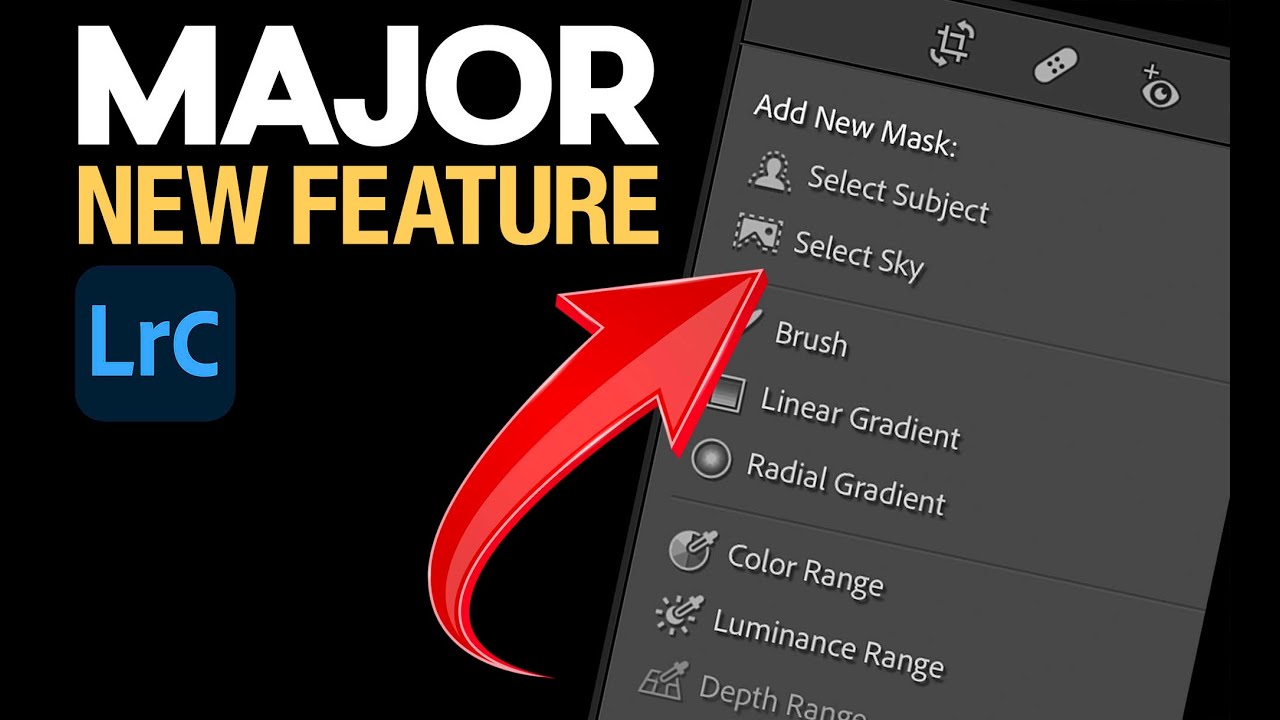
I spent years making selections the hard way. Brush a little here, erase a little there, zoom in to 200% to catch the stray pixels around someone’s hair, repeat until I questioned my career choices. If you edit portraits, landscapes, or really anything with a complicated edge, you know the feeling. So when the October 2021 Lightroom Classic update dropped and I saw what Adobe had quietly tucked into version 11, I genuinely stopped what I was doing and watched Matt Kloskowski’s breakdown twice. The short version: Adobe brought the AI-powered masking tools from Photoshop directly into Lightroom Classic, and they work better than I expected them to.
In this Matt Kloskowski tutorial, he moves fast through the update because the masking changes are so significant that everything else almost feels like a footnote. But the “footnotes” are worth paying attention to too, especially if you’re someone who actually tries to stay organized in the Library module. Here’s the full walkthrough, slowed down so you can follow it step by step without scrubbing back and forth.
Step 1: Find the New Masking Panel
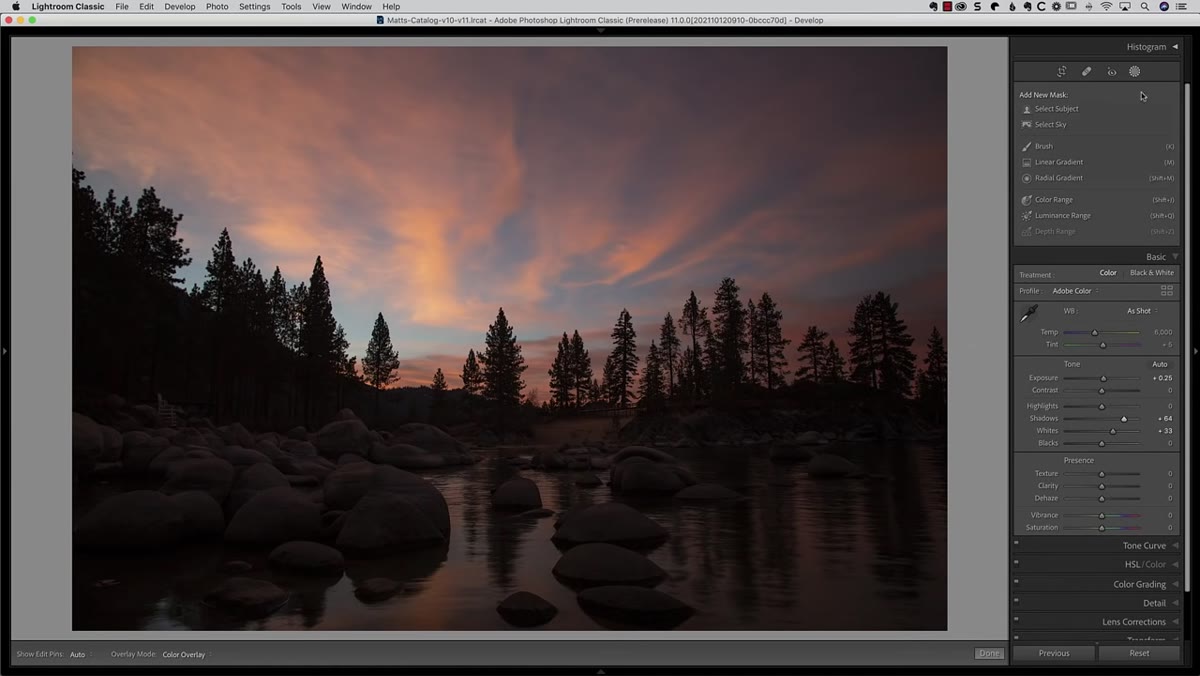 New masking panel appearing above the Basic panel in Lightroom
The masking panel lives right between your histogram and your Basic panel on the right-hand side of the Develop module. If you’ve used Lightroom Classic for any amount of time, you’ll notice immediately that this isn’t just a relocated version of the old Adjustment Brush or Graduated Filter. It’s a full panel with multiple selection types listed out in front of you. Adobe kept the classic tools you already know, but added new AI-driven options alongside them. Think of it as the old toolbox getting a serious upgrade rather than a replacement.
New masking panel appearing above the Basic panel in Lightroom
The masking panel lives right between your histogram and your Basic panel on the right-hand side of the Develop module. If you’ve used Lightroom Classic for any amount of time, you’ll notice immediately that this isn’t just a relocated version of the old Adjustment Brush or Graduated Filter. It’s a full panel with multiple selection types listed out in front of you. Adobe kept the classic tools you already know, but added new AI-driven options alongside them. Think of it as the old toolbox getting a serious upgrade rather than a replacement.
Click the masking icon (it looks like a circle with a dotted outline) to open the panel. You’ll see your familiar brush and gradient options, plus the new additions. From here, every mask you create gets its own layer in the panel, which makes managing multiple local adjustments far cleaner than the old workflow.
Step 2: Use Select Sky to Isolate and Edit Your Background
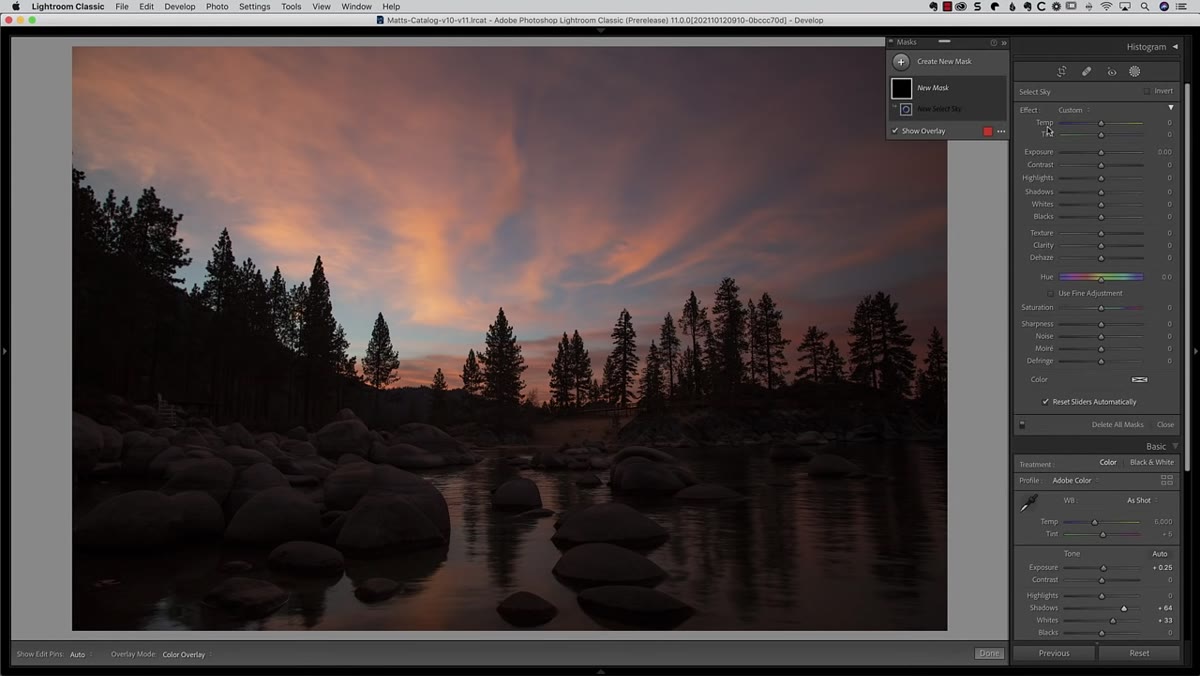 Select Sky tool creating an automatic sky selection on a landscape photo
Click “Select Sky” and Lightroom does the work. On a landscape with a defined horizon, the selection is almost instant and usually accurate enough to start making adjustments right away. What you’d previously spend five minutes brushing in manually now takes about two seconds. Once the selection is active, you can pull down highlights, boost blues, or add a little drama to the sky without touching the foreground at all.
Select Sky tool creating an automatic sky selection on a landscape photo
Click “Select Sky” and Lightroom does the work. On a landscape with a defined horizon, the selection is almost instant and usually accurate enough to start making adjustments right away. What you’d previously spend five minutes brushing in manually now takes about two seconds. Once the selection is active, you can pull down highlights, boost blues, or add a little drama to the sky without touching the foreground at all.
The part that made me pause the video: every mask you create comes with a built-in invert toggle. That means after you make your sky selection, you can duplicate the logic, hit invert, and instantly have an equally accurate foreground selection. Two masks, two separate sets of adjustments, one extremely precise result. No tedious masking around tree lines or rooftops required.
Step 3: Use Select Subject for Portraits and Complex Edges
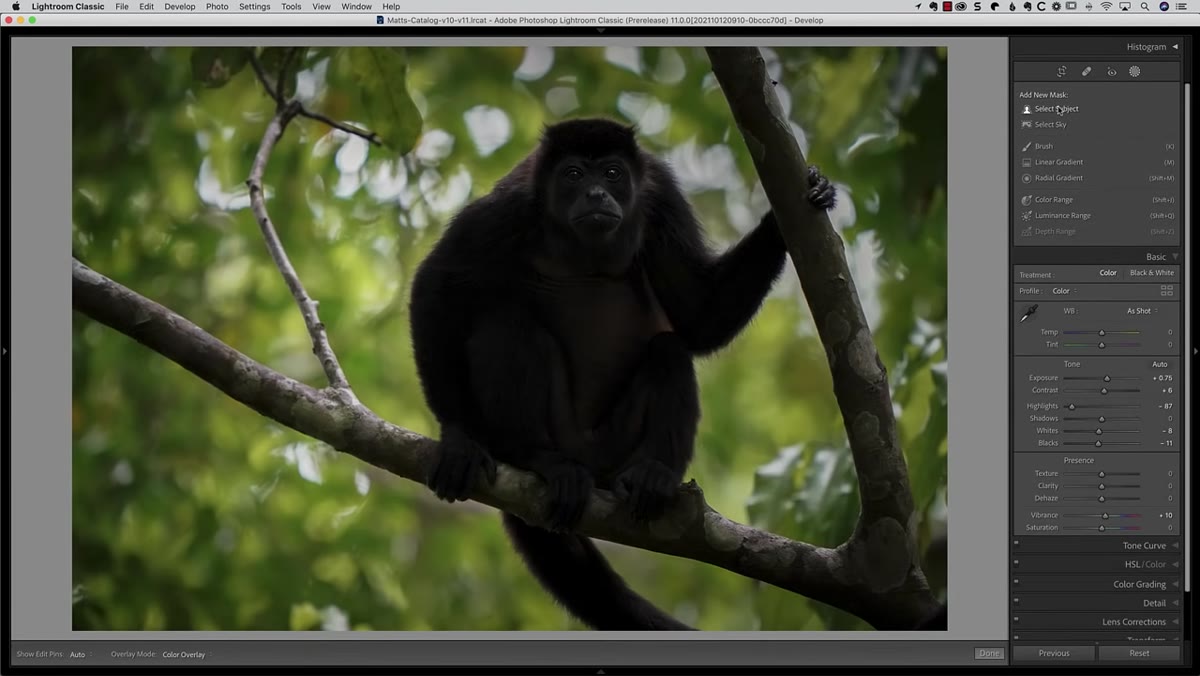 Select Subject tool isolating an animal with detailed fur edges
Select Subject is where the AI really shows off. Kloskowski demonstrates it on a photo of an animal with fur, which is about as hard an edge case as you can throw at an automated tool. The selection holds up around the irregular, wispy edges in a way that would have taken serious Photoshop work to replicate even a couple of years ago. For portrait photographers, this changes the speed of a basic edit significantly.
Select Subject tool isolating an animal with detailed fur edges
Select Subject is where the AI really shows off. Kloskowski demonstrates it on a photo of an animal with fur, which is about as hard an edge case as you can throw at an automated tool. The selection holds up around the irregular, wispy edges in a way that would have taken serious Photoshop work to replicate even a couple of years ago. For portrait photographers, this changes the speed of a basic edit significantly.
Once the subject is selected, you can push exposure, recover shadows, or adjust white balance on just that subject without worrying about halos or spill into the background. Bump exposure up by maybe a third to a half stop, bring shadows up slightly, and the subject pops forward without looking composited. The selection is doing the heavy lifting so your eye can focus on the actual creative decision.
Step 4: Combine Masks Using Add, Subtract, and Intersect
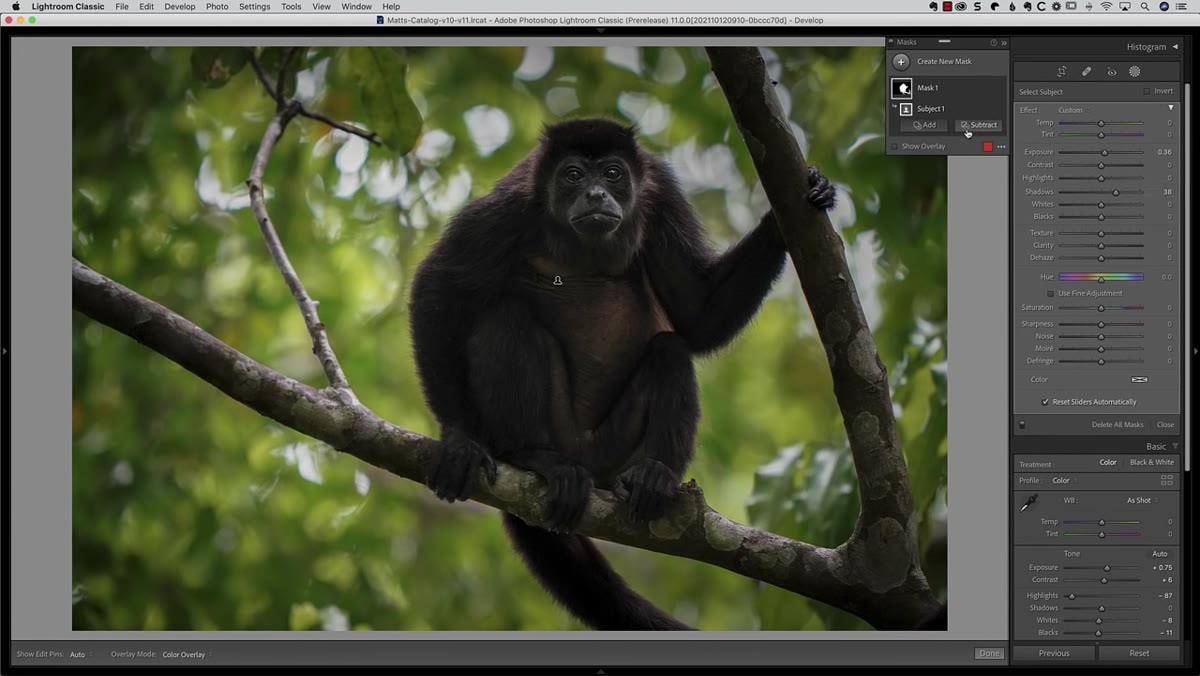 Add and subtract options shown within a mask adjustment layer
This is the step most people will skip over in a quick watch and then wish they hadn’t. Every mask you create has Add and Subtract buttons, and inside those options you get access to the full list of selection tools, including Color Range, Luminance Range, Select Subject, and Select Sky. That means you can start with a sky selection and then subtract a specific color range from it, or intersect a subject selection with a luminance range to target only the bright areas of your subject.
Add and subtract options shown within a mask adjustment layer
This is the step most people will skip over in a quick watch and then wish they hadn’t. Every mask you create has Add and Subtract buttons, and inside those options you get access to the full list of selection tools, including Color Range, Luminance Range, Select Subject, and Select Sky. That means you can start with a sky selection and then subtract a specific color range from it, or intersect a subject selection with a luminance range to target only the bright areas of your subject.
It sounds complex but in practice it’s modular. Build a base selection, then refine it with a second tool. The Intersect option in particular is useful when you want to target something like the highlights on a subject’s face without affecting the shadows. Kloskowski notes this is deep enough to warrant its own dedicated video, and he’s right. But knowing these options exist means you can start experimenting with layered selections right away.
Step 5: Filter Photos by Day and Month in the Library
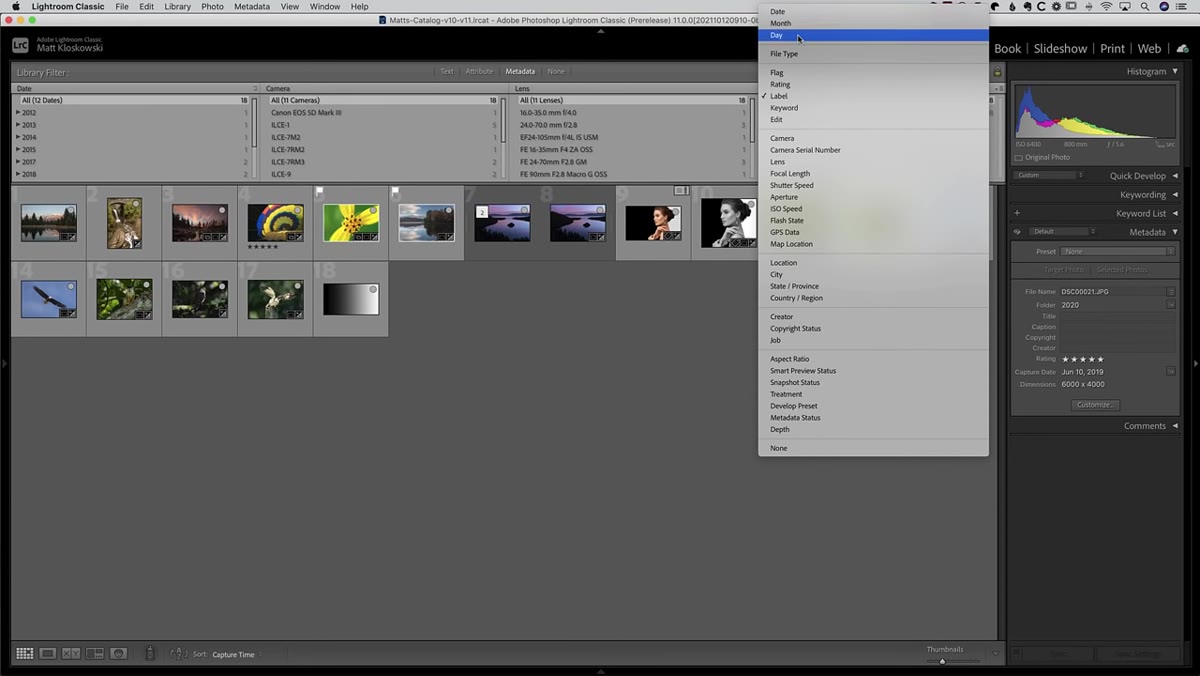 Metadata filter bar showing new Day and Month filter options
Head over to the Library module and pull up the Filter Bar under the View menu. Under Metadata filtering, you’ve always been able to search by date, but it used to mean drilling down through year after year before you could get specific. The update adds Day and Month as separate, filterable columns, which sounds minor until you’re trying to find every photo from a specific birthday or anniversary shoot across multiple years.
Metadata filter bar showing new Day and Month filter options
Head over to the Library module and pull up the Filter Bar under the View menu. Under Metadata filtering, you’ve always been able to search by date, but it used to mean drilling down through year after year before you could get specific. The update adds Day and Month as separate, filterable columns, which sounds minor until you’re trying to find every photo from a specific birthday or anniversary shoot across multiple years.
For anyone who doesn’t organize by rigid folder structures, this is genuinely useful. I keep presets organized almost like a playlist and my folders are sometimes more thematic than chronological, so being able to filter by month across the entire catalog saves a real amount of time.
Step 6: Customize Your Metadata Panel Fields
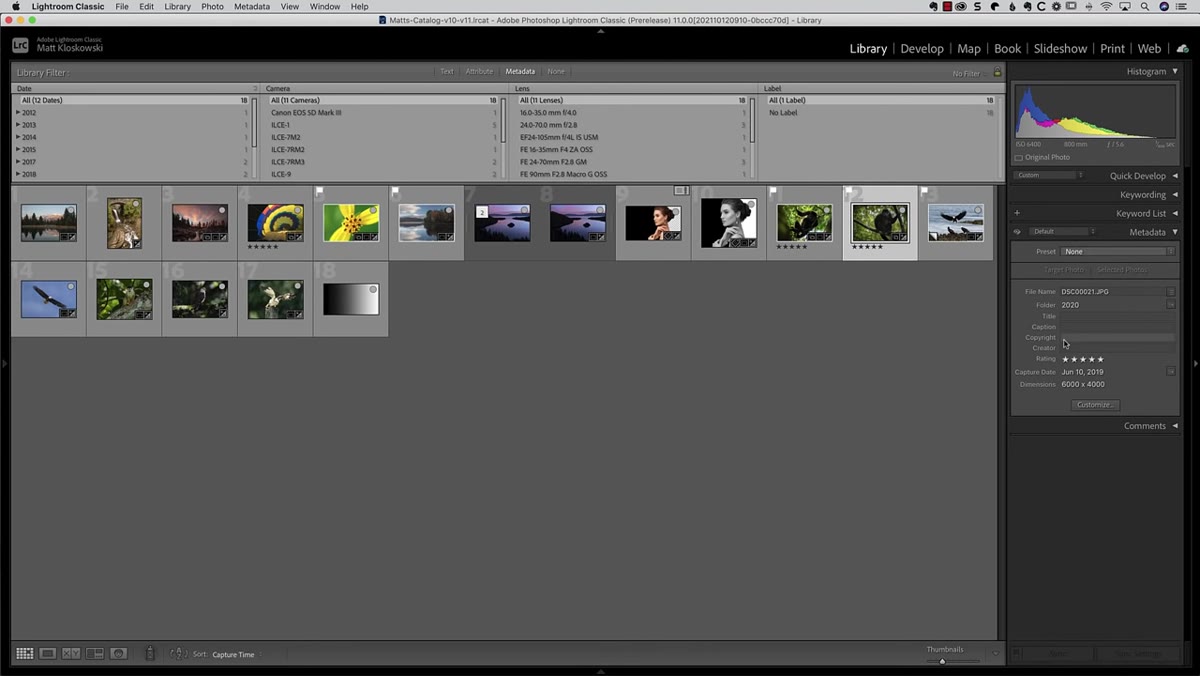 Customize button in metadata panel with field options open
In the right-hand panel of the Library module, look for a small “Customize” button in the metadata section. It only appears when you have the Default metadata preset selected, so if you’re using a custom preset you may need to switch back to Default first to find it. Once you click it, you can choose exactly which metadata fields appear in that panel, removing the ones you never check and surfacing the ones you actually use.
Customize button in metadata panel with field options open
In the right-hand panel of the Library module, look for a small “Customize” button in the metadata section. It only appears when you have the Default metadata preset selected, so if you’re using a custom preset you may need to switch back to Default first to find it. Once you click it, you can choose exactly which metadata fields appear in that panel, removing the ones you never check and surfacing the ones you actually use.
If your metadata panel currently feels like a scroll through fields you don’t care about, this is the fix. Keep it to the essentials: filename, camera model, lens, copyright, and whatever else fits your actual workflow. A cleaner panel means faster decisions during culling.
One Thing I’d Add From My Own Workflow
The Select Sky and Select Subject tools are impressive out of the box, but they’re not always the final word on a selection. I’ve found that using them as a starting point and then using the Subtract brush to clean up small problem areas gives me the best results, especially on photos with overcast skies where the edge between sky and subject is soft rather than clearly defined. Think of the AI selection as the 90% solution. Your brush handles the last 10%, and that’s still a massive time savings compared to starting from scratch.
The single biggest shift in this update is that Lightroom Classic can now make intelligent, context-aware selections without sending you to Photoshop. If your current workflow involves round-tripping to Photoshop just to isolate a sky or a subject, you can stop doing that today. The tools are here, they’re fast, and they work.
Watch the full tutorial on YouTube to see Kloskowski walk through each tool in real time, and check out his longer dedicated masking video if you want to go deeper on the intersect and combine workflows.
Comments (3)
Printing this out and pinning it next to my monitor. That good.
Quality content like this is rare. Keep it up.
Quality content like this is rare. Keep it up.
Leave a Comment