Most of my serious editing still happens at a desk with a cup of coffee and a Fleetwood Mac record spinning in the background. But client work doesn’t wait for ideal conditions, and I’ve had to get comfortable finishing edits on my phone more times than I’d like to admit. The problem is that most “mobile editing” tutorials treat Lightroom Mobile like a toy version of the real thing, full of vague gestures and zero actual settings. That’s why when I came across this Mango Street tutorial on editing like a pro in Lightroom Mobile, I paid attention. Watch the full tutorial on YouTube
What makes it worth your time is that it doesn’t pretend mobile editing is effortless. It walks through two genuinely challenging images — an astrophotography shot and a portrait — and shows the actual sliders, the actual order of operations, and the actual workarounds for people who haven’t dropped $10 a month on an Adobe subscription. Whether you’re fully paid up or running the free tier, there’s something concrete here for you.
I’m going to break it down step by step the way I wish tutorials had been written when I was learning this stuff, so you can follow along without pausing and rewinding every 30 seconds.
Step 1: Understand What You Get For Free (And What You Don’t)
 Lightroom Mobile app open on phone screen
Lightroom Mobile is free, but the free version has real limits worth knowing before you start. You won’t get selective adjustment tools like the graduated filter or healing brush. Your edits and presets won’t sync between desktop and mobile. And you can’t edit proprietary RAW files like Canon’s CR2 or CR3 format — only DNG files work on the free tier. The good news is that free web converters exist that will turn any RAW file into a DNG before you bring it into Lightroom, so the workaround is annoying but not impossible. If you’re on the fence, Adobe offers a seven-day free trial of the full version.
Lightroom Mobile app open on phone screen
Lightroom Mobile is free, but the free version has real limits worth knowing before you start. You won’t get selective adjustment tools like the graduated filter or healing brush. Your edits and presets won’t sync between desktop and mobile. And you can’t edit proprietary RAW files like Canon’s CR2 or CR3 format — only DNG files work on the free tier. The good news is that free web converters exist that will turn any RAW file into a DNG before you bring it into Lightroom, so the workaround is annoying but not impossible. If you’re on the fence, Adobe offers a seven-day free trial of the full version.
Step 2: Get Your Presets Into Lightroom Mobile
 Desktop Lightroom presets panel with import option visible
If you’re a paid subscriber, this is painless. Open the non-Classic version of desktop Lightroom, find the presets panel, click the three-dot menu, and choose import presets. Once they’re in desktop Lightroom, they automatically appear on your phone. That’s the whole step. Free users have a longer road: you need DNG versions of your presets, which you upload to a cloud service like Dropbox or Google Drive. From the Lightroom Mobile app, tap the add photos icon, choose “from files,” navigate to your preset DNGs, select all, and import them.
Desktop Lightroom presets panel with import option visible
If you’re a paid subscriber, this is painless. Open the non-Classic version of desktop Lightroom, find the presets panel, click the three-dot menu, and choose import presets. Once they’re in desktop Lightroom, they automatically appear on your phone. That’s the whole step. Free users have a longer road: you need DNG versions of your presets, which you upload to a cloud service like Dropbox or Google Drive. From the Lightroom Mobile app, tap the add photos icon, choose “from files,” navigate to your preset DNGs, select all, and import them.
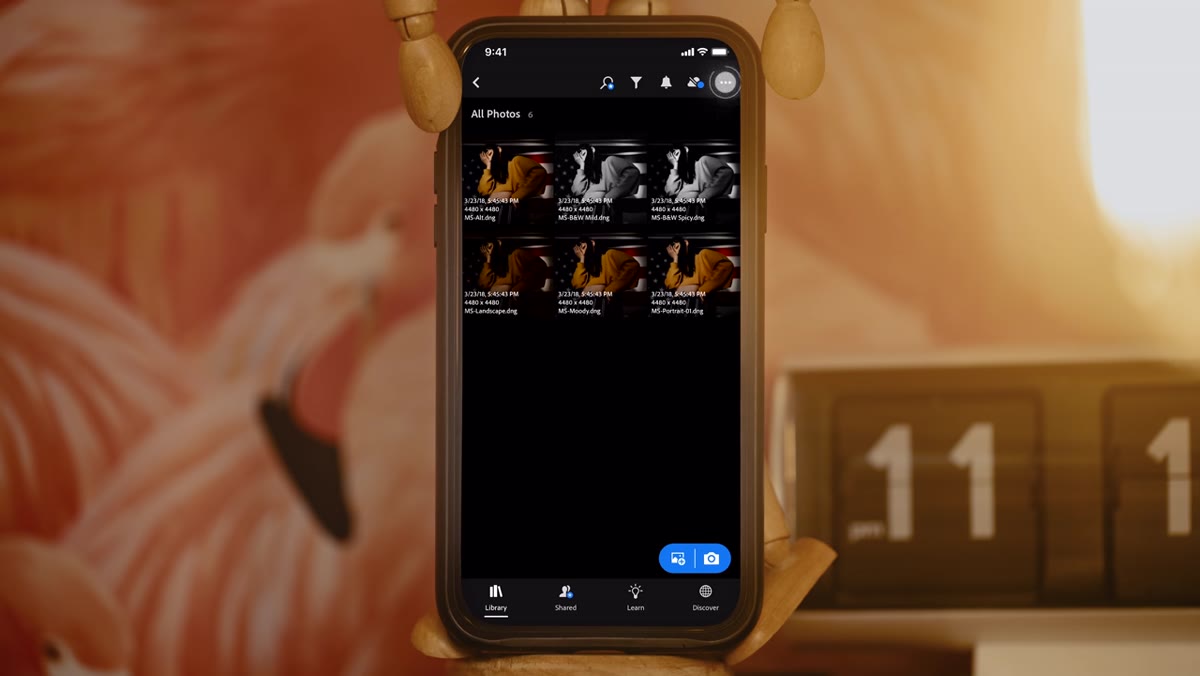 Lightroom Mobile library showing imported DNG preset files
Once imported, those DNG files sit in your library with all their settings baked in. To turn one into a usable preset, open the image, tap the menu, and choose “Create Preset.” Name it, then go into the Light settings and deselect Exposure, and into Color and deselect White Balance. You want the preset to carry your look without overriding the exposure and color temperature decisions you’ll make fresh on each new image.
Lightroom Mobile library showing imported DNG preset files
Once imported, those DNG files sit in your library with all their settings baked in. To turn one into a usable preset, open the image, tap the menu, and choose “Create Preset.” Name it, then go into the Light settings and deselect Exposure, and into Color and deselect White Balance. You want the preset to carry your look without overriding the exposure and color temperature decisions you’ll make fresh on each new image.
Step 3: Bring In Your Photo and Start With Exposure
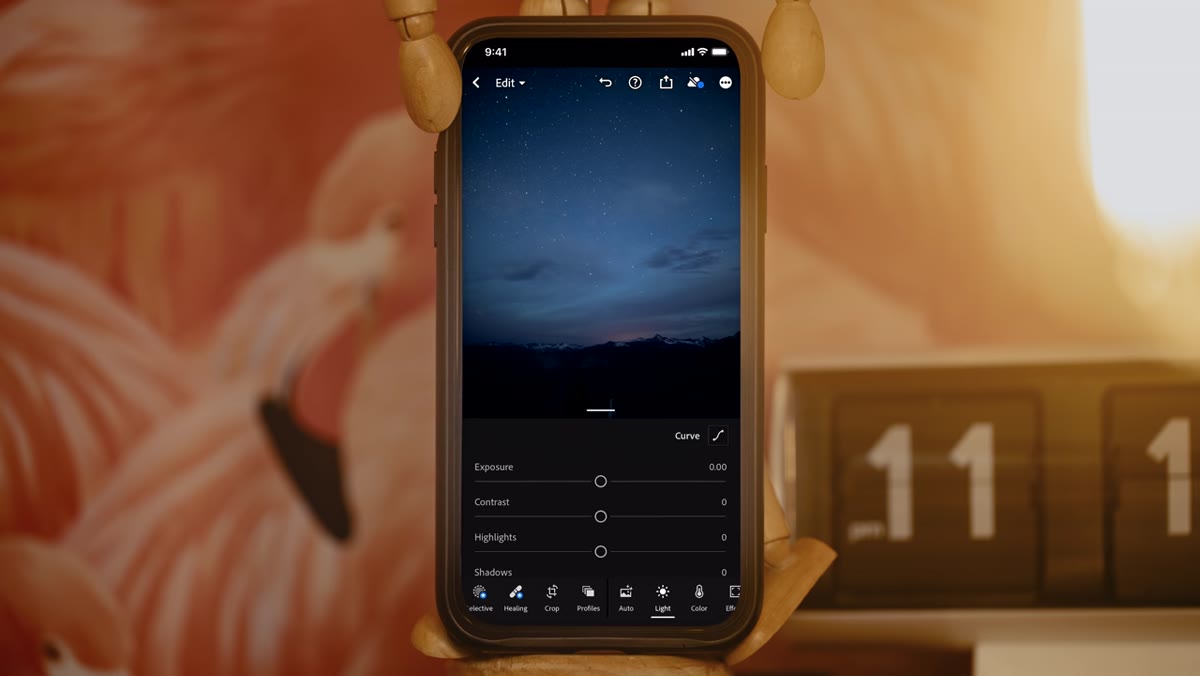 Underexposed astrophotography image open in Lightroom Mobile
The first edit in the tutorial is an astrophotography shot on a Canon 5D Mark IV, imported as a DNG. The image arrives severely underexposed, which is actually a smart shooting strategy for night sky work — you protect the highlights in the sky and recover the shadows in post. In the Light panel, push the Exposure slider up meaningfully to bring the overall brightness into a workable range. Don’t just nudge it. Night shots often need a full stop or more of recovery, and you can always pull back if things go too bright.
Underexposed astrophotography image open in Lightroom Mobile
The first edit in the tutorial is an astrophotography shot on a Canon 5D Mark IV, imported as a DNG. The image arrives severely underexposed, which is actually a smart shooting strategy for night sky work — you protect the highlights in the sky and recover the shadows in post. In the Light panel, push the Exposure slider up meaningfully to bring the overall brightness into a workable range. Don’t just nudge it. Night shots often need a full stop or more of recovery, and you can always pull back if things go too bright.
After Exposure, move to the Shadows slider and lift it separately. Shadows lets you open up the dark areas of the frame without blowing out the stars or any light sources in the image. These two sliders together give you more control than using Exposure alone.
Step 4: Adjust White Balance Creatively
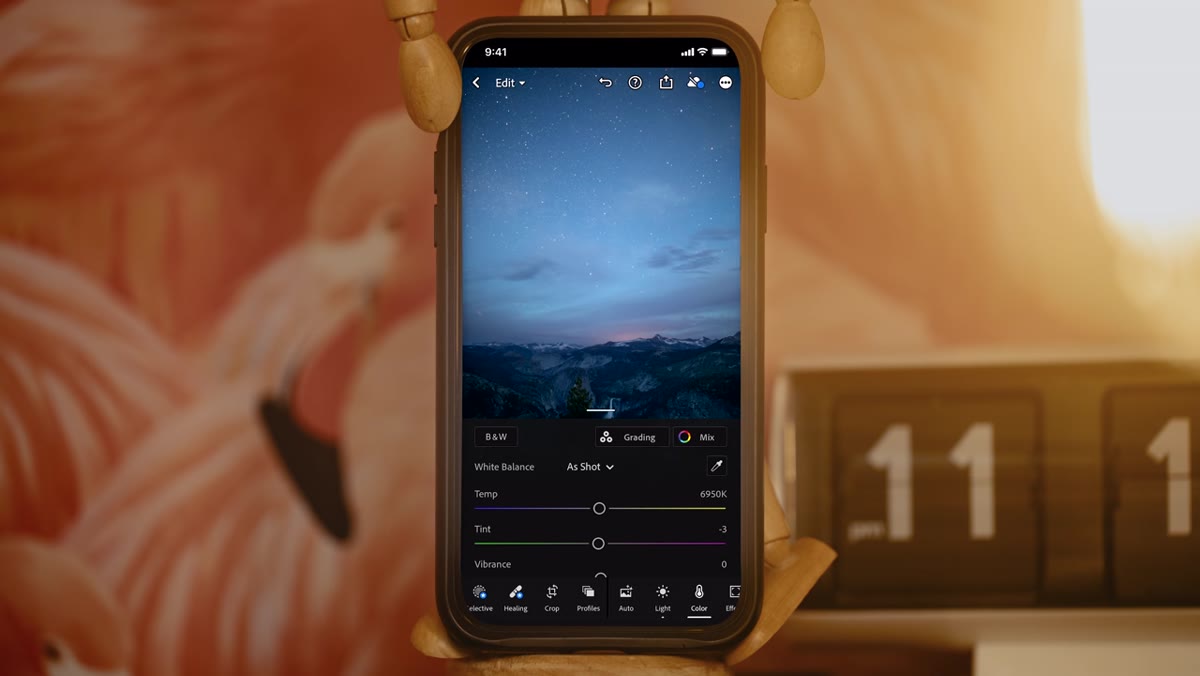 Color panel open with white balance sliders visible
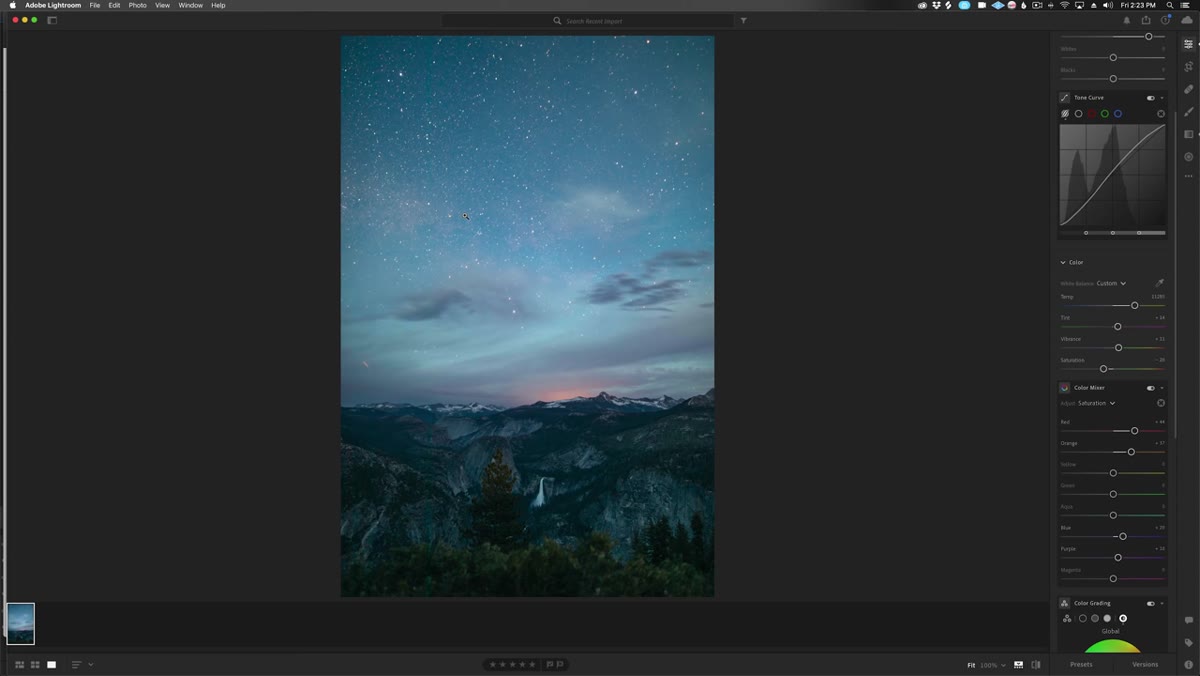
Astrophotography sits in an interesting zone where technical accuracy matters less than emotional impact. The Mango Street approach here is to warm the image slightly rather than chase a neutral white balance. In the Color panel, pull the Temperature slider toward the warm end, just enough to give the scene a golden quality, as if the last light of sunset is still caught in the atmosphere. This works especially well when there’s a mountain or horizon element in the frame that picks up that warmth. Don’t overdo it — the stars themselves should still read as cold and white.
Color panel open with white balance sliders visible
Astrophotography sits in an interesting zone where technical accuracy matters less than emotional impact. The Mango Street approach here is to warm the image slightly rather than chase a neutral white balance. In the Color panel, pull the Temperature slider toward the warm end, just enough to give the scene a golden quality, as if the last light of sunset is still caught in the atmosphere. This works especially well when there’s a mountain or horizon element in the frame that picks up that warmth. Don’t overdo it — the stars themselves should still read as cold and white.
Step 5: Use Vibrance and Saturation Together (Not Interchangeably)
 Vibrance and saturation sliders in Lightroom Mobile color panel
This is the step most beginners skip because they treat Vibrance and Saturation as the same tool. They aren’t. Vibrance is intelligent — it boosts the colors that are already muted in your image without pushing the already-saturated colors further. In a night sky photo, that means it brings out the warm orange glow near the horizon or a faint purple in the upper atmosphere without making the whole image look like a theme park. Boost Vibrance first, then actually pull Saturation down slightly. The combination feels richer and more controlled than cranking either one alone.
Vibrance and saturation sliders in Lightroom Mobile color panel
This is the step most beginners skip because they treat Vibrance and Saturation as the same tool. They aren’t. Vibrance is intelligent — it boosts the colors that are already muted in your image without pushing the already-saturated colors further. In a night sky photo, that means it brings out the warm orange glow near the horizon or a faint purple in the upper atmosphere without making the whole image look like a theme park. Boost Vibrance first, then actually pull Saturation down slightly. The combination feels richer and more controlled than cranking either one alone.
Step 6: Shape the Tone Curve
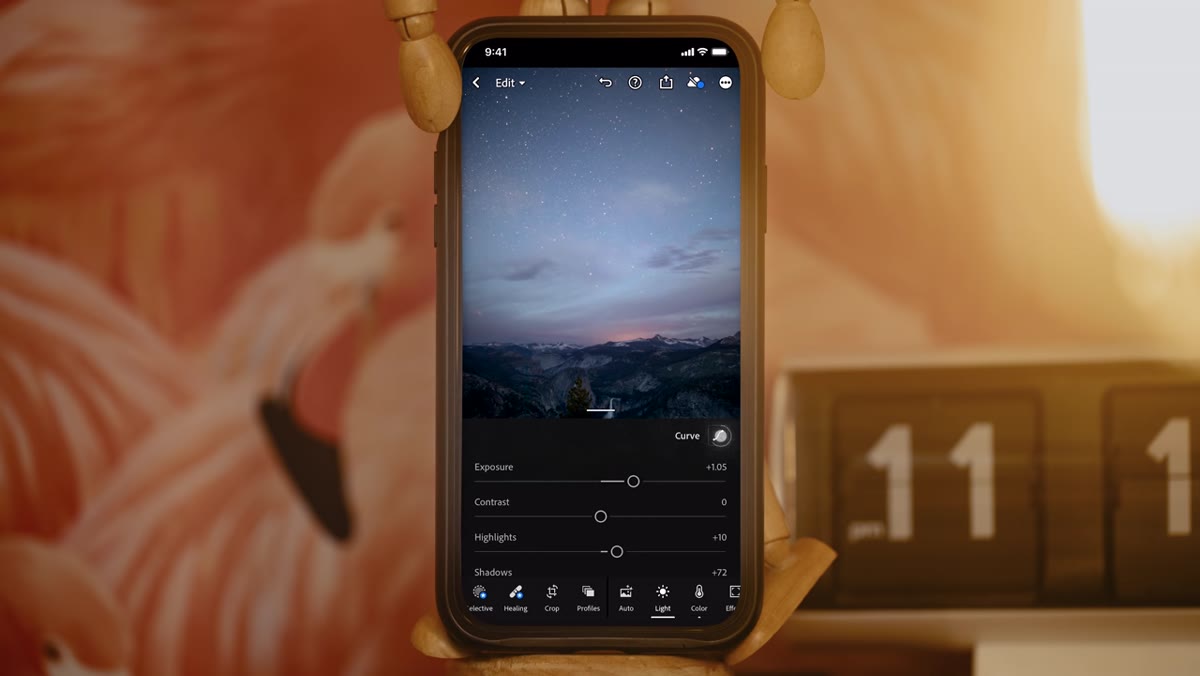 Tone curve panel open in Lightroom Mobile
The curve is where the edit goes from corrected to crafted. Tap the curve icon in the Light menu. For a moody astrophotography look, a gentle S-curve works well — lift the highlights slightly, pull the shadows down slightly — but the Mango Street approach in this tutorial focuses on building contrast without destroying the shadow detail they worked hard to recover. Small moves matter here. On a phone screen the curve editor feels cramped, but take your time placing anchor points because one aggressive pull will flatten or blow out what you’ve spent the previous steps building.
Tone curve panel open in Lightroom Mobile
The curve is where the edit goes from corrected to crafted. Tap the curve icon in the Light menu. For a moody astrophotography look, a gentle S-curve works well — lift the highlights slightly, pull the shadows down slightly — but the Mango Street approach in this tutorial focuses on building contrast without destroying the shadow detail they worked hard to recover. Small moves matter here. On a phone screen the curve editor feels cramped, but take your time placing anchor points because one aggressive pull will flatten or blow out what you’ve spent the previous steps building.
What I’d Add From My Own Workflow
The tutorial covers the mechanics well, but one thing I always do before touching Exposure on a night shot is check the histogram. Lightroom Mobile shows it at the top of the edit panel, and for astrophotography you want to see the majority of data living in the left half of the histogram before you start pushing it right. If the shot is so underexposed that the histogram is crammed against the left wall, that’s a signal your shadows may turn noisy as you lift them. In that case, I’ll bump Noise Reduction under the Detail panel before anything else, so the recovery process doesn’t amplify grain I’ll have to fight later. It’s a small move that saves real time.
The single most important thing this tutorial gets right is the order of operations. Exposure first, then white balance, then vibrance before saturation, then the curve. That sequence isn’t arbitrary — each adjustment is working with the corrected version of the step before it. Follow that order and your edits will feel intentional rather than like you’re just pushing sliders until something looks good.
Watch the full tutorial on YouTube to see the portrait edit that follows, which uses a different set of priorities and is worth studying alongside the astrophotography breakdown.
Comments (1)
I keep coming back to this article. It's that useful.
Leave a Comment