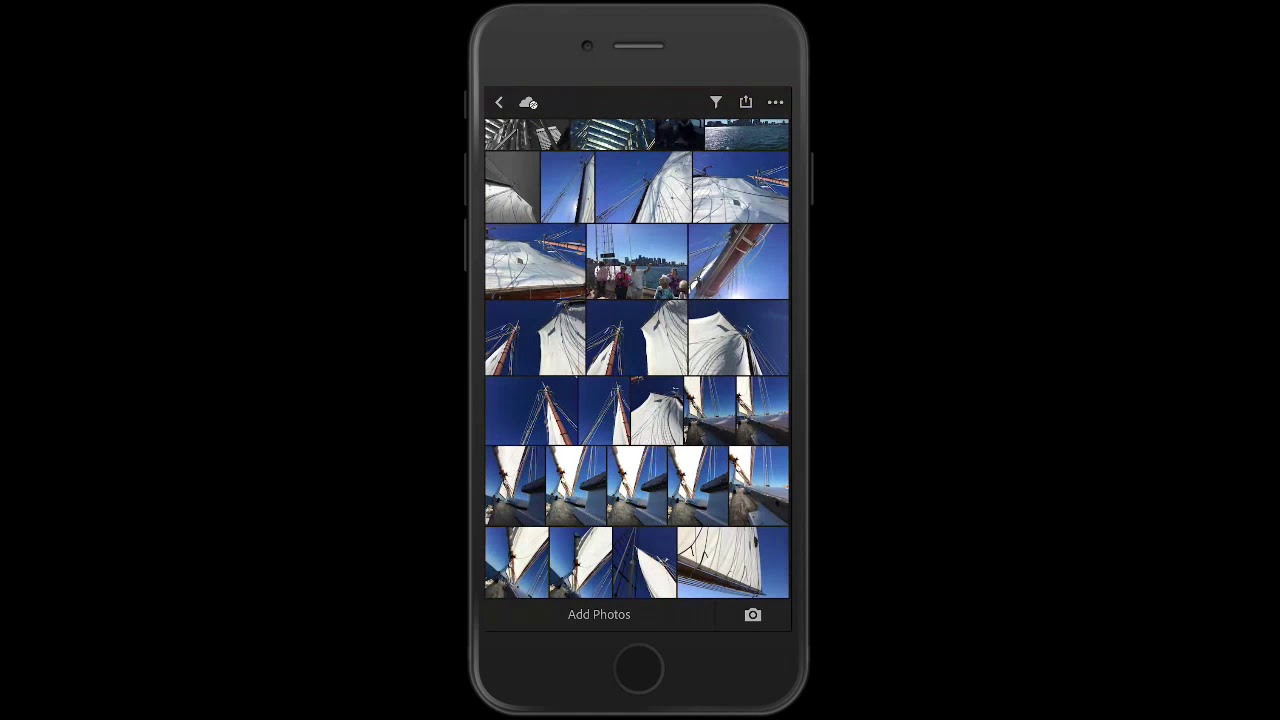
If you edit photos on your phone with any regularity, you already know the specific frustration of reaching for a tool that should be there and finding nothing. For me, that tool was the brush. Every time I handed off a mobile edit workflow to a client or walked someone through Lightroom Mobile at a workshop, the question was the same: “Where’s the brush?” And every time, I had to explain that it just wasn’t there yet. Then July 2017 happened.
Watch the full tutorial on YouTube
In this Matt Kloskowski tutorial, recorded the day the Lightroom Mobile 2.8 update dropped, Matt walks through the two additions that photographers had been asking about the loudest: the brush tool for selective edits and global sharpening in the Detail panel. These aren’t flashy AI features. They’re foundational tools that should have been there from the start, and now that they are, mobile editing finally feels like a complete workflow rather than a compromised one. Here’s exactly how to use them.
Step 1: Find the Selective Edits Panel
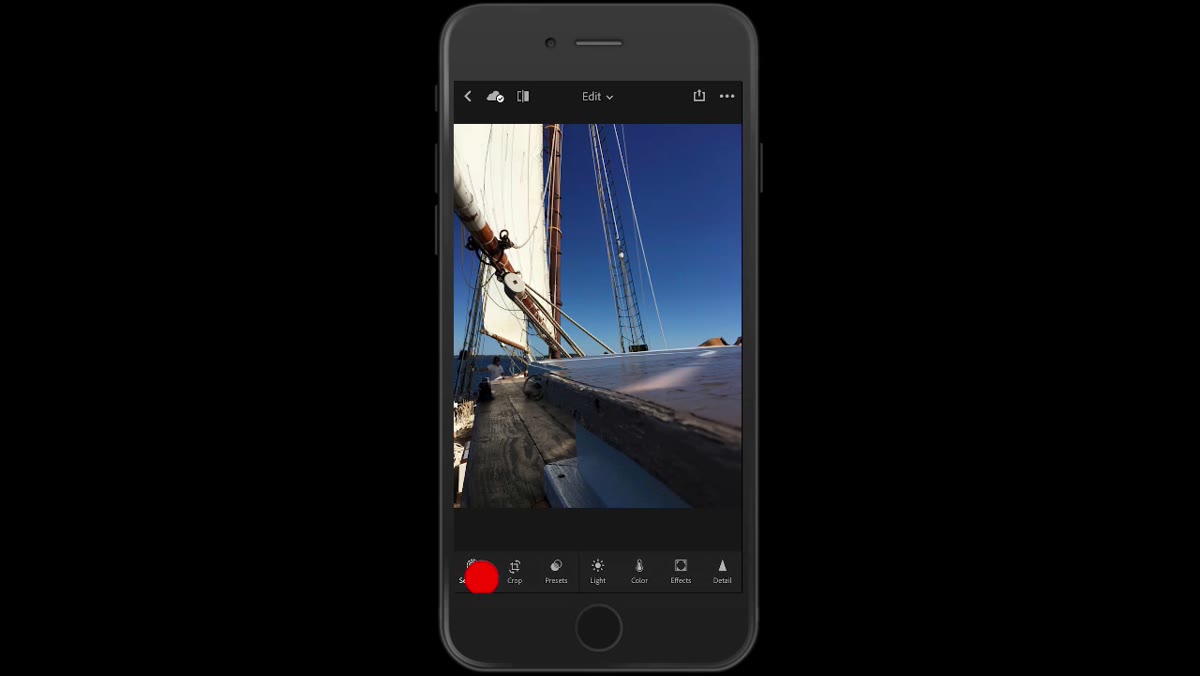 Selective edits menu open, showing the plus icon
Open any image in Lightroom Mobile and look at the lower left corner of the screen. You’ll see a button labeled “Selective Edits.” Tap it, then tap the small plus icon that appears. This reveals your local adjustment tools. Before version 2.8, you had two options: the radial filter (the circle) and the graduated filter (the square). Now a third option sits alongside them: the brush.
Selective edits menu open, showing the plus icon
Open any image in Lightroom Mobile and look at the lower left corner of the screen. You’ll see a button labeled “Selective Edits.” Tap it, then tap the small plus icon that appears. This reveals your local adjustment tools. Before version 2.8, you had two options: the radial filter (the circle) and the graduated filter (the square). Now a third option sits alongside them: the brush.
This placement makes sense once you know it’s there, but it’s easy to miss if you’re scanning the interface quickly. Take a second to orient yourself before moving on.
Step 2: Select the Brush Tool
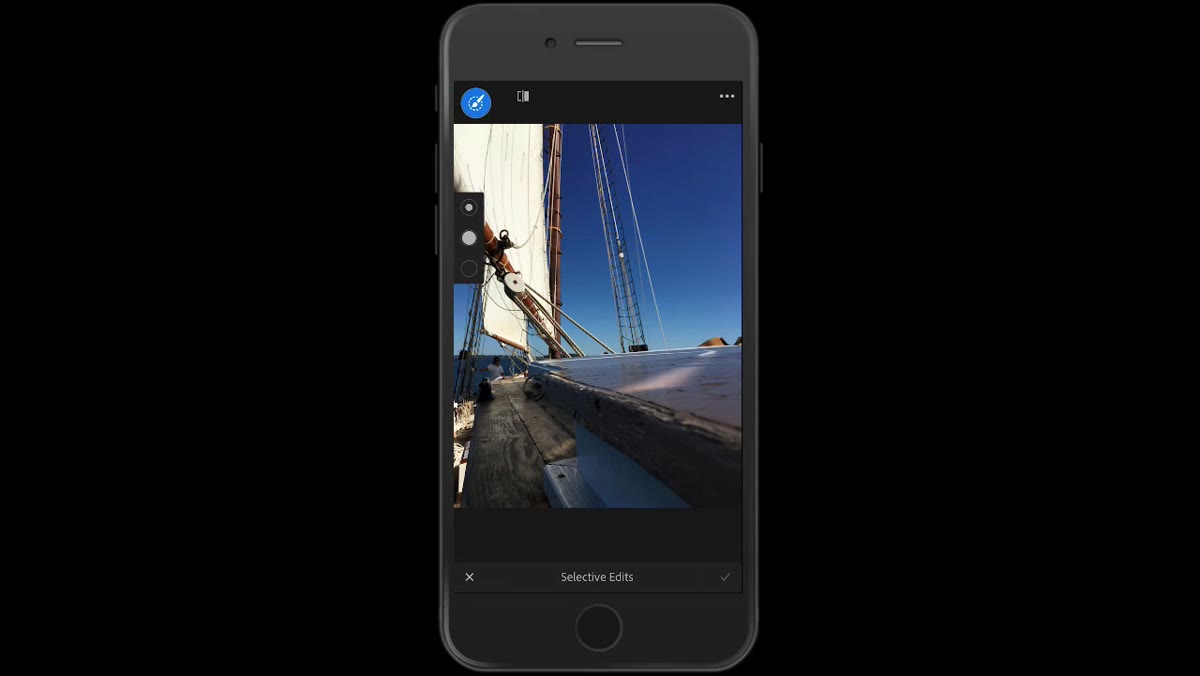 Brush tool selected in the selective edits menu
Tap the brush icon to activate it. Once you do, three small dots appear along the side of the screen. These are your brush controls, and they’re not labeled, so here’s what each one does: the bottom dot controls flow, the middle dot controls feather, and the top dot controls brush size. Tap and hold any of them, then drag up or down to adjust the value.
Brush tool selected in the selective edits menu
Tap the brush icon to activate it. Once you do, three small dots appear along the side of the screen. These are your brush controls, and they’re not labeled, so here’s what each one does: the bottom dot controls flow, the middle dot controls feather, and the top dot controls brush size. Tap and hold any of them, then drag up or down to adjust the value.
Flow determines how much of the adjustment gets applied with each stroke. Feather softens the edges of your brush strokes so they blend naturally into the surrounding image. Size is self-explanatory. Get comfortable with these three before you start painting, because trying to fix a heavy-handed brush stroke after the fact is more annoying than setting it right from the beginning.
Step 3: Paint Your Adjustment Area
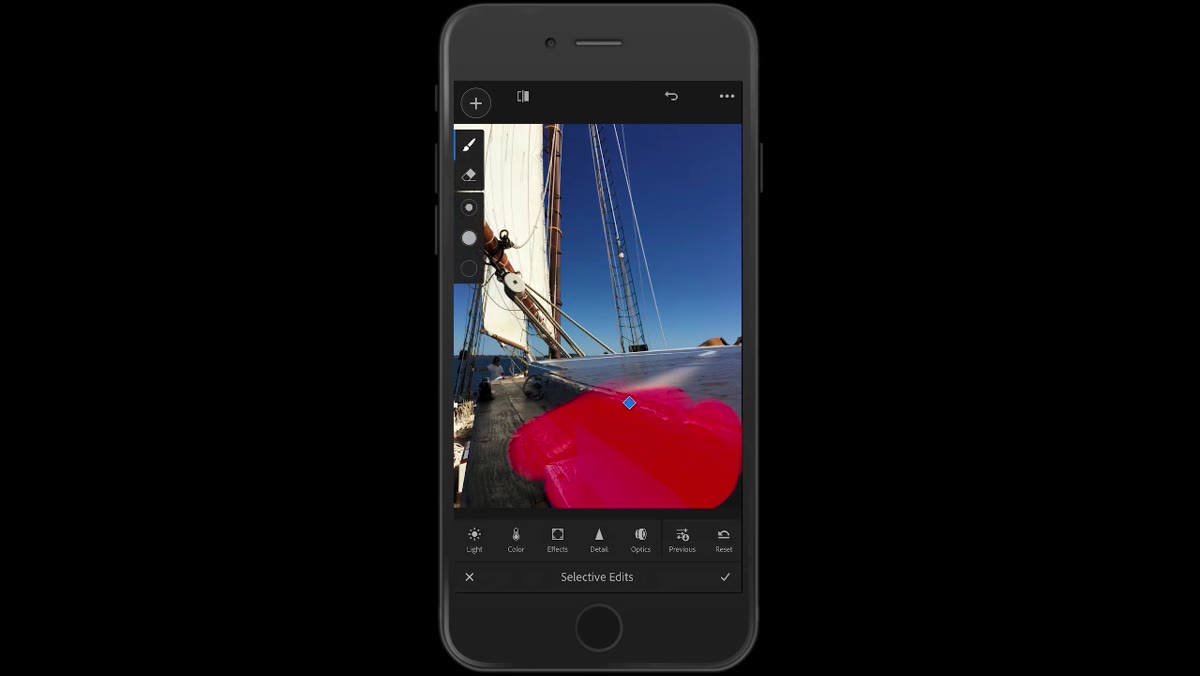 Brush strokes being applied to the lower corner of the photo
With your brush configured, paint over the area of the image you want to affect. One detail that Matt points out, and that genuinely surprised me the first time I tried it: the brush is pressure sensitive. A light tap lays down a subtle stroke. Pressing harder increases the opacity of the effect right where you’re painting. If you’re using a stylus, this feels remarkably close to painting in a desktop application. Even with a finger, it gives you more control than you’d expect.
Brush strokes being applied to the lower corner of the photo
With your brush configured, paint over the area of the image you want to affect. One detail that Matt points out, and that genuinely surprised me the first time I tried it: the brush is pressure sensitive. A light tap lays down a subtle stroke. Pressing harder increases the opacity of the effect right where you’re painting. If you’re using a stylus, this feels remarkably close to painting in a desktop application. Even with a finger, it gives you more control than you’d expect.
If you overshoot the area you meant to paint, there’s an erase button at the top of the screen. Switch to it and brush away the mistake. You don’t have to undo the whole stroke and start over.
Step 4: Apply Your Adjustment
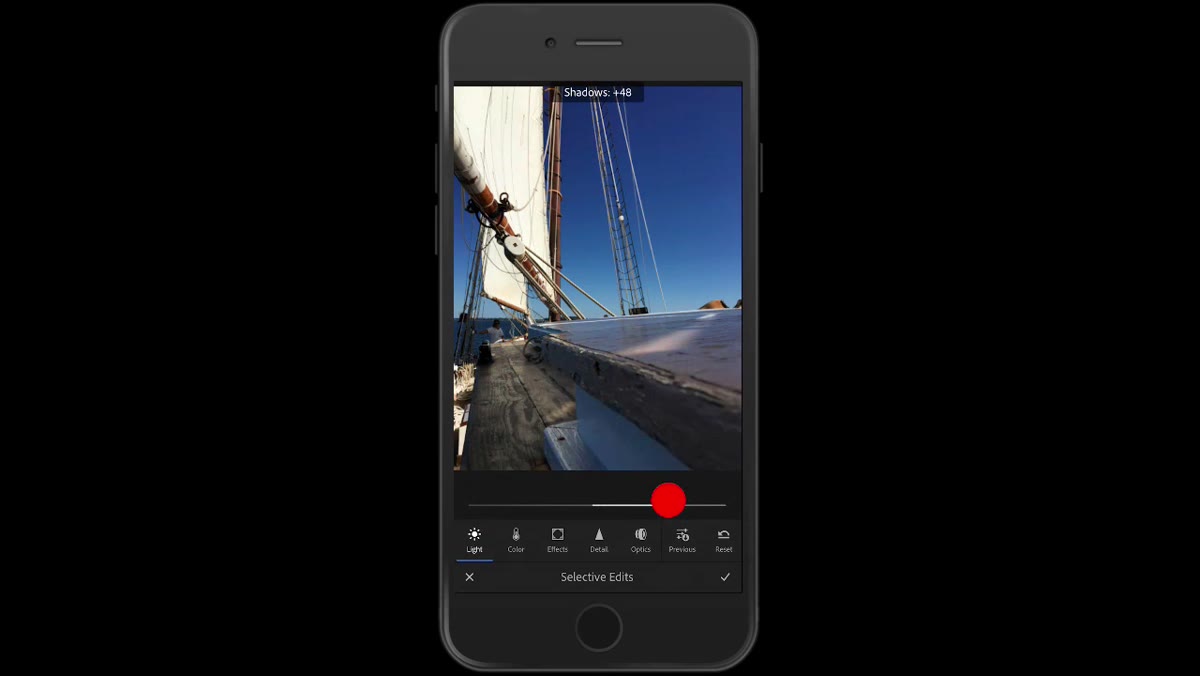 Exposure slider being dragged up on a brushed selection
Once you’ve painted your mask, tap one of the adjustment icons at the bottom of the screen to choose what you want to change. Exposure, shadows, highlights, contrast, and other familiar sliders are all available. Drag the slider and the adjustment applies only to the area you painted. Matt demonstrates this by brightening an underexposed corner, which is one of the most common real-world uses for a selective brush.
Exposure slider being dragged up on a brushed selection
Once you’ve painted your mask, tap one of the adjustment icons at the bottom of the screen to choose what you want to change. Exposure, shadows, highlights, contrast, and other familiar sliders are all available. Drag the slider and the adjustment applies only to the area you painted. Matt demonstrates this by brightening an underexposed corner, which is one of the most common real-world uses for a selective brush.
The adjustment preview updates in real time, so you can see exactly what’s happening as you drag. If the effect looks too heavy, pull the slider back. If it’s too subtle, increase it. The mask you already painted stays in place while you tweak.
Step 5: Use the Overlay and Brush Options Menu
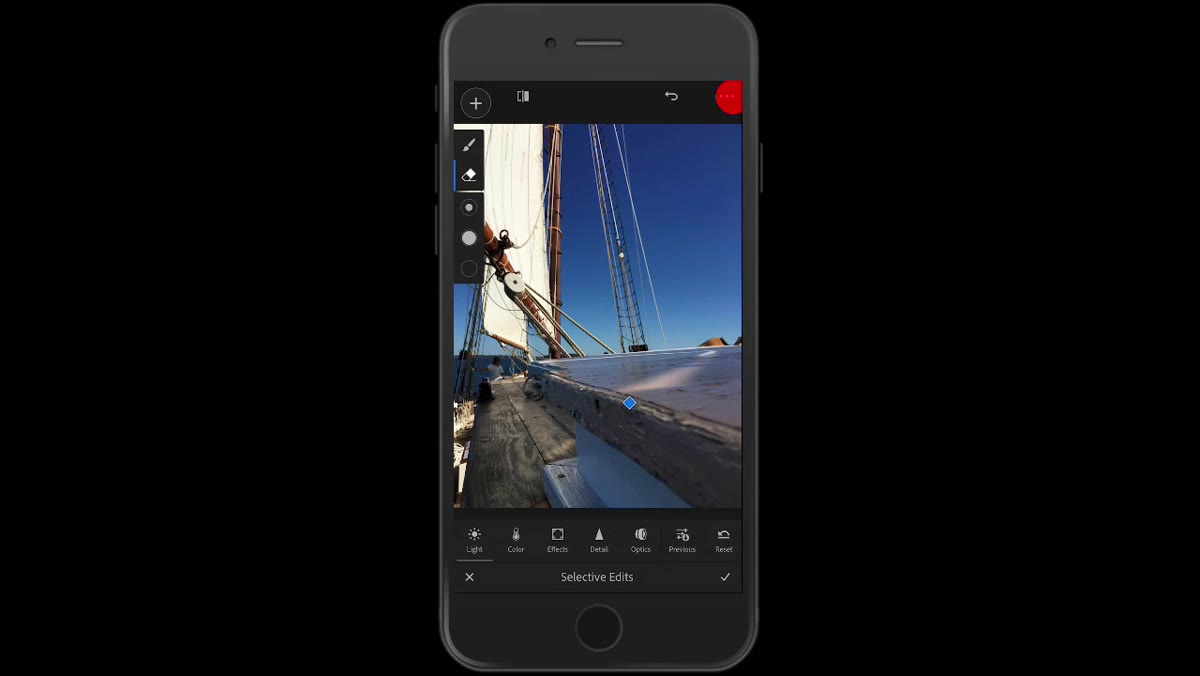 Three-dot menu open showing duplicate, remove, reset, and auto-show options
Tap the three dots in the upper right corner of the brush interface to access additional options. You’ll find the ability to duplicate the brush, remove it, or reset it. The option Matt specifically recommends is “Auto Show Overlay.” When this is active, Lightroom displays the red overlay while you’re painting so you can see exactly where your mask is being applied. When you stop brushing and start adjusting sliders, the overlay disappears so you can evaluate the actual edit without the red tint in the way.
Three-dot menu open showing duplicate, remove, reset, and auto-show options
Tap the three dots in the upper right corner of the brush interface to access additional options. You’ll find the ability to duplicate the brush, remove it, or reset it. The option Matt specifically recommends is “Auto Show Overlay.” When this is active, Lightroom displays the red overlay while you’re painting so you can see exactly where your mask is being applied. When you stop brushing and start adjusting sliders, the overlay disappears so you can evaluate the actual edit without the red tint in the way.
This toggle is small but it changes the whole experience. Without it, you’re either looking at a red mask when you want to see your edit, or flying blind when you want to check your mask coverage.
Step 6: Add Global Sharpening With the Detail Panel
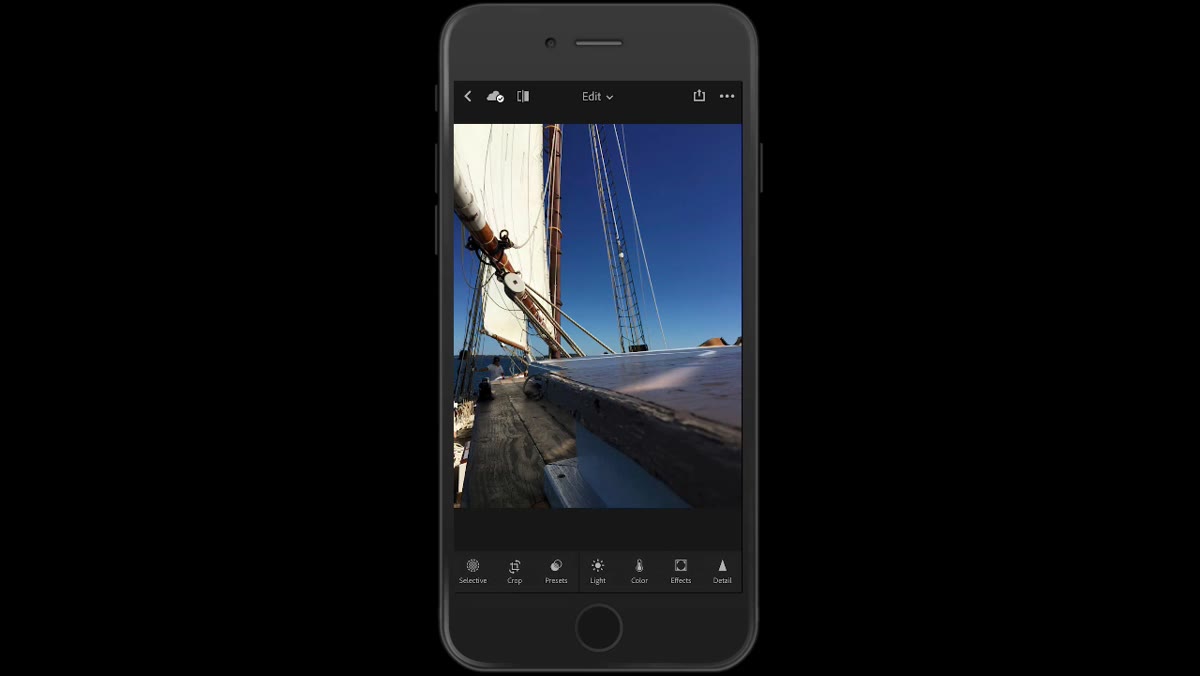 Detail panel open showing sharpening and noise reduction sliders
After committing your brush edit with the checkmark, exit the selective edit panel and scroll to the lower right corner of the main editing interface. There’s now a panel called Detail. Tap it and you’ll find sharpening and noise reduction sliders, both of which now apply globally to the entire image.
Detail panel open showing sharpening and noise reduction sliders
After committing your brush edit with the checkmark, exit the selective edit panel and scroll to the lower right corner of the main editing interface. There’s now a panel called Detail. Tap it and you’ll find sharpening and noise reduction sliders, both of which now apply globally to the entire image.
Before version 2.8, sharpening was only available inside the radial and graduated filter tools, which meant you could only sharpen a region, not the whole photo. That was a strange limitation that made it hard to finish an image on mobile. Now the workflow makes sense. Dial in your sharpening here the same way you would in desktop Lightroom, and the edit syncs across your devices like everything else.
What I’d Add From My Own Workflow
The brush tool in mobile is genuinely useful, but I’d encourage you to keep your strokes broad and intentional. Mobile screens make it easy to think you’re being precise when you’re actually painting into areas you didn’t mean to touch. I’ve started zooming in before brushing on any edit that involves a subject’s face or a fine edge between light and shadow. Pinch to zoom works in the selective edit view, and using it consistently has cut my erase-and-redo cycles in half.
Also worth knowing: if you paint a brush adjustment on mobile and then open the same file in Lightroom on desktop, the brush mask comes through correctly. The sync is clean. That means you can rough in a brush edit on your phone while you’re on location and refine it at your desk later without losing any work.
The Lightroom Mobile brush tool transformed mobile editing from a preview-and-approximate experience into something you can actually finish a photo inside. The same goes for global sharpening. These two additions, simple as they sound, removed the last reasons I had to defer edits until I was back at my desk.
If you want to see Matt walk through both features in real time with a live image, the full video is worth watching before you dig into your own photos.
Watch the full tutorial on YouTube
Comments (2)
Printing this out and pinning it next to my monitor. That good.
Would love to see a follow-up going deeper into this topic.
Leave a Comment