
There’s a specific kind of editing paralysis I run into more than I’d like to admit. I open a raw file, stare at the develop module, and have absolutely no idea where to start. The image is technically fine, but the look I want is somewhere in my head and I can’t translate it into slider movements. For years, the solution was either burning time experimenting or reaching for a preset pack and hoping something landed close enough to build from. Both felt like workarounds. Lightroom’s AI adaptive presets feel like an actual answer.
Watch the full tutorial on YouTube
In this Aaron Nace (PHLEARN) tutorial, the final episode of his 30 Days of Lightroom series, he walks through how to use Lightroom’s AI-powered adaptive presets across Classic, mobile, and desktop versions. These aren’t your standard one-size-fits-all presets. They use machine learning to identify specific elements in your photo, including the sky, the subject, and the background depth, and apply targeted edits only to those areas. No masking, no selection work, no manual masking with a brush. The whole process takes seconds, which sounds like marketing language until you actually watch it happen.
What makes this tutorial worth your time isn’t just that Nace shows you the presets exist. He shows you how to use them as a creative launching pad rather than a final answer, and that reframe changes how useful they actually are.
Step 1: Open the Develop Module and Find the Presets Panel
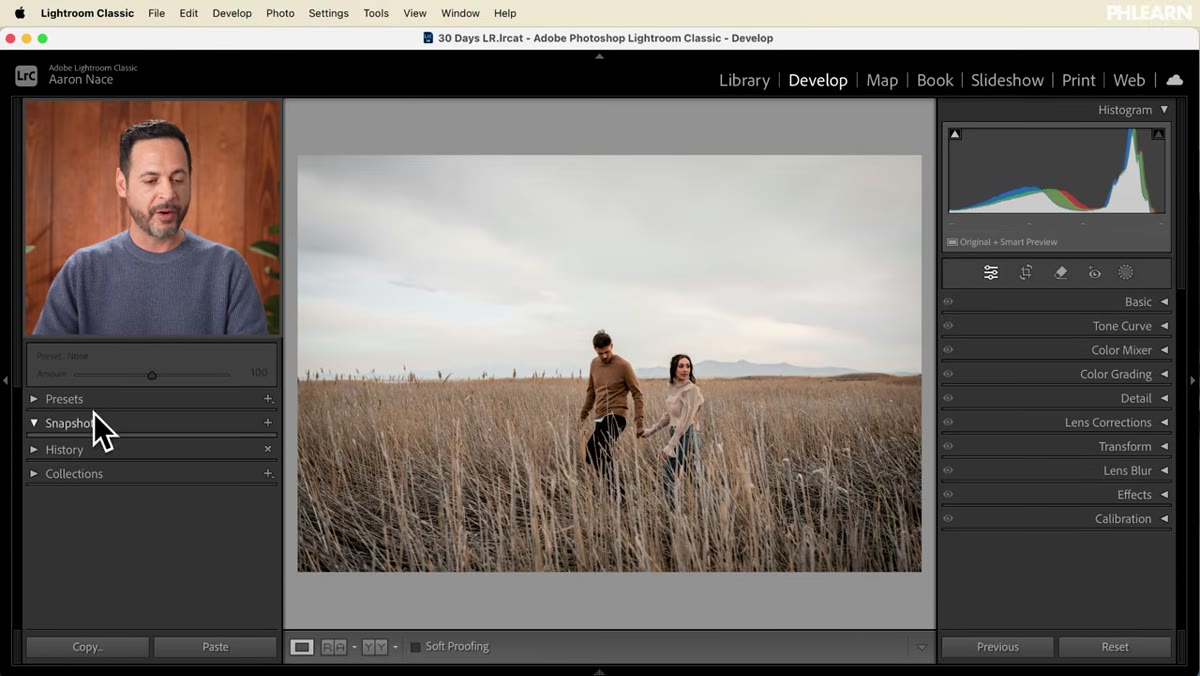 Develop module open with presets panel visible on left
Start in Lightroom Classic with your image open. Switch to the Develop module, then look at the left panel and expand the Presets section. If you’ve been following along with any editing work, you’ll likely see your own user presets sitting at the top. Nace notes that you can apply any of those here, and creating your own is as simple as dialing in the settings you want on the right panel, then clicking the plus icon to save them. Color grading settings work especially well for this.
Develop module open with presets panel visible on left
Start in Lightroom Classic with your image open. Switch to the Develop module, then look at the left panel and expand the Presets section. If you’ve been following along with any editing work, you’ll likely see your own user presets sitting at the top. Nace notes that you can apply any of those here, and creating your own is as simple as dialing in the settings you want on the right panel, then clicking the plus icon to save them. Color grading settings work especially well for this.
Step 2: Locate the Adaptive Presets Folder
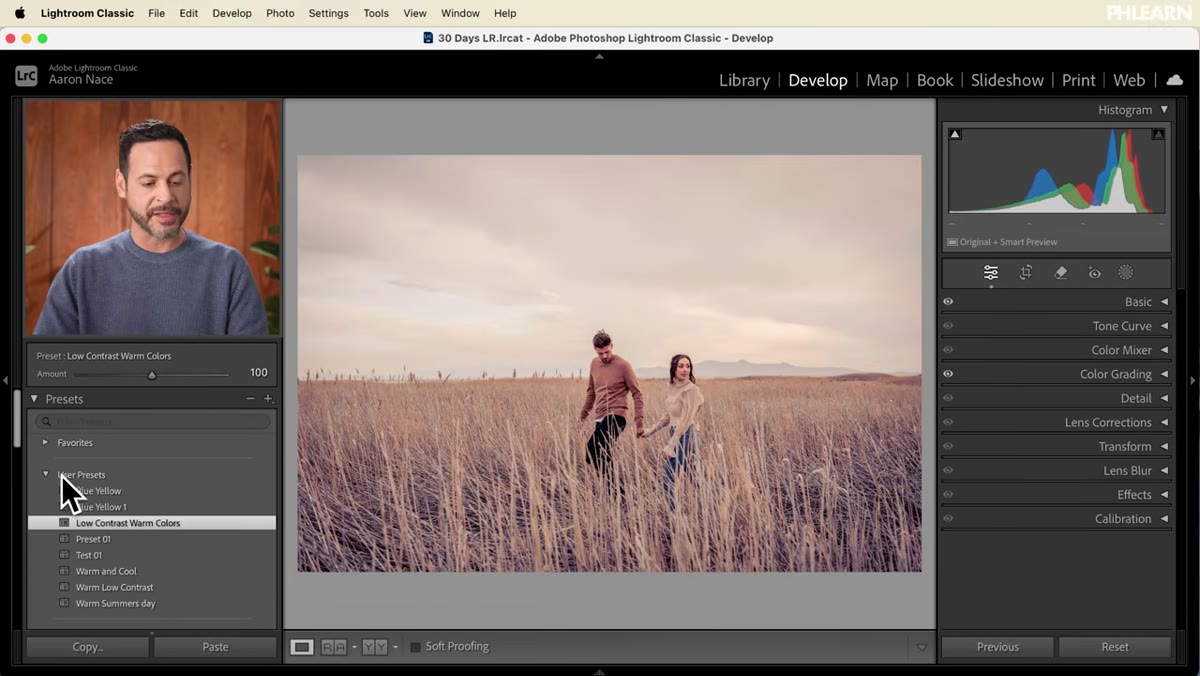 Adaptive presets folder expanded showing categories
Scroll past your user presets until you find the Adaptive Presets section. Expand it and you’ll see four main categories: Portrait, Sky, Subject, and Blur Background. Each one is powered by Lightroom’s AI, which means the edits aren’t applied as a flat layer across the whole image. The software reads the photo first, identifies the relevant region, and confines the edit to that area. This is the core difference between adaptive presets and every other preset you’ve used before.
Adaptive presets folder expanded showing categories
Scroll past your user presets until you find the Adaptive Presets section. Expand it and you’ll see four main categories: Portrait, Sky, Subject, and Blur Background. Each one is powered by Lightroom’s AI, which means the edits aren’t applied as a flat layer across the whole image. The software reads the photo first, identifies the relevant region, and confines the edit to that area. This is the core difference between adaptive presets and every other preset you’ve used before.
Step 3: Apply an Adaptive Sky Preset
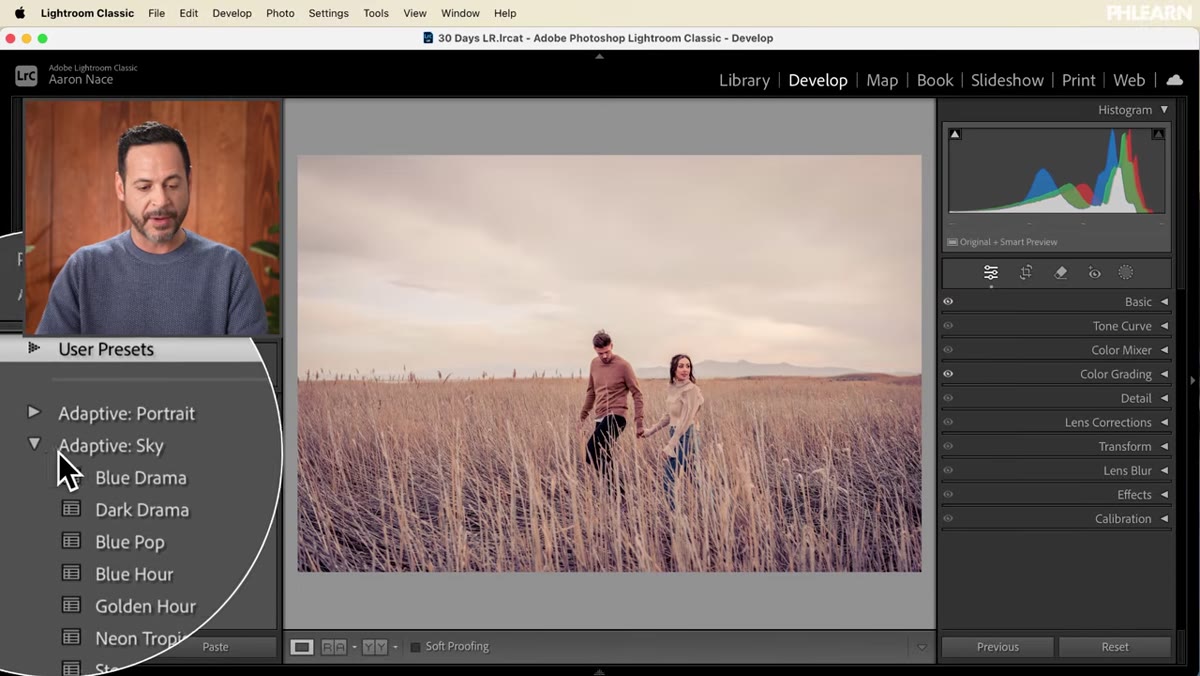 Sky preset applied to landscape image, sky visibly changed
Click on the Sky category and a set of style options will appear. Hover over any of them and Lightroom previews the result in real time directly on your image. Nace demonstrates this with a landscape shot, and you can watch the sky shift tone and color as he moves through each option. The AI has already identified the sky region, so the edit stops at the horizon. Nothing in the foreground is touched. His pick is a sunset-style purple treatment, but the real value here isn’t which preset looks best. It’s that within thirty seconds you have a direction for the image that would have taken several minutes of manual masking to set up.
Sky preset applied to landscape image, sky visibly changed
Click on the Sky category and a set of style options will appear. Hover over any of them and Lightroom previews the result in real time directly on your image. Nace demonstrates this with a landscape shot, and you can watch the sky shift tone and color as he moves through each option. The AI has already identified the sky region, so the edit stops at the horizon. Nothing in the foreground is touched. His pick is a sunset-style purple treatment, but the real value here isn’t which preset looks best. It’s that within thirty seconds you have a direction for the image that would have taken several minutes of manual masking to set up.
Step 4: Apply an Adaptive Subject Preset
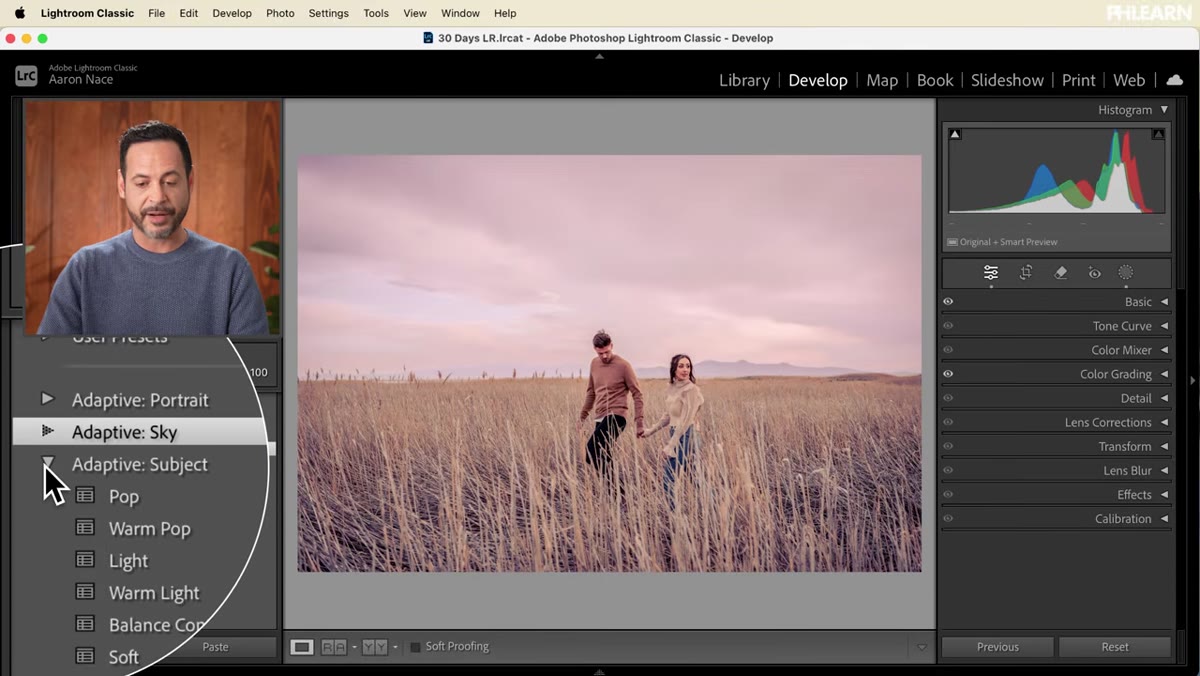 Subject preset applied, people in image selectively edited
Switch to the Subject category inside Adaptive Presets. Even if your subjects are small in the frame or not sharply separated from the background, Lightroom’s subject detection still picks them up. Nace tests this on an image where the people are not the dominant element and the AI finds them anyway. Scroll through the options and look for something that adds dimension without flattening the natural look of the photo. He lands on a “Pop” style treatment. The subjects read with a little more presence without looking artificially brightened.
Subject preset applied, people in image selectively edited
Switch to the Subject category inside Adaptive Presets. Even if your subjects are small in the frame or not sharply separated from the background, Lightroom’s subject detection still picks them up. Nace tests this on an image where the people are not the dominant element and the AI finds them anyway. Scroll through the options and look for something that adds dimension without flattening the natural look of the photo. He lands on a “Pop” style treatment. The subjects read with a little more presence without looking artificially brightened.
Step 5: Use the Amount Slider to Dial It Back
 Amount slider being adjusted under adaptive preset options
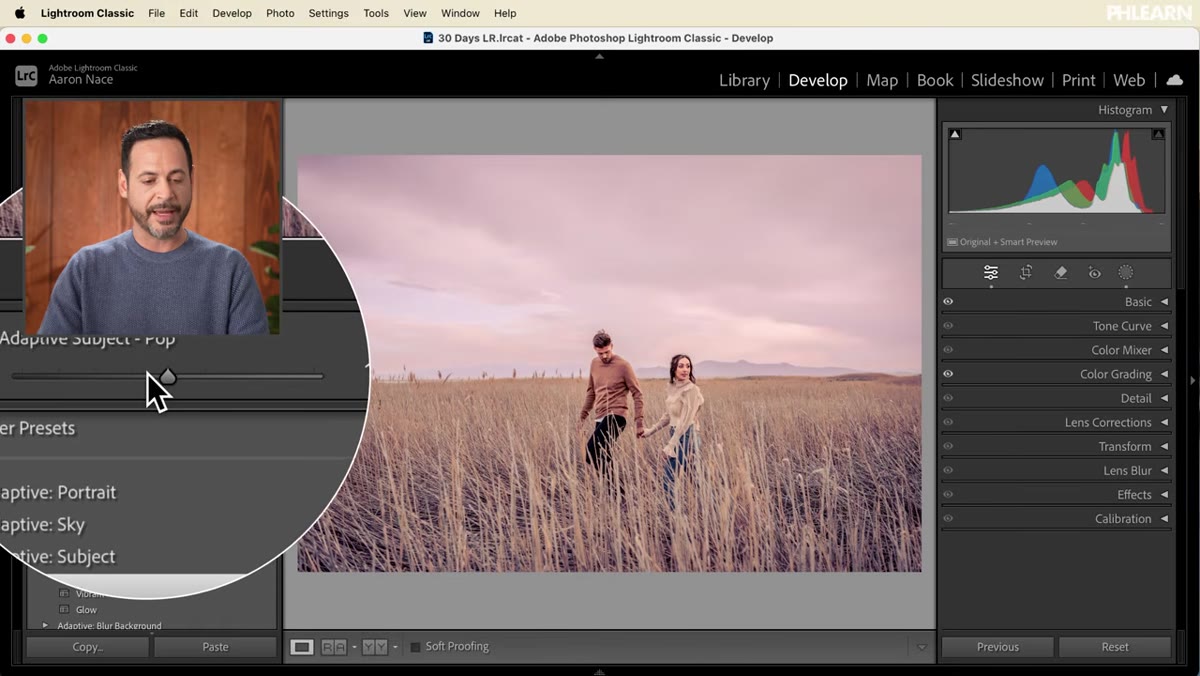
This is the step most people skip, and it matters. After applying any adaptive preset, look just below the preset name in the panel and you’ll find an Amount slider. It defaults to 100, but pulling it down to somewhere between 40 and 70 usually produces a much more natural result. Think of it like opacity for the whole preset. Nace pushes his all the way up and then back down to demonstrate the range. The slider gives you the creative control to decide how hard or soft the AI’s interpretation lands on your specific image.
Amount slider being adjusted under adaptive preset options
This is the step most people skip, and it matters. After applying any adaptive preset, look just below the preset name in the panel and you’ll find an Amount slider. It defaults to 100, but pulling it down to somewhere between 40 and 70 usually produces a much more natural result. Think of it like opacity for the whole preset. Nace pushes his all the way up and then back down to demonstrate the range. The slider gives you the creative control to decide how hard or soft the AI’s interpretation lands on your specific image.
Step 6: Apply the Blur Background Preset
 Background blur applied, foreground subjects remain sharp
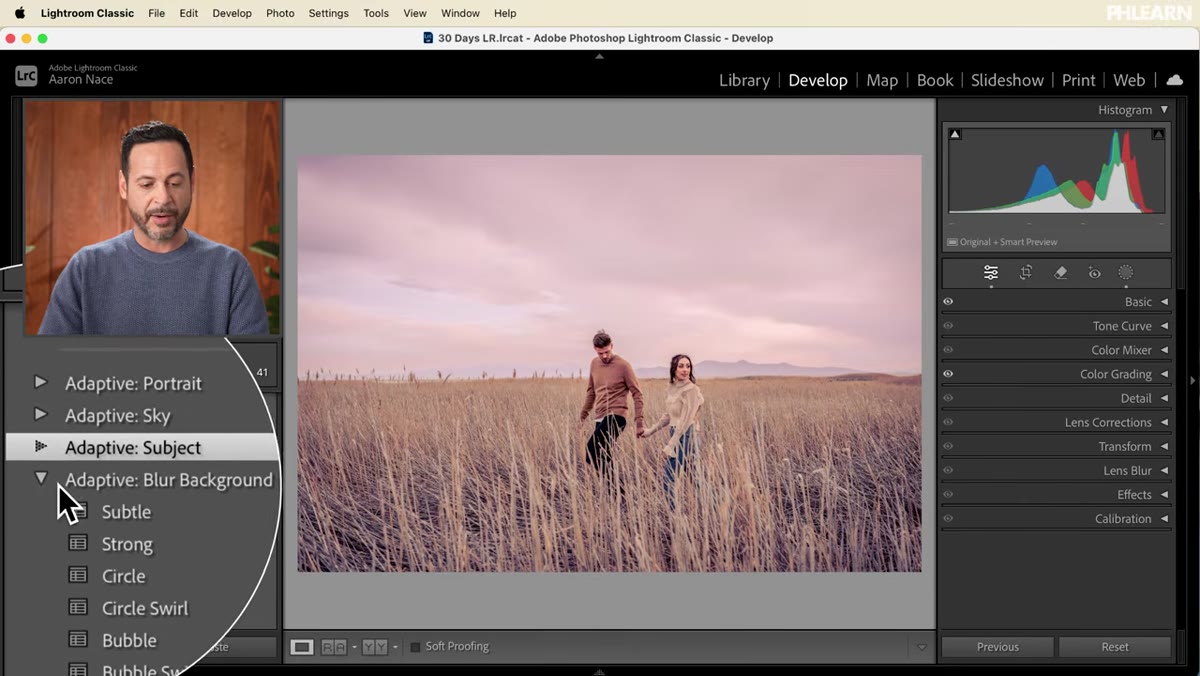
The Blur Background adaptive preset is where the AI does its most impressive work. Select either the Subtle or Strong option and Lightroom analyzes the depth information in the image to estimate a depth map. The background softens while the foreground subjects remain sharp. Nace demonstrates both options and shows how the Amount slider applies here too, letting you control exactly how much separation you’re adding. The Strong setting on a landscape or environmental portrait gives you a look that would otherwise require either a wide aperture lens or a manual depth mask built by hand in Photoshop.
Background blur applied, foreground subjects remain sharp
The Blur Background adaptive preset is where the AI does its most impressive work. Select either the Subtle or Strong option and Lightroom analyzes the depth information in the image to estimate a depth map. The background softens while the foreground subjects remain sharp. Nace demonstrates both options and shows how the Amount slider applies here too, letting you control exactly how much separation you’re adding. The Strong setting on a landscape or environmental portrait gives you a look that would otherwise require either a wide aperture lens or a manual depth mask built by hand in Photoshop.
Step 7: Compare Before and After
 Before and after view using backslash key toggle
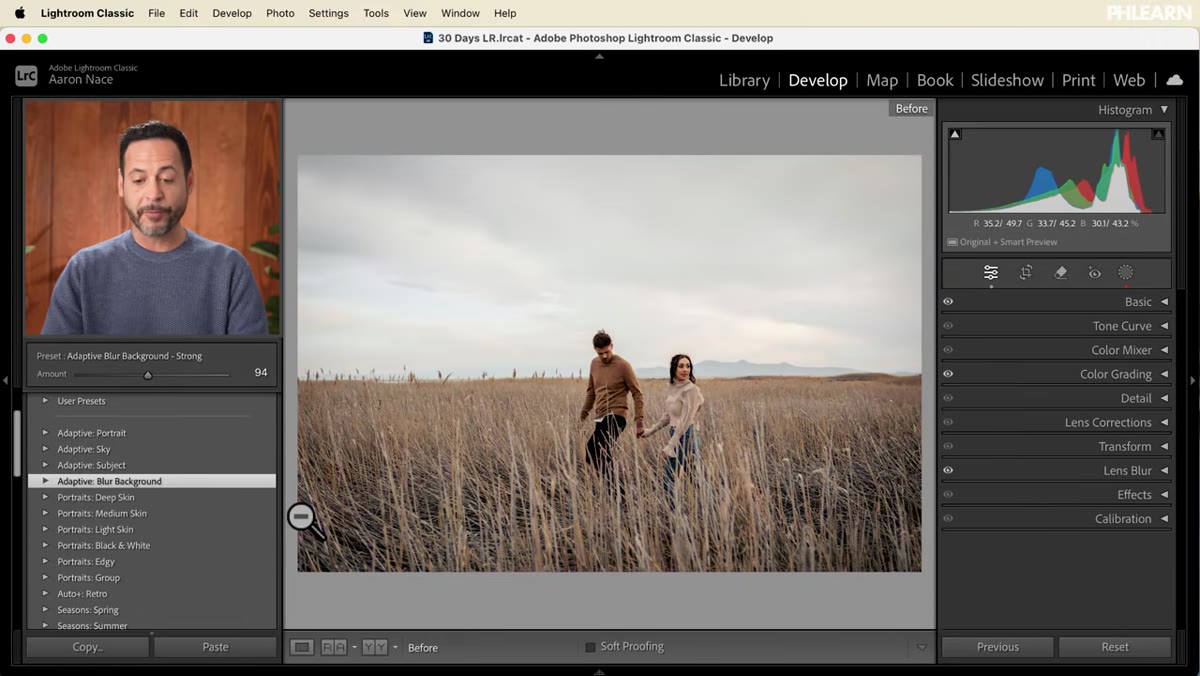
Hit the backslash key, the one directly above the Enter key, to toggle between your original file and your current edit. This is Lightroom’s fastest before-and-after comparison and it’s worth doing before you commit to any preset combination. Nace uses it to show the cumulative effect of stacking subject and background edits, and the difference is substantial without looking over-processed. If the edit reads as too heavy in the before-after view, go back and lower the Amount slider rather than undoing the preset entirely.
Before and after view using backslash key toggle
Hit the backslash key, the one directly above the Enter key, to toggle between your original file and your current edit. This is Lightroom’s fastest before-and-after comparison and it’s worth doing before you commit to any preset combination. Nace uses it to show the cumulative effect of stacking subject and background edits, and the difference is substantial without looking over-processed. If the edit reads as too heavy in the before-after view, go back and lower the Amount slider rather than undoing the preset entirely.
One Thing I’d Add From My Own Workflow
The AI presets are excellent for getting somewhere fast, but I treat them as a rough sketch rather than a finished edit. After applying an adaptive preset, I check the masking panel on the right side to see exactly what the AI selected. Sometimes the sky mask clips a tree line awkwardly, or the subject mask bleeds into a bright patch of background. Clicking into the mask and painting a small correction takes thirty seconds and keeps the result from looking like a preset rather than an edit. The AI does about 90% of the work. A quick manual refinement closes the gap.
I also started naming the looks I build on top of these presets as starting points. One of my favorites right now is built on the Sky Sunset base with a modified tone curve layered over it. I’ve been calling it “Rumours” because the warm, slightly hazy quality reminds me of the Fleetwood Mac album cover. Naming presets after something that captures the feeling helps me remember what they actually do, which sounds silly until you have sixty of them in the panel.
The single most important thing Aaron Nace demonstrates in this tutorial is the Amount slider. Every adaptive preset becomes twice as useful the moment you stop applying it at full strength. Start at 100, then pull it until the image feels like it came from a camera, not a filter. That one habit will change how you feel about AI editing tools in Lightroom.
Watch the full tutorial on YouTube
Comments
Leave a Comment