There’s a specific frustration I run into on almost every edit, and it took me longer than I’d like to admit to find the right fix. The photo is technically fine. Exposure is decent. Composition is solid. But it looks flat. Nothing pulls the eye where it’s supposed to go. The subject is sitting in the frame competing with everything around it on equal footing, and the whole image feels like a shrug.
The radial mask tool in Lightroom is the answer I kept overlooking. I’ve been editing in Lightroom for years, and I still catch myself reaching for the basic exposure slider out of habit when what I actually need is a localized adjustment. In this Peter McKinnon tutorial, he walks through exactly how the radial mask works using a still-life coffee setup, and the approach translates directly to portraits, landscapes, and product photography. Watch the full tutorial on YouTube if you want to see it in action, then come back here for the full breakdown with settings.
The core idea is simple: instead of adjusting an entire photo, you draw a shape over a specific area and apply adjustments only inside (or outside) that shape. It’s like placing a virtual spotlight on whatever matters most. Here’s how to do it.
Step 1: Choose a Photo With a Clear Focal Point
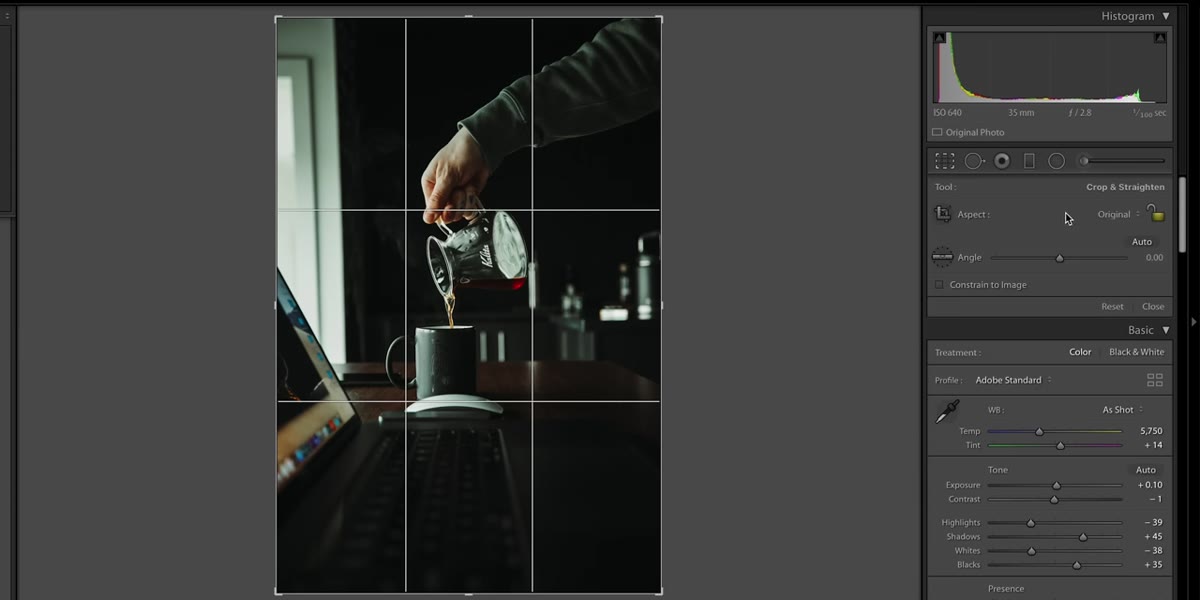 Coffee flat lay being reviewed inside Lightroom grid
Before you even open the masking panel, spend ten seconds identifying what you actually want to emphasize. McKinnon uses a coffee setup where the kettle and mug are the subjects. The principle holds for any shot: a face in a portrait, a mountain peak in a landscape, a product on a clean background. The radial mask is a directing tool. You need to know where you want the viewer to look before you can tell Lightroom to point them there.
Coffee flat lay being reviewed inside Lightroom grid
Before you even open the masking panel, spend ten seconds identifying what you actually want to emphasize. McKinnon uses a coffee setup where the kettle and mug are the subjects. The principle holds for any shot: a face in a portrait, a mountain peak in a landscape, a product on a clean background. The radial mask is a directing tool. You need to know where you want the viewer to look before you can tell Lightroom to point them there.
If your focal point isn’t clear in the original frame, no amount of masking will fix it. But if the composition is there and the image just lacks drama, this is exactly where the radial mask earns its reputation.
Step 2: Open the Masking Panel and Select the Radial Gradient
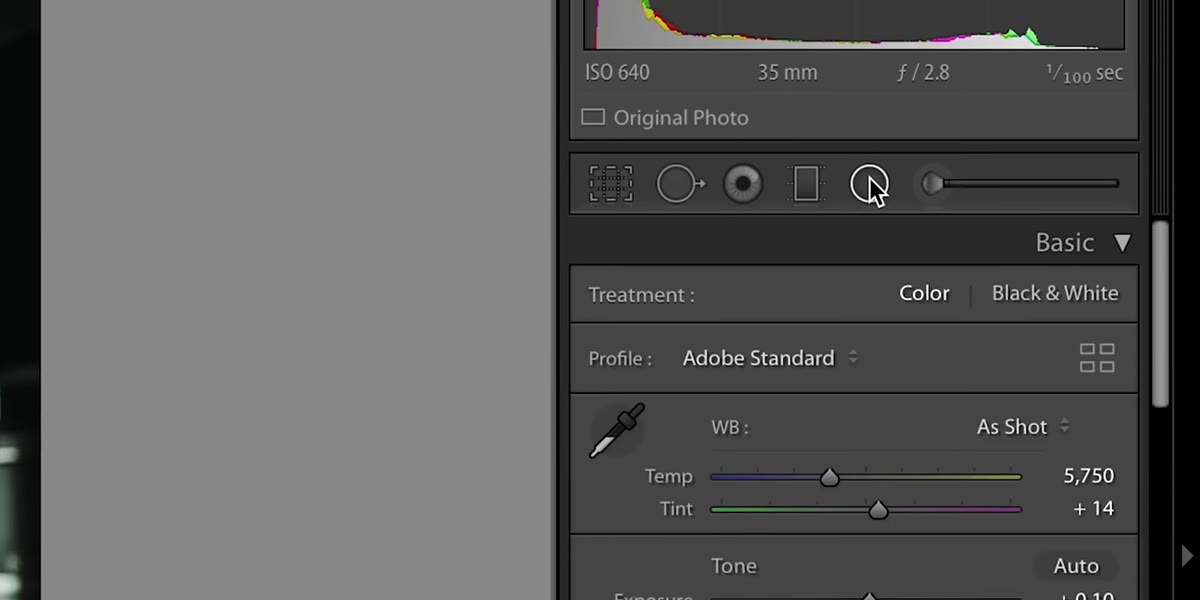 Lightroom masking panel open with radial gradient tool visible
In Lightroom Classic, the masking panel is the icon that looks like a dotted circle, sitting in the toolbar just above your Basic panel on the right side. Click it, and you’ll see a menu of masking options. Select “Radial Gradient.” In the mobile or web versions of Lightroom, it lives under the same masking section, though the icon placement varies slightly.
Lightroom masking panel open with radial gradient tool visible
In Lightroom Classic, the masking panel is the icon that looks like a dotted circle, sitting in the toolbar just above your Basic panel on the right side. Click it, and you’ll see a menu of masking options. Select “Radial Gradient.” In the mobile or web versions of Lightroom, it lives under the same masking section, though the icon placement varies slightly.
Once you’ve selected the tool, your cursor will change. You’re ready to draw.
Step 3: Draw Your Mask Over the Subject
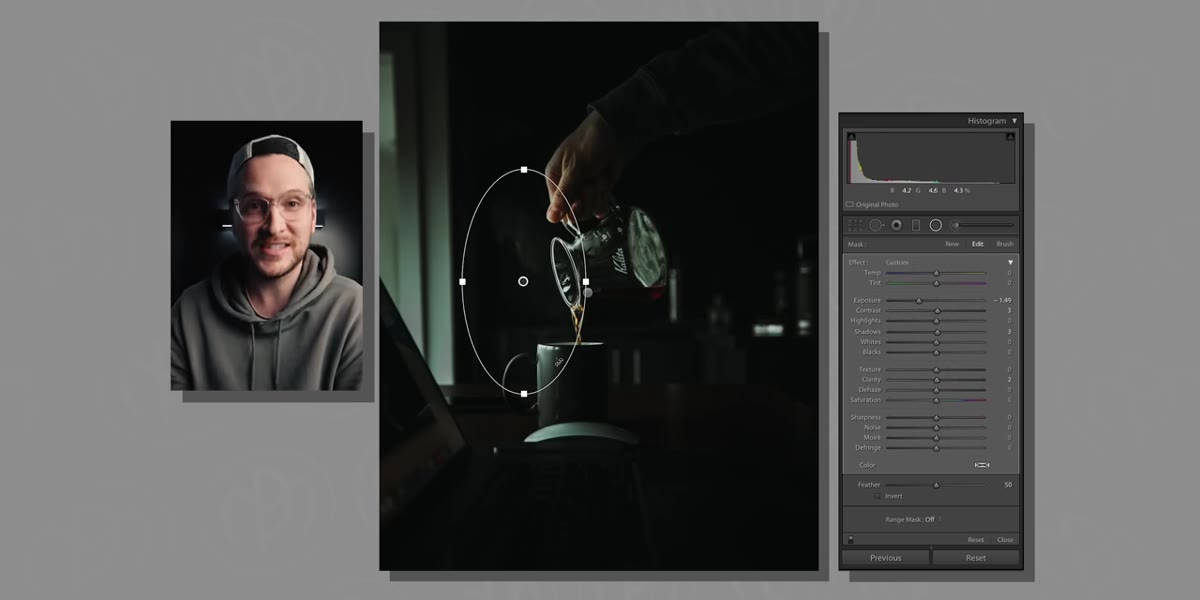 Radial oval being drawn over coffee kettle and mug
Click and drag from the center of your subject outward to create an oval. Don’t worry about getting it perfect on the first pull. You can reposition the mask after drawing it by clicking inside and dragging, and you can resize it by pulling any of the edge handles. Shape it so it covers your subject with a little breathing room on all sides.
Radial oval being drawn over coffee kettle and mug
Click and drag from the center of your subject outward to create an oval. Don’t worry about getting it perfect on the first pull. You can reposition the mask after drawing it by clicking inside and dragging, and you can resize it by pulling any of the edge handles. Shape it so it covers your subject with a little breathing room on all sides.
By default, the adjustments you make will apply to the area inside the oval. McKinnon uses this to brighten the kettle and mug without affecting the rest of the frame. Think of it as putting your subject under a softbox while the background stays where it is.
Step 4: Adjust Exposure, Contrast, or Color Inside the Mask
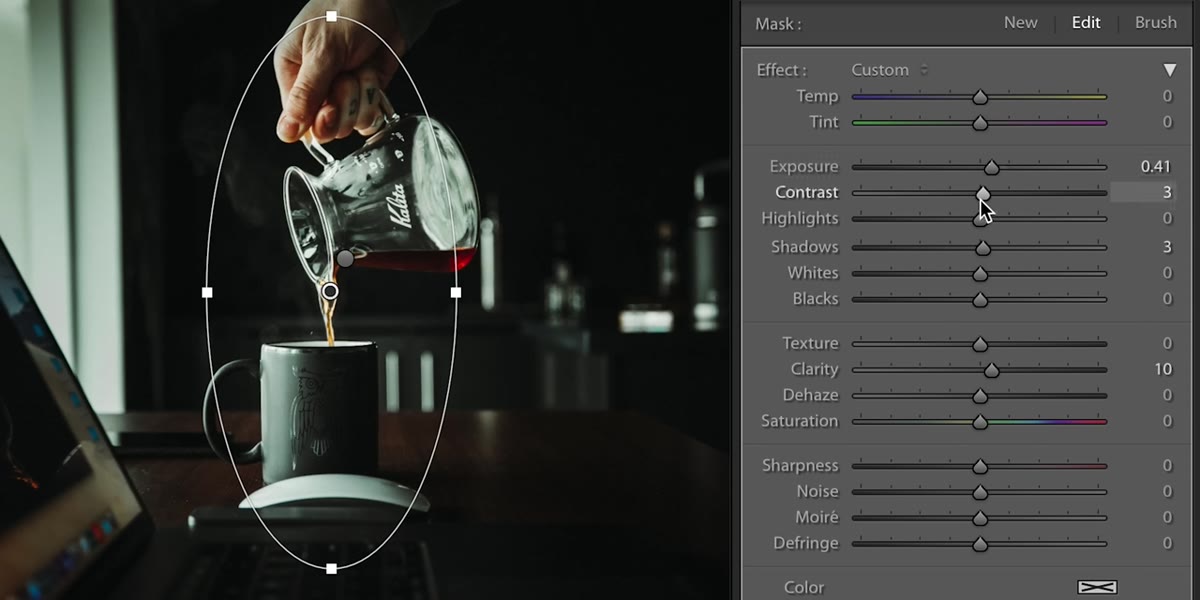 Exposure slider being raised inside active radial mask
With the mask active, all the sliders in your right-hand panel now apply only to the masked area. McKinnon primarily reaches for the exposure slider here, pulling it up to add light to the subject. For most still-life and portrait work, small moves are more effective than big ones. Try +0.3 to +0.7 on exposure and see how it reads.
Exposure slider being raised inside active radial mask
With the mask active, all the sliders in your right-hand panel now apply only to the masked area. McKinnon primarily reaches for the exposure slider here, pulling it up to add light to the subject. For most still-life and portrait work, small moves are more effective than big ones. Try +0.3 to +0.7 on exposure and see how it reads.
Beyond exposure, this is also where you can push contrast, lift shadows to reveal detail in darker subjects, or adjust white balance if your subject is lit differently from the background. Each adjustment is completely isolated. The rest of your image doesn’t move.
Step 5: Use the Invert Toggle to Darken the Background Instead
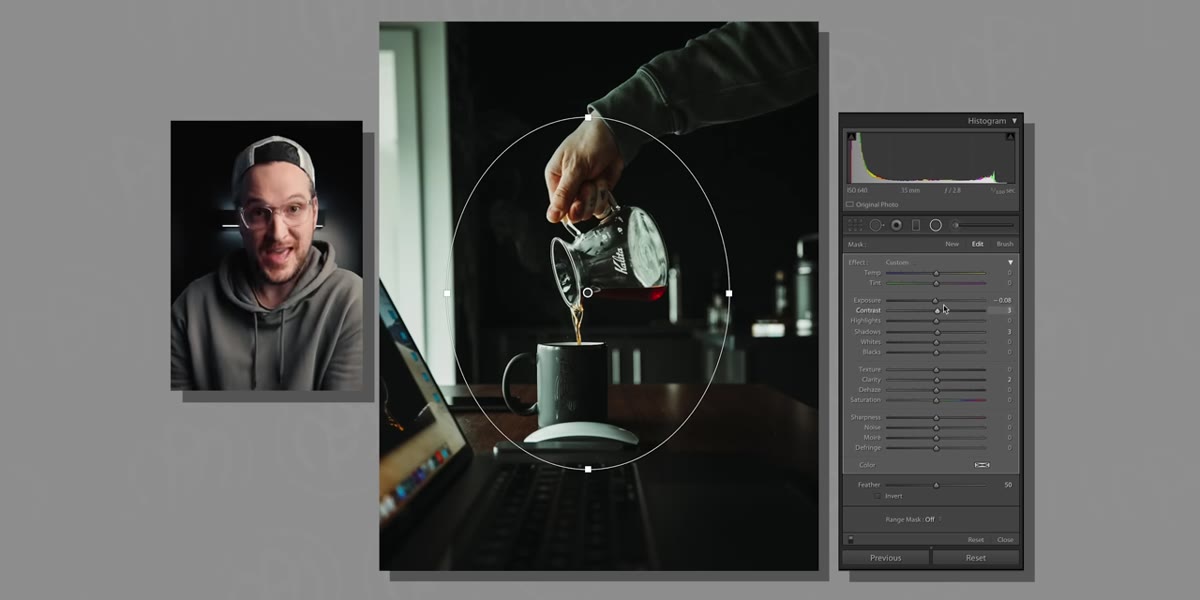 Invert checkbox being toggled to affect area outside oval
Here’s where it gets interesting. That same oval you drew can flip its effect with one click. There’s an “Invert” checkbox at the bottom of the masking options. Toggle it and now your adjustments apply to everything outside the oval instead of everything inside it.
Invert checkbox being toggled to affect area outside oval
Here’s where it gets interesting. That same oval you drew can flip its effect with one click. There’s an “Invert” checkbox at the bottom of the masking options. Toggle it and now your adjustments apply to everything outside the oval instead of everything inside it.
This is the move for creating that cinematic vignette effect without using Lightroom’s basic vignette tool, which applies a fixed circle centered on the frame. A radial mask gives you full control over placement and shape. Drop the exposure slightly on the inverted mask and you pull the background down while your subject stays bright. It’s subtle when done right, and it reads as natural light rather than a filter.
Step 6: Feather the Edges for a Natural Blend
 Feather slider being dragged to soften radial mask edge
A hard-edged oval sitting on top of your image looks exactly like what it is: a mask. Feathering is what makes the transition invisible. McKinnon describes it well using the analogy of a harsh spotlight versus one with a soft diffuser. The feather slider blends the edge of your mask into the surrounding image so the brightness change reads as natural light rather than a cutout.
Feather slider being dragged to soften radial mask edge
A hard-edged oval sitting on top of your image looks exactly like what it is: a mask. Feathering is what makes the transition invisible. McKinnon describes it well using the analogy of a harsh spotlight versus one with a soft diffuser. The feather slider blends the edge of your mask into the surrounding image so the brightness change reads as natural light rather than a cutout.
For most images, I find a feather value somewhere between 60 and 90 works well. If your subject has hard edges or fills most of the frame, you can go lower. The goal is that someone looking at the finished photo shouldn’t be able to tell a mask exists. They should just feel like the subject is lit well.
Step 7: Stack Multiple Masks for More Complex Edits
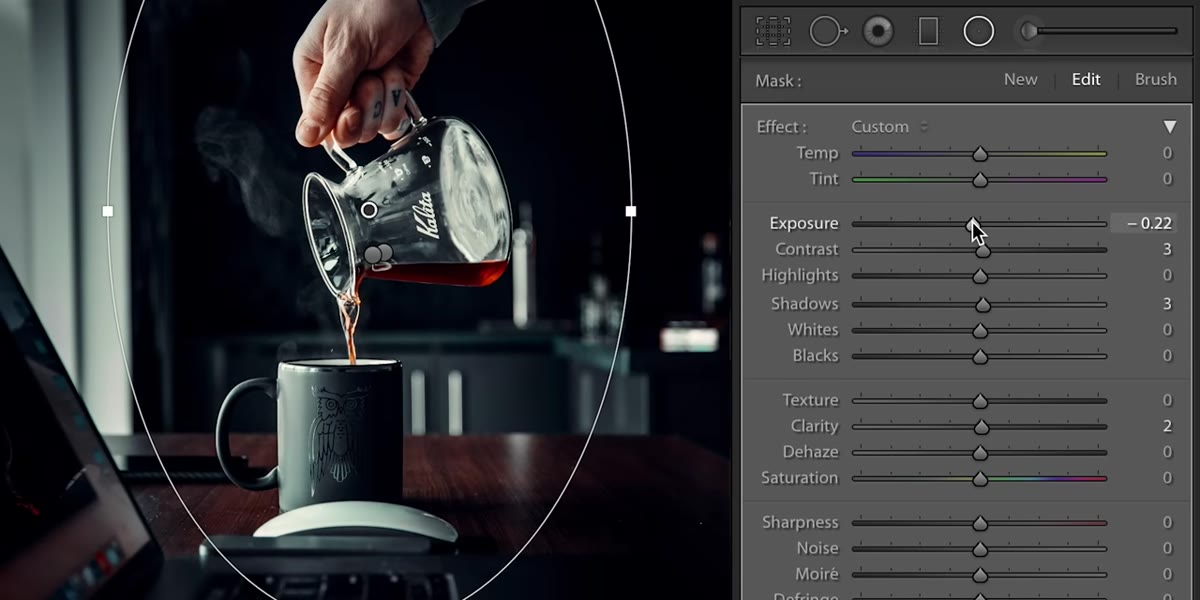 Second linear gradient mask being added to left side of image
One mask is a starting point. McKinnon adds a second mask, this time a linear gradient, to handle the window light coming in from the left side of the frame. You can layer as many masks as your edit needs.
Second linear gradient mask being added to left side of image
One mask is a starting point. McKinnon adds a second mask, this time a linear gradient, to handle the window light coming in from the left side of the frame. You can layer as many masks as your edit needs.
A typical workflow for portraits might look like this: one radial mask brightening the face, a second radial mask with inverted exposure to pull the background down, and a third using the “Select Subject” option to push contrast only on the person. Each mask operates independently and can be adjusted or deleted without touching the others.
A Note From My Own Editing Practice
I started using radial masks heavily when I was editing band press shots years ago, mostly because I was working with images taken in inconsistent lighting and couldn’t reshoot. What I found was that a subtle radial mask on the lead singer’s face, nothing dramatic, just +0.4 exposure and a feather of 75, made a photo that read as well-lit when it wasn’t. Nobody knew. The mask just quietly did its job.
The biggest mistake I see in tutorials and in my own early edits is going too far. Push the exposure inside a radial mask to +1.5 and it looks like a flashlight pointed at someone’s face. The magic of this tool is in restraint. Make the adjustment, then pull it back by about a third. That’s usually where it lives.
The radial mask tool is one of those features that sounds technical until you use it once, and then you wonder how you edited without it. It’s the difference between a photo that’s correctly exposed and a photo that has a point of view. A little light in the right place does more than any global adjustment can.
Watch the full tutorial on YouTube to see McKinnon walk through the live edit from start to finish. It’s a short watch and the coffee setup alone is worth it.
Comments
Leave a Comment