
There’s a specific kind of frustration that comes from a technically solid wildlife shot where the animal’s eye just looks dead. The exposure is right, the composition works, and you got the focus — but the eye is a dark void that pulls attention nowhere. I’ve been there more times than I’d like to admit, staring at a photo in Lightroom wondering why it feels flat when everything else checks out. That one detail, the catch light, the depth, the life in the eye, is doing more heavy lifting than most people realize.
In this Matt Kloskowski tutorial, he walks through exactly that problem using a bird photo where the overall tone is fine but the eye reads as too dark once he brightens the image to where it needs to be. Watch the full tutorial on YouTube — it’s under five minutes and worth every second. What I want to do here is slow it down, name the decisions behind each move, and give you something you can follow step by step without pausing and rewinding.
The key insight Matt offers upfront is one I wish someone had told me years ago: cranking global Shadows to fix a dark eye is a trap. It lifts the eye, sure, but it also flattens the entire image in the process. The fix has to be local, targeted, and small. Here’s how to do it right.
Step 1: Nail the Global Exposure First
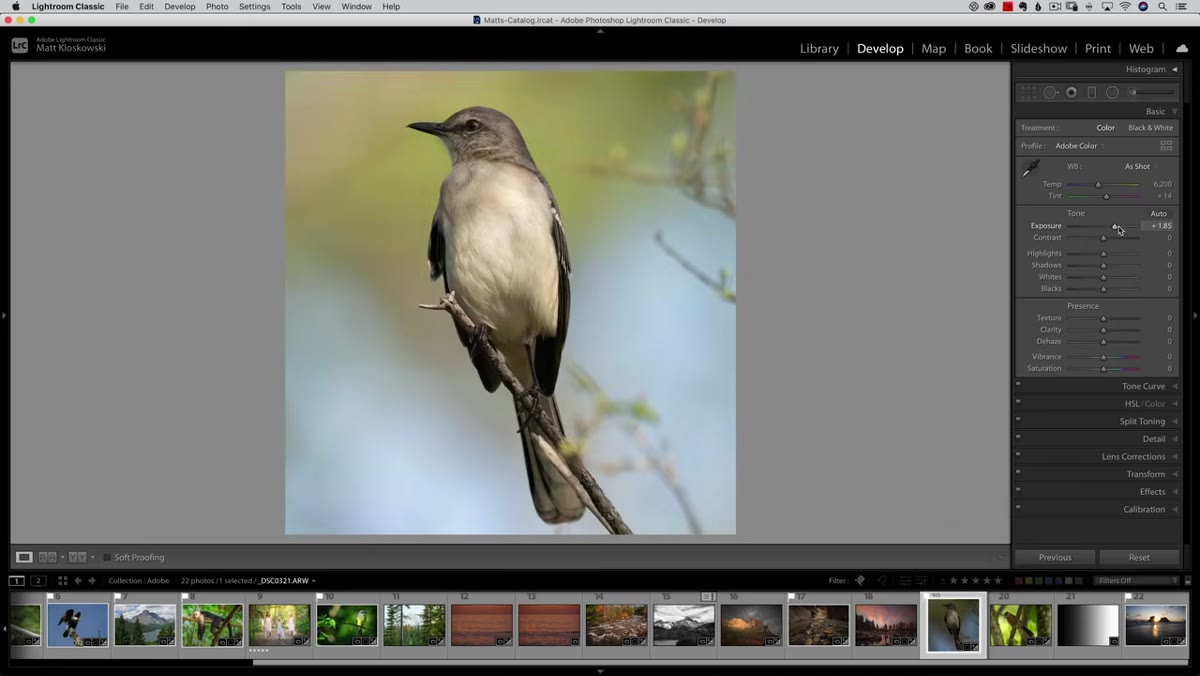 Bird photo with overall exposure adjustment applied in Lightroom
Before touching the eye, get the overall image to where it belongs tonally. Matt adjusts the global Exposure slider to bring the image to a brightness that feels right for the scene. Don’t skip this step or try to compensate for global exposure problems later with local adjustments. The radial gradient technique works best when the rest of the image is already sitting where you want it, and you’re only solving the one remaining problem: the eye.
Bird photo with overall exposure adjustment applied in Lightroom
Before touching the eye, get the overall image to where it belongs tonally. Matt adjusts the global Exposure slider to bring the image to a brightness that feels right for the scene. Don’t skip this step or try to compensate for global exposure problems later with local adjustments. The radial gradient technique works best when the rest of the image is already sitting where you want it, and you’re only solving the one remaining problem: the eye.
Step 2: Resist the Urge to Use Global Shadows
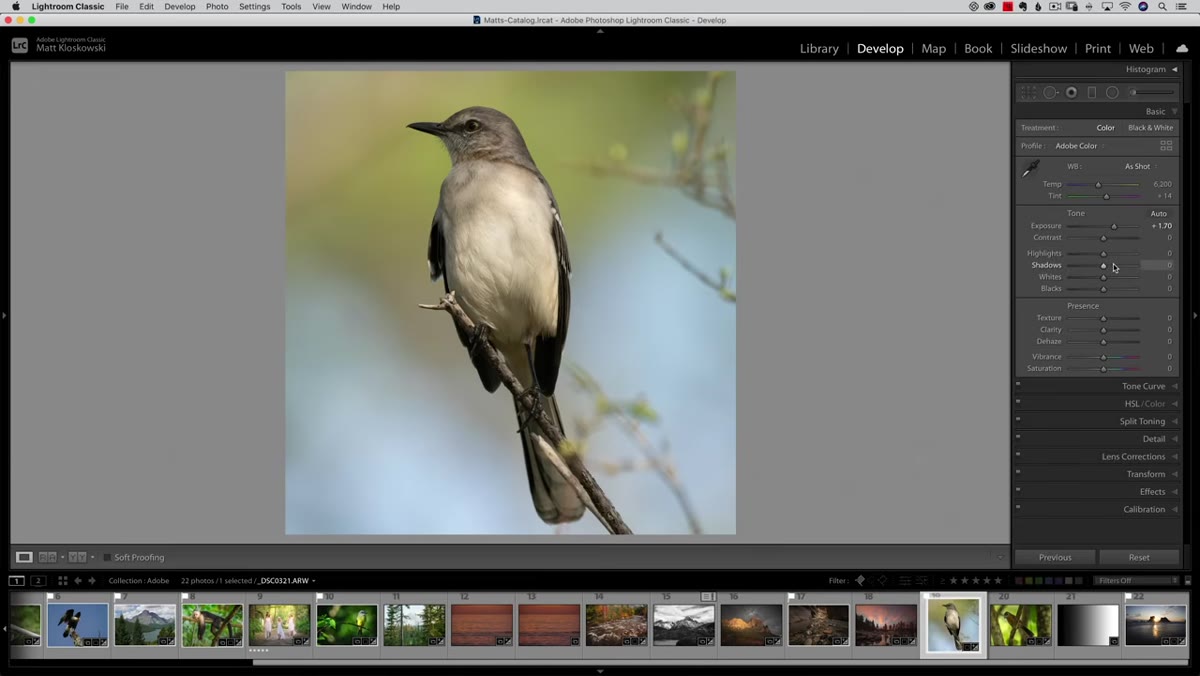 Shadows slider cranked up, showing flattened image effect
This is the step most people skip straight past, and it costs them. Matt demonstrates what happens when you just drag the Shadows slider up hard — the eye does get brighter, but the image loses contrast and depth everywhere. It’s a brute-force move that trades one problem for another. Note the flattening effect before you move on. Knowing why a tool fails in a given situation is just as useful as knowing what works.
Shadows slider cranked up, showing flattened image effect
This is the step most people skip straight past, and it costs them. Matt demonstrates what happens when you just drag the Shadows slider up hard — the eye does get brighter, but the image loses contrast and depth everywhere. It’s a brute-force move that trades one problem for another. Note the flattening effect before you move on. Knowing why a tool fails in a given situation is just as useful as knowing what works.
Step 3: Select the Radial Gradient Tool
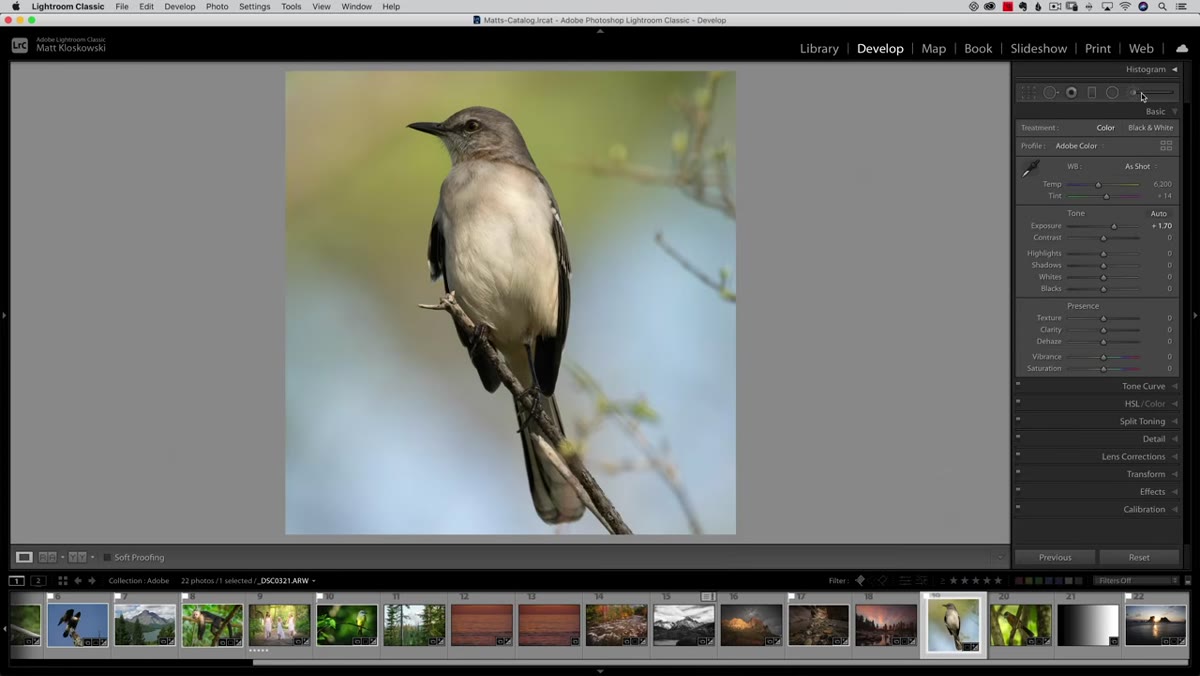 Radial Gradient tool selected in Lightroom’s toolbar
Up in the local adjustments toolbar, grab the Radial Gradient (sometimes called the Radial Filter depending on your Lightroom version). Matt describes these three local adjustment tools — the Brush, the Linear Gradient, and the Radial Gradient — as the most powerful tools in Lightroom. For a small circular subject like an eye, the Radial Gradient is the natural fit. Before drawing anything, double-click the word “Effect” in the panel to reset all the sliders to zero. Starting clean means you’re not inheriting leftover adjustments from a previous use.
Radial Gradient tool selected in Lightroom’s toolbar
Up in the local adjustments toolbar, grab the Radial Gradient (sometimes called the Radial Filter depending on your Lightroom version). Matt describes these three local adjustment tools — the Brush, the Linear Gradient, and the Radial Gradient — as the most powerful tools in Lightroom. For a small circular subject like an eye, the Radial Gradient is the natural fit. Before drawing anything, double-click the word “Effect” in the panel to reset all the sliders to zero. Starting clean means you’re not inheriting leftover adjustments from a previous use.
Step 4: Set Your Adjustments Before You Draw
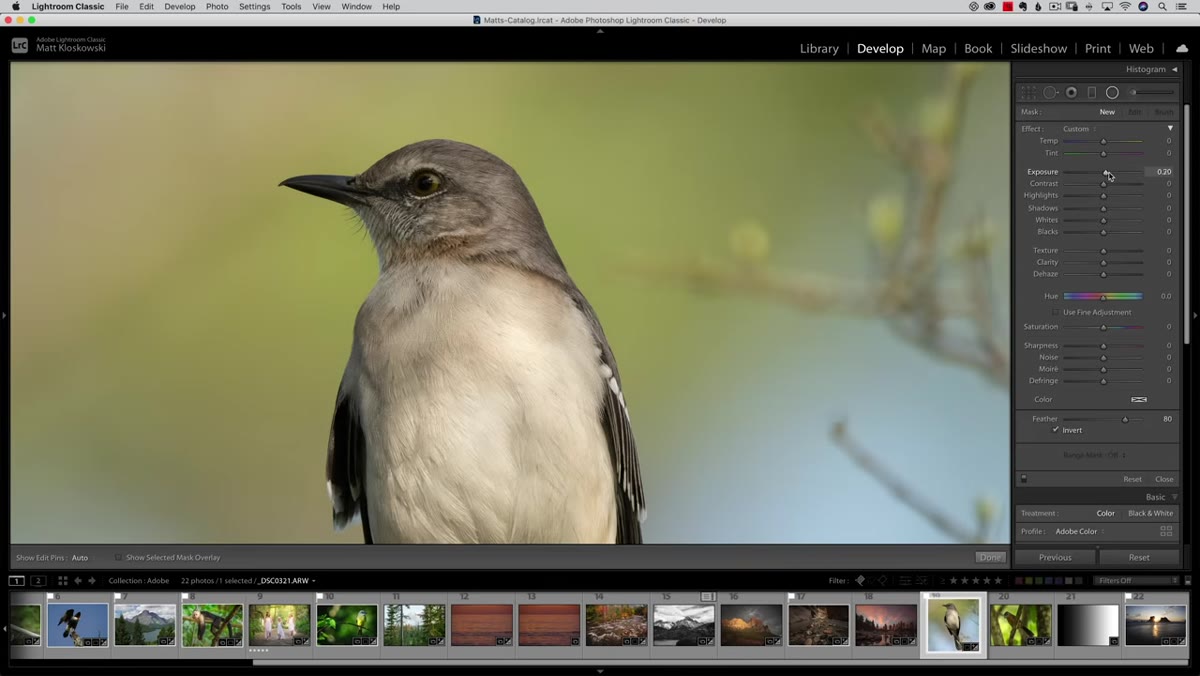 Exposure and Shadows sliders being adjusted in the local panel
With a clean slate, dial in your target adjustments before placing the gradient on the eye. Matt increases Exposure modestly and pushes Shadows up noticeably. He also adds a touch of Texture and a bump in Sharpness. The Texture slider is doing something useful here: it adds micro-contrast that makes the catch light feel more three-dimensional without the blunt-force effect of Clarity. Think of it as bringing out what’s already in the eye rather than manufacturing something that wasn’t there.
Exposure and Shadows sliders being adjusted in the local panel
With a clean slate, dial in your target adjustments before placing the gradient on the eye. Matt increases Exposure modestly and pushes Shadows up noticeably. He also adds a touch of Texture and a bump in Sharpness. The Texture slider is doing something useful here: it adds micro-contrast that makes the catch light feel more three-dimensional without the blunt-force effect of Clarity. Think of it as bringing out what’s already in the eye rather than manufacturing something that wasn’t there.
Step 5: Draw the Radial Gradient Over the Eye
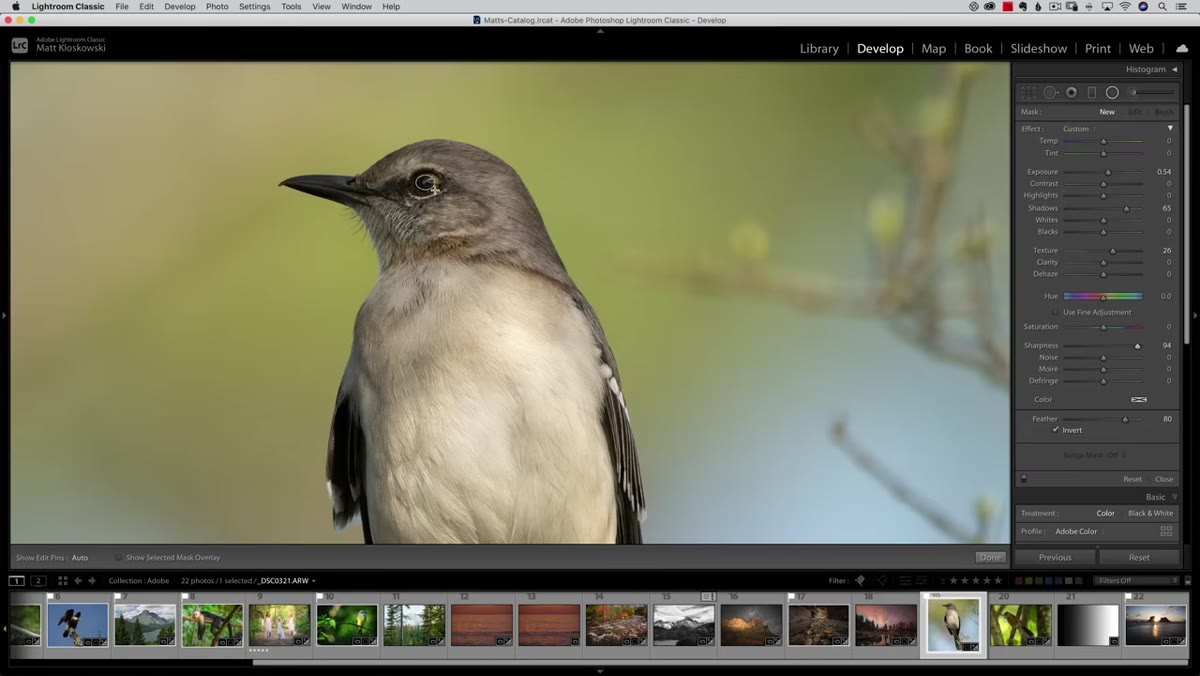 Radial Gradient being drawn over the bird’s eye on screen
Click in the center of the eye and drag outward to create the ellipse. Keep it tight — you want to cover the eye and a small margin around it, not the whole head. The adjustment applies inside the circle by default in recent versions of Lightroom (if yours applies it outside, there’s an “Invert” checkbox at the bottom of the panel — check it). Move your cursor off the gradient to hide the control points and see the actual effect clearly. Matt notes a toggle at the bottom of the panel that lets you flip the adjustment on and off to compare, which is worth doing before you commit to any values.
Radial Gradient being drawn over the bird’s eye on screen
Click in the center of the eye and drag outward to create the ellipse. Keep it tight — you want to cover the eye and a small margin around it, not the whole head. The adjustment applies inside the circle by default in recent versions of Lightroom (if yours applies it outside, there’s an “Invert” checkbox at the bottom of the panel — check it). Move your cursor off the gradient to hide the control points and see the actual effect clearly. Matt notes a toggle at the bottom of the panel that lets you flip the adjustment on and off to compare, which is worth doing before you commit to any values.
Step 6: Dial Back If It’s Overdone
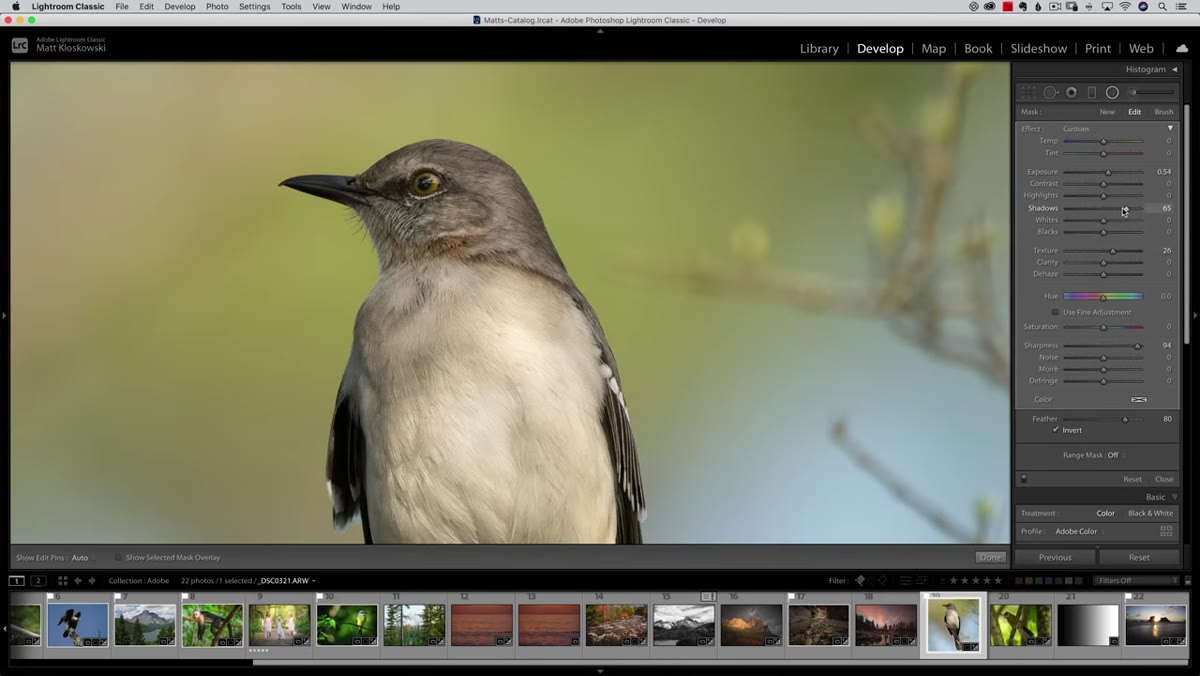 Exposure slider being reduced after initial radial gradient placement
After placing the gradient, Matt pulls the Exposure value back down a bit because the eye went too bright on the first pass. This is normal and expected. The goal is not a glowing alien eye — it’s an eye that reads as lit and alive. Small adjustments here matter more than big ones. A before/after toggle is your gut-check: if the after looks obviously edited, you’ve gone too far.
Exposure slider being reduced after initial radial gradient placement
After placing the gradient, Matt pulls the Exposure value back down a bit because the eye went too bright on the first pass. This is normal and expected. The goal is not a glowing alien eye — it’s an eye that reads as lit and alive. Small adjustments here matter more than big ones. A before/after toggle is your gut-check: if the after looks obviously edited, you’ve gone too far.
Step 7: Try Boosting Whites for the Catch Light
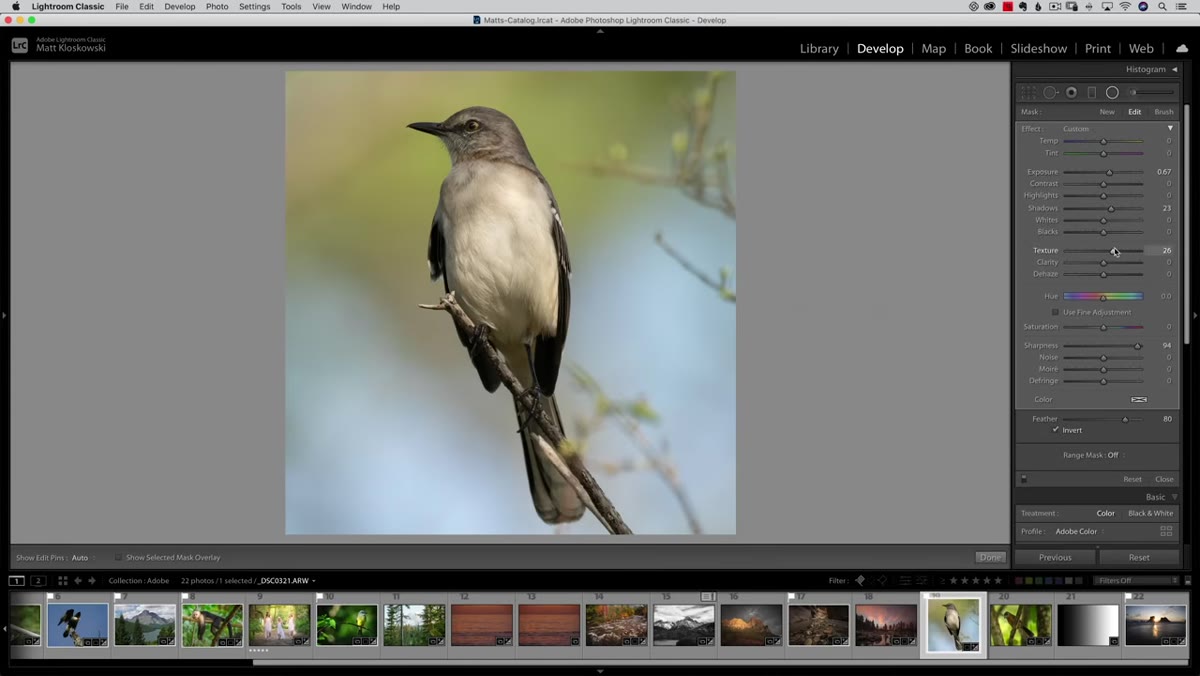 Whites slider being increased inside the radial gradient adjustment
Here’s a move Matt mentions almost as an aside, but it’s genuinely useful. Inside the same radial gradient, try pulling the Whites slider up. Unlike Exposure or Shadows, Whites targets the brightest parts of the selection — which means it punches up the catch light specifically without lifting the darker areas of the iris or pupil. The effect is subtle but precise. It gives the eye a sense of wetness and dimension that’s harder to get from Exposure alone. Use it in combination with the Exposure and Shadows adjustments rather than as a replacement.
Whites slider being increased inside the radial gradient adjustment
Here’s a move Matt mentions almost as an aside, but it’s genuinely useful. Inside the same radial gradient, try pulling the Whites slider up. Unlike Exposure or Shadows, Whites targets the brightest parts of the selection — which means it punches up the catch light specifically without lifting the darker areas of the iris or pupil. The effect is subtle but precise. It gives the eye a sense of wetness and dimension that’s harder to get from Exposure alone. Use it in combination with the Exposure and Shadows adjustments rather than as a replacement.
One More Thing: This Works on More Than Birds
I’ve been applying this exact technique to pet portraits and even to people, and the logic holds across all of them. What I’ve found is that the Texture slider inside the radial gradient does a lot of work on human and animal eyes that people tend to overlook. Most tutorials jump straight to Sharpness, but Texture at moderate values does a better job of making an iris look detailed without adding the halo artifacts that aggressive Sharpness can introduce at the edges of a pupil. Start with Texture around +20 to +30, then add Sharpness only if you still feel the eye needs more definition. That combination has saved a lot of portraits I would have otherwise buried in a rejection folder.
The single thing to take away from this technique is that targeted local adjustments will always beat global slider moves when you’re solving a problem in one specific part of an image. Drawing a small radial gradient over an eye and nudging Exposure, Shadows, Texture, and Whites takes about thirty seconds, and the difference in the final image is not subtle. The before and after Matt shows in the video makes the point better than any description can. Watch the full tutorial on YouTube and see it for yourself.
Comments (3)
Great breakdown. The step-by-step approach really helps.
This is the kind of content that keeps me coming back.
Excellent tutorial. I'd add that from a landscape standpoint, this technique is incredibly versatile.
Leave a Comment