I have a recurring nightmare. Not the one where I show up to a shoot and forgot my memory cards. The one where I get home from a week of shooting, dump everything into my laptop catalog, and then spend two hours Googling “how to merge Lightroom catalogs without losing edits” at midnight. If you’ve been there, you know the specific dread of not being sure whether your metadata survived the trip.
The fix is simpler than most people think, and it starts before you ever leave home. In this Marc Muench tutorial, he walks through a clean, repeatable system for creating a temporary travel catalog on a portable hard drive, shooting and editing with it on the road, and then merging it back into your master catalog when you return. No drama, no duplicate folders spiraling into chaos, no “which version is the real version” panic. Watch the full tutorial on YouTube if you want to follow along with the video, or work through the steps below.
The whole system hinges on one physical object: a portable hard drive. Everything lives on it. The catalog, the images, all of it. That single constraint is actually what makes the workflow elegant.
Step 1: Set Up Your Portable Hard Drive with Two Folders
 Two new folders created on external hard drive root
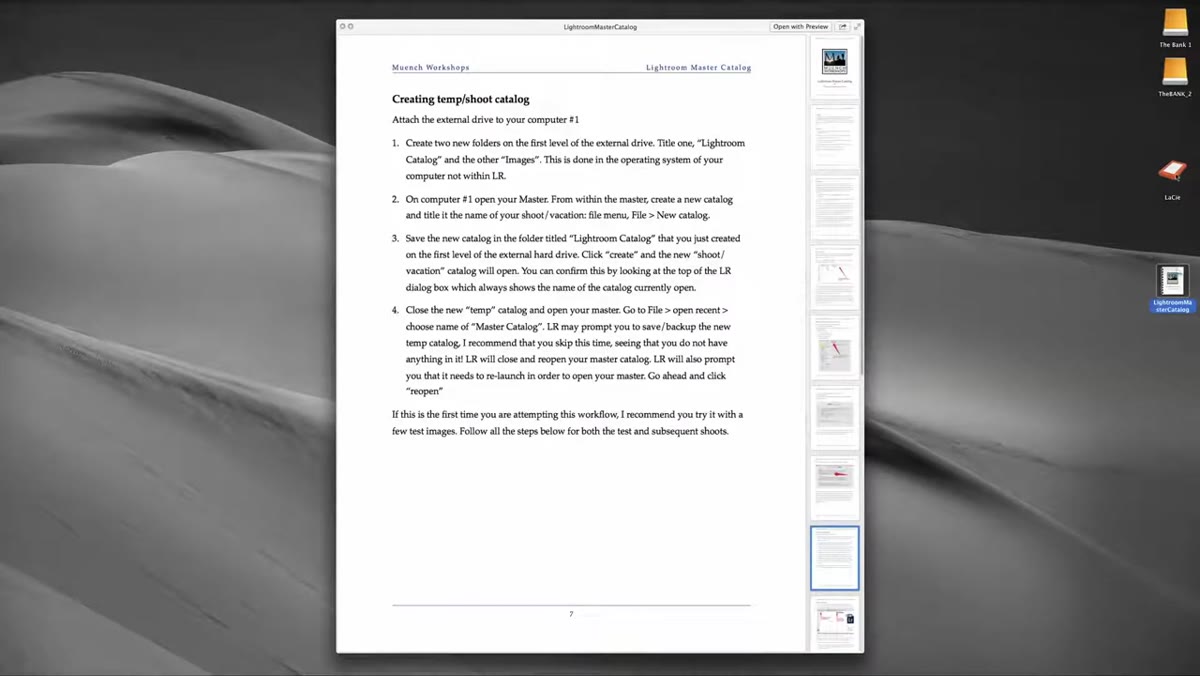
Before Lightroom even opens, format your portable drive and create two folders at the top level of the drive, not nested inside anything else. Name one
Two new folders created on external hard drive root
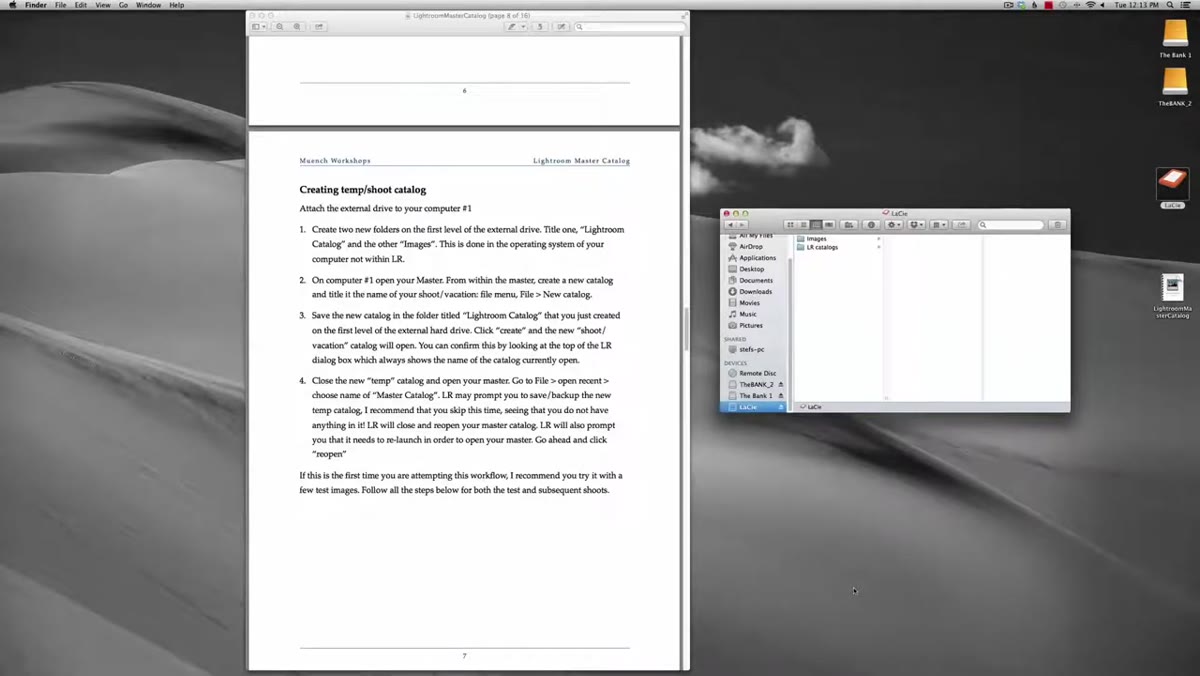
Before Lightroom even opens, format your portable drive and create two folders at the top level of the drive, not nested inside anything else. Name one Images and the other LR Catalogs. Keeping them at the root level of the drive matters more than it sounds. Drive letters and mount paths can shift between computers, and Lightroom needs to find your files wherever it lands. Flat and simple beats organized-but-nested every time.
Step 2: Create the Temporary Catalog on Your Desktop Machine
 Lightroom File menu open, New Catalog option highlighted
With your portable drive connected to your main desktop computer, open Lightroom with your master catalog loaded. Go to File, then New Catalog. Give it a name, something like “Temp” or the trip name works fine, and when Lightroom asks where to save it, navigate to that
Lightroom File menu open, New Catalog option highlighted
With your portable drive connected to your main desktop computer, open Lightroom with your master catalog loaded. Go to File, then New Catalog. Give it a name, something like “Temp” or the trip name works fine, and when Lightroom asks where to save it, navigate to that LR Catalogs folder you just created on the external drive. Click Create.
Lightroom will close your master catalog and relaunch with the new empty catalog. That’s expected. The key thing to understand here is that you are building the travel catalog on the external drive intentionally, not on your desktop. This is what makes it portable. Once the blank catalog appears, go back to File, Open Recent, and reopen your master catalog so your desktop machine returns to its normal state.
Step 3: Launch the Travel Catalog from Your Laptop
 Double-clicking the .lrcat file inside the LR Catalogs folder
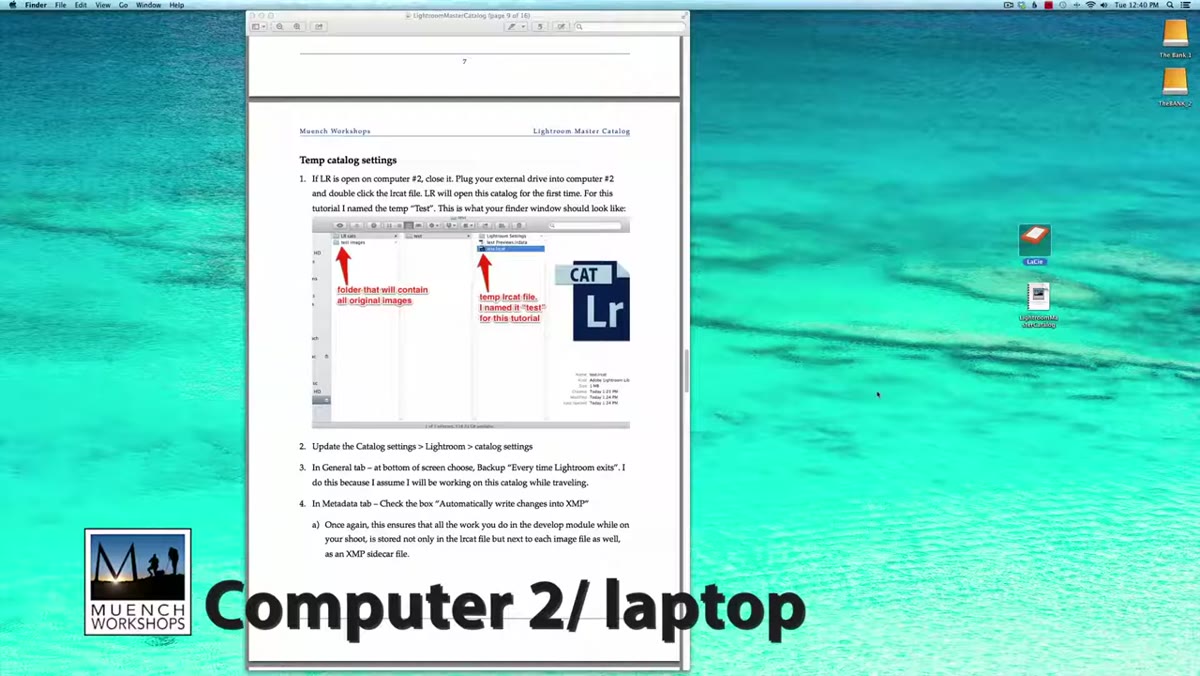
When you’re ready to travel, eject the portable drive from your desktop and plug it into your laptop. If Lightroom is open on the laptop, close it first. Then open the drive in Finder or File Explorer, navigate into
Double-clicking the .lrcat file inside the LR Catalogs folder
When you’re ready to travel, eject the portable drive from your desktop and plug it into your laptop. If Lightroom is open on the laptop, close it first. Then open the drive in Finder or File Explorer, navigate into LR Catalogs, then into your temp catalog folder, and double-click the .lrcat file directly. Lightroom will launch and open that catalog automatically. You’re now running your travel catalog from the portable drive on your laptop, and the two machines have never had to talk to each other.
Step 4: Import Your Images to the Right Place
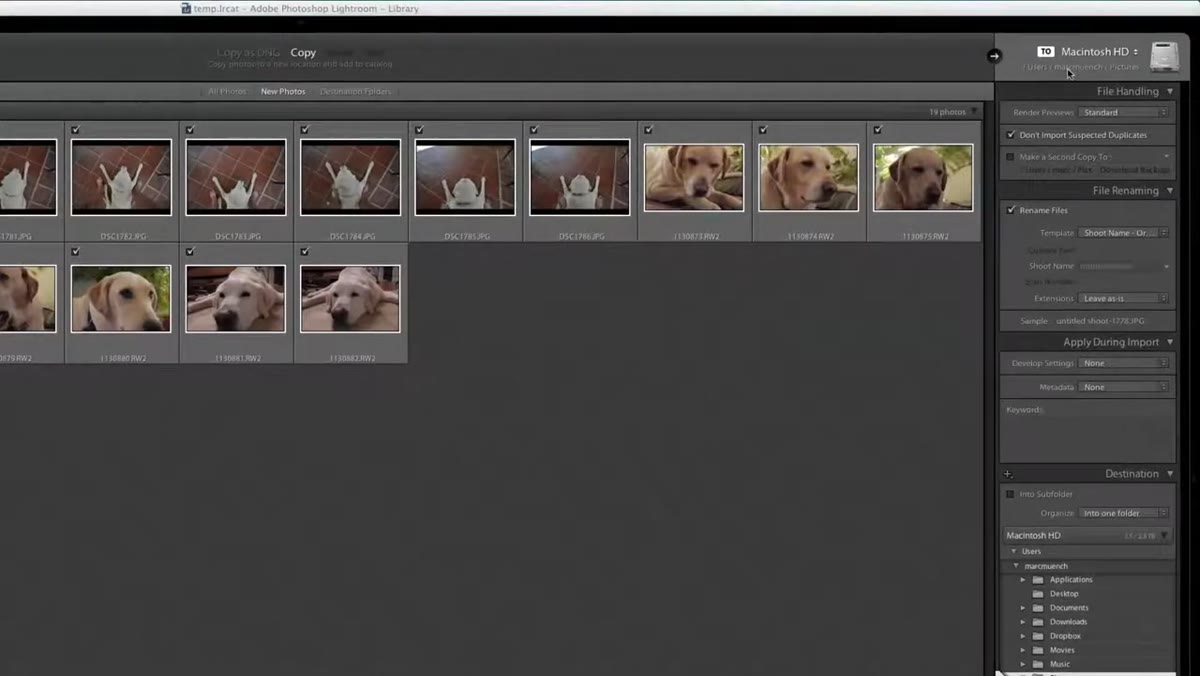 Import dialog showing destination set to external drive Images folder
This step is where most people introduce problems without realizing it. When you import photos during your trip, you need to be deliberate about the destination. In the Import dialog, look for the destination hyperlink in the upper right corner of the panel. Choose Other Destination and navigate to the
Import dialog showing destination set to external drive Images folder
This step is where most people introduce problems without realizing it. When you import photos during your trip, you need to be deliberate about the destination. In the Import dialog, look for the destination hyperlink in the upper right corner of the panel. Choose Other Destination and navigate to the Images folder on your external drive. That’s where your photos should land.
Two settings to double-check before you click Import: first, make sure “Into Subfolder” is unchecked under the Destination tab. If it’s checked, Lightroom creates an additional nested folder inside Images, and things start getting messy fast. Second, set the folder organization to “Into One Folder” rather than “By Date.” Organizing by date feels tidy in theory but creates a sprawl of subfolders that complicates the merge later.
Step 5: Merge the Travel Catalog Back into Your Master
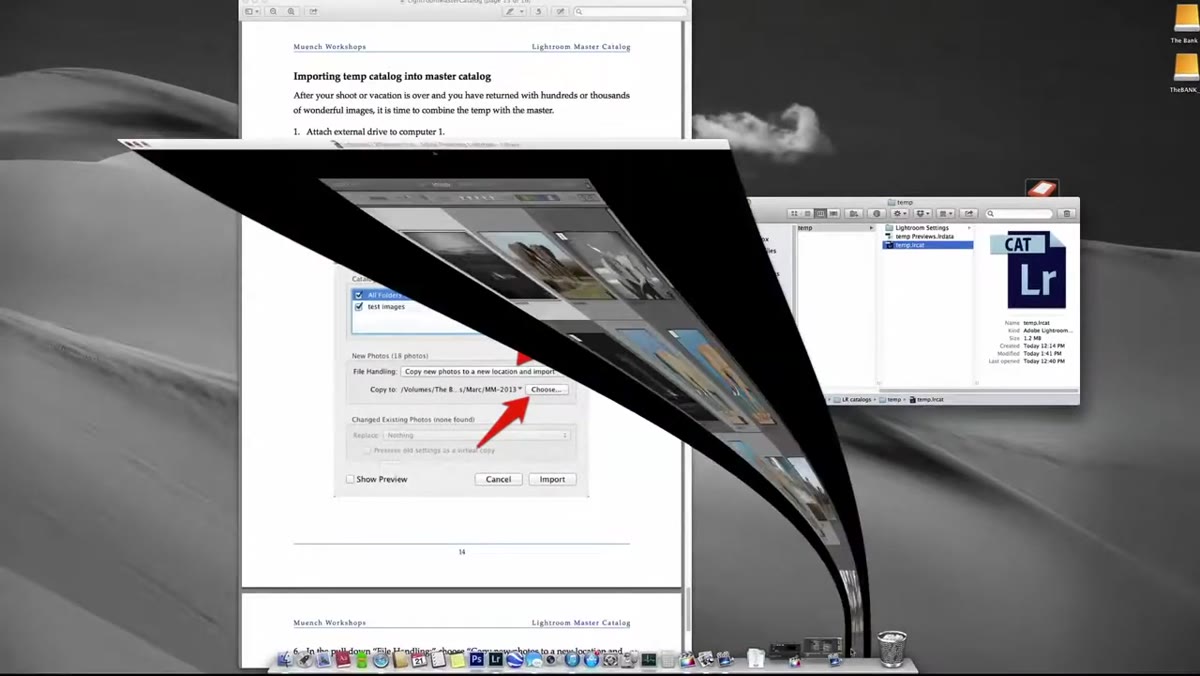 File menu open on desktop showing Import from Another Catalog option
You’re home. Drive is plugged into the desktop. Open your master catalog on your main machine. Now go to File and choose “Import from Another Catalog.” A dialog box opens asking you to locate the catalog file. Navigate to your external drive, into
File menu open on desktop showing Import from Another Catalog option
You’re home. Drive is plugged into the desktop. Open your master catalog on your main machine. Now go to File and choose “Import from Another Catalog.” A dialog box opens asking you to locate the catalog file. Navigate to your external drive, into LR Catalogs, into the temp folder, and select the .lrcat file.
Lightroom will pull in every image, edit, metadata change, and flag from your travel catalog into the master. Because the images are sitting on the same external drive that you named during import, the file paths are intact and Lightroom can find everything without you having to manually relink anything. That’s the payoff of setting up the folder structure correctly back in Step 1.
One Thing I’d Add: Copy the Images Off the External Drive After You Merge
Marc’s tutorial gets the catalog workflow exactly right, and I’d follow it to the letter. But there’s one step that comes after the merge that I’ve made a habit of doing immediately: copying the images from the external drive into my main photo archive on my desktop or NAS before I do anything else.
The portable drive is not a backup. It’s a working drive, which means it’s getting plugged and unplugged constantly, tossed in a bag, occasionally forgotten on a coffee shop table. Once the merge is complete and everything is in your master catalog, move the image files to their permanent home and then update Lightroom’s folder references to reflect the new location. You can do that by right-clicking the folder in the Folders panel and choosing “Update Folder Location.” It takes two minutes and means your master catalog is pointing to files on a drive that isn’t going on your next trip.
I name the destination folder after the project, same way I name my presets after songs. It keeps the library from turning into an archaeological dig every time I need to find something from three years ago.
The single most important thing this system does is force a clean separation between your working environment and your archive. Your master catalog stays untouched while you travel. Your edits stay local and organized on the road. And the merge is a Lightroom-native operation, not a workaround, which means it actually works.
If you shoot regularly on two machines and you’ve been avoiding this because it sounded complicated, it isn’t. The setup takes maybe fifteen minutes.
Watch the full tutorial on YouTube and download the PDF Marc mentions in the video. He wrote it to accompany this workflow, and it fills in a few details around backup strategy that are worth reading before your next trip.
Comments
Leave a Comment