
Product photography doesn’t forgive blown highlights. When a client is paying you to show off their product, “you can kind of see the shape of it” is not an acceptable answer. I ran into this exact wall early on, shooting press photos for my band on a budget that left exactly zero dollars for a professional photographer. One overexposed candle top, one blown-out guitarist’s shirt, same problem: the detail is gone, and the client (or bandmate) is unhappy. Except, with raw files, the detail isn’t always actually gone. That’s the whole point of this technique.
In this Aaron Nace (PHLEARN) tutorial, Watch the full tutorial on YouTube, Aaron walks through a method for correcting overexposure using nothing but the single raw file you already have. The approach uses Lightroom’s virtual copies feature to simulate multiple exposures from one image, then merges them into an HDR. No bracketing required. No reshoot. Just a raw file with more information hiding in it than you probably realized.
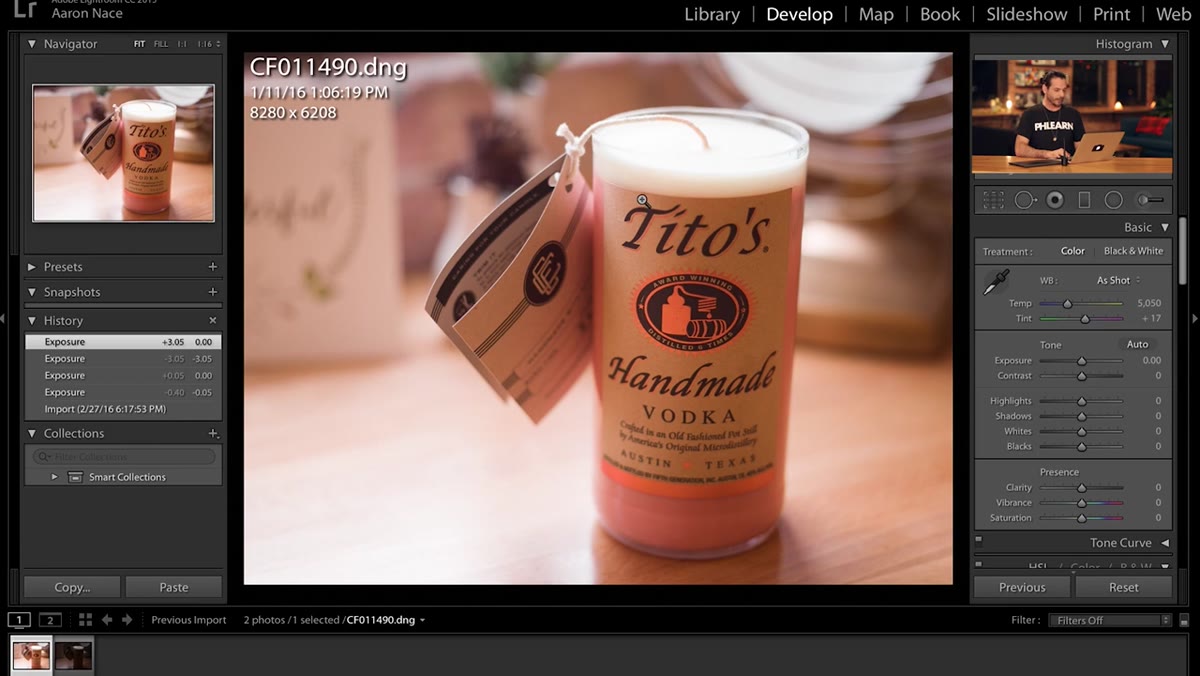
The image in the tutorial is a promotional shot for a Chicago candle company, and the top of the candle is completely blown out. If you’ve shot products under artificial lighting, you’ve been here. Here’s how to fix it.
Step 1: Check What’s Actually in Your Raw File
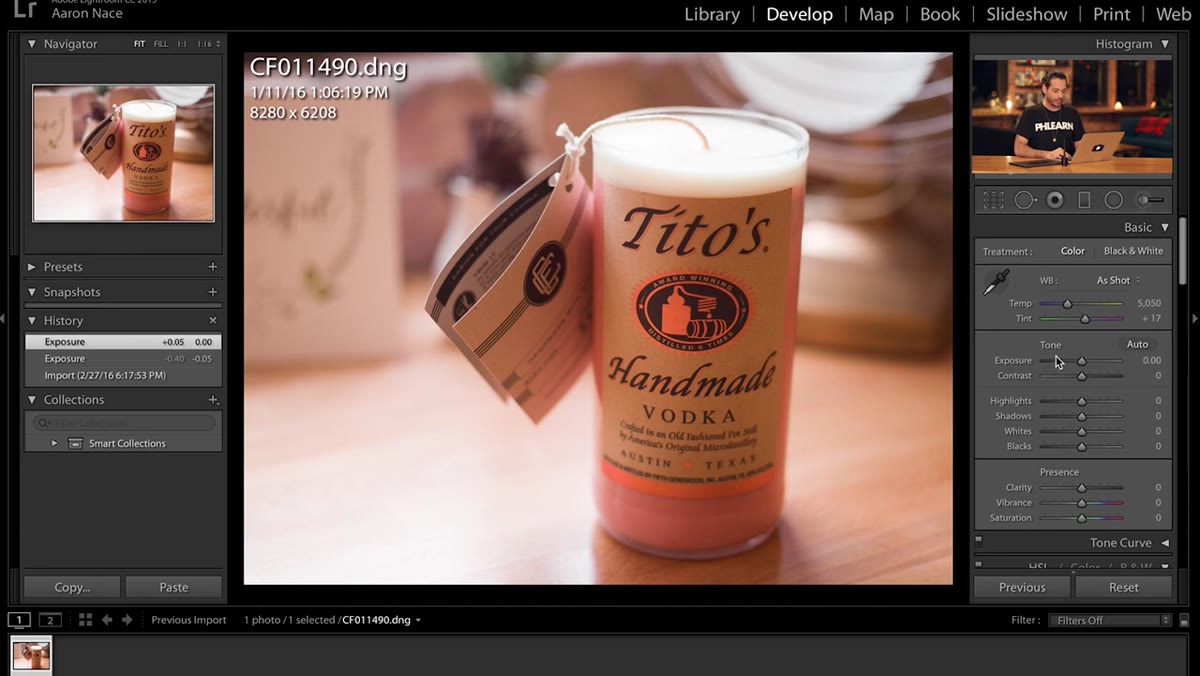 Exposure slider pulled down revealing hidden highlight detail
Before you do anything else, you need to know whether your raw file actually contains recoverable information in the overexposed areas. This step saves you from wasting time on a file that’s genuinely unrecoverable. In the Develop module, grab the Exposure slider and pull it way down, somewhere in the range of -3 to -4 stops. Watch what happens to your blown-out areas.
Exposure slider pulled down revealing hidden highlight detail
Before you do anything else, you need to know whether your raw file actually contains recoverable information in the overexposed areas. This step saves you from wasting time on a file that’s genuinely unrecoverable. In the Develop module, grab the Exposure slider and pull it way down, somewhere in the range of -3 to -4 stops. Watch what happens to your blown-out areas.
If detail starts appearing where you had pure white, you’re in good shape. The data was always there, encoded in the raw file, just hidden by the exposure setting. If it stays white no matter how far you pull the slider, the sensor was truly clipped and there’s nothing to recover. Shoot in raw (not JPEG) precisely because raw captures that extra latitude. A JPEG bakes the exposure in at capture time, and those highlights are gone for real.
Step 2: Create Virtual Copies for Each Exposure Variant
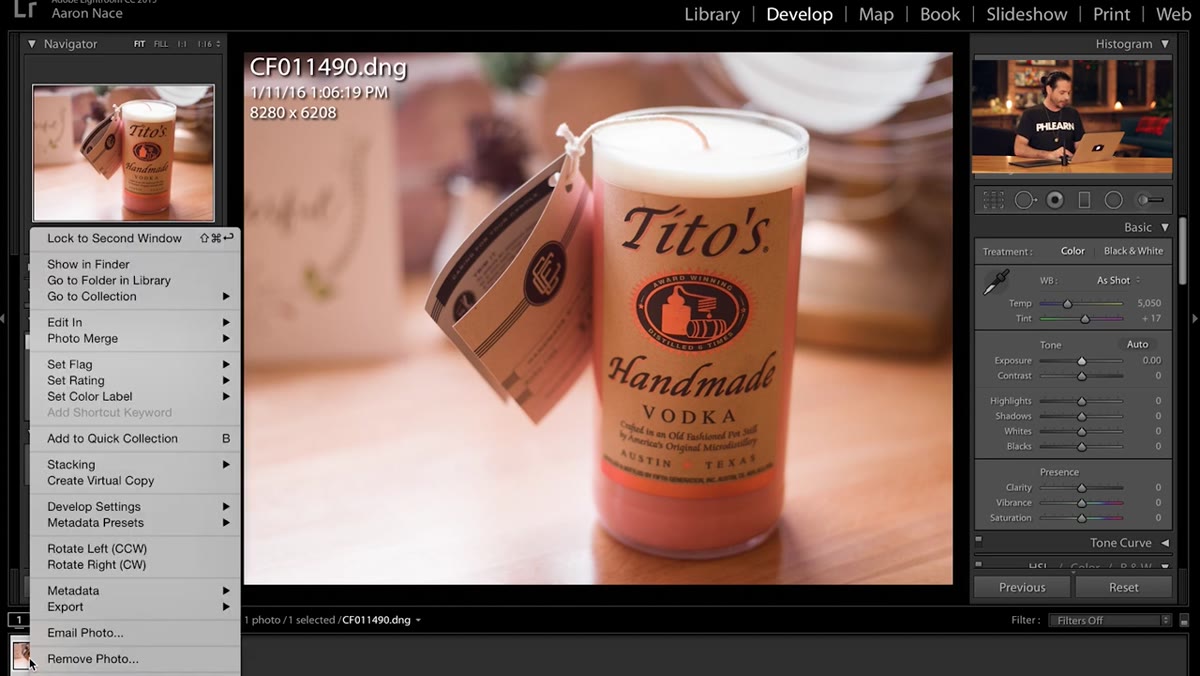 Right-click context menu showing Create Virtual Copy option
Once you’ve confirmed the recoverable data exists, right-click your image in Lightroom and select “Create Virtual Copy.” This generates a duplicate of the image in your catalog that points to the same raw file but can hold completely independent develop settings. No extra storage, no duplicate file on your hard drive.
Right-click context menu showing Create Virtual Copy option
Once you’ve confirmed the recoverable data exists, right-click your image in Lightroom and select “Create Virtual Copy.” This generates a duplicate of the image in your catalog that points to the same raw file but can hold completely independent develop settings. No extra storage, no duplicate file on your hard drive.
For a basic overexposure fix, you’ll want at least two versions: your original exposure and one pulled down enough to reveal full highlight detail. If your image also has underexposed shadow areas, create a third copy and push the exposure up to bring those in. Think of each virtual copy as one frame in a traditional HDR bracket, except you’re generating them all from a single capture.
Step 3: Dial In Your Exposure for the Dark (Highlight Recovery) Copy
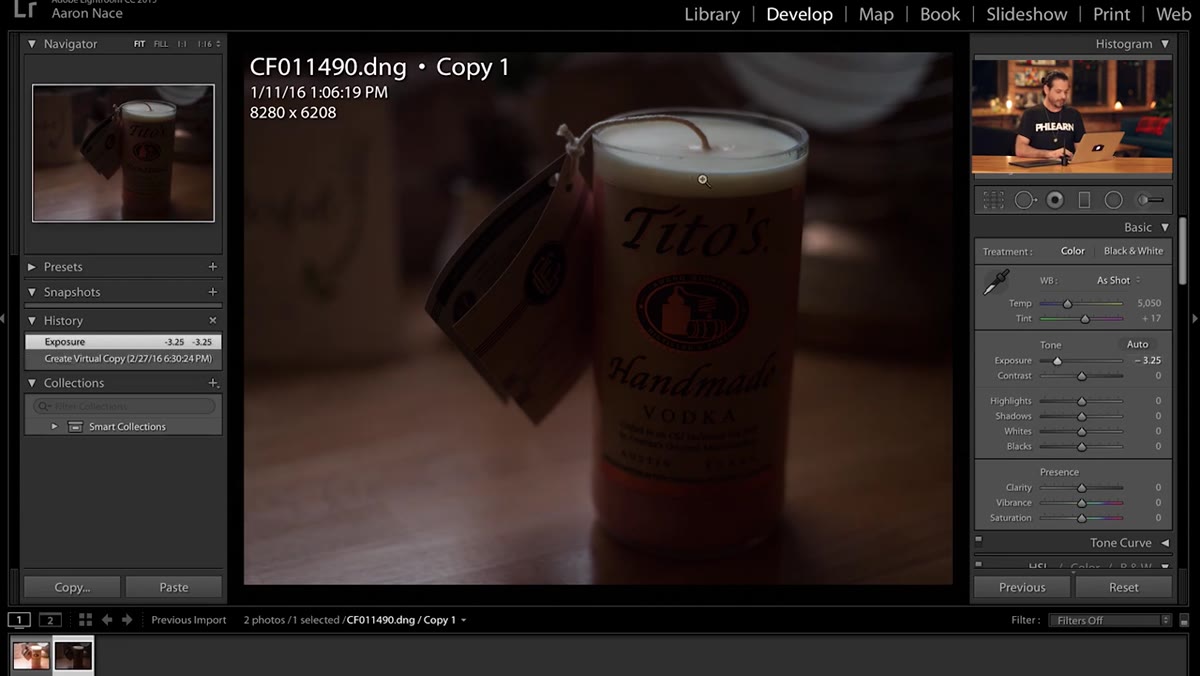 Dark virtual copy showing full candle top detail at low exposure
Select the virtual copy you created and drag the Exposure slider down until your previously blown-out area shows clean, clear detail. In the tutorial, Aaron brings it down to the point where the top of the candle becomes fully visible. Don’t worry about the rest of the image looking too dark at this stage. You’re not trying to make a finished photo here, you’re extracting specific tonal information that will be composited later.
Dark virtual copy showing full candle top detail at low exposure
Select the virtual copy you created and drag the Exposure slider down until your previously blown-out area shows clean, clear detail. In the tutorial, Aaron brings it down to the point where the top of the candle becomes fully visible. Don’t worry about the rest of the image looking too dark at this stage. You’re not trying to make a finished photo here, you’re extracting specific tonal information that will be composited later.
Write down or mentally note the exposure value where the highlight detail fully appears. This is your anchor point. Everything below that threshold is going to look underlit and flat, but that’s fine because the HDR merge will blend it with your brighter version.
Step 4: Keep Your Original (Normal Exposure) Copy as the Base
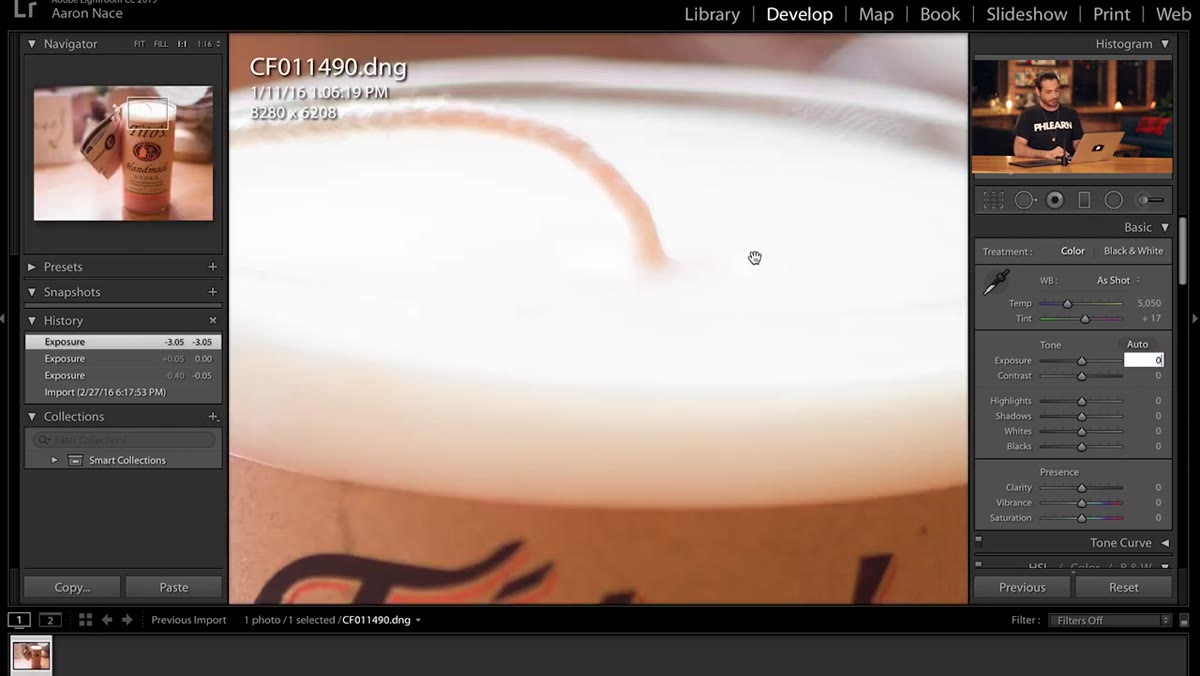 Original image at camera exposure before adjustments
Your second image is actually the simplest one to deal with: it’s your file at its original camera exposure, or close to it. This version carries your shadow detail, your midtones, and the overall feel of the shot. Leave it alone for now or make minor adjustments, but don’t try to correct the highlights here. That’s not what this copy is for.
Original image at camera exposure before adjustments
Your second image is actually the simplest one to deal with: it’s your file at its original camera exposure, or close to it. This version carries your shadow detail, your midtones, and the overall feel of the shot. Leave it alone for now or make minor adjustments, but don’t try to correct the highlights here. That’s not what this copy is for.
If your image has underexposed areas, your third virtual copy should have the Exposure slider pushed up until those shadow regions open up. Same logic applies in reverse: you’re not trying to make the whole image look right, just extract the tonal range from a specific zone.
Step 5: Select All Copies and Merge to HDR
 Multiple virtual copies selected in filmstrip view
In your filmstrip or grid view, select all your virtual copies together. Then go to Photo > Photo Merge > HDR. Lightroom will open the HDR merge dialog. You’ll see a preview of the merged result and a few options: Auto Align (useful if you have any camera movement, though with virtual copies it’s irrelevant), Deghost (leave on None or Low for studio work), and Auto Settings.
Multiple virtual copies selected in filmstrip view
In your filmstrip or grid view, select all your virtual copies together. Then go to Photo > Photo Merge > HDR. Lightroom will open the HDR merge dialog. You’ll see a preview of the merged result and a few options: Auto Align (useful if you have any camera movement, though with virtual copies it’s irrelevant), Deghost (leave on None or Low for studio work), and Auto Settings.
The merge works by analyzing the tonal content of each image and pulling the best-exposed pixels from each version. Your highlight detail comes from the dark copy. Your shadows and midtones come from the brighter one. The result is a single DNG file with a much wider effective dynamic range than either version alone. Once the merge completes, it drops the new DNG into your catalog and you can develop it normally.
A Note on When This Actually Works (and When to Reach for Photoshop)
I’ve used this technique on product shots, food photography, and the occasional landscape when I didn’t bracket properly. It holds up well when the overexposure is moderate and the detail in the raw file is genuinely recoverable. Where it gets complicated is when the blown area has a visible hard edge, like a sharp light falloff on a shiny surface. The HDR merge handles smooth gradients beautifully, but a crisp edge between an exposed area and a clipped one can sometimes show a subtle halo or transition line.
In those cases, I’ll do the HDR merge anyway to get most of the recovery, then bring both the merged result and the dark virtual copy into Photoshop as layers and mask in just the edge area manually. It adds ten minutes to the workflow, but the result is cleaner than anything a slider can do automatically. Aaron hints at this in the tutorial when he mentions that some remaining imperfections can be retouched in Photoshop. He’s right, and it’s worth building that expectation into your process from the start.
The single most important thing I took from this technique is the mental shift it requires: a raw file is not a finished photograph, it’s a container of information waiting to be shaped. Blown highlights in a JPEG are a funeral. Blown highlights in a raw file are often just a puzzle with a solution hiding three slider moves away. Check your data first, build your exposures from it, then let the merge do the heavy lifting.
Watch the full tutorial on YouTube to see Aaron walk through the complete process with the candle image from start to finish.
Comments (3)
Quality content like this is rare. Keep it up.
This is the kind of content that keeps me coming back.
Great article! I actually covered something related on my site — the lighting angle is really complementary to this.
Leave a Comment