Every January I tell myself I’m going to do something meaningful with the thousands of photos sitting in my Lightroom catalog. Not just export them to a hard drive and forget they exist, but actually put them somewhere physical where people can see them. A printed calendar is one of the best answers to that problem, and it costs almost nothing if you know where to look.
In this Scott Kelby tutorial, he walks through a workflow built around free calendar templates created annually by photographer Ed Weaver. Weaver designs these templates specifically for Lightroom’s Print module, and he releases them every year at no cost, which is genuinely rare generosity in a space where every other resource wants your email address and a monthly subscription. Kelby’s tutorial cuts straight to the process, no fluff, no upsell. I’ve used this workflow myself and it holds up. Here’s the full breakdown so you can follow along without pausing and rewinding every thirty seconds.
Watch the full tutorial on YouTube
Step 1: Download the Free Templates from Ed Weaver’s Site
 Ed Weaver’s website open in browser showing template download page
Head to Ed Weaver’s site at readphotographic.com/lr-calendar-templates and download the free template pack. You’ll get two calendar layout options: one where weeks start on Sunday and one where they start on Monday. This matters depending on where you live or simply how your brain reads a calendar grid. Kelby goes with the Sunday version. I do too, but grab both if you want flexibility. The download is a zip file containing both graphic files and print module templates.
Ed Weaver’s website open in browser showing template download page
Head to Ed Weaver’s site at readphotographic.com/lr-calendar-templates and download the free template pack. You’ll get two calendar layout options: one where weeks start on Sunday and one where they start on Monday. This matters depending on where you live or simply how your brain reads a calendar grid. Kelby goes with the Sunday version. I do too, but grab both if you want flexibility. The download is a zip file containing both graphic files and print module templates.
Step 2: Build a Collection of Your Photos in Lightroom
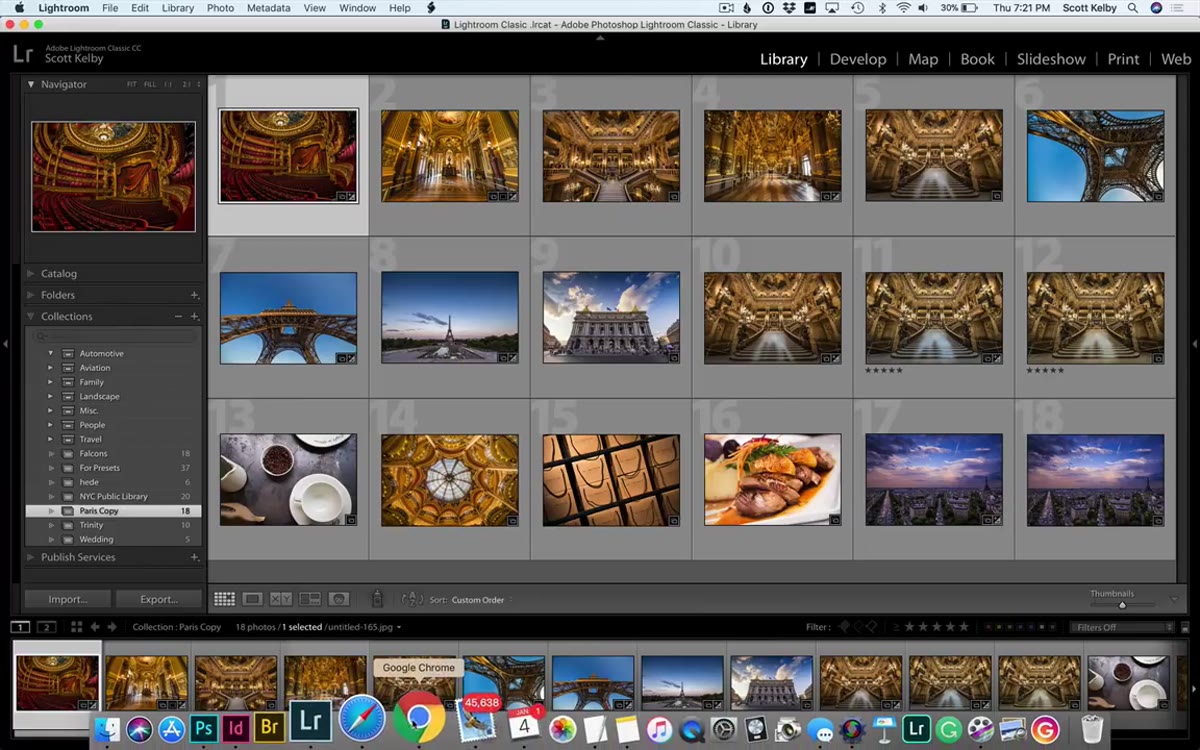
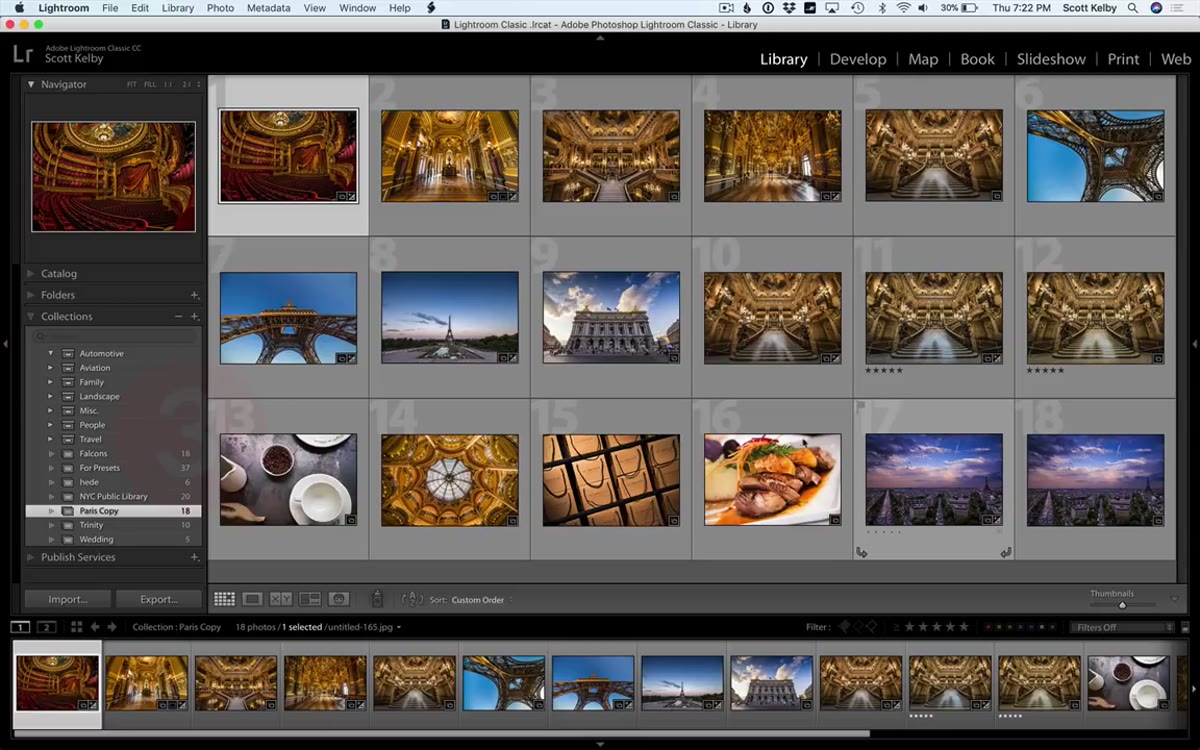
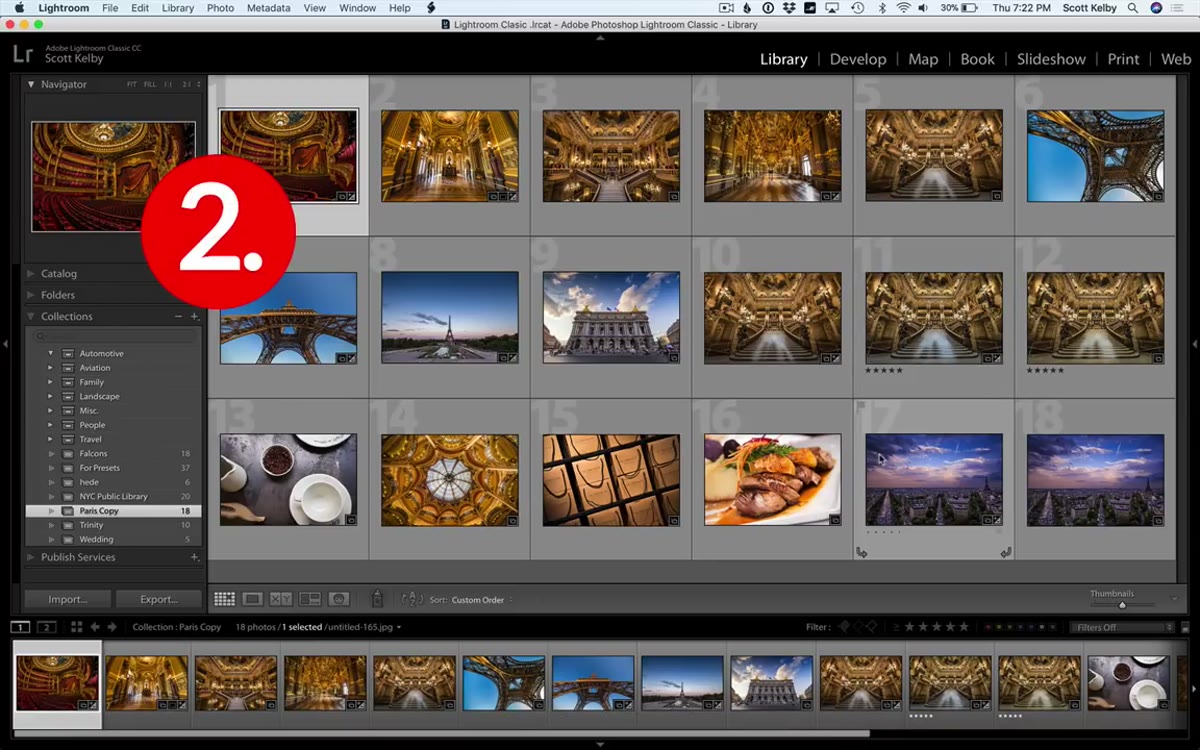 Lightroom library showing a collection of images in the filmstrip
Before you touch the Print module, go to your Library and create a new collection specifically for this project. Pull in twelve images you want to represent each month. You don’t have to commit to final picks right now, but having a working pool of photos grouped together will save you serious time later. The reason this matters will become clear in the next step, when you’re importing the calendar graphics. You want everything in one place so you’re not jumping between collections mid-workflow.
Lightroom library showing a collection of images in the filmstrip
Before you touch the Print module, go to your Library and create a new collection specifically for this project. Pull in twelve images you want to represent each month. You don’t have to commit to final picks right now, but having a working pool of photos grouped together will save you serious time later. The reason this matters will become clear in the next step, when you’re importing the calendar graphics. You want everything in one place so you’re not jumping between collections mid-workflow.
Step 3: Import the Calendar Graphics into That Same Collection
 Lightroom import dialog open with calendar graphic files selected
This is the step most people skip, and then wonder why the workflow feels clunky. In Lightroom’s import dialog, navigate to the folder where you downloaded Weaver’s files and select the calendar graphics package you want, such as the Sunday large version. Before you click Import, look for the “Add to Collection” option in the import panel and point it at the collection you just made. This puts the graphic overlays and your photos in the same collection simultaneously. When you’re in the Print module building your calendar pages, having the date graphics and the photos side by side in your filmstrip makes the whole process much faster.
Lightroom import dialog open with calendar graphic files selected
This is the step most people skip, and then wonder why the workflow feels clunky. In Lightroom’s import dialog, navigate to the folder where you downloaded Weaver’s files and select the calendar graphics package you want, such as the Sunday large version. Before you click Import, look for the “Add to Collection” option in the import panel and point it at the collection you just made. This puts the graphic overlays and your photos in the same collection simultaneously. When you’re in the Print module building your calendar pages, having the date graphics and the photos side by side in your filmstrip makes the whole process much faster.
Step 4: Install the Print Module Templates
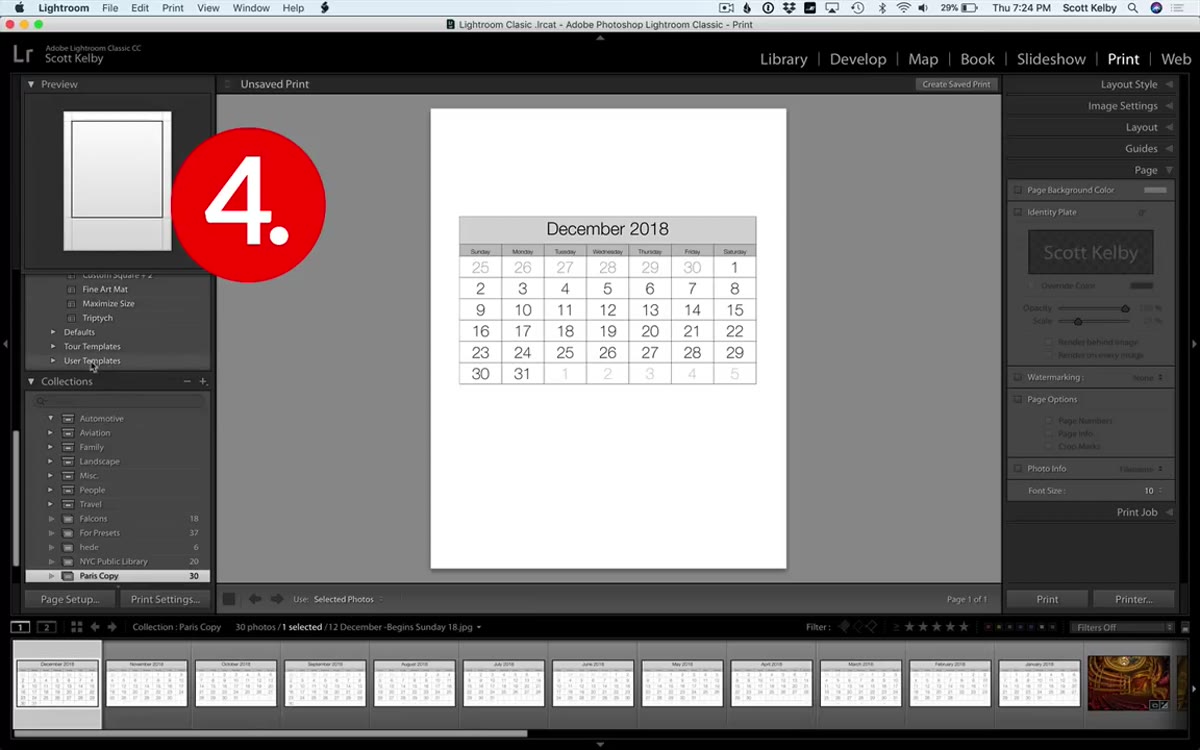 Lightroom template panel showing right-click menu with “New Folder” option
Go to the Print module. In the left panel under “Template Browser,” right-click (or Control-click on Mac) on “User Templates” and create a new folder. Name it something obvious like “Calendar” so you can find it later. Once that folder exists, right-click on it again and choose “Import.” Navigate to Weaver’s downloaded files and select the print template you want. He includes several sizes, including 8.5x11 and 13x19, and gives you options for one image per month or a single-page layout showing all twelve months at once in either vertical or horizontal orientation. For a traditional wall calendar, the one-image-per-month 8.5x11 template is the practical starting point.
Lightroom template panel showing right-click menu with “New Folder” option
Go to the Print module. In the left panel under “Template Browser,” right-click (or Control-click on Mac) on “User Templates” and create a new folder. Name it something obvious like “Calendar” so you can find it later. Once that folder exists, right-click on it again and choose “Import.” Navigate to Weaver’s downloaded files and select the print template you want. He includes several sizes, including 8.5x11 and 13x19, and gives you options for one image per month or a single-page layout showing all twelve months at once in either vertical or horizontal orientation. For a traditional wall calendar, the one-image-per-month 8.5x11 template is the practical starting point.
Step 5: Click the Template and Watch the Layout Snap Into Place
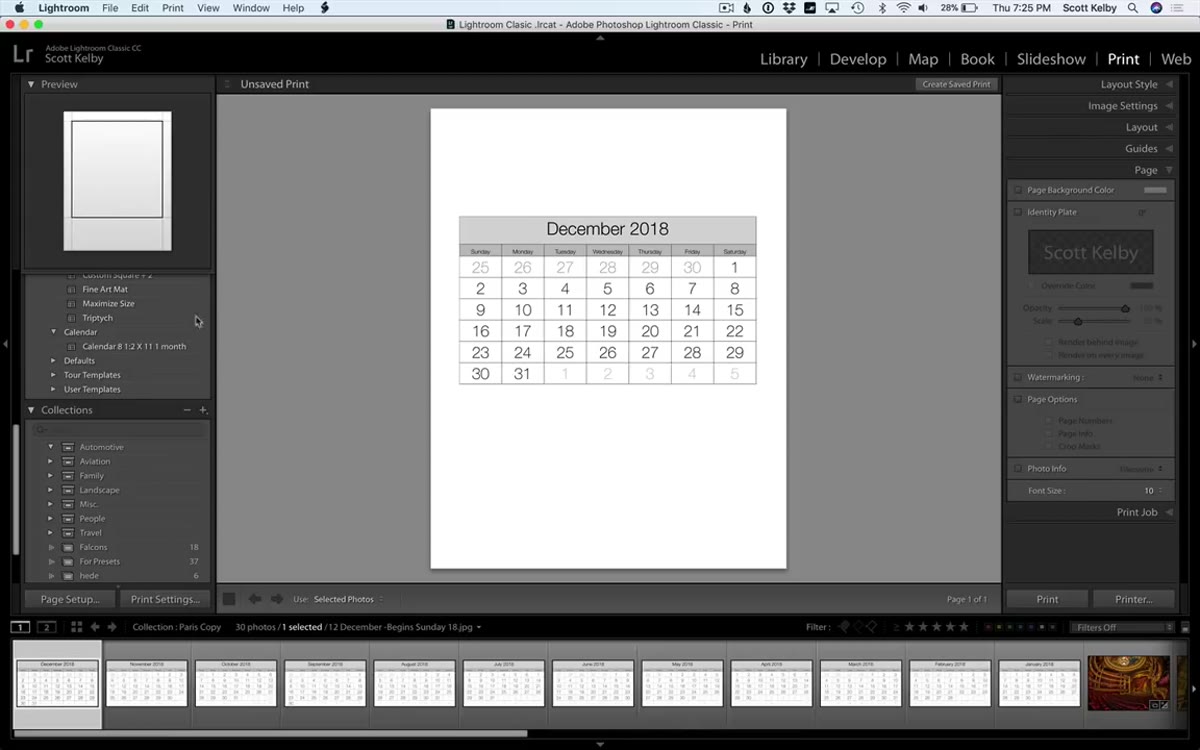 Print module layout updating after template selection
Once you click the imported template in the Template Browser, Lightroom will update the print layout immediately. You’ll see a structured page appear with space for your photo and a calendar grid for the month’s dates. This is the payoff for all the setup work. The template does the heavy lifting on spacing, margins, and proportions. Your only job now is to populate it.
Print module layout updating after template selection
Once you click the imported template in the Template Browser, Lightroom will update the print layout immediately. You’ll see a structured page appear with space for your photo and a calendar grid for the month’s dates. This is the payoff for all the setup work. The template does the heavy lifting on spacing, margins, and proportions. Your only job now is to populate it.
Step 6: Pair Each Month with a Photo and Print or Export
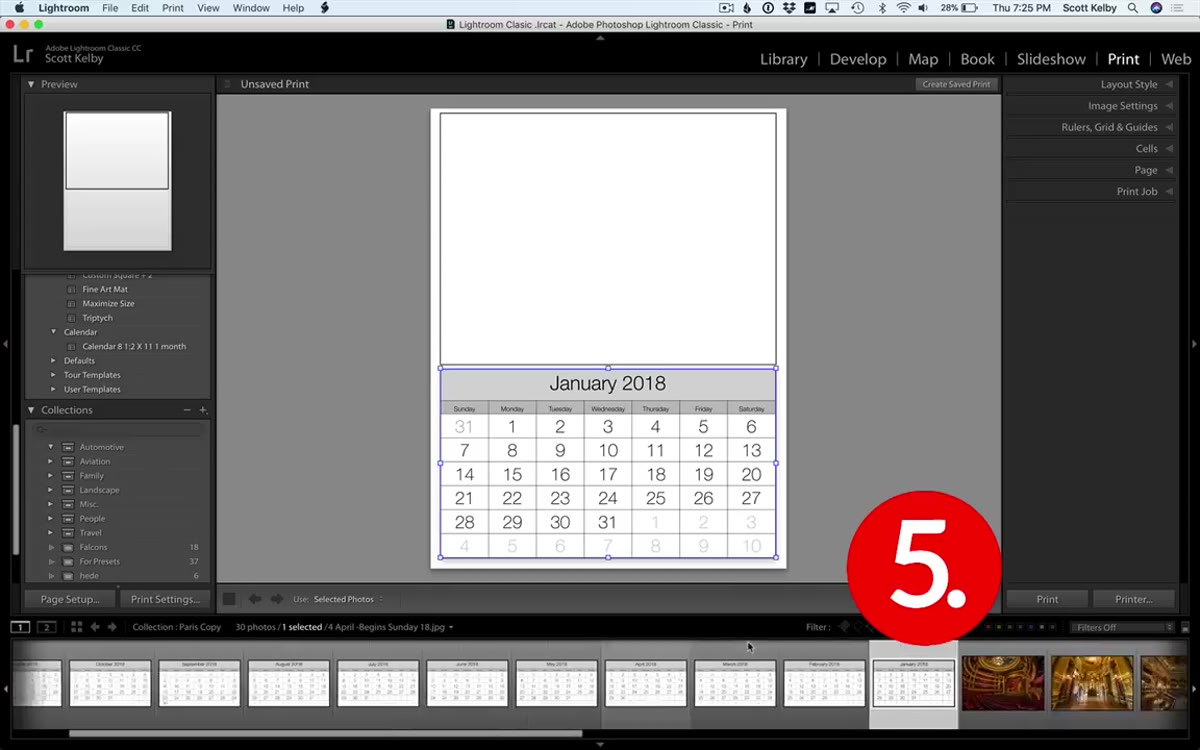 Completed January calendar page with photo in the Print module
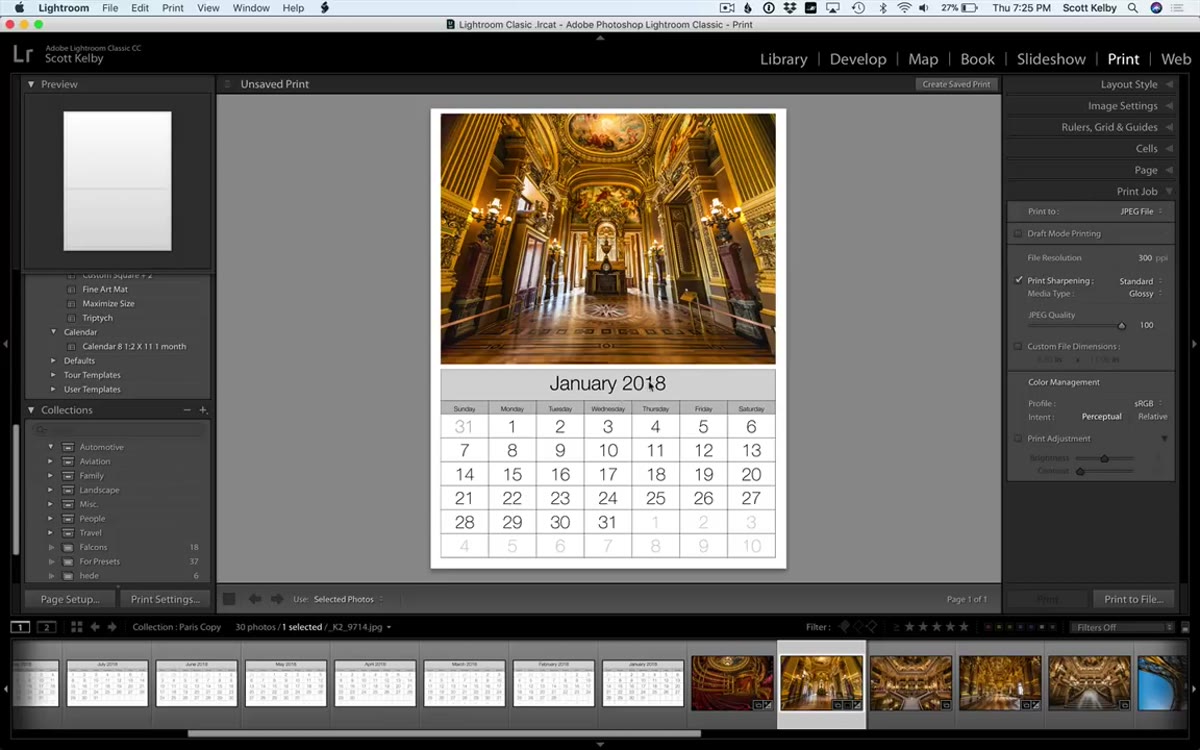
In the filmstrip at the bottom of the Print module, select the January date graphic and then select your photo for that month. The layout will display them together as a finished calendar page. From here you have two output options. You can send it directly to a printer through the Print Job panel on the right side, or you can export it as a JPEG by opening the print driver dialog and choosing “Print to JPEG” from the output options. The JPEG route is useful if you want to send pages to a print lab or share them digitally before printing.
Completed January calendar page with photo in the Print module
In the filmstrip at the bottom of the Print module, select the January date graphic and then select your photo for that month. The layout will display them together as a finished calendar page. From here you have two output options. You can send it directly to a printer through the Print Job panel on the right side, or you can export it as a JPEG by opening the print driver dialog and choosing “Print to JPEG” from the output options. The JPEG route is useful if you want to send pages to a print lab or share them digitally before printing.
Step 7: Use Split Toning to Match the Calendar’s Color to Your Image
 Develop module split toning panel with color selected for highlights
The calendar grid area defaults to a neutral grey background, which works fine with most photos but can feel disconnected from images that have a strong color palette. Kelby’s fix is quick and smart: select your photo, drop into the Develop module, and open the Split Toning panel. Add a subtle hue to the Highlights that pulls from your image’s dominant color, then bump the Saturation just enough to see it register. Go back to the Print module and the background area of the calendar will now feel like it belongs with the photo rather than sitting next to it. Don’t overdo the saturation or it will fight the date text for attention.
Develop module split toning panel with color selected for highlights
The calendar grid area defaults to a neutral grey background, which works fine with most photos but can feel disconnected from images that have a strong color palette. Kelby’s fix is quick and smart: select your photo, drop into the Develop module, and open the Split Toning panel. Add a subtle hue to the Highlights that pulls from your image’s dominant color, then bump the Saturation just enough to see it register. Go back to the Print module and the background area of the calendar will now feel like it belongs with the photo rather than sitting next to it. Don’t overdo the saturation or it will fight the date text for attention.
One Thing I’d Add: Treat the Month Pairings Like a Curation Project
The purely practical read of this workflow is “pick twelve photos, one per month, done.” But I’d push back on that slightly. The month you assign a photo to actually changes how people experience it. A January image feels right when it has quiet, cold tones, not because of any rule but because of association. When I built my last personal calendar in Lightroom, I spent an extra hour matching image mood to month rather than just assigning them in chronological order. The result felt cohesive in a way that surprised me. If you’re printing one to give someone as a gift, that extra curation pass is worth the time.
The core lesson here is that Lightroom’s Print module is far more capable than most people realize, and Ed Weaver’s templates are one of the best arguments for actually learning it. The whole setup takes under fifteen minutes once you have the files, and you end up with something physical and personal that most photographers never bother to make.
Watch the full tutorial on YouTube and download Weaver’s templates at readphotographic.com/lr-calendar-templates. They’re free, updated annually, and genuinely well made.
Comments (4)
Printing this out and pinning it next to my monitor. That good.
Love this. I referenced a similar technique in one of my recent posts. Always good to see other perspectives.
Simple but effective. Sometimes that's all you need.
Simple but effective. Sometimes that's all you need.
Leave a Comment