
There’s a specific kind of frustration that hits when you deliver a print to a client and then spot the problem yourself, standing right there next to them. Purple fringing along a roofline, a green halo eating into a branch, some artifact you somehow missed at screen size. I’ve been there more than once, and it never gets less embarrassing. The fix exists, it takes about fifteen seconds, and for whatever reason it doesn’t get talked about enough in beginner and intermediate circles.
In this KelbyOne tutorial, Scott Kelby and RC Concepcion walk through two separate but equally useful Lightroom workflows: removing chromatic aberration using the Lens Correction panel and the manual defringe sliders, and setting up Publish Services so you can push images directly from Lightroom to platforms like 500px and Behance without ever touching a browser. Watch the full tutorial on YouTube — but the breakdown below will get you moving even faster.
These aren’t glamorous topics. Nobody’s naming a preset pack after chromatic aberration correction. But they’re the kind of foundational skills that separate a tidy, professional workflow from one that creates extra problems downstream. Let’s get into it.
Step 1: Zoom In and Actually Find the Problem
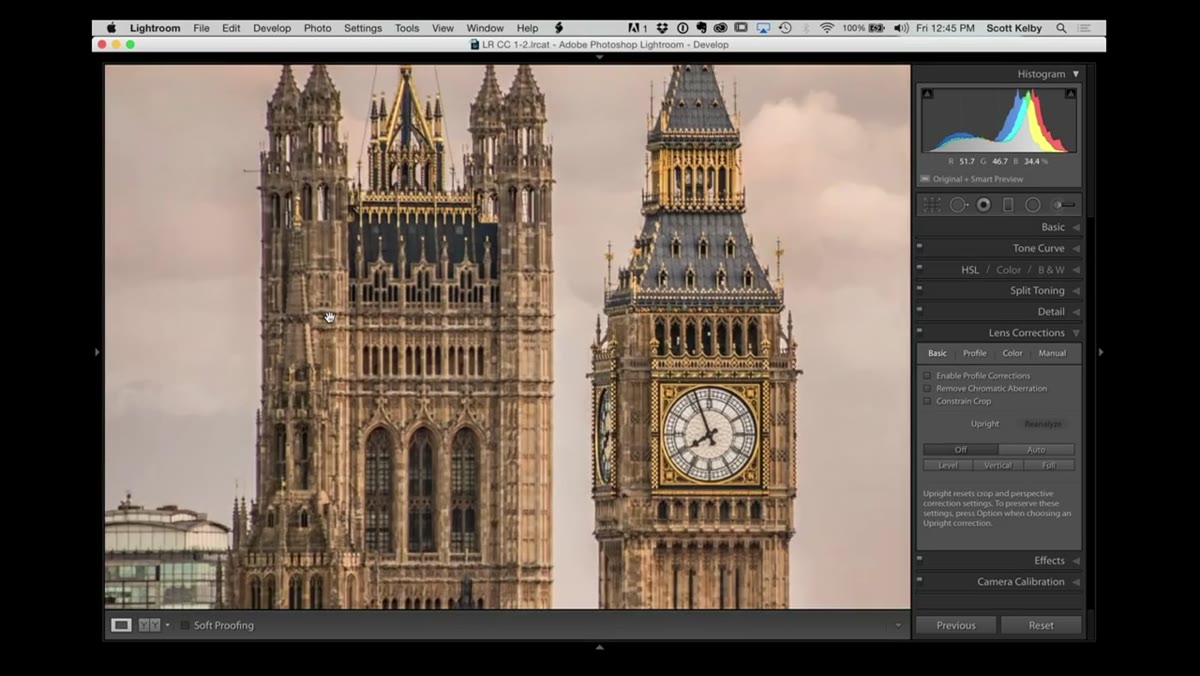 Zoomed-in hotel window photo showing heavy purple fringing
Before you can fix chromatic aberration, you have to see it. At normal zoom levels, most images look perfectly fine, which is exactly why this issue survives all the way to the print stage so often. RC demonstrates this with a hotel-window shot that looks completely ordinary at fit-to-screen view. The moment he zooms in tight, a thick purple line appears along every high-contrast edge, the kind of fringe that would ruin a large-format print.
Zoomed-in hotel window photo showing heavy purple fringing
Before you can fix chromatic aberration, you have to see it. At normal zoom levels, most images look perfectly fine, which is exactly why this issue survives all the way to the print stage so often. RC demonstrates this with a hotel-window shot that looks completely ordinary at fit-to-screen view. The moment he zooms in tight, a thick purple line appears along every high-contrast edge, the kind of fringe that would ruin a large-format print.
Chromatic aberration shows up at the borders between bright areas and dark areas. Backlit subjects, window frames, tree branches against a bright sky, architectural edges against an overcast background. Zoom to 1:1 or higher and pan around those high-contrast edges before you call an image done. Purple and green are the two colors you’re hunting for.
Step 2: Check What’s Causing It Before You Fix It
 Lightroom Develop module with Clarity and Shadows sliders visible
Chromatic aberration is usually blamed on the lens, and lenses do cause it, especially at wide apertures and at the edges of the frame. But RC makes a point here that I want to underline because it changed how I audit my own edits: heavy Clarity boosts and aggressive shadow recovery can pull chromatic aberration out of an image that might have otherwise been clean. The edit itself can create the problem.
Lightroom Develop module with Clarity and Shadows sliders visible
Chromatic aberration is usually blamed on the lens, and lenses do cause it, especially at wide apertures and at the edges of the frame. But RC makes a point here that I want to underline because it changed how I audit my own edits: heavy Clarity boosts and aggressive shadow recovery can pull chromatic aberration out of an image that might have otherwise been clean. The edit itself can create the problem.
Before reaching for the fix, take a quick look at your Develop settings. If your Clarity slider is sitting at plus 70 and your Shadows are cranked up, that fringing might be partially your own doing. You can still fix it, but knowing the cause helps you decide whether to back off the aggressive adjustments first or just correct the symptom directly.
Step 3: Run the One-Click Fix in Lens Corrections
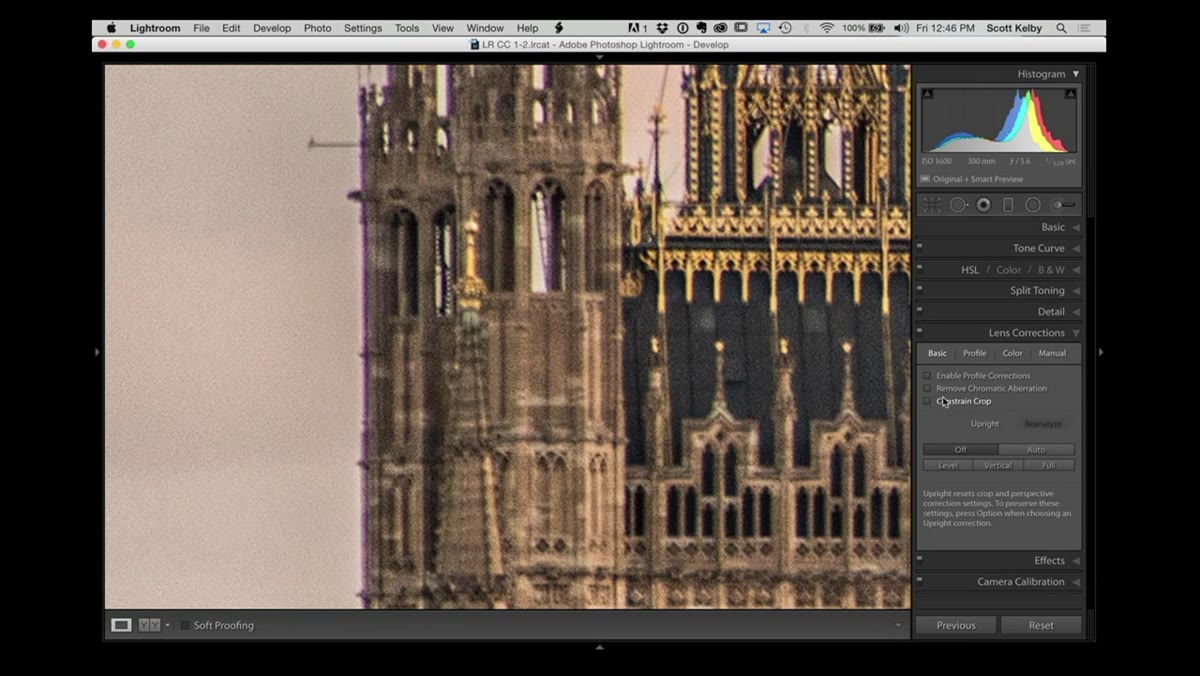 Lens Corrections panel open, Remove Chromatic Aberration checkbox highlighted
Open the Lens Corrections panel in the Develop module and check the box that says “Remove Chromatic Aberrations.” One click. For a lot of images, especially ones shot with modern lenses, this single checkbox handles the problem almost completely. Lightroom uses lens profile data to identify and neutralize the fringing automatically.
Lens Corrections panel open, Remove Chromatic Aberration checkbox highlighted
Open the Lens Corrections panel in the Develop module and check the box that says “Remove Chromatic Aberrations.” One click. For a lot of images, especially ones shot with modern lenses, this single checkbox handles the problem almost completely. Lightroom uses lens profile data to identify and neutralize the fringing automatically.
In the tutorial example, the one-click fix makes a noticeable improvement but doesn’t finish the job. That’s normal for images with heavier fringing or significant post-processing applied. Think of this checkbox as the first pass. It handles the easy cases automatically and reduces the severity of the harder ones so the manual controls have less work to do.
Step 4: Use the Manual Defringe Sliders for Stubborn Fringing
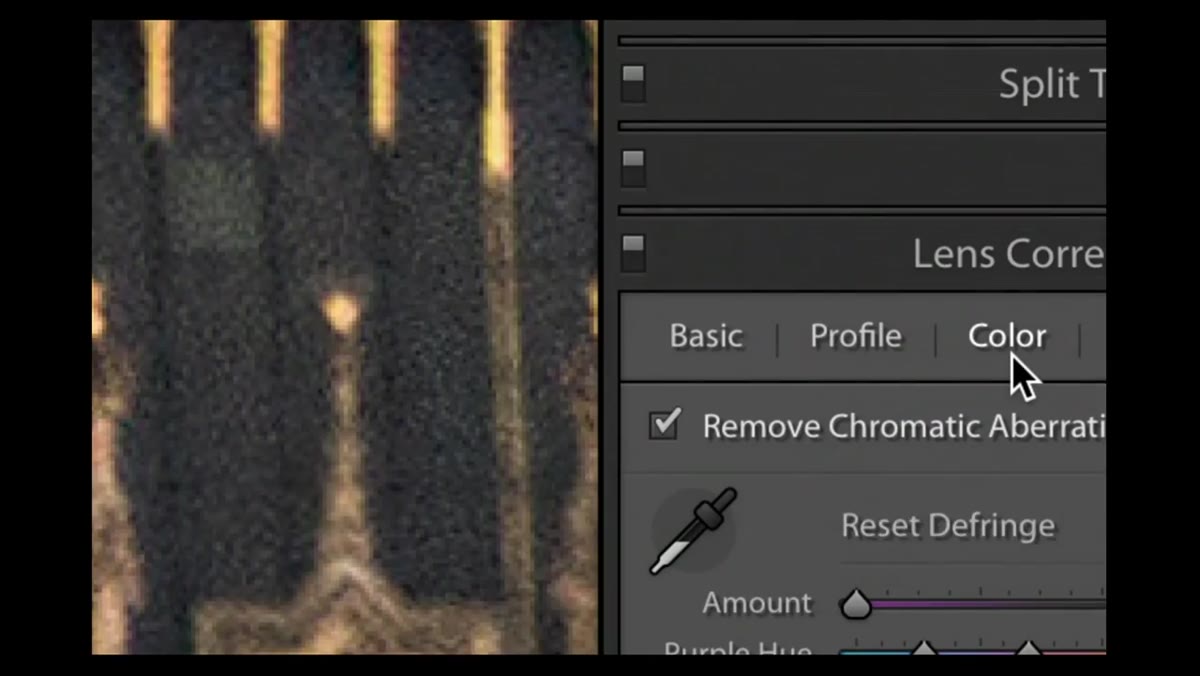 Color panel inside Lens Corrections showing Purple and Green Amount sliders
Still inside the Lens Corrections panel, click over to the Color tab. You’ll see two sets of controls: one for purple fringing and one for green fringing. Each set has an Amount slider and a Hue range selector. For the hotel-window image, the fringing is purple, so RC works the Purple Amount slider.
Color panel inside Lens Corrections showing Purple and Green Amount sliders
Still inside the Lens Corrections panel, click over to the Color tab. You’ll see two sets of controls: one for purple fringing and one for green fringing. Each set has an Amount slider and a Hue range selector. For the hotel-window image, the fringing is purple, so RC works the Purple Amount slider.
The adjustment is surprisingly small. He lands somewhere between four and five on the slider and the purple line disappears. The instinct is to drag aggressively, but these sliders are sensitive. Start low, maybe two or three, and work up until the color fringe neutralizes. You’re not looking for zero, you’re looking for a point where the edge reads as neutral gray or white rather than purple or green. If your fringing is green, same process, different slider.
Step 5: Set Up a Publish Service to Send Images Directly to Platforms
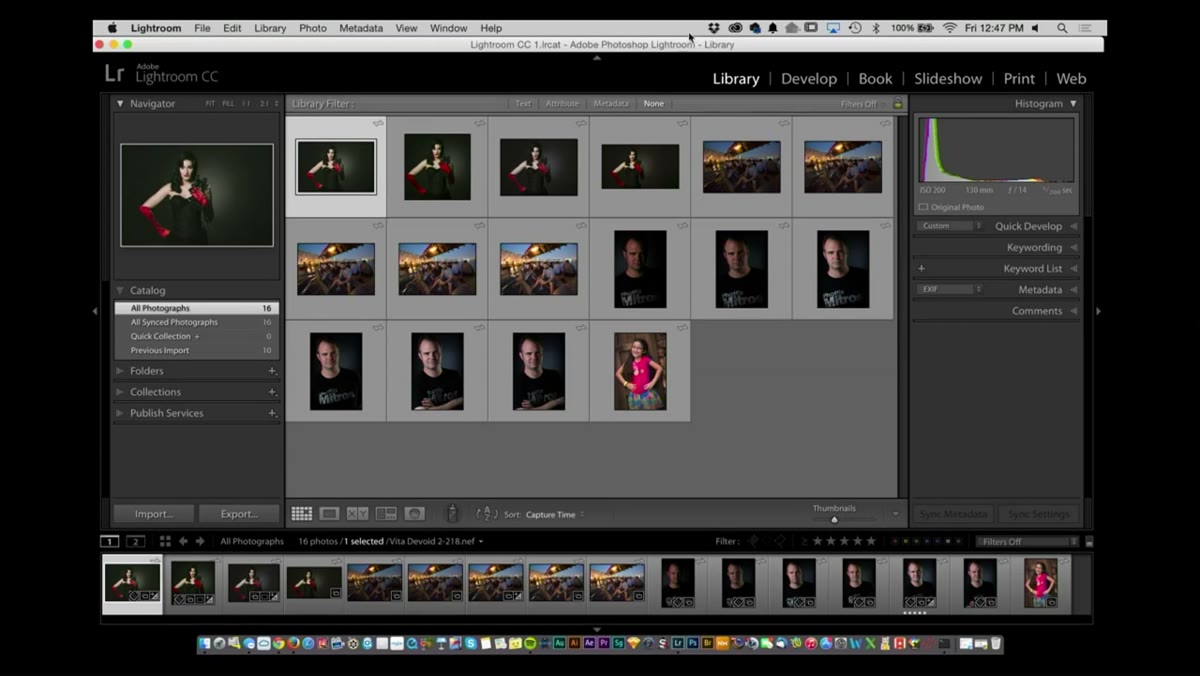 Library module showing Publish Services panel with 500px and Behance listed
Switch over to the Library module and look at the left panel. Toward the bottom you’ll find the Publish Services section. This is one of those Lightroom features that sits in plain sight and gets ignored because most people assume exporting and then uploading separately is just the way things work. It isn’t.
Library module showing Publish Services panel with 500px and Behance listed
Switch over to the Library module and look at the left panel. Toward the bottom you’ll find the Publish Services section. This is one of those Lightroom features that sits in plain sight and gets ignored because most people assume exporting and then uploading separately is just the way things work. It isn’t.
Out of the box, Lightroom includes services for 500px, Facebook, Behance, and a few others. If you haven’t connected any of them, each one will show a Setup button. Click Setup next to the service you want to connect and Lightroom walks you through authentication.
Step 6: Authenticate and Name Your Publish Connection
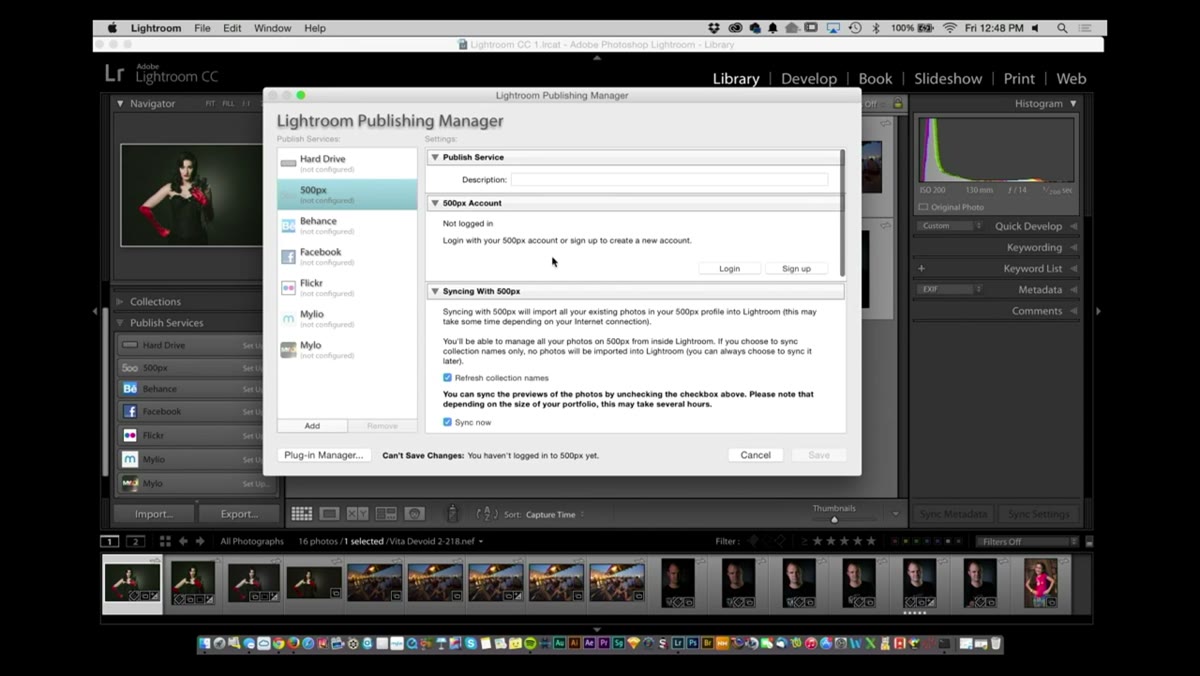 Browser-style authorization screen for 500px inside Lightroom
After clicking Setup, Lightroom opens an authorization screen where you log into your account on the platform. Once you approve the connection, you’ll be dropped back into Lightroom’s publish settings where you can configure export settings and give the connection a name.
Browser-style authorization screen for 500px inside Lightroom
After clicking Setup, Lightroom opens an authorization screen where you log into your account on the platform. Once you approve the connection, you’ll be dropped back into Lightroom’s publish settings where you can configure export settings and give the connection a name.
RC names his 500px connection something personal and specific, which is smart practice if you have multiple accounts or use Lightroom on more than one machine. Treat the name like a label in a filing system. Something that tells you exactly what it is six months from now when you’ve forgotten setting it up. Then click Save.
Step 7: Let Lightroom Sync Your Existing Content
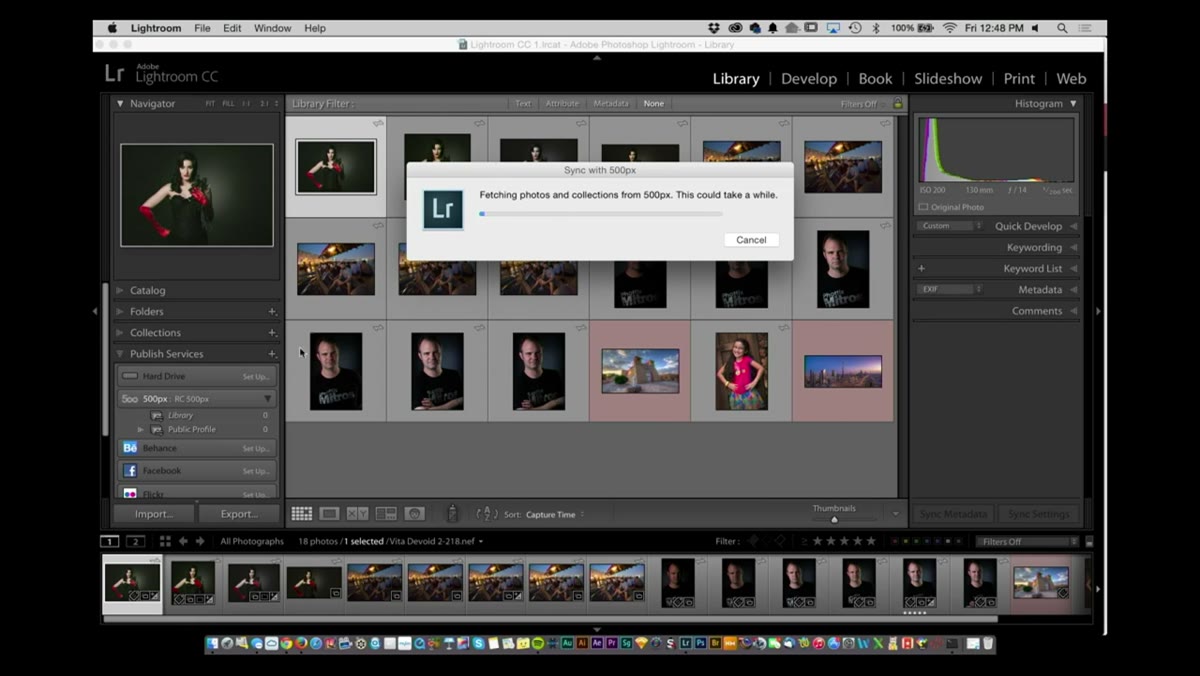 Published collection showing existing 500px images pulled into Lightroom
Here’s where it gets genuinely useful. Once the connection is saved, Lightroom doesn’t just create an empty bucket for future uploads. It pulls in the images you’ve already published to that platform and displays them inside the Published Collection. You can see what’s already out there, what needs to be republished after edits, and what hasn’t been sent yet, all from inside Lightroom.
Published collection showing existing 500px images pulled into Lightroom
Here’s where it gets genuinely useful. Once the connection is saved, Lightroom doesn’t just create an empty bucket for future uploads. It pulls in the images you’ve already published to that platform and displays them inside the Published Collection. You can see what’s already out there, what needs to be republished after edits, and what hasn’t been sent yet, all from inside Lightroom.
From here, dragging images into the published collection queue and hitting Publish sends them directly to the platform without leaving Lightroom. No exporting to your desktop, no browser tab hunting, no manual upload. For anyone publishing to multiple platforms regularly, this alone is worth the few minutes of setup.
One Thing I’d Add: Fix Chromatic Aberration in Your Import Preset
I’ve started including the “Remove Chromatic Aberrations” checkbox as a default in my import presets, the ones I apply at ingest before I’ve even looked at an image. It costs nothing, it’s non-destructive, and it means I’m never delivering a file that has the easy version of the problem still sitting in it. If an image needs the manual slider work on top of that, I catch it during culling when I’m already zooming in to check focus. The two-step process becomes one invisible background task and one quick manual check, rather than a separate correction step I might forget.
Chromatic aberration is one of those things that, once you know what you’re looking for, you’ll start seeing it everywhere. That’s not a curse, it’s just what happens when you learn to look at images more carefully. The fix is fast enough that finding it is never the frustrating part.
The Publish Services workflow is a different kind of time saver, less about fixing a problem and more about removing an unnecessary step from something you’re already doing. Both techniques are small individually. Together they’re the kind of workflow tightening that adds up to real hours saved over a year of editing.
Watch the full tutorial on YouTube to see Scott and RC walk through both techniques in real time.
Comments (2)
Quality content like this is rare. Keep it up.
Been doing this wrong for years apparently. Thanks for the wake-up call.
Leave a Comment