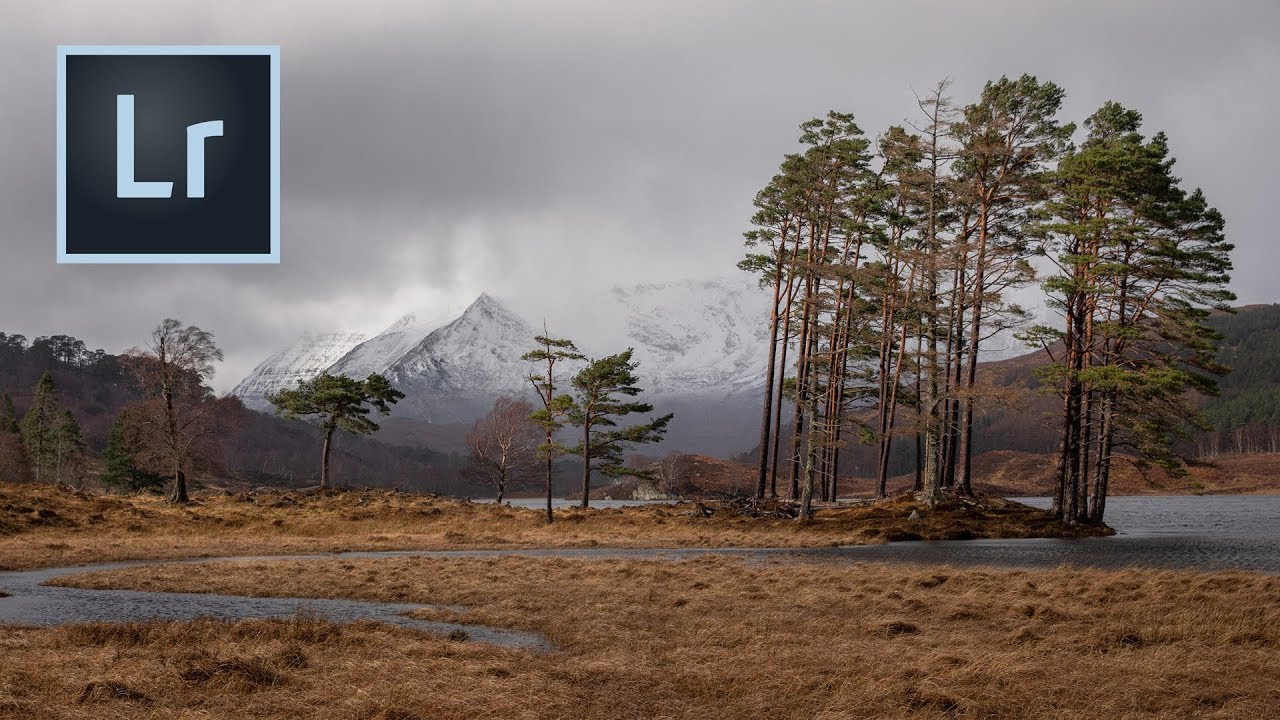
There’s a problem I run into constantly when editing landscape shots, and I’d bet you’ve hit it too. You’ve got a blown-out sky sitting on top of a beautifully exposed foreground, so you reach for Lightroom’s graduated filter, drag it down over the sky, pull the exposure back, and then stare at the result in quiet frustration. The filter doesn’t care about your mountain peak. It doesn’t care that your brightest cloud and your darkest ridge are sitting two inches apart. It just applies the effect to a rectangle, and that rectangle always clips something it shouldn’t.
I’ve been chasing workarounds for this for years. Layer masks in Photoshop, manual brush dodging, the whole nine yards. So when I sat down with Watch the full tutorial on YouTube - this Thomas Heaton tutorial on range masking - and watched him solve it in about thirty seconds inside Lightroom, I felt equal parts relieved and annoyed that I hadn’t been doing this sooner. Heaton demonstrates the technique on a Scotland landscape with a dramatic sunrise sky on one side and deep blue shadow on the other. The imbalance is real, and the fix is elegant. Here’s how it works.
Step 1: Apply Your Graduated Filter as Normal
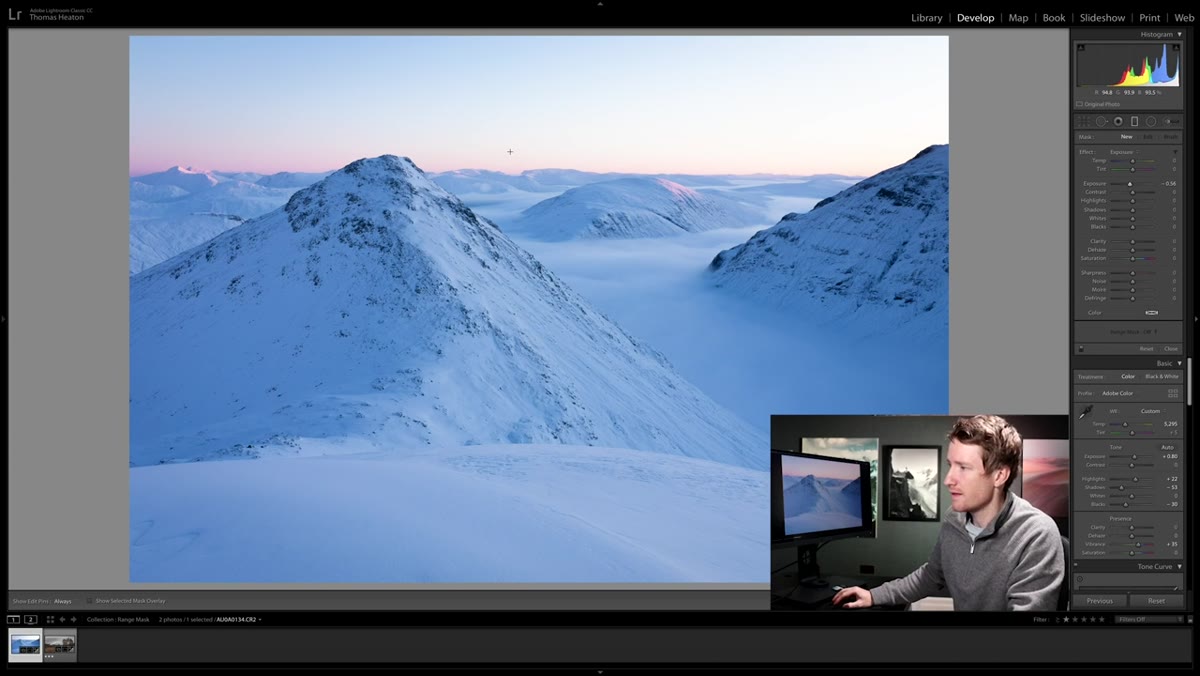 Graduated filter dragged down across bright sky
Start exactly the way you always would. Select the Graduated Filter tool, dial in a meaningful exposure reduction (Heaton goes a couple stops down and drops the highlights too), and drag the filter from the top of the frame down over the sky. Don’t try to be surgical at this point. The goal right now is just to tell Lightroom where you’re working, not to get the final result right.
Graduated filter dragged down across bright sky
Start exactly the way you always would. Select the Graduated Filter tool, dial in a meaningful exposure reduction (Heaton goes a couple stops down and drops the highlights too), and drag the filter from the top of the frame down over the sky. Don’t try to be surgical at this point. The goal right now is just to tell Lightroom where you’re working, not to get the final result right.
If the sky is wildly bright relative to the foreground, be aggressive. You can always back off later. The important thing is that your graduated filter is placed and your adjustments are set before you touch anything else.
Step 2: Observe the Problem It Creates
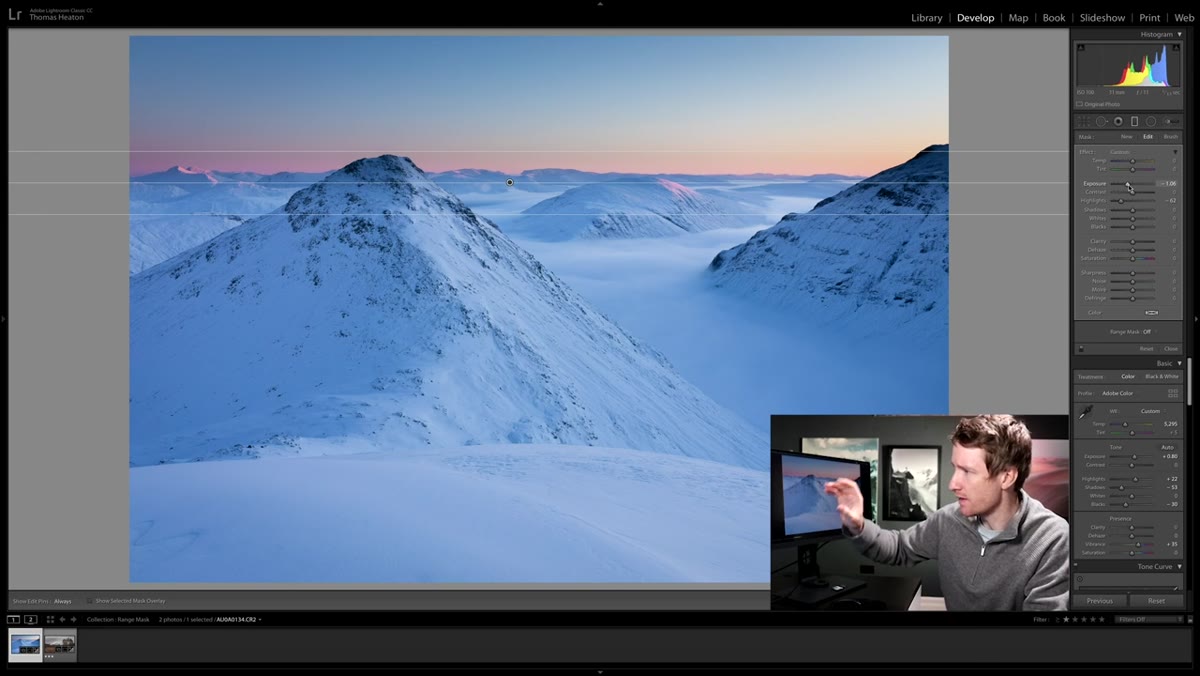 Graduated filter darkening mountain peak alongside sky
This is the step most tutorials skip, but it’s worth pausing here. Look at what the graduated filter has actually done to your image. In Heaton’s example, the filter has darkened the peak of the mountain in frame because the gradient reached down that far. You’ve also got a sky that’s still uneven, because a flat gradient can’t account for a sun-side that’s two stops brighter than the shadow-side.
Graduated filter darkening mountain peak alongside sky
This is the step most tutorials skip, but it’s worth pausing here. Look at what the graduated filter has actually done to your image. In Heaton’s example, the filter has darkened the peak of the mountain in frame because the gradient reached down that far. You’ve also got a sky that’s still uneven, because a flat gradient can’t account for a sun-side that’s two stops brighter than the shadow-side.
The graduated filter as a standalone tool is a blunt instrument. It operates on geometry, not on the actual tonal information in your scene. Recognizing this limitation is what makes the next step feel like a genuine revelation rather than just a buried menu option.
Step 3: Open the Range Mask Dropdown
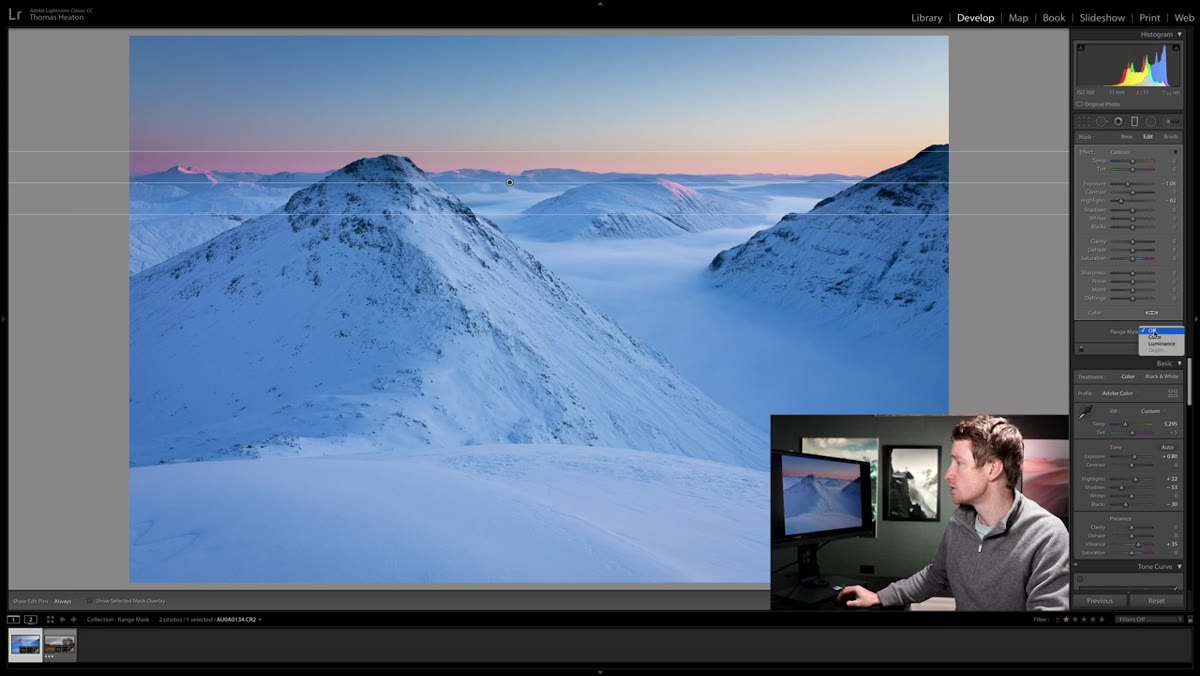 Range mask dropdown menu appearing at bottom of panel
Scroll to the bottom of the Graduated Filter panel while your filter is still active and selected. You’ll see a dropdown labeled “Range Mask” set to “None” by default. Click it. You’ll see three options: Luminance, Color, and Depth. For sky work and most tonal corrections, you want Luminance.
Range mask dropdown menu appearing at bottom of panel
Scroll to the bottom of the Graduated Filter panel while your filter is still active and selected. You’ll see a dropdown labeled “Range Mask” set to “None” by default. Click it. You’ll see three options: Luminance, Color, and Depth. For sky work and most tonal corrections, you want Luminance.
Select it. The panel will expand and show you a new slider beneath the dropdown. This is where the real control lives. What you’ve just done is told Lightroom: “Don’t apply this filter to the whole gradient area. Apply it only to pixels within a specific brightness range.”
Step 4: Enable “Show Luminance Mask” to See What You’re Doing
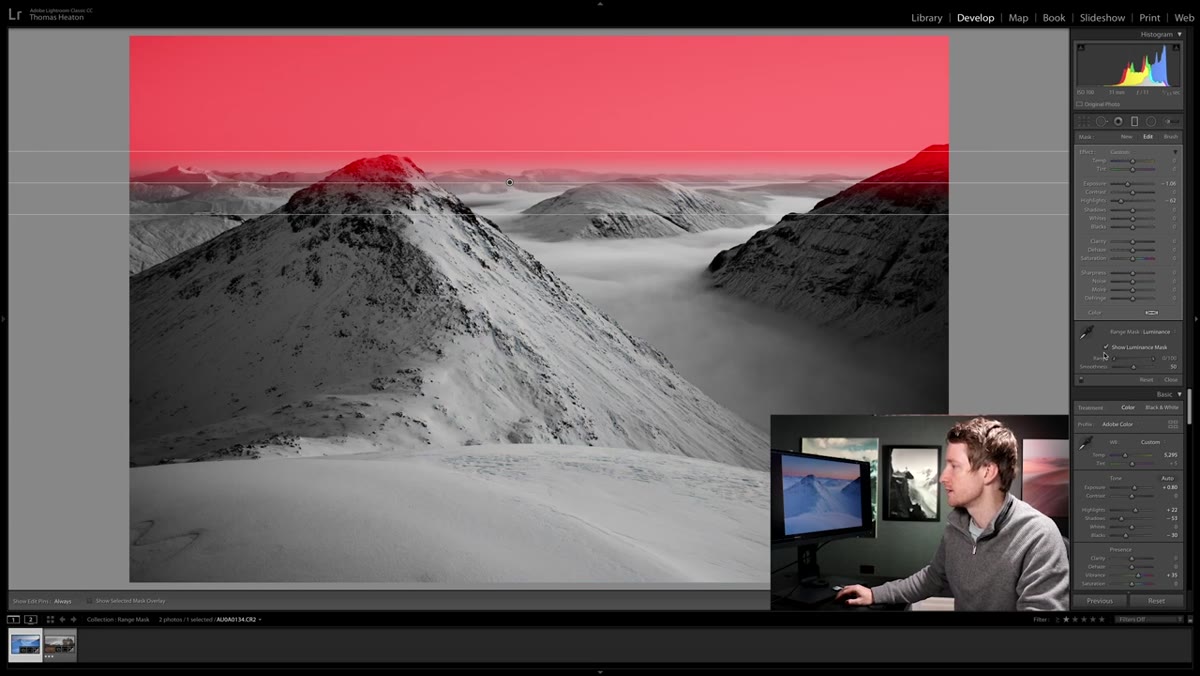 Red overlay showing luminance mask coverage on image
Before you start dragging the range slider, turn on the visual overlay. There’s a checkbox labeled “Show Luminance Mask” (sometimes labeled “Show Overlay” depending on your Lightroom version). Enable it. The areas where your adjustments are active will show up as a red overlay on the image, and everything excluded from the effect will look normal.
Red overlay showing luminance mask coverage on image
Before you start dragging the range slider, turn on the visual overlay. There’s a checkbox labeled “Show Luminance Mask” (sometimes labeled “Show Overlay” depending on your Lightroom version). Enable it. The areas where your adjustments are active will show up as a red overlay on the image, and everything excluded from the effect will look normal.
This is the only way to edit the range mask with any precision. Without the overlay, you’re flying blind. Heaton uses it throughout his demonstration, and it’s the single habit that separates people who use this feature effectively from people who add it, wiggle a slider, and give up.
Step 5: Drag the Luminance Range Slider to Target the Sky
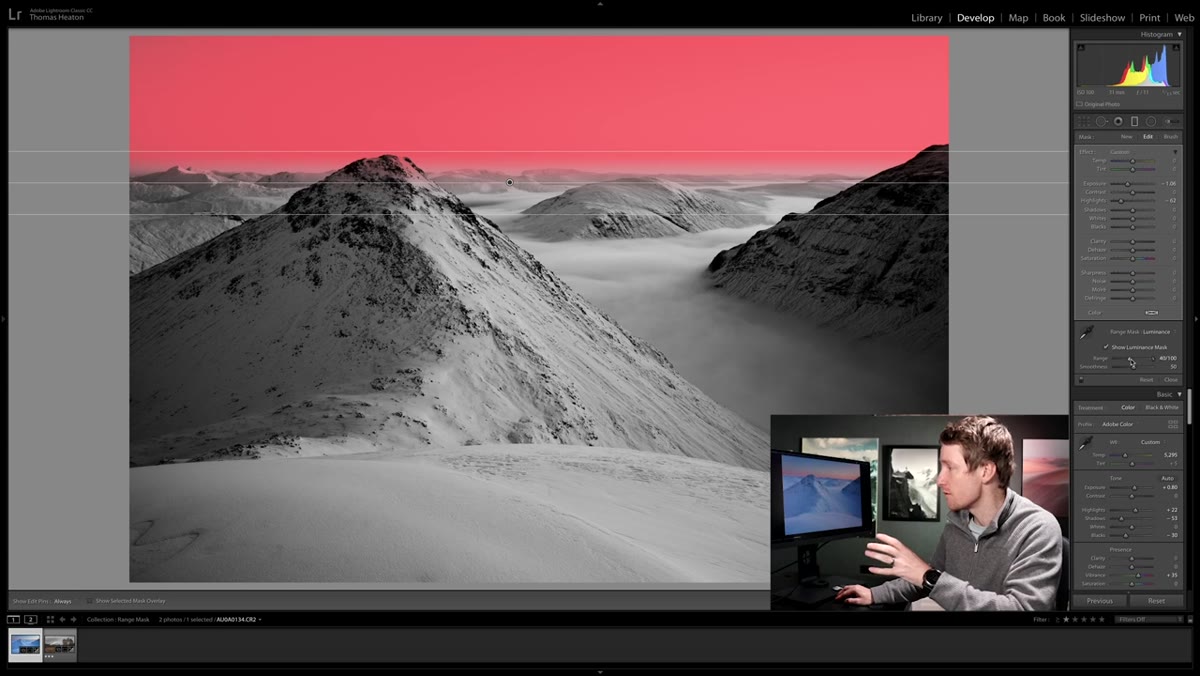 Luminance range slider being adjusted, red overlay shifting
The Luminance range slider has two handles. Think of the slider as a miniature histogram, with pure black on the left and pure white on the right. By adjusting the handles, you’re defining which brightness values receive the graduated filter’s effect.
Luminance range slider being adjusted, red overlay shifting
The Luminance range slider has two handles. Think of the slider as a miniature histogram, with pure black on the left and pure white on the right. By adjusting the handles, you’re defining which brightness values receive the graduated filter’s effect.
To target a bright sky, push the left handle to the right so you’re only including the brighter tonal values. Watch the red overlay. As you move the handles, the overlay will shrink away from the mountain peak and foreground elements and concentrate itself on the actual bright areas of the sky. That’s Lightroom reading the real pixel data and applying your exposure adjustment only where those luminosity values live. The mountain that was getting clipped by the gradient? It drops out of the effect entirely.
Step 6: Fine-Tune and Turn Off the Overlay
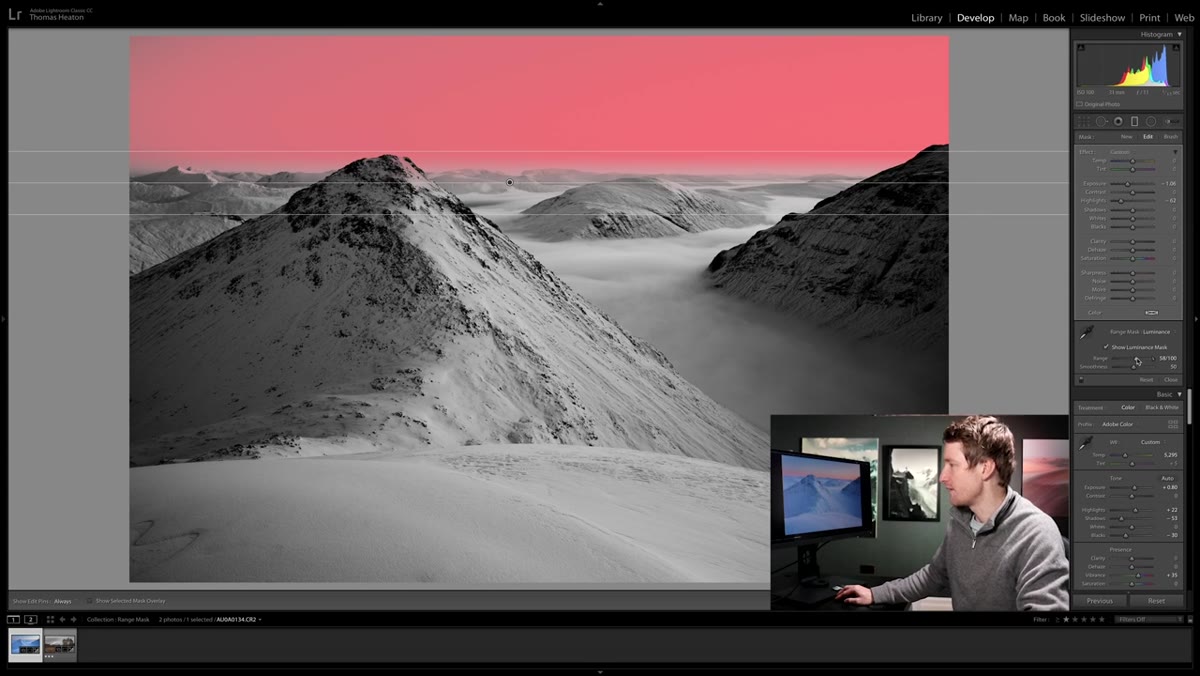 Final image with clean sky correction, no mountain darkening
Once the red overlay looks like it’s sitting cleanly on the sky and not bleeding into your foreground, turn the overlay off and evaluate the actual image. Nine times out of ten you’ll want to come back and nudge the slider slightly after seeing the real result without the red covering everything.
Final image with clean sky correction, no mountain darkening
Once the red overlay looks like it’s sitting cleanly on the sky and not bleeding into your foreground, turn the overlay off and evaluate the actual image. Nine times out of ten you’ll want to come back and nudge the slider slightly after seeing the real result without the red covering everything.
Heaton also points out that the Smoothness slider (just below the range slider) controls how hard or soft the edge is between the affected and unaffected areas. A higher smoothness value blends the transition more gradually, which tends to look more natural on complex edges like treelines or ridgelines.
What I’d Add: Try This With the Brush Tool Too
Heaton focuses on the graduated filter in this tutorial, and that’s the most common use case. But range masking works on every local adjustment tool in Lightroom, including the Adjustment Brush and the Radial Filter.
My favorite application is using the Adjustment Brush to paint a rough selection over a subject, then using the Color range mask to isolate just the skin tones or just the fabric, so the adjustment doesn’t bleed into similarly-toned background elements. It’s not as precise as a Photoshop layer mask, but for 90% of portrait and travel work, it gets you there without leaving Lightroom. I’ve started building this step into almost every edit I do with local adjustments, and it’s cut my round-trip Photoshop time down significantly.
Range masking is one of those features that sounds like a niche power-user tool until you actually use it, and then you can’t imagine editing without it. The core idea is simple: instead of applying local adjustments to a geometric region, you apply them to a tonal or color range within that region. That one shift in thinking changes what Lightroom can do.
Watch the full tutorial on YouTube to see Heaton walk through both example images and hear his commentary on where the technique fits into a real editing workflow. He’s one of the clearest landscape photographers working in this space, and this tutorial earns its runtime.
Comments
Leave a Comment