
Every time Adobe quietly removes something from Lightroom Classic, my inbox fills up like a rain barrel in a Nashville thunderstorm. The Done button is the latest casualty, and honestly, I get it. When something you’ve clicked a thousand times just vanishes, it feels like Adobe rearranged your kitchen while you were sleeping. But after watching this Matt Kloskowski tutorial on exactly that topic, I walked away thinking less about the button itself and more about how many of us were doing things the hard way without even realizing it.
Watch the full tutorial on YouTube
The real value in Matt’s breakdown isn’t the button post-mortem. It’s the reminder that Lightroom has always had faster entry and exit points for its tools built right in. Most photographers, myself included when I was still learning this software on a shoestring budget shooting band press photos, default to clicking around the interface when keyboard shortcuts would cut the time in half. Here’s a step-by-step walk through the whole thing so you can follow along without needing to pause and rewind.
Step 1: Understand Where the Done Button Used to Live
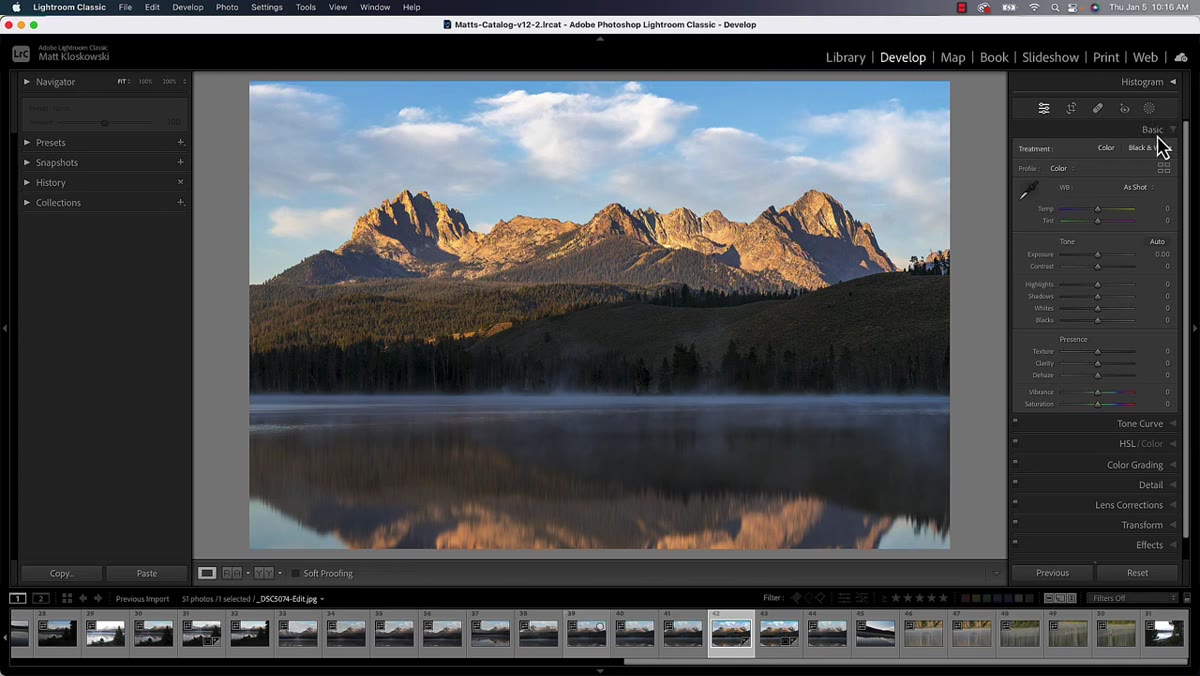 Crop tool open with Done button visible in bottom corner
The Done button appeared in the lower portion of your photo whenever you activated one of the tool panel options sitting just below the histogram in the Develop module. That means the Crop tool, the Healing tool, Red Eye correction, and the Masking tools all triggered it. It was a big, visible call to action that said “okay, I’m finished with this tool, put me back.” Adobe flagged its removal in a recent update, but it had already been disappearing from some areas before the official announcement.
Crop tool open with Done button visible in bottom corner
The Done button appeared in the lower portion of your photo whenever you activated one of the tool panel options sitting just below the histogram in the Develop module. That means the Crop tool, the Healing tool, Red Eye correction, and the Masking tools all triggered it. It was a big, visible call to action that said “okay, I’m finished with this tool, put me back.” Adobe flagged its removal in a recent update, but it had already been disappearing from some areas before the official announcement.
The reason its removal stings for some users is pure muscle memory. If you clicked Done hundreds of times, your brain just expects it. But as Matt points out, it was always redundant with another option that was already right there.
Step 2: Use the Close Option That Was Always There
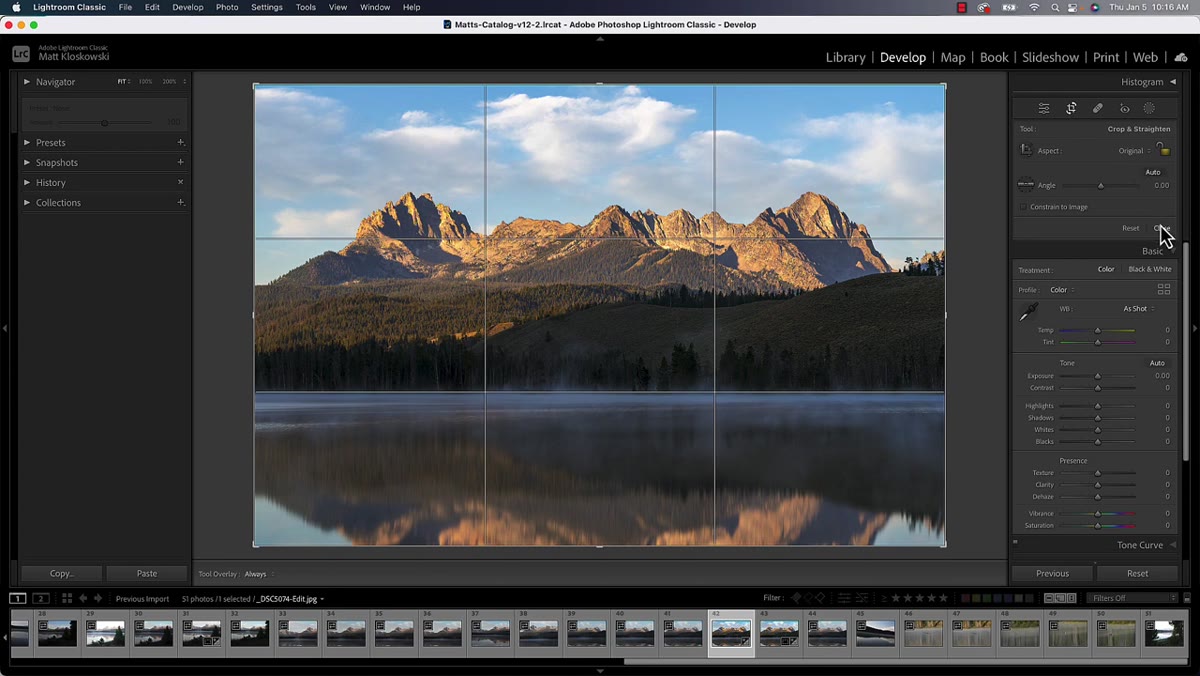 Close button highlighted in the tool panel area
Before the Done button existed in its most visible form, there was already a Close option sitting in the tool panel area. When you open the Crop tool or the Healing brush, look toward the upper right of that panel section. A small Close control has been living there quietly this whole time. Your cursor is almost always in that region of the screen when you’re actively using these tools, which makes Close genuinely more convenient than a button anchored to the bottom corner of your photo.
Close button highlighted in the tool panel area
Before the Done button existed in its most visible form, there was already a Close option sitting in the tool panel area. When you open the Crop tool or the Healing brush, look toward the upper right of that panel section. A small Close control has been living there quietly this whole time. Your cursor is almost always in that region of the screen when you’re actively using these tools, which makes Close genuinely more convenient than a button anchored to the bottom corner of your photo.
Matt makes a sharp observation here: people used to ask him constantly what the difference was between Close and Done. The answer was nothing. They did the exact same thing. One of them just had better real estate.
Step 3: Use the New Adjustment Slider Icon to Exit Tools
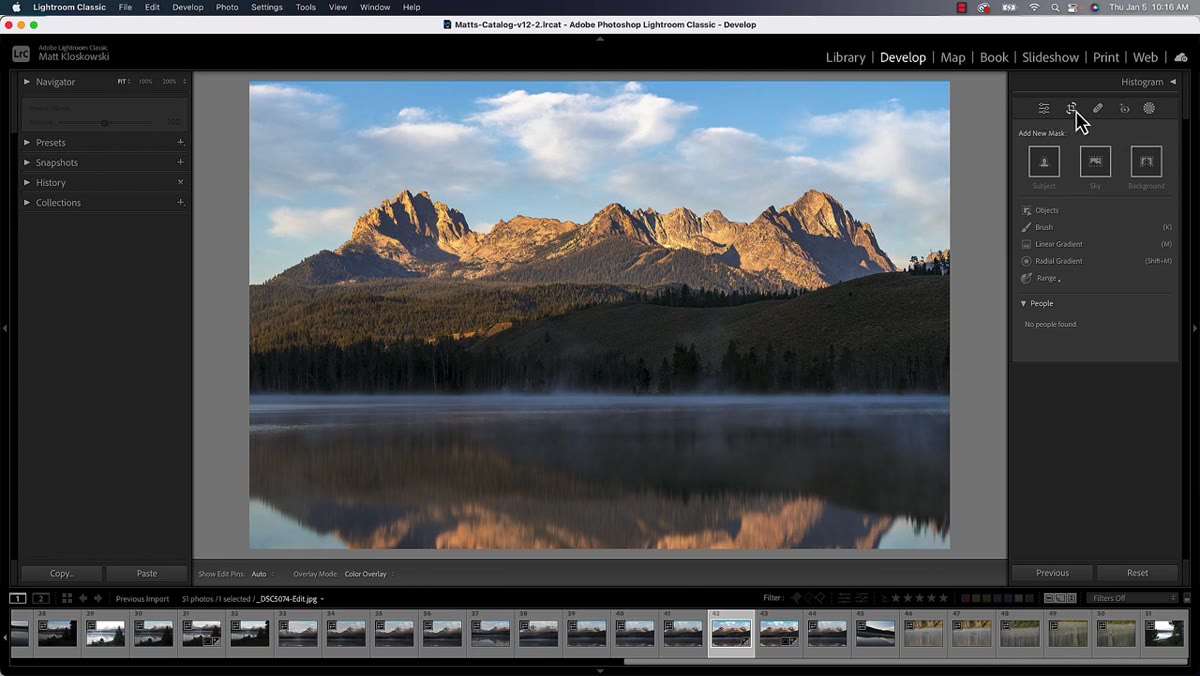 New adjustment slider icon highlighted in top-left of tool strip
Adobe added a small icon to help fill the gap left by Done’s disappearance. It looks like a stack of adjustment sliders and sits in the top-left area of the tool options panel. Clicking it when you’re inside any local tool will return you to the main Develop panel controls. It’s a logical replacement since it visually signals “go back to adjustments,” which is exactly what you want after finishing a crop or a mask.
New adjustment slider icon highlighted in top-left of tool strip
Adobe added a small icon to help fill the gap left by Done’s disappearance. It looks like a stack of adjustment sliders and sits in the top-left area of the tool options panel. Clicking it when you’re inside any local tool will return you to the main Develop panel controls. It’s a logical replacement since it visually signals “go back to adjustments,” which is exactly what you want after finishing a crop or a mask.
This isn’t the fastest method, but it’s good to know it exists if you’re someone who prefers clicking over keyboard shortcuts. Think of it as the training wheels option while you build the habits described in the next steps.
Step 4: Toggle the Crop Tool with the R Key
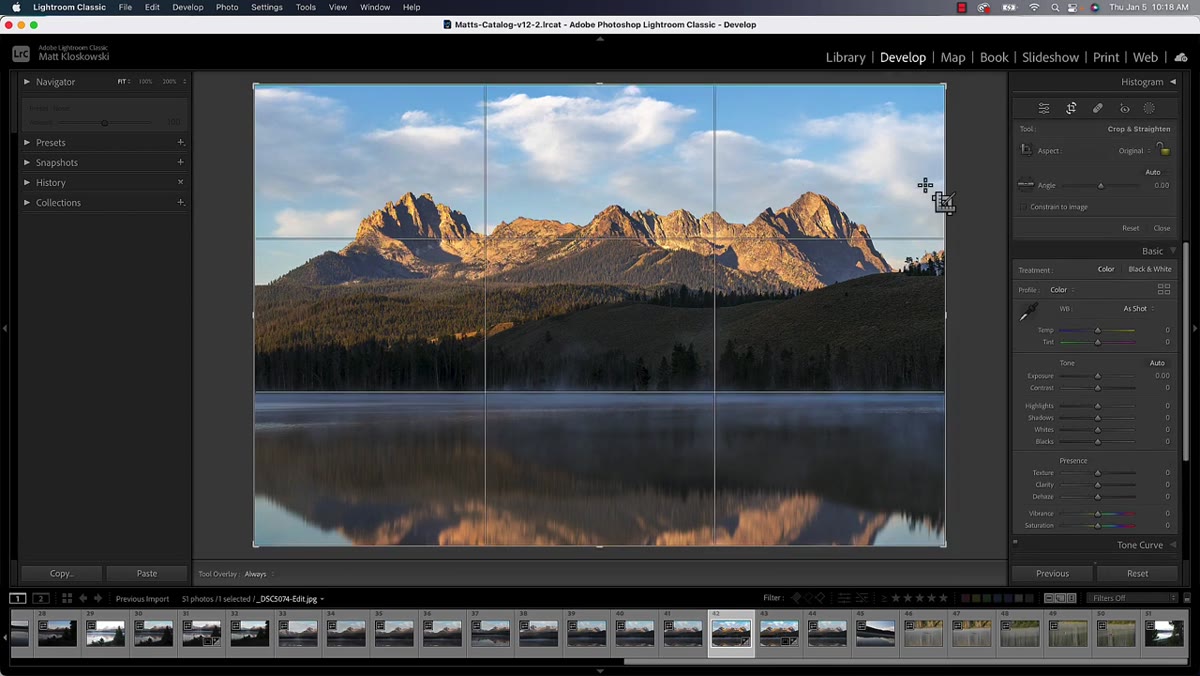 Crop tool activated by pressing R, keyboard shortcut shown
This is the one that changed how I work. Press R to enter the Crop tool. Make your adjustments. Press R again to exit and return to the Develop panel. No button required, no trip to the panel header, no clicking. The crop is applied the moment you press R to leave, same as if you had clicked Done back in the day.
Crop tool activated by pressing R, keyboard shortcut shown
This is the one that changed how I work. Press R to enter the Crop tool. Make your adjustments. Press R again to exit and return to the Develop panel. No button required, no trip to the panel header, no clicking. The crop is applied the moment you press R to leave, same as if you had clicked Done back in the day.
If you’ve been double-clicking inside the crop boundary or hunting for a confirm button, this shortcut will feel like finding a shortcut through traffic. It’s the kind of thing that sounds small until you realize how many times a day you crop images during a culling and editing session.
Step 5: Find Shortcuts for All the Tool Panel Options
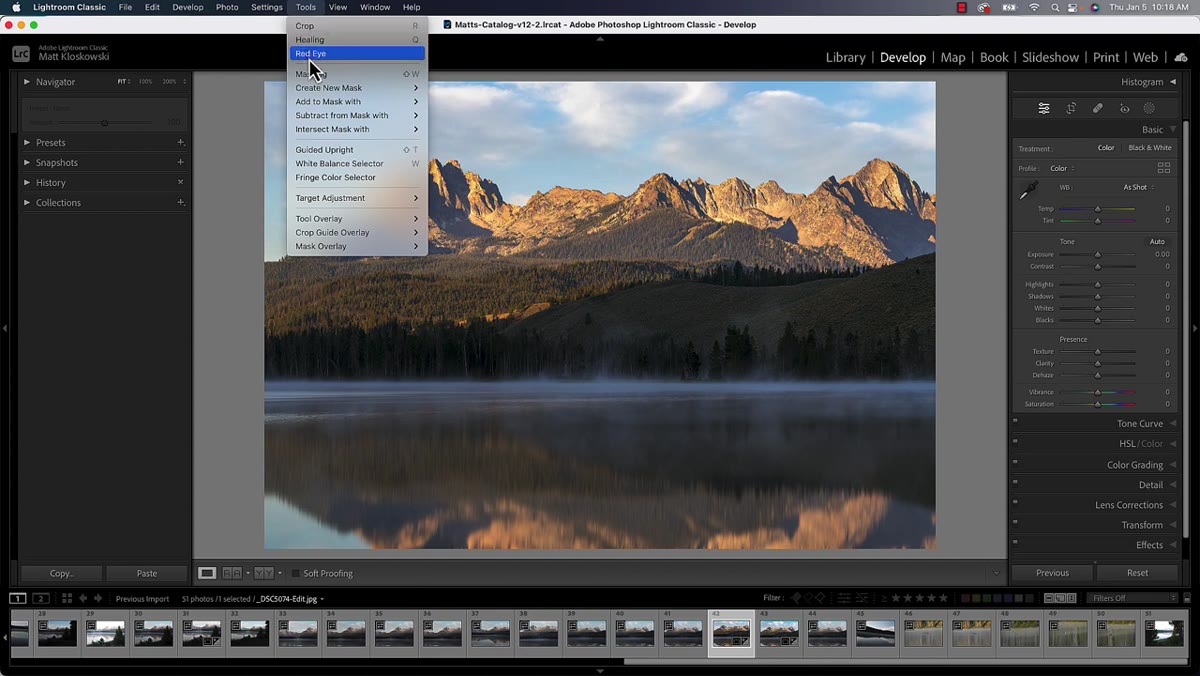 Tools menu open showing keyboard shortcuts listed beside tools
Go to the Tools menu in the menu bar at the top of Lightroom Classic. Every tool that has an assigned keyboard shortcut will show it listed right there beside the tool name. The Crop tool shows R. The Healing tool has its own shortcut. Red Eye correction does not have one, and as Matt notes, that’s fine since it’s not a tool most people use constantly, and Lightroom Classic doesn’t let you reassign or add custom shortcuts natively.
Tools menu open showing keyboard shortcuts listed beside tools
Go to the Tools menu in the menu bar at the top of Lightroom Classic. Every tool that has an assigned keyboard shortcut will show it listed right there beside the tool name. The Crop tool shows R. The Healing tool has its own shortcut. Red Eye correction does not have one, and as Matt notes, that’s fine since it’s not a tool most people use constantly, and Lightroom Classic doesn’t let you reassign or add custom shortcuts natively.
This menu is essentially a cheat sheet. Screenshot it, print it, tape it to your monitor if you’re old school. The point is that the Done button existed partly because people didn’t know these shortcuts were available. Now that the button is gone, the menu is exactly where you should go first.
Step 6: Open and Close the Masking Panel with Shift+W
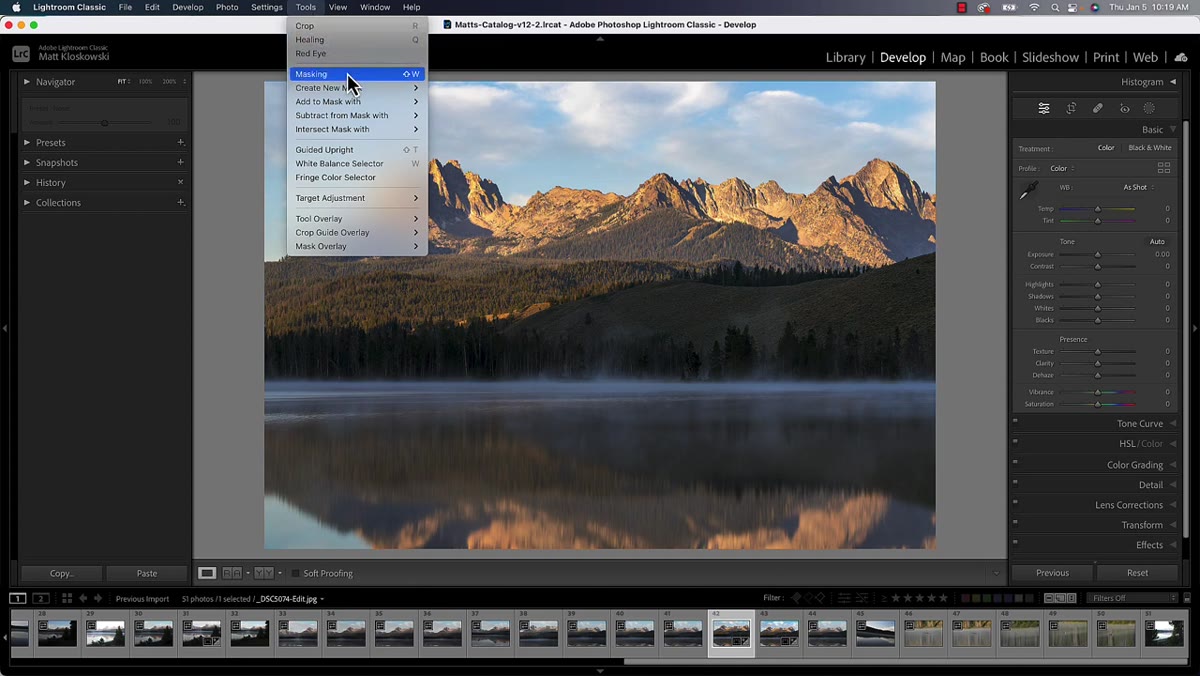 Masking panel opening after pressing Shift+W
The Masking panel is where a lot of photographers spend serious time, especially with the AI-powered subject and sky selection tools that have improved so much over recent versions. Press Shift+W to open the Masking panel. Press Shift+W again to close it and return to the standard Develop controls. That’s the whole workflow.
Masking panel opening after pressing Shift+W
The Masking panel is where a lot of photographers spend serious time, especially with the AI-powered subject and sky selection tools that have improved so much over recent versions. Press Shift+W to open the Masking panel. Press Shift+W again to close it and return to the standard Develop controls. That’s the whole workflow.
This is the shortcut I find myself using constantly. Masking sessions can involve a lot of back-and-forth between the mask itself and the adjustment sliders that control it, and toggling with Shift+W keeps that rhythm fast. No Done button ever needed.
One Thing I’d Add From My Own Experience
The transition from clicking to keyboard shortcuts in Lightroom feels uncomfortable for about two sessions, and then it becomes completely invisible. I’d suggest picking just one shortcut from this list, R for the Crop tool is the obvious starting point, and committing to it for a full week of editing. By the time you’ve cropped a couple hundred images that way, your hand will hit R before your brain even registers you need the tool.
The bigger picture here is that Adobe’s tool removals, as annoying as they can feel, often push us toward workflows that were already better. The Done button was a comfort item. The shortcuts are the actual workflow.
The single most important thing Matt’s tutorial reinforces is that Lightroom Classic rewards users who learn its keyboard layer. The panel interface is designed for discoverability. The keyboard shortcuts are designed for speed. Once you start living in both simultaneously, gone buttons stop mattering entirely.
Watch the full tutorial on YouTube to see Matt demonstrate these shortcuts in real time against actual images. It’s a short watch and worth every minute.
Comments
Leave a Comment