
There’s a specific kind of frustration that every Lightroom editor knows. You’ve got a portrait where the background is a warm, muddy green and you want it cooler. Or you shot golden hour and the highlights went a little too orange on someone’s skin. You open the HSL panel, drag the hue slider, and watch the color shift everywhere at once, including in places you absolutely didn’t want it to touch. For years, the only fix was a clunky round-trip to Photoshop or a workaround involving multiple adjustment brushes that sort of, kind of, got you there. That ends with the June 2020 Lightroom Classic update.
In this Matt Kloskowski tutorial, Watch the full tutorial on YouTube, he walks through what version 9.3 added to Lightroom Classic, and the headline feature is one that editors have been requesting for years: a Hue slider inside the local adjustment tools. That means you can now shift color in specific areas of a photo using the brush, the graduated filter, or the radial filter, all without touching the rest of the image. I tested this on a batch of outdoor portraits the same afternoon I saw the video, and it changed how I think about color work in Lightroom.
The walkthrough below covers the key steps from Matt’s video, written so you can follow along without pausing and rewinding every thirty seconds.
Step 1: Update Lightroom Classic to Version 9.3
 Adobe Creative Cloud updater showing Lightroom 9.3 available
Before anything else, make sure you’re actually running the updated version. Open Adobe Creative Cloud, check for updates, and install Lightroom Classic 9.3. Matt notes that he had to restart his computer before the update appeared in the Creative Cloud app, so if you’re not seeing it, a reboot is the first thing to try. You’ll also notice new app icons with a rounded design and “LRC” labeling. They don’t affect how anything works, but don’t let them confuse you into thinking something broke.
Adobe Creative Cloud updater showing Lightroom 9.3 available
Before anything else, make sure you’re actually running the updated version. Open Adobe Creative Cloud, check for updates, and install Lightroom Classic 9.3. Matt notes that he had to restart his computer before the update appeared in the Creative Cloud app, so if you’re not seeing it, a reboot is the first thing to try. You’ll also notice new app icons with a rounded design and “LRC” labeling. They don’t affect how anything works, but don’t let them confuse you into thinking something broke.
Step 2: Notice the Interface Tweaks Before Digging In
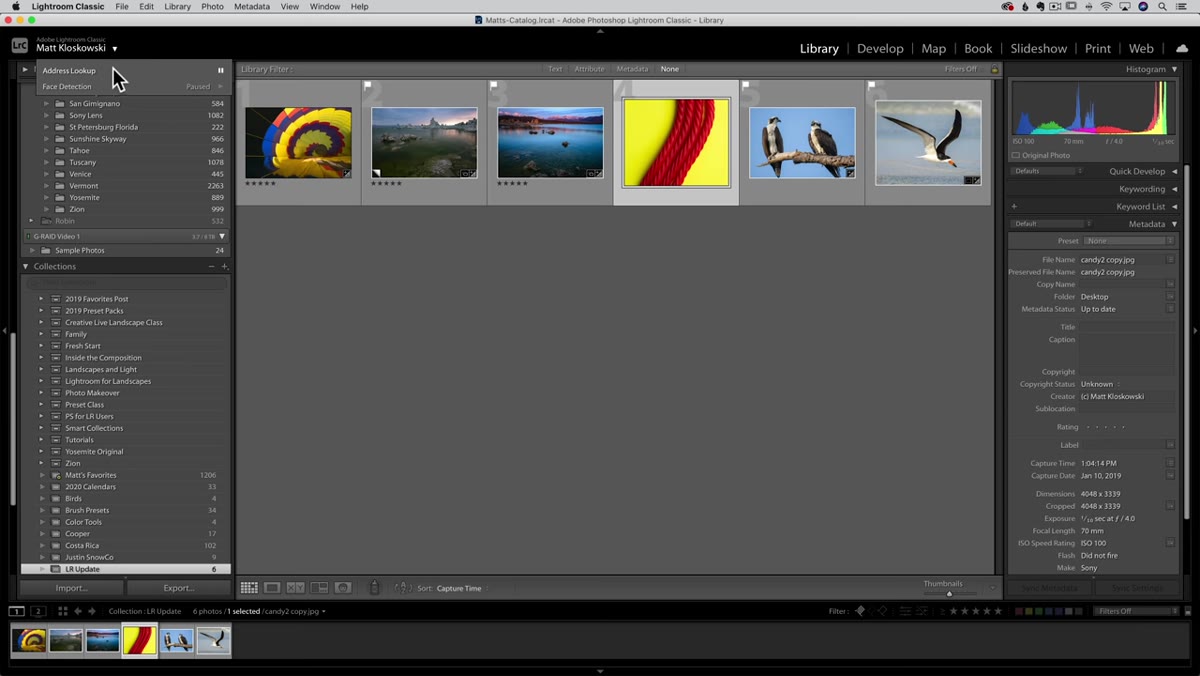 Lightroom Classic interface showing cloud sync icon moved to top right corner
Once you’re updated, there’s one small interface change worth knowing about so it doesn’t trip you up mid-edit. The Creative Cloud sync icon, the one that shows whether your photos are syncing to the Lightroom cloud, has moved from the top left corner to the top right. It’s a minor thing, but if you’re used to glancing at that spot to check sync status, your muscle memory will betray you at least a few times. Get familiar with the new position now and save yourself the confusion later.
Lightroom Classic interface showing cloud sync icon moved to top right corner
Once you’re updated, there’s one small interface change worth knowing about so it doesn’t trip you up mid-edit. The Creative Cloud sync icon, the one that shows whether your photos are syncing to the Lightroom cloud, has moved from the top left corner to the top right. It’s a minor thing, but if you’re used to glancing at that spot to check sync status, your muscle memory will betray you at least a few times. Get familiar with the new position now and save yourself the confusion later.
Step 3: Open the Develop Module and Select a Local Adjustment Tool
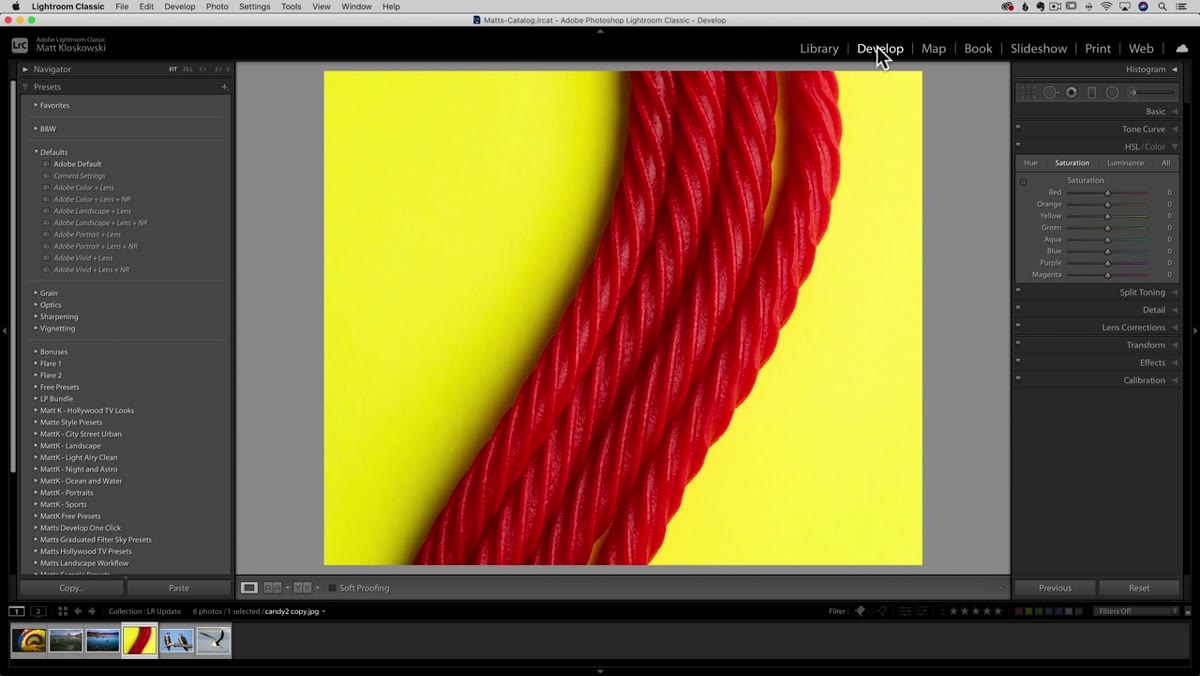 Develop module open with graduated filter, radial filter, and brush tool visible
Head into the Develop module and choose any of the three local adjustment tools: the graduated filter, the radial filter, or the adjustment brush. The new Hue slider lives inside all three of them, which means the technique works whether you’re masking a region with a gradient or painting a precise area by hand. For most selective color work on subjects, the adjustment brush gives you the most control, so that’s the one Matt demonstrates and the one I’d recommend starting with.
Develop module open with graduated filter, radial filter, and brush tool visible
Head into the Develop module and choose any of the three local adjustment tools: the graduated filter, the radial filter, or the adjustment brush. The new Hue slider lives inside all three of them, which means the technique works whether you’re masking a region with a gradient or painting a precise area by hand. For most selective color work on subjects, the adjustment brush gives you the most control, so that’s the one Matt demonstrates and the one I’d recommend starting with.
Step 4: Find the New Hue Slider in the Local Adjustment Panel
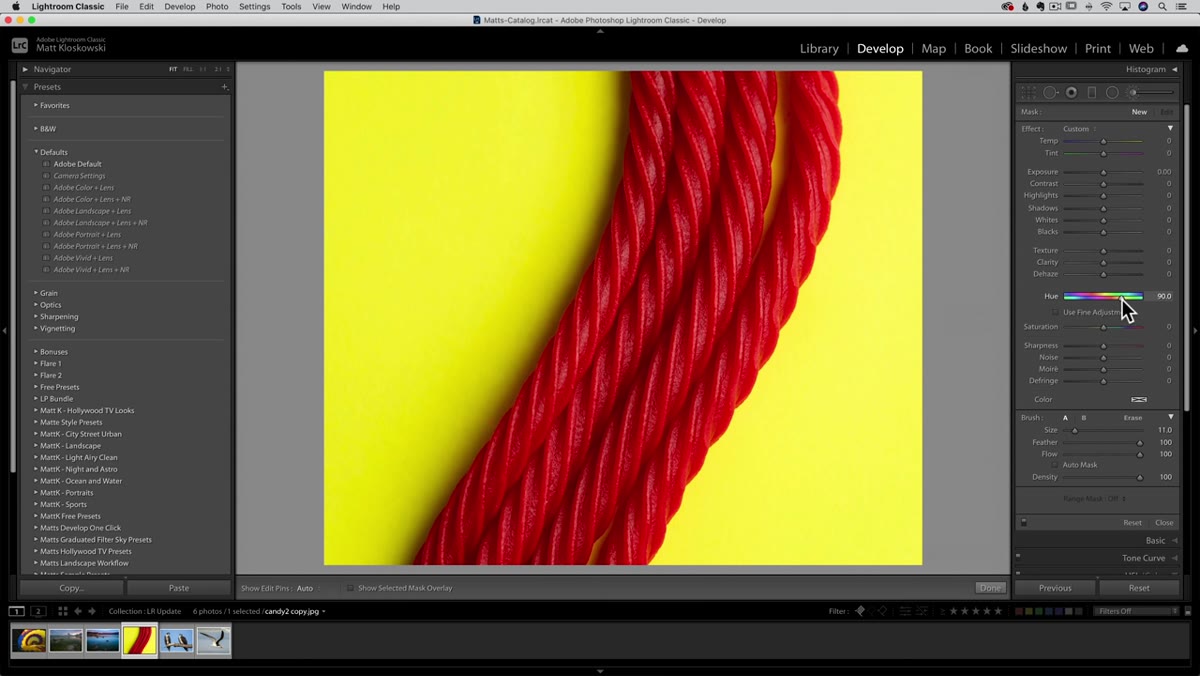 Local adjustments panel showing new Hue slider alongside existing controls
With your local adjustment tool active, look at the panel on the right side. You’ll now see a Hue slider alongside the familiar Exposure, Contrast, Saturation, and other controls. This is the new addition. It works as a color wheel representation condensed into a linear slider. Moving it shifts whatever color exists in your masked area toward another hue on the spectrum. You’re not removing color or adding a color cast uniformly across the whole image. You’re redirecting the specific hues that live inside your mask.
Local adjustments panel showing new Hue slider alongside existing controls
With your local adjustment tool active, look at the panel on the right side. You’ll now see a Hue slider alongside the familiar Exposure, Contrast, Saturation, and other controls. This is the new addition. It works as a color wheel representation condensed into a linear slider. Moving it shifts whatever color exists in your masked area toward another hue on the spectrum. You’re not removing color or adding a color cast uniformly across the whole image. You’re redirecting the specific hues that live inside your mask.
Step 5: Set the Hue Slider Before You Paint
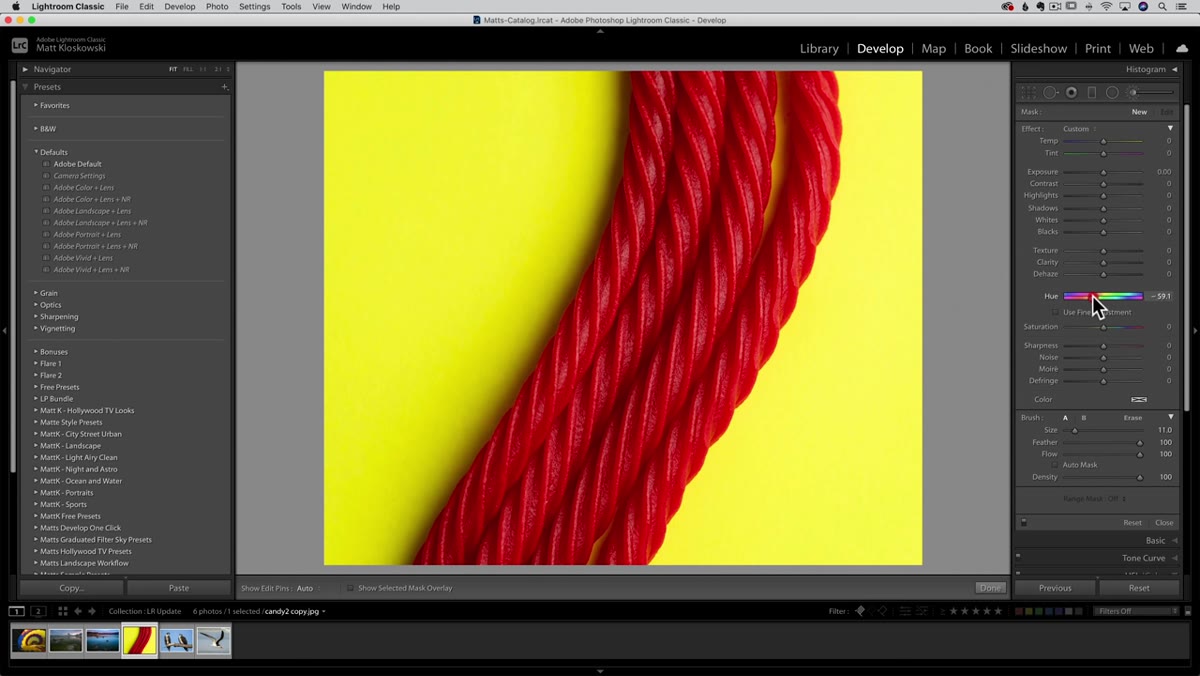 Hue slider being adjusted, pointing toward blue on the color wheel
Matt’s workflow tip here is worth following: move the Hue slider to roughly the color you want to shift toward before you start painting. It gives you immediate visual feedback as your brush strokes go down, so you can see whether you’re heading in the right direction rather than painting blind and adjusting after the fact. In his demo, he moves the slider toward blue before brushing over a surface he wants to cool down. You don’t have to be precise at this stage since you can refine the value after your mask is in place.
Hue slider being adjusted, pointing toward blue on the color wheel
Matt’s workflow tip here is worth following: move the Hue slider to roughly the color you want to shift toward before you start painting. It gives you immediate visual feedback as your brush strokes go down, so you can see whether you’re heading in the right direction rather than painting blind and adjusting after the fact. In his demo, he moves the slider toward blue before brushing over a surface he wants to cool down. You don’t have to be precise at this stage since you can refine the value after your mask is in place.
Step 6: Paint the Mask with Auto Mask Off, Then Use It for Edges
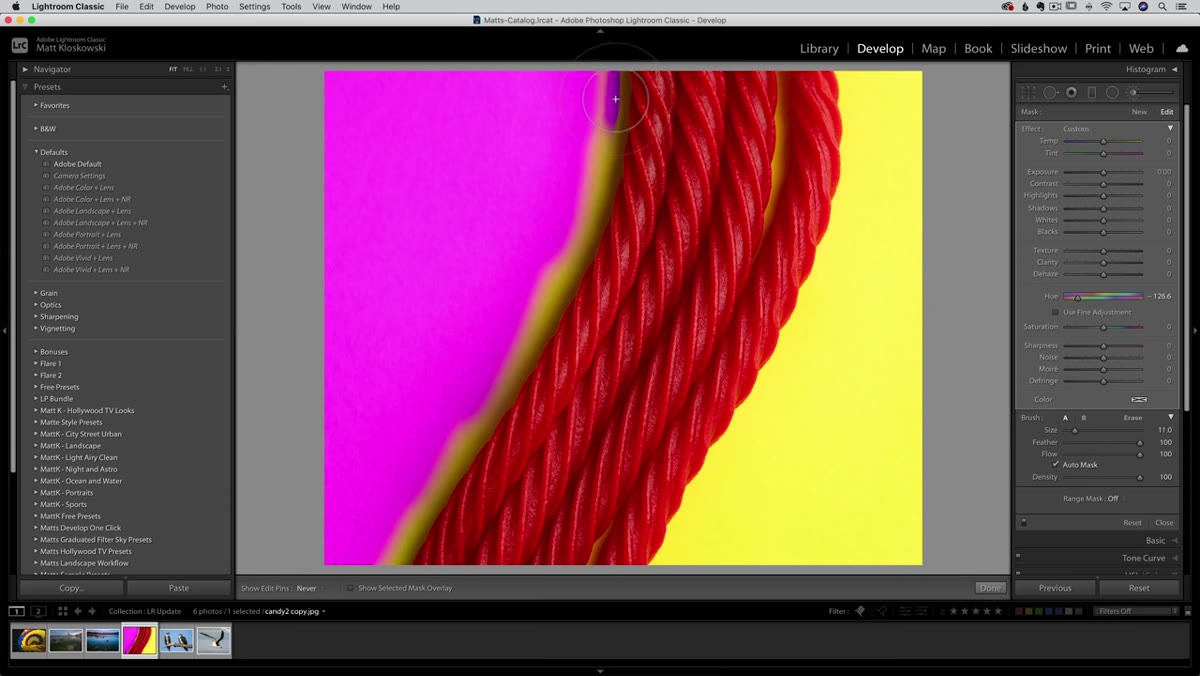 Adjustment brush painting over subject with Auto Mask toggle visible in panel
Start painting over the area you want to affect with Auto Mask turned off. Auto Mask is useful, but it slows down your brush response and can create uneven, splotchy coverage when you’re working through large open areas. Cover the bulk of your selection quickly without it, then turn Auto Mask on when you get close to edges where the color you’re shifting meets a color you want to leave alone. If you spill over, Command+Z on Mac or Ctrl+Z on Windows steps you back. Once you’re past the edges, turn Auto Mask off again to finish painting the interior cleanly.
Adjustment brush painting over subject with Auto Mask toggle visible in panel
Start painting over the area you want to affect with Auto Mask turned off. Auto Mask is useful, but it slows down your brush response and can create uneven, splotchy coverage when you’re working through large open areas. Cover the bulk of your selection quickly without it, then turn Auto Mask on when you get close to edges where the color you’re shifting meets a color you want to leave alone. If you spill over, Command+Z on Mac or Ctrl+Z on Windows steps you back. Once you’re past the edges, turn Auto Mask off again to finish painting the interior cleanly.
Step 7: Fine-Tune the Hue Slider After Masking
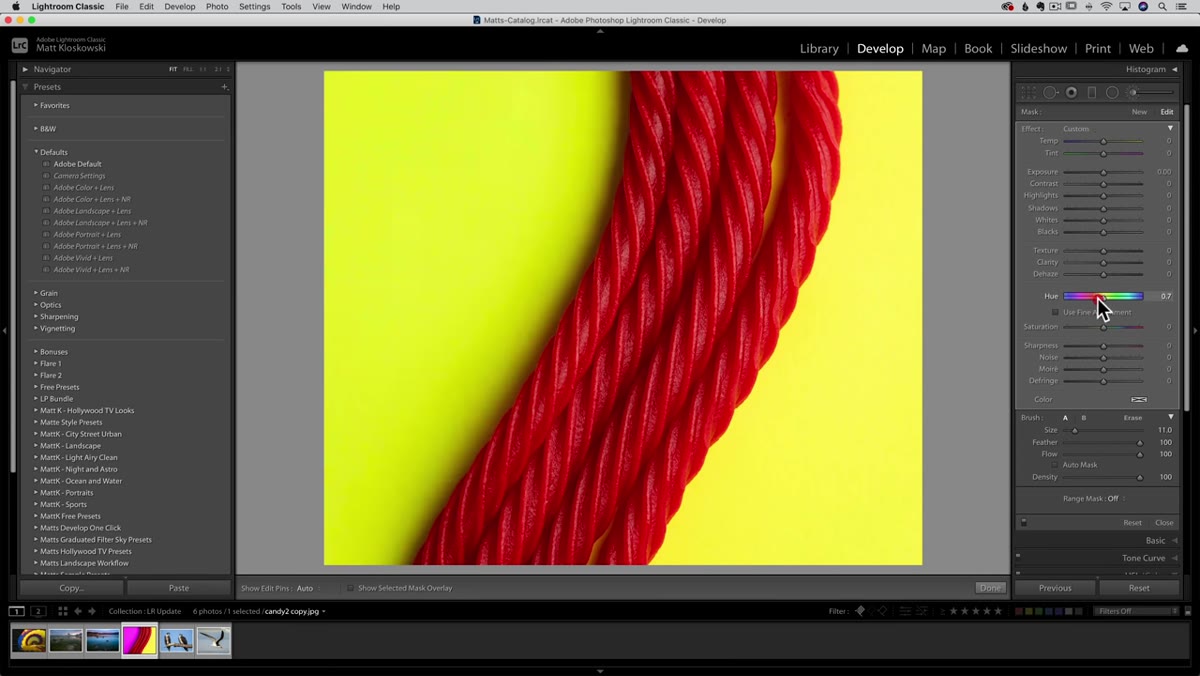 Hue slider being refined after mask is painted, showing color shift on photo
With your mask painted, drag the Hue slider left or right to land on exactly the color shift you want. The slider points toward the target hue, so watch the image rather than the number. What’s useful here is that all your other local adjustment controls still work alongside it. You can pull Saturation down slightly if the shifted color looks oversaturated, or nudge Luminance if the tonal value feels off. The Hue adjustment layers into the full stack of controls, which means you’re not sacrificing anything to use it.
Hue slider being refined after mask is painted, showing color shift on photo
With your mask painted, drag the Hue slider left or right to land on exactly the color shift you want. The slider points toward the target hue, so watch the image rather than the number. What’s useful here is that all your other local adjustment controls still work alongside it. You can pull Saturation down slightly if the shifted color looks oversaturated, or nudge Luminance if the tonal value feels off. The Hue adjustment layers into the full stack of controls, which means you’re not sacrificing anything to use it.
How I’m Actually Using This in My Editing
The selective Hue slider has become a regular part of my color grading on location portraits. The situation I run into constantly in Nashville is mixed outdoor lighting: open shade on a subject, warm sunlight hitting the background. Before this update, cooling a green or teal background without touching the subject’s skin meant a Photoshop round-trip nine times out of ten. Now I draw a graduated filter across the background, push the Hue slider toward a cooler blue-green, and I’m done in under a minute. I’ve also started using it on wardrobe. A client’s jacket reads differently on camera than in person, and being able to nudge that color without affecting their skin or the background is the kind of precision that used to require masking in Photoshop. This feature doesn’t replace Photoshop for complex work, but it closes the gap for a wide range of everyday edits.
The single most important thing to take away from this update is that selective color control in Lightroom is no longer a workaround situation. The Hue slider in local adjustments is a genuine, practical tool that handles real editing problems cleanly and non-destructively, inside a workflow you’re already using. If you want to see Matt walk through the whole update including performance improvements and additional interface changes, Watch the full tutorial on YouTube. It’s worth the watch even if you’ve already updated.
Comments (1)
The before and after really sells it. Incredible difference.
Leave a Comment