There’s a trade-off nobody warns you about when you first start editing in Lightroom. You shoot something in low light, you get it into the Develop module, and you drag those shadows up to rescue all that beautiful detail you knew was hiding in the dark. The image opens up. You feel like a genius. Then you zoom in and see it: grain. Speckles. A texture that looks less like film and more like your sensor had a bad night. That’s noise, and pulling up shadows is one of the fastest ways to invite it into your photo.
I’ve been dealing with this exact problem since I started editing my band’s press shots years ago on a laptop with questionable RAM and even more questionable monitors. In this CreativeLive tutorial with Lesa Snider, she walks through exactly how to handle this situation inside Lightroom’s Detail panel, and she does it in a way that actually sticks. This is one of those techniques that takes about three minutes to learn and then becomes permanent muscle memory.
Step 1: Understand the Two Types of Noise You’re Fighting
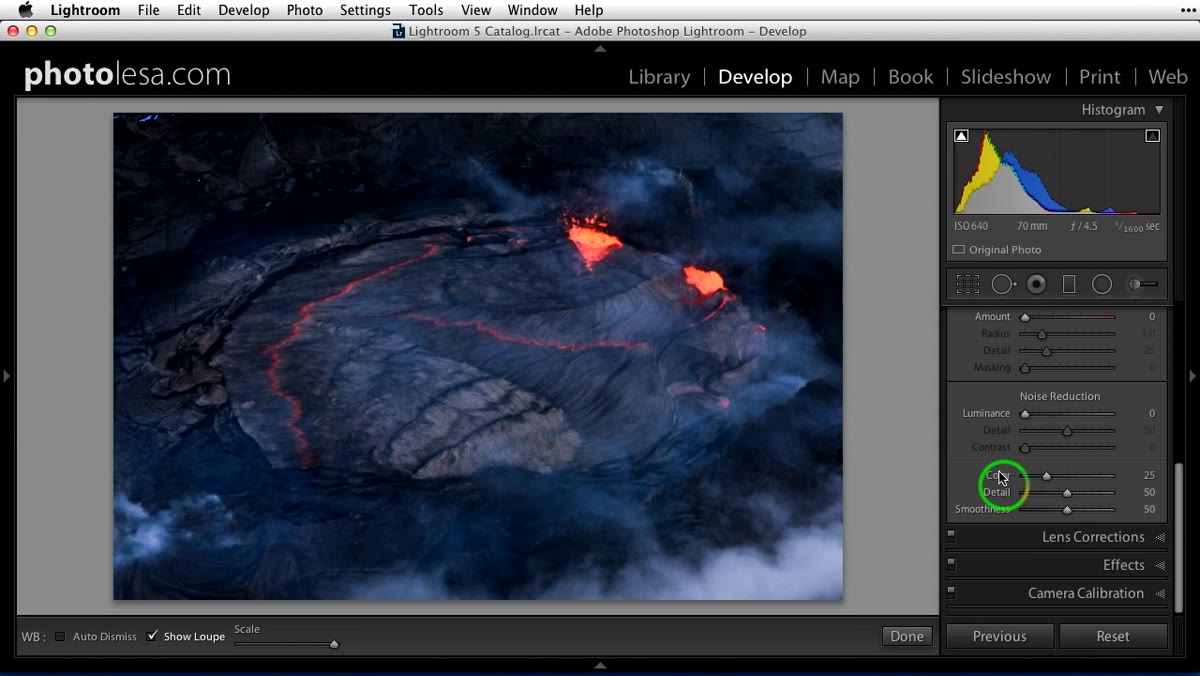 Two noise reduction sliders visible in the Detail panel
Before you touch any sliders, you need to know what you’re actually looking at. Lightroom recognizes two distinct types of noise. Luminance noise is tied to light intensity. It shows up as a grayscale grain pattern, that rough, sandy texture you see when a shot was taken at high ISO or when you’ve pushed the shadows hard. Color noise is different. It shows up as tiny, out-of-focus colored speckles scattered across your image, like someone scattered a handful of microscopic Christmas lights across your photo. By default, Lightroom applies some color noise reduction automatically. Luminance noise reduction starts at zero, which means if your problem is that gray, gritty grain, you’re on your own until you go fix it manually.
Two noise reduction sliders visible in the Detail panel
Before you touch any sliders, you need to know what you’re actually looking at. Lightroom recognizes two distinct types of noise. Luminance noise is tied to light intensity. It shows up as a grayscale grain pattern, that rough, sandy texture you see when a shot was taken at high ISO or when you’ve pushed the shadows hard. Color noise is different. It shows up as tiny, out-of-focus colored speckles scattered across your image, like someone scattered a handful of microscopic Christmas lights across your photo. By default, Lightroom applies some color noise reduction automatically. Luminance noise reduction starts at zero, which means if your problem is that gray, gritty grain, you’re on your own until you go fix it manually.
Step 2: Open the Detail Panel in the Develop Module
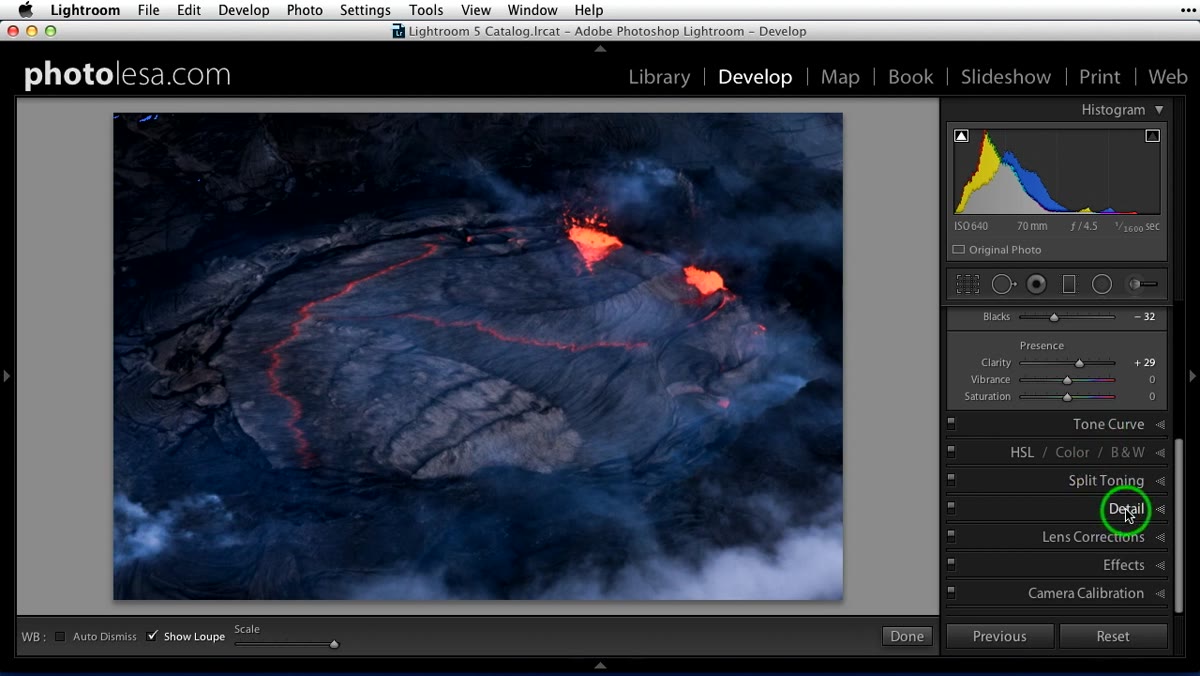 Detail panel location in Develop module right-side panel
Scroll down the right-side panel in the Develop module until you find the Detail panel. It sits below the Tone Curve and HSL sections. Click to expand it and you’ll see two major sections: Sharpening on top and Noise Reduction underneath. One important note here, and Snider makes this clear in the tutorial: don’t touch sharpening yet. Sharpening is one of the last things you do in a Lightroom edit, not one of the first. If you sharpen before you reduce noise, you’re not sharpening your image. You’re sharpening your noise, making the problem louder and more visible. Do the noise work first, save the sharpening for when you’re polishing the final image before export.
Detail panel location in Develop module right-side panel
Scroll down the right-side panel in the Develop module until you find the Detail panel. It sits below the Tone Curve and HSL sections. Click to expand it and you’ll see two major sections: Sharpening on top and Noise Reduction underneath. One important note here, and Snider makes this clear in the tutorial: don’t touch sharpening yet. Sharpening is one of the last things you do in a Lightroom edit, not one of the first. If you sharpen before you reduce noise, you’re not sharpening your image. You’re sharpening your noise, making the problem louder and more visible. Do the noise work first, save the sharpening for when you’re polishing the final image before export.
Step 3: Use the Zoom Preview to Find the Noisiest Area
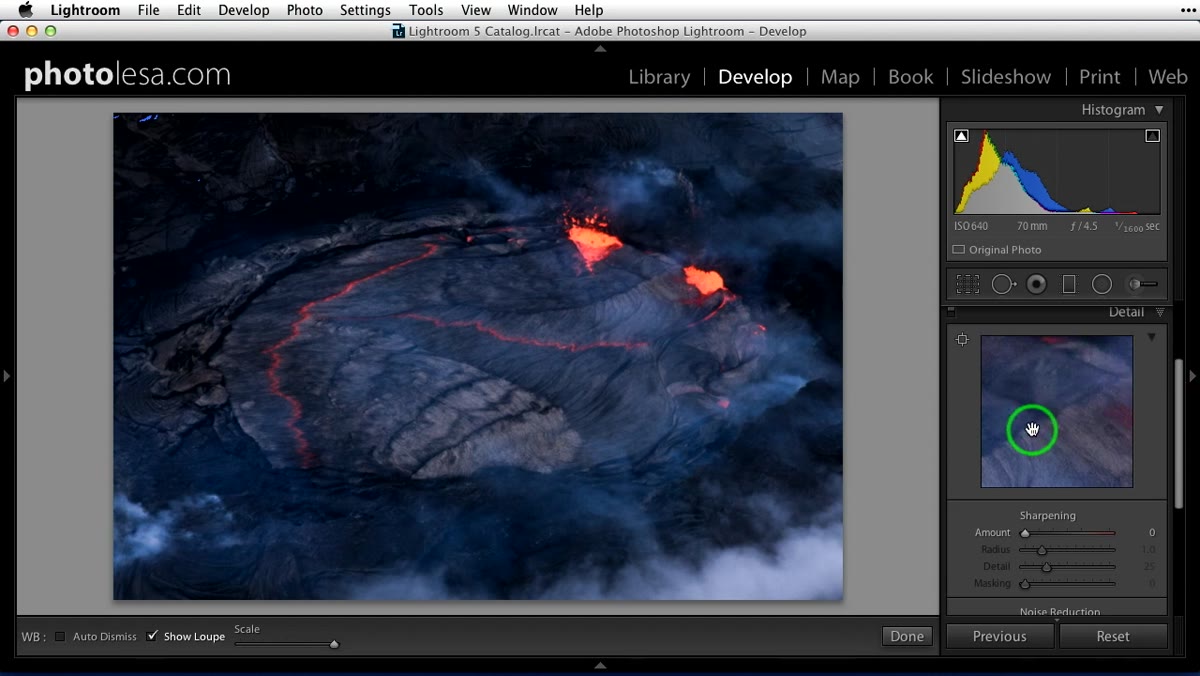 Small zoom preview panel showing close-up of image detail
At the top of the Detail panel there’s a small preview window that shows a zoomed-in crop of your image. This is your diagnostic tool. You want to position it over the area of the photo that matters most, and in most cases that’s also the area most likely to be showing noise. Dark areas near your focal point are usually where grain congregates. You can click and drag inside the preview window itself to reposition it, but there’s a faster method. Grab the small crosshair tool next to the preview and click directly on your main image canvas. The preview snaps to that exact spot immediately. It’s a small workflow detail, but when you’re doing this on dozens of images, that speed adds up.
Small zoom preview panel showing close-up of image detail
At the top of the Detail panel there’s a small preview window that shows a zoomed-in crop of your image. This is your diagnostic tool. You want to position it over the area of the photo that matters most, and in most cases that’s also the area most likely to be showing noise. Dark areas near your focal point are usually where grain congregates. You can click and drag inside the preview window itself to reposition it, but there’s a faster method. Grab the small crosshair tool next to the preview and click directly on your main image canvas. The preview snaps to that exact spot immediately. It’s a small workflow detail, but when you’re doing this on dozens of images, that speed adds up.
Step 4: Drag the Luminance Slider and Watch the Preview
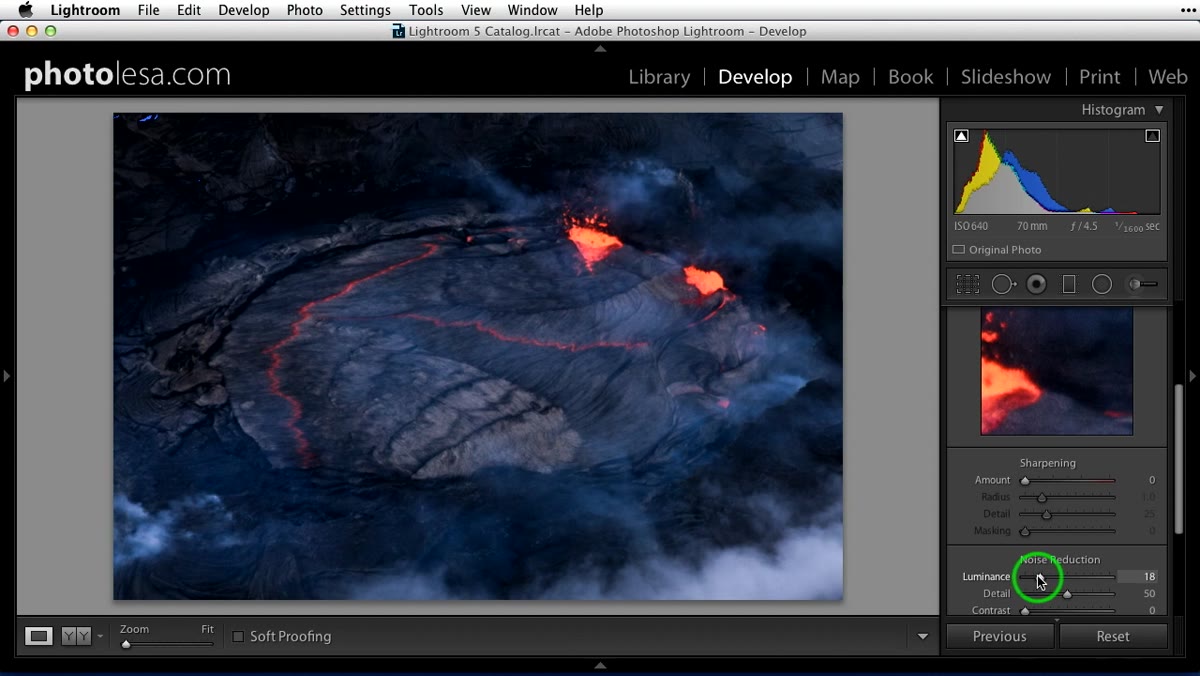 Luminance slider being dragged in Noise Reduction section
Now go to the Noise Reduction section and find the Luminance slider. Drag it slowly to the right while watching the preview window. What Lightroom is doing here is blurring those noisy pixels together in a way that makes the grain less visible. It’s not removing the noise at a technical level, it’s hiding it. That distinction matters because there’s a ceiling. Push the Luminance slider too far and your image starts to look plastic, soft, and fake. The texture you wanted to preserve disappears. The goal is to find the point where the grain becomes acceptable without sacrificing the natural look of the photo.
Luminance slider being dragged in Noise Reduction section
Now go to the Noise Reduction section and find the Luminance slider. Drag it slowly to the right while watching the preview window. What Lightroom is doing here is blurring those noisy pixels together in a way that makes the grain less visible. It’s not removing the noise at a technical level, it’s hiding it. That distinction matters because there’s a ceiling. Push the Luminance slider too far and your image starts to look plastic, soft, and fake. The texture you wanted to preserve disappears. The goal is to find the point where the grain becomes acceptable without sacrificing the natural look of the photo.
Step 5: Use the Panel Switch to Compare Before and After
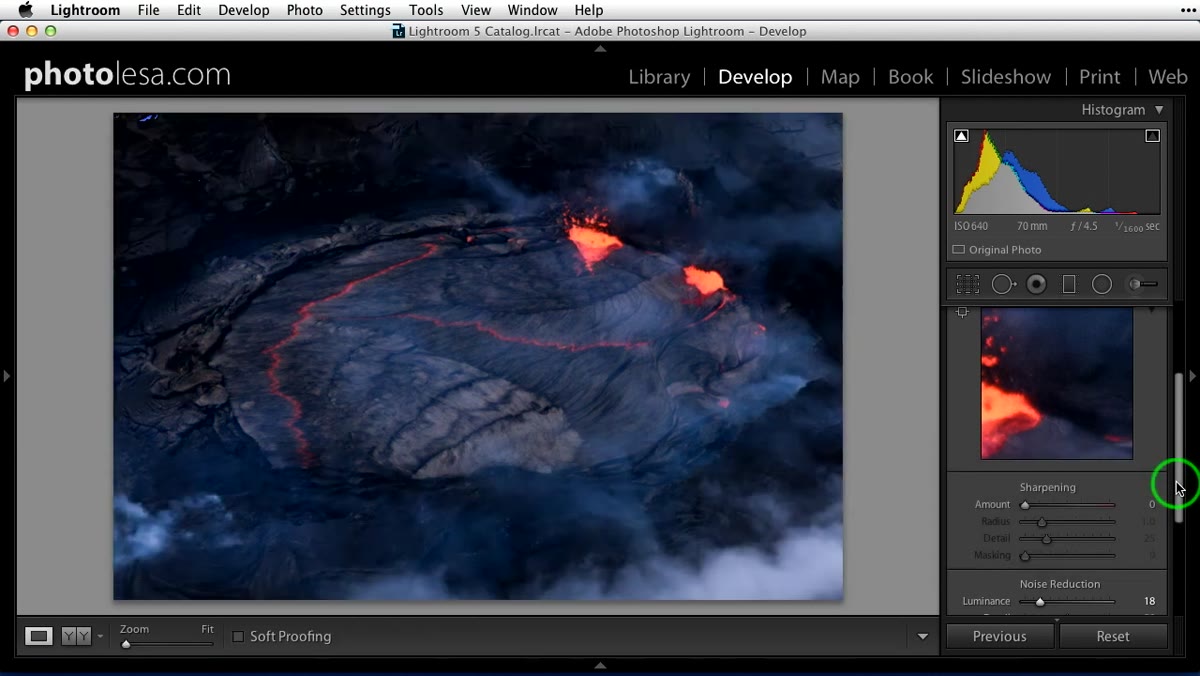 Before/after toggle switch at top of Detail panel
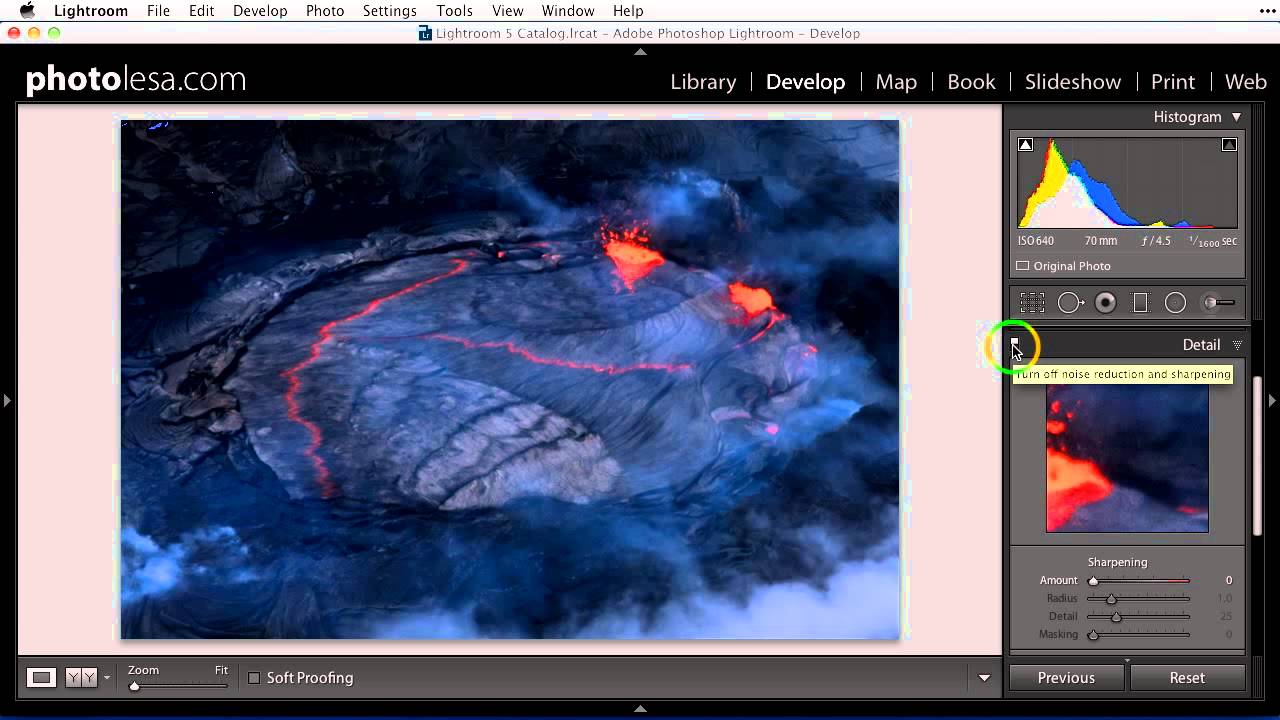
At the top of the Detail panel there’s a small toggle switch. Click it to turn the panel’s adjustments on and off. This is your before-and-after comparison for everything in the Detail panel, and it’s one of the more useful quick-check tools in Lightroom. Zoom in a bit more on your main image while using this toggle, and reposition the larger view so you’re looking at the area with the most noise. Flip it on and off. You’re looking for a real reduction in grain texture without any loss of edge sharpness in the parts of the image that should be sharp. If you can see a meaningful difference and the image still looks like a photograph, you’re in the right range.
Before/after toggle switch at top of Detail panel
At the top of the Detail panel there’s a small toggle switch. Click it to turn the panel’s adjustments on and off. This is your before-and-after comparison for everything in the Detail panel, and it’s one of the more useful quick-check tools in Lightroom. Zoom in a bit more on your main image while using this toggle, and reposition the larger view so you’re looking at the area with the most noise. Flip it on and off. You’re looking for a real reduction in grain texture without any loss of edge sharpness in the parts of the image that should be sharp. If you can see a meaningful difference and the image still looks like a photograph, you’re in the right range.
What I Do Differently: Treat Noise Reduction as a First Stop After Shadow Recovery
Every time I significantly lift shadows on an image, I go straight to the Detail panel before I do anything else in that edit. Not before I open the photo. Not at the end. Right after the shadow move. The reason is practical: if I don’t, I tend to forget, and then I sharpen the image and the noise problem gets baked in deeper. By building it into the sequence, it becomes automatic.
I also try to keep the Luminance slider more conservative than I think I need to. My rule of thumb is to push it until the grain disappears, then back off about 20 percent of that value. That 20 percent rollback usually preserves enough surface texture to keep the image from looking like a smoothed-out skin filter. If you’re working on a portrait, you can push harder. For landscapes or anything where rock, bark, or rough texture should look tactile, pull back.
One more thing worth knowing: if you’ve been shooting at high ISOs regularly, like 3200 and above, you may need to use both the Luminance and Color noise sliders together. The camera is generating both types of noise under those conditions, and Lightroom’s automatic color noise reduction may not be enough on its own.
Noise reduction is one of those techniques that looks invisible when you do it right, which is exactly the point. The single most important thing from this tutorial is the order of operations: reduce noise before you sharpen, not after. Get that sequence locked in and your edits will be cleaner across the board.
Watch the full tutorial on YouTube to see Lesa Snider walk through this on a real image with live before-and-after comparisons. She covers more ground than just noise, and her explanation of the Detail panel is one of the clearest I’ve come across.
Comments
Leave a Comment