Every time I come back from a shoot with bracketed exposures, I face the same low-grade dread: opening Lightroom to find what feels like a thousand nearly identical frames staring back at me. Nine brackets per scene, multiplied across an afternoon of walking around downtown Nashville, and suddenly I’m not editing photos anymore. I’m just managing files. That’s not why I picked up a camera.
This KelbyOne tutorial from Matt Kloskowski landed in my feed at exactly the right moment. Watch the full tutorial on YouTube - it runs just a few minutes and fixes a problem that’s been quietly eating hours of my editing life. Matt’s approach is fast, it’s surgical, and it uses a tool most of us completely ignore. Here’s the full walkthrough so you can follow along without pausing and rewinding.
Step 1: Understand Why You’re Even Bracketing
 Explaining the reason for shooting bracketed series in camera
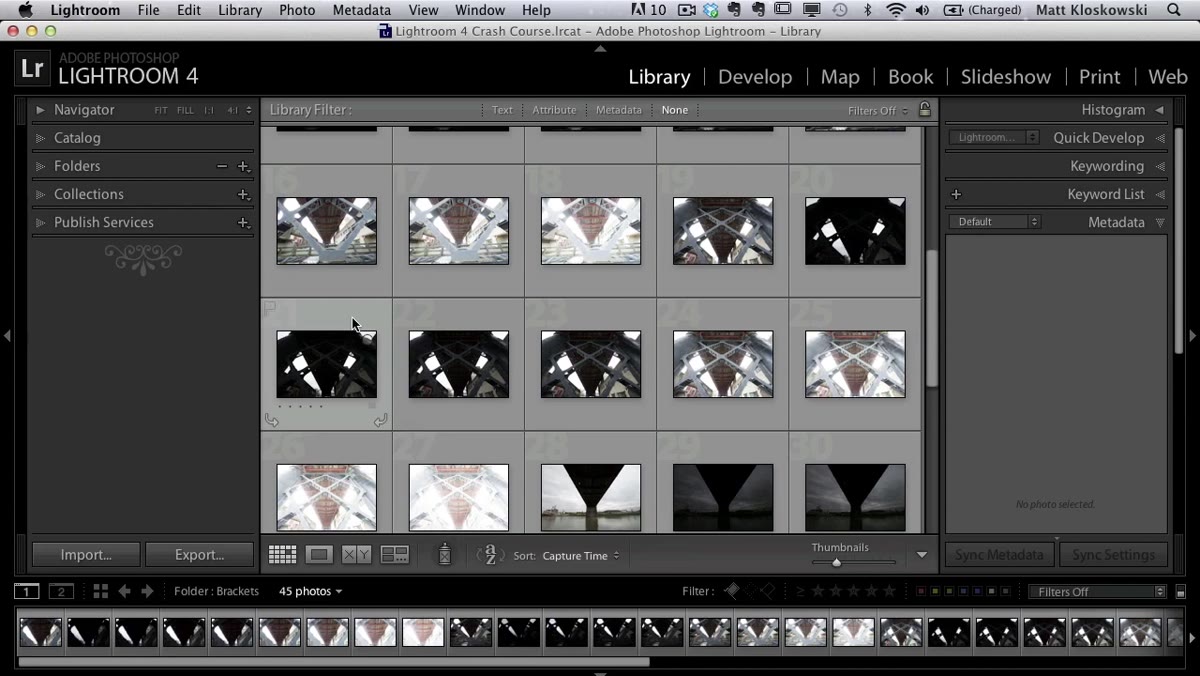
Before the technique makes sense, the mindset has to click. Matt’s take resonates with me completely: he’s not always shooting brackets because he plans to merge an HDR image. He’s shooting them because it frees up his brain. When your camera is capturing three, five, or nine exposures per scene, you stop worrying about whether you nailed the exposure and start focusing on composition, light, and timing. You can sort out the best frame later. The bracket is insurance, not a commitment.
Explaining the reason for shooting bracketed series in camera
Before the technique makes sense, the mindset has to click. Matt’s take resonates with me completely: he’s not always shooting brackets because he plans to merge an HDR image. He’s shooting them because it frees up his brain. When your camera is capturing three, five, or nine exposures per scene, you stop worrying about whether you nailed the exposure and start focusing on composition, light, and timing. You can sort out the best frame later. The bracket is insurance, not a commitment.
If you shoot Nikon like Matt, you already know the camera can go up to nine frames per bracket, each separated by a stop of exposure. That’s a massive safety net. But it also means nine times the files, and you almost never need all nine to do anything useful.
Step 2: Set Your Thumbnail Grid to Match Your Bracket Count
 Adjusting thumbnail slider to show nine images across grid
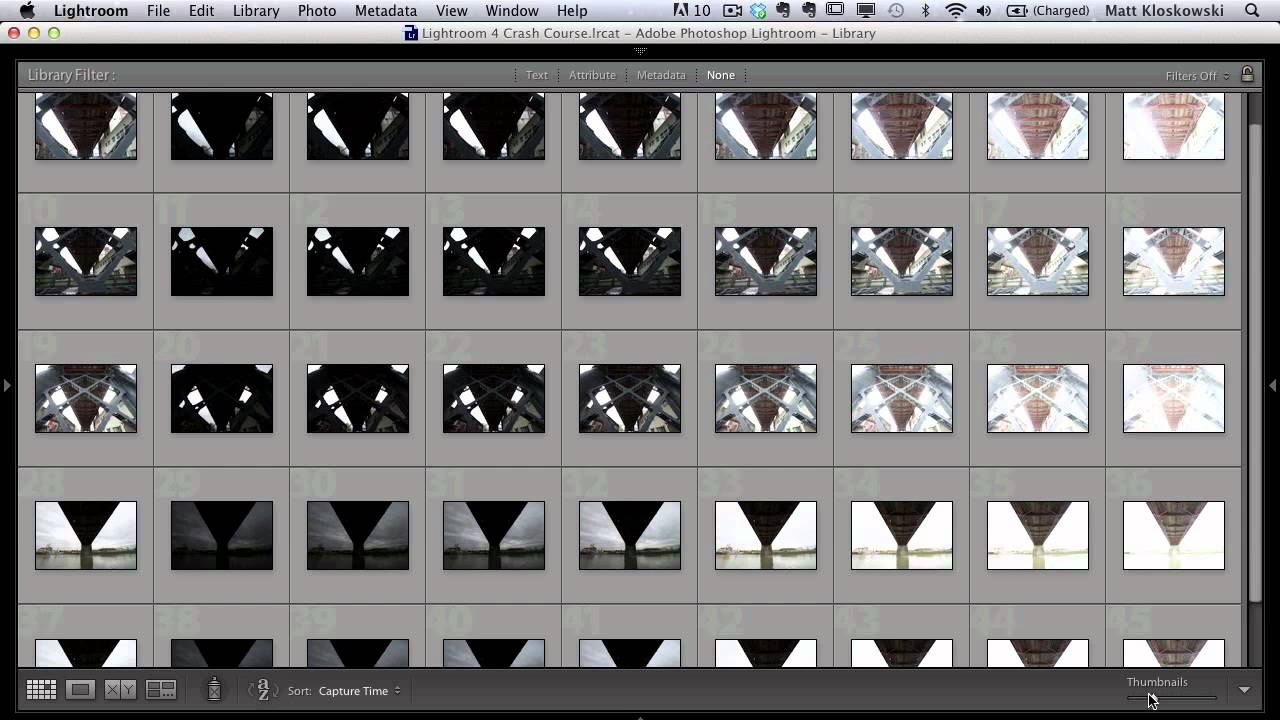
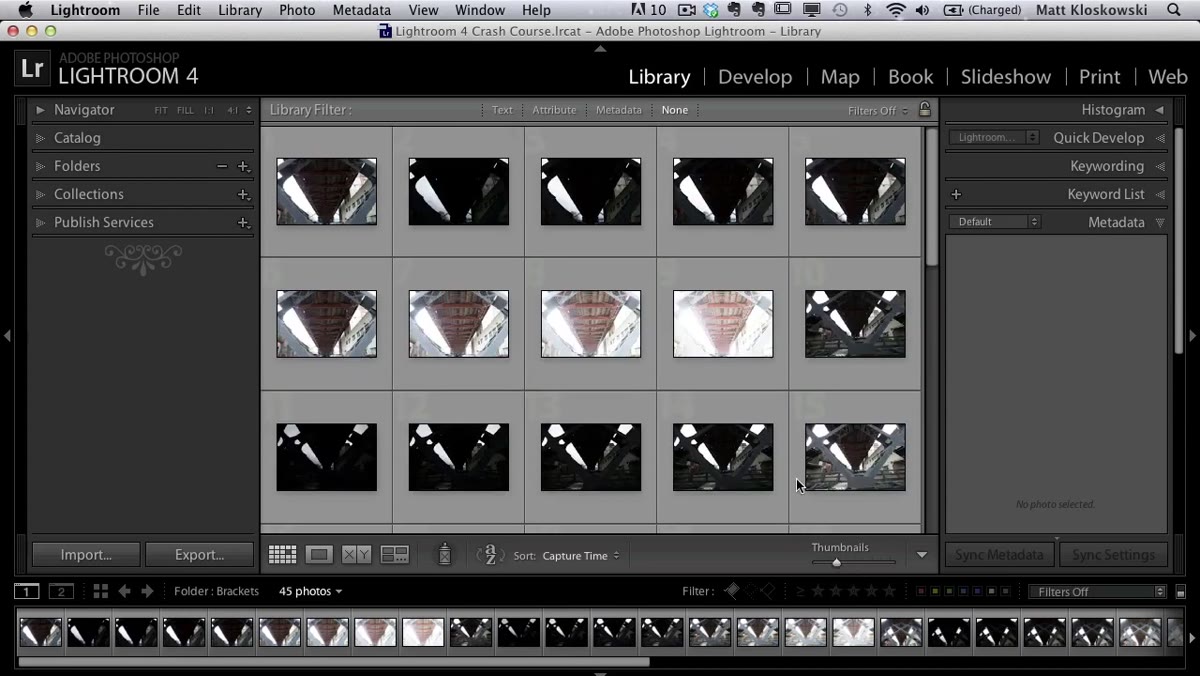
Once your photos are imported, head to the Library module in Lightroom and look at the thumbnail size slider at the bottom right of the grid view. Drag it until the number of thumbnails fitting across one row matches your bracket count. If you shot in sets of nine, you want nine images across. If you shot three-frame brackets, dial it down until three fills a row.
Adjusting thumbnail slider to show nine images across grid
Once your photos are imported, head to the Library module in Lightroom and look at the thumbnail size slider at the bottom right of the grid view. Drag it until the number of thumbnails fitting across one row matches your bracket count. If you shot in sets of nine, you want nine images across. If you shot three-frame brackets, dial it down until three fills a row.
This turns your grid into a visual map of your shoot. Each horizontal row becomes one complete bracketed set, lined up side by side. At a glance, you can now see the full tonal range of every scene you captured, from the darkest underexposed frame on one end to the brightest overexposed frame on the other. Press Shift+Tab first to collapse both side panels and give yourself maximum screen real estate. That single shortcut makes a real difference when you’re looking at a full shoot.
Step 3: Grab the Spray Can Tool
 Selecting the spray can tool in the Lightroom toolbar
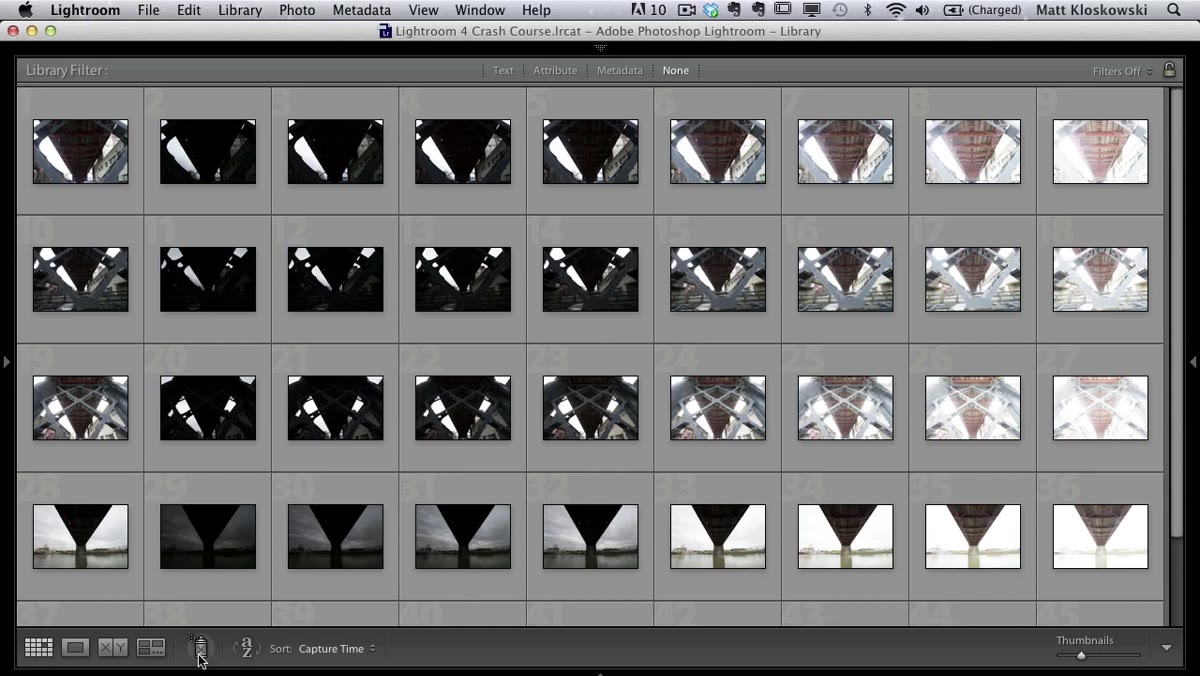
Down at the bottom of the Library module’s toolbar, there’s a small spray can icon that most people never touch. Click it. A dropdown will appear asking what you want to “spray” onto your photos. Choose Flag from the list, then set the flag type to Rejected. You’re now holding a rejection stamp that you can drag across any image in the grid.
Selecting the spray can tool in the Lightroom toolbar
Down at the bottom of the Library module’s toolbar, there’s a small spray can icon that most people never touch. Click it. A dropdown will appear asking what you want to “spray” onto your photos. Choose Flag from the list, then set the flag type to Rejected. You’re now holding a rejection stamp that you can drag across any image in the grid.
This tool is genuinely underrated. I’ll be honest - before I watched this tutorial I maybe used it twice in five years of Lightroom work. But for bulk operations on a predictable, repeating structure like brackets, it’s the right tool for exactly this job.
Step 4: Identify Which Frames You Actually Need
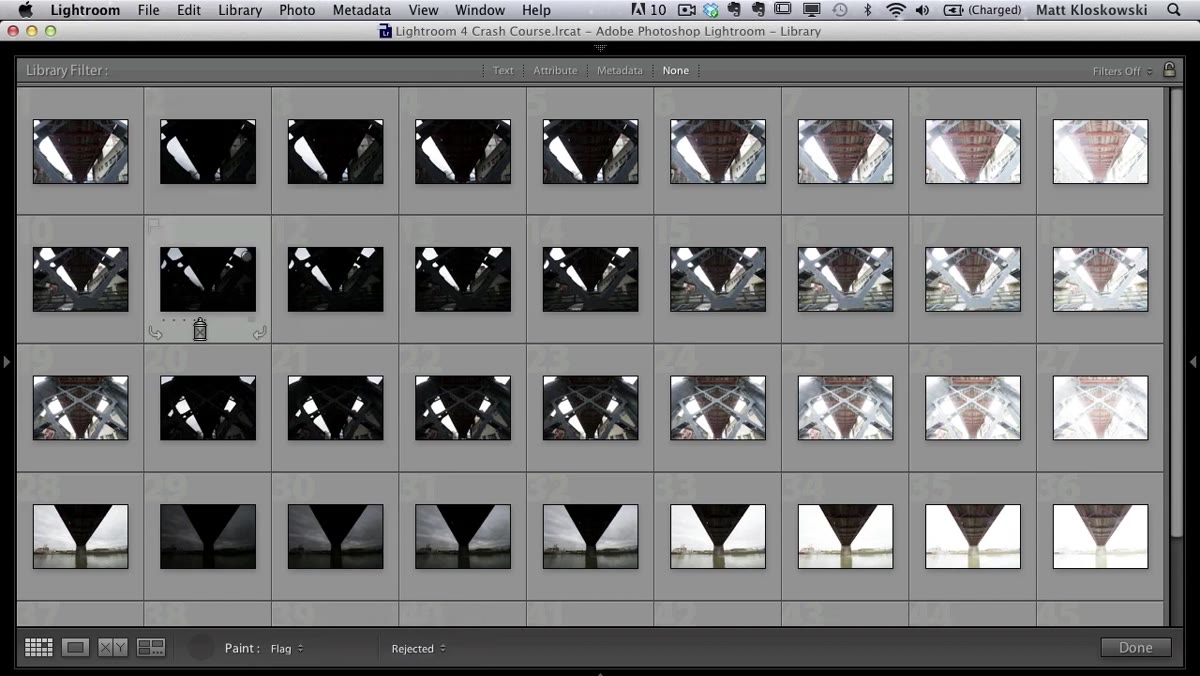 Reviewing bracket frames to decide which to keep or reject
Take a moment to look at your grid and think about what you actually need from each bracketed set. Matt’s approach is practical: he usually keeps the metered exposure (the first frame) and the darkest frame, because those give him the most useful range. The frames in between, separated by only a stop from each other, often don’t add enough unique information to be worth keeping.
Reviewing bracket frames to decide which to keep or reject
Take a moment to look at your grid and think about what you actually need from each bracketed set. Matt’s approach is practical: he usually keeps the metered exposure (the first frame) and the darkest frame, because those give him the most useful range. The frames in between, separated by only a stop from each other, often don’t add enough unique information to be worth keeping.
You don’t have to follow that exact logic. Maybe you’re shooting architecture and you care most about window detail, so you want the brightest frames. Maybe you’re blending sky and foreground and you just need the two extremes. The point is to decide on a consistent pattern before you start spraying, so you can work fast and systematically instead of second-guessing every frame.
Step 5: Spray the Rejected Frames Column by Column
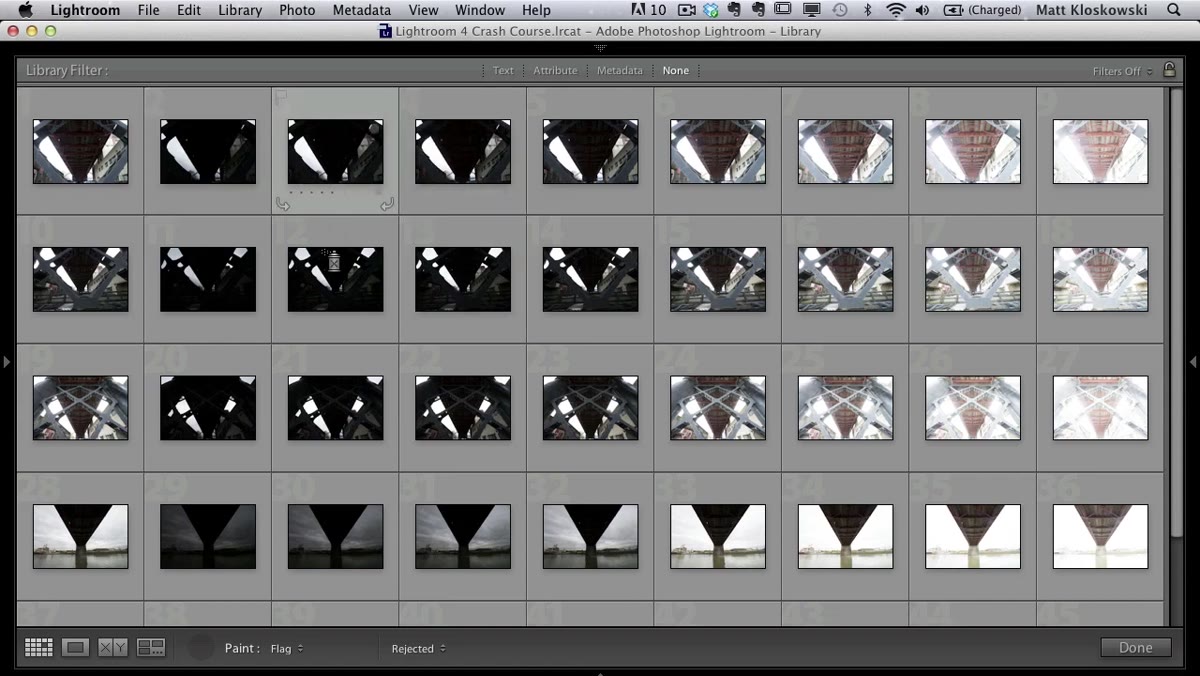 Using spray can tool to reject columns of unwanted bracket frames
Here’s where the grid layout pays off. Because each column in your nine-across grid represents the same position in every bracket set across your entire shoot, you can reject whole columns at once. Click and drag the spray can tool straight down a column you don’t want. Every image in that column across every bracketed set gets flagged as rejected in one motion.
Using spray can tool to reject columns of unwanted bracket frames
Here’s where the grid layout pays off. Because each column in your nine-across grid represents the same position in every bracket set across your entire shoot, you can reject whole columns at once. Click and drag the spray can tool straight down a column you don’t want. Every image in that column across every bracketed set gets flagged as rejected in one motion.
Work your way across the grid, dragging down the columns you’re removing and skipping the ones you’re keeping. What would have been an hour of clicking through individual frames turns into about 30 seconds of vertical drags. It’s one of those workflow moments where you feel the time savings physically.
Step 6: Delete the Rejected Photos
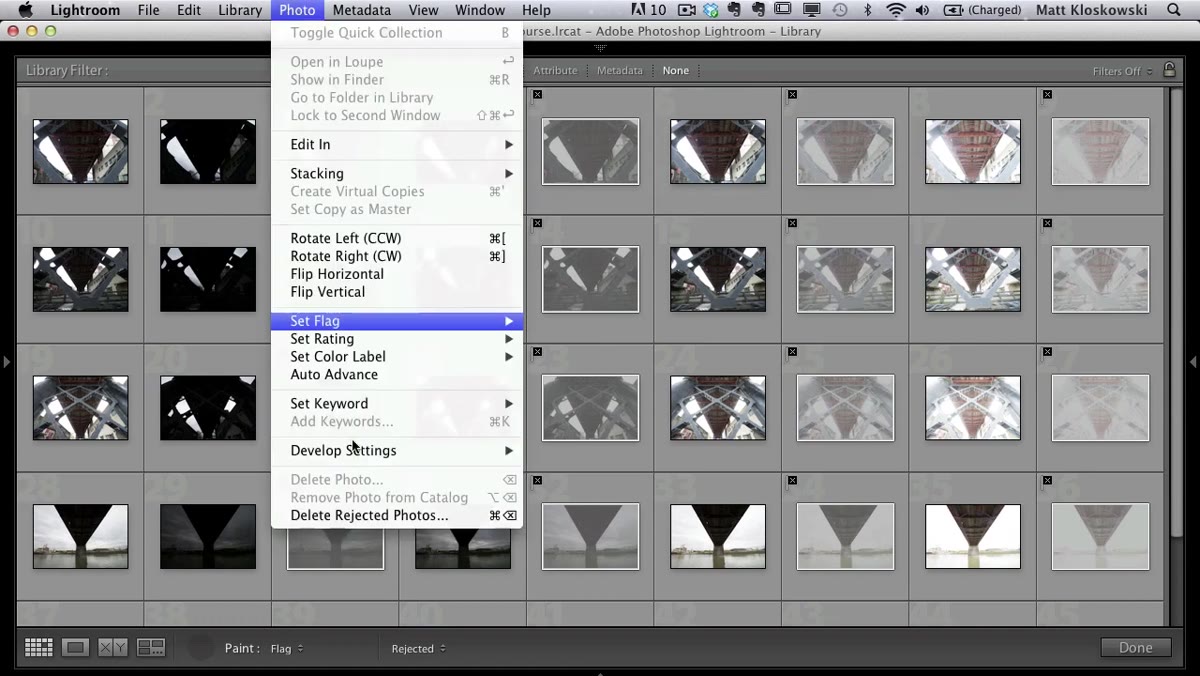 Navigating to Photo menu to delete rejected photos
Once you’ve sprayed your rejected columns, go up to the Photo menu in the menu bar and choose Delete Rejected Photos. Lightroom will ask whether you want to remove the files from Lightroom only or delete them from your disk entirely. If these are frames you genuinely have no use for, go ahead and delete from disk. You’re not losing anything you’d ever go back for.
Navigating to Photo menu to delete rejected photos
Once you’ve sprayed your rejected columns, go up to the Photo menu in the menu bar and choose Delete Rejected Photos. Lightroom will ask whether you want to remove the files from Lightroom only or delete them from your disk entirely. If these are frames you genuinely have no use for, go ahead and delete from disk. You’re not losing anything you’d ever go back for.
Your catalog is now trimmed down to only the frames worth evaluating. The grid cleans up, the scrolling shortens, and your brain isn’t fighting through redundant data just to find what matters.
One Thing I’d Add: Flag Your Keeper First
Before I spray rejections across a set, I take ten seconds to click through the bracket and flag my single strongest frame with a white pick flag. That way, after the deletions, I already have a filtered view of just the selects ready to go. It’s a small addition to Matt’s workflow, but it means I leave the culling phase with a shortlist in hand rather than just a smaller mess.
This also pairs well with stacking your brackets in Lightroom after culling. If you select your remaining frames in each set and use Photo, Stacking, Group into Stack, Lightroom collapses them into a single stack thumbnail in the grid. Your library view becomes clean and navigable, with each shooting location showing as one frame unless you expand it.
The real takeaway from Matt’s tutorial isn’t the spray can trick itself. It’s the mindset shift: shoot brackets freely because it protects your creative focus in the field, then build a fast system for handling the volume afterward so the extra files never become a tax on your editing time. The tool only works if you trust that you’ve got a reliable way to clean house when you get home.
Watch the full tutorial on YouTube to see Matt walk through the spray can technique in real time. Seeing the grid layout in action makes the column-by-column logic click faster than any description can.
Comments (2)
Printing this out and pinning it next to my monitor. That good.
This is the kind of content that keeps me coming back.
Leave a Comment