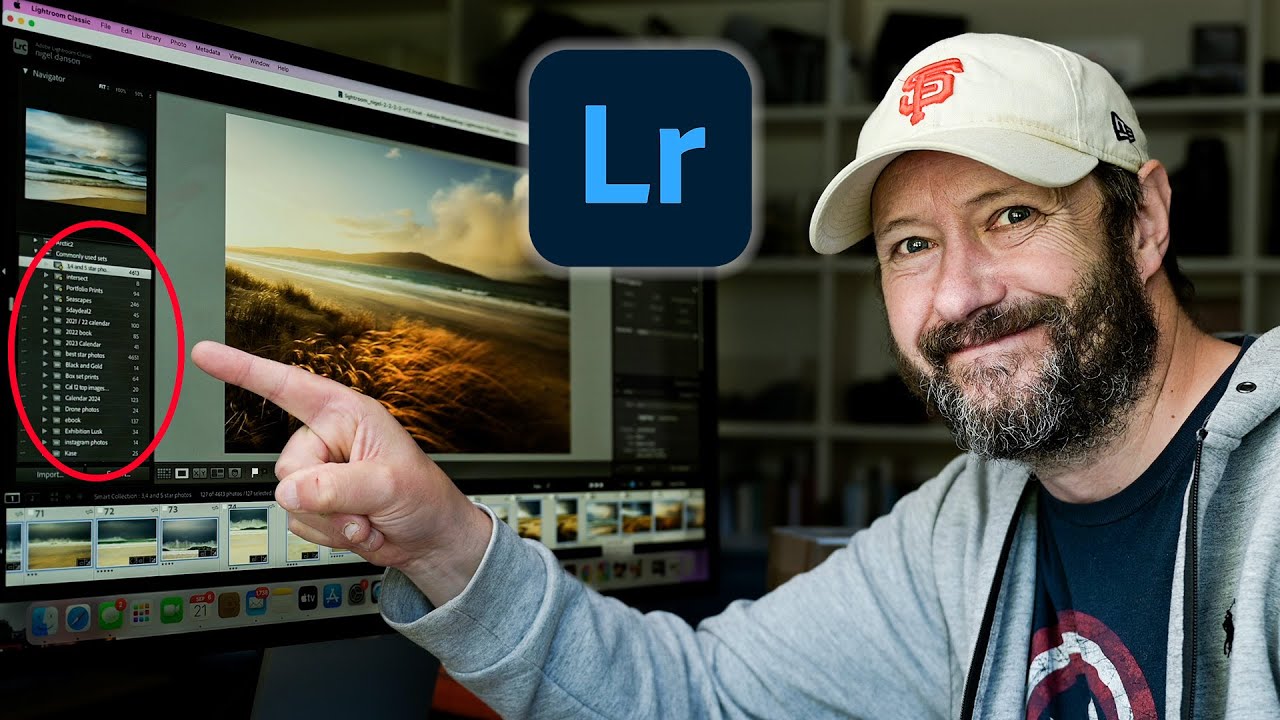
My Lightroom catalog used to feel like a junk drawer. You know the one. You open it looking for a battery, and you find three dried-up pens, a takeout menu from 2019, and your old apartment key. That’s what happens when you import without a system. Photos pile up by shoot date, folder names get vague (“Nashville_finals_FINAL_v3”), and culling becomes something you put off until you genuinely cannot remember which trip produced which set of shots.
I ran into this exact wall after a heavy shooting stretch last spring. So when I came across this Nigel Danson tutorial on organizing a Lightroom catalog, I paid attention. Danson has been shooting since 2002 and has accumulated around 275,000 images in a single catalog. That alone told me his system had to be robust. Watch the full tutorial on YouTube if you want to see his actual catalog as he walks through it. What follows is my breakdown of the system, written so you can implement it today without pausing and rewinding every 30 seconds.
The core insight here is not glamorous, but it is powerful: a folder structure you decide on once, applied consistently from the first import, eliminates almost every downstream organizational headache. Here is exactly how Danson does it.
Step 1: Build Your Top-Level Folder Structure by Year
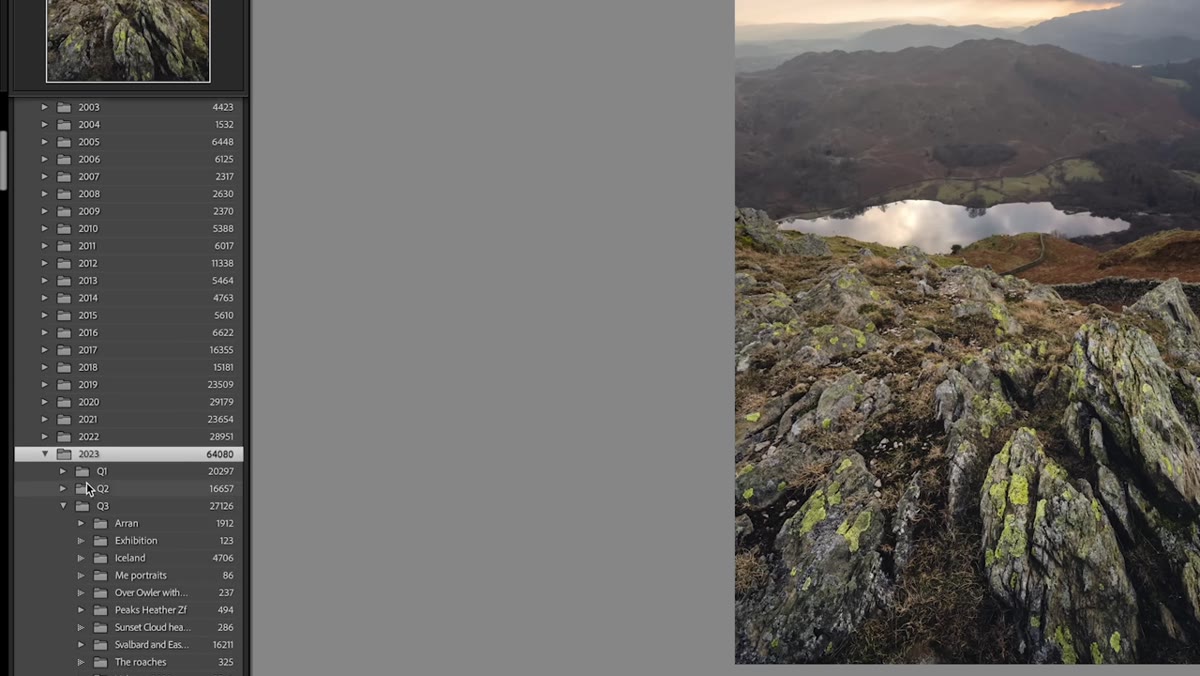
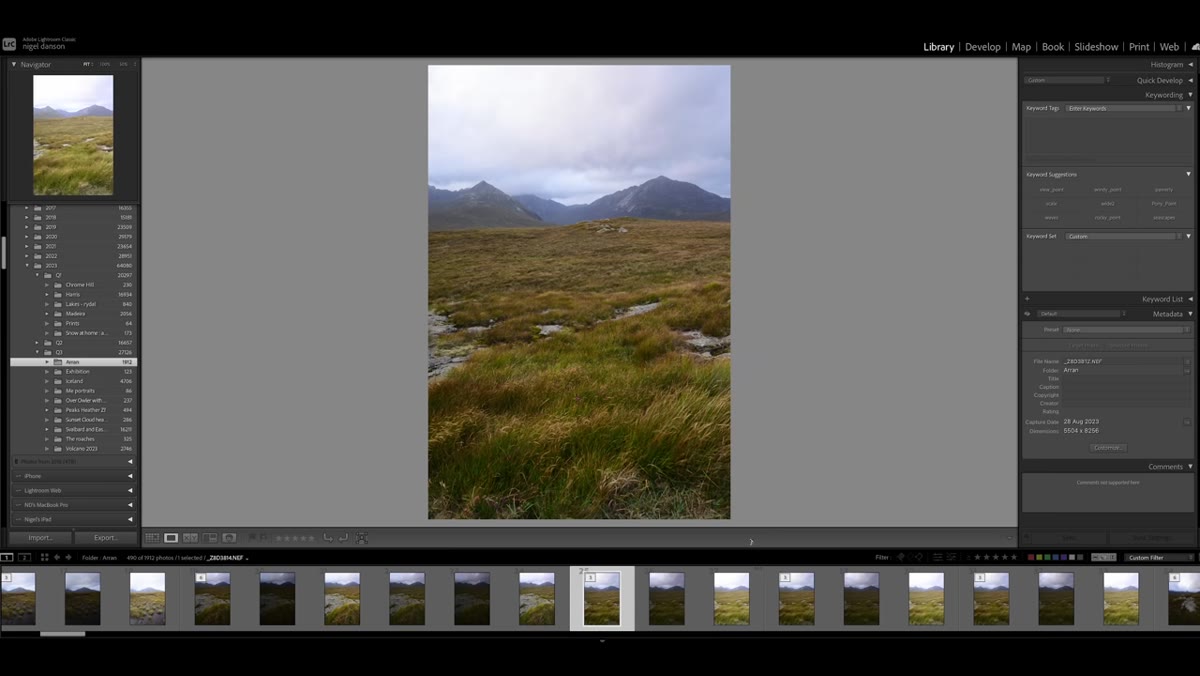
 Lightroom folder panel showing year-based folders on NAS
Danson stores everything on a NAS (network-attached storage) drive, but the folder logic works on any external drive. The top level is dead simple: one folder per year, going all the way back to when you started shooting. No subfolders for camera bodies, no folders by subject or genre. Just years. This matters because it matches how your brain actually searches for photos (“that was the winter I went to Scotland, so 2022”) rather than forcing you to remember a taxonomy you invented in a different season of your life.
Step 2: Divide Each Year Into Quarters
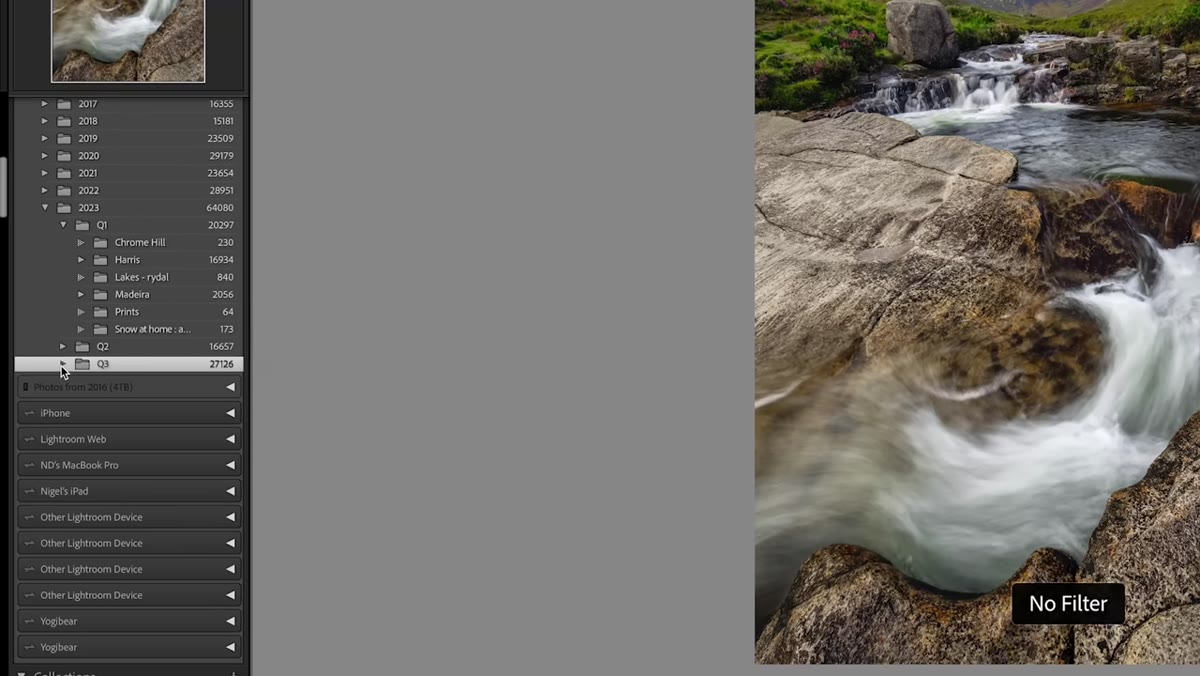
 Q1 Q2 Q3 Q4 subfolders inside a year folder
Inside each year folder, Danson uses four subfolders: Q1, Q2, Q3, and Q4. That is January through March, April through June, July through September, and October through December. This middle layer does something smart: it limits how many project folders you are scanning at once. Instead of scrolling through 40 shoot folders in one flat list, you open a quarter and see maybe 8 to 12 trips or projects. For anyone who shoots seasonally (which, if you do landscapes, is probably most of you), this also maps naturally onto light conditions and locations.
Step 3: Name Project Folders Inside Each Quarter
 Project folder labeled with location name inside Q3
Within each quarter, each distinct trip or project gets its own folder named by location or subject. Danson keeps the naming simple and descriptive: the place, not a date string. For longer trips with multiple intense shooting days, he goes one level deeper and splits by day. He is clear that this is not the default; he only adds day-level folders when the trip is long enough that “Harris, Day 1” and “Harris, Day 3” would actually contain meaningfully different bodies of work. For a weekend outing, one project folder is enough. The rule of thumb: add a folder level only when removing it would cause you to lose real context.
Step 4: Import Everything Into Lightroom Referencing Those Folders
 Lightroom import dialog with folder destination selected
Once your physical folders are set up on the drive, the import step is straightforward. Danson imports all images from a shoot into the matching project folder. In Lightroom’s import dialog, set the destination to the correct quarter folder and confirm the subfolder name matches your project naming convention before you click Import. This keeps Lightroom’s folder panel synchronized with your actual file system, which means if you ever need to find a file outside of Lightroom (say, to send a raw file directly), you can navigate there in seconds.
Step 5: Auto-Stack by Capture Time
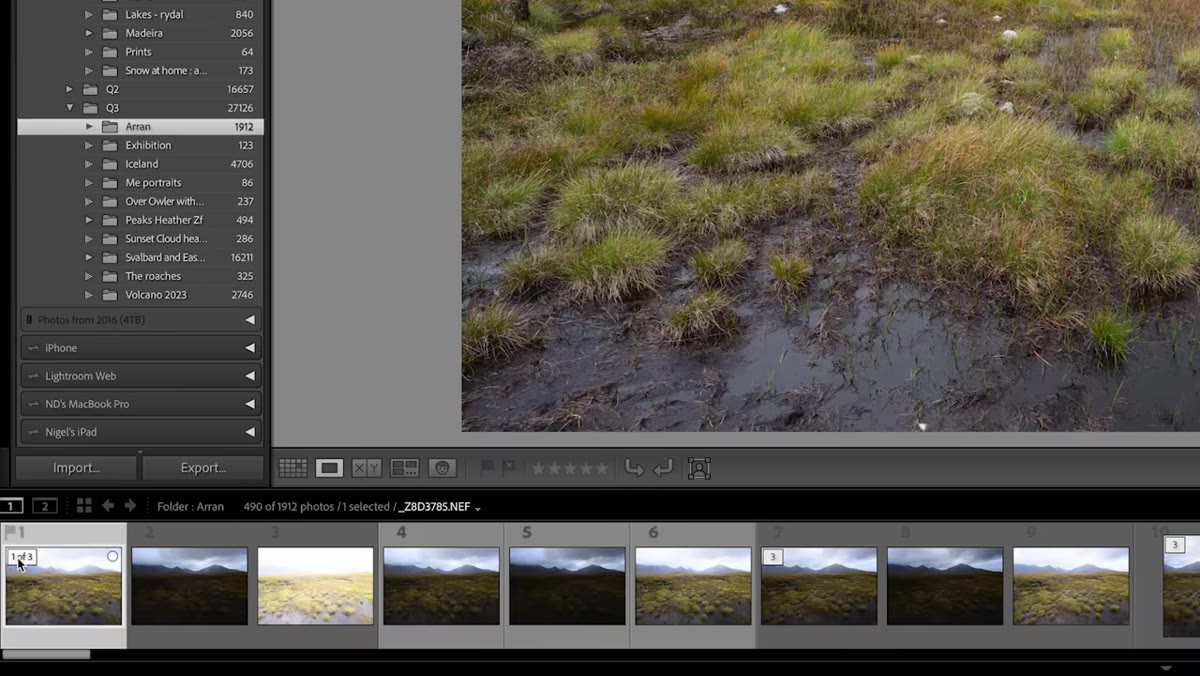 Photo menu open showing Stack and Auto Stack by Capture Time
This step is a genuine time-saver that a lot of shooters skip. After importing, go to Photo, then Stack, then Auto Stack by Capture Time. Lightroom will group images captured within a specified time interval into collapsible stacks. For Danson, this is primarily useful for bracketed HDR sequences: instead of seeing nine near-identical exposures spread across your grid, you see one stack representing the whole bracket. You can still expand any stack to access individual frames, and the stack badge tells you how many images are inside. Your grid goes from overwhelming to navigable in about 10 seconds.
Step 6: Flag Your Best Shots With Picks
 Grid view with flagged picks visible on image thumbnails
Once the catalog is tidy, culling begins. Danson’s method is the keyboard-first approach most experienced Lightroom users land on eventually: press P to flag an image as a Pick, and press the right arrow key to advance to the next frame. No star ratings at this stage, no color labels. Just a binary decision: keep or skip. This keeps momentum high during the cull because you are not stopping to deliberate between three stars and four stars. After one pass, you filter to show only flagged images and you have your working set for editing. It is not a complicated system. That is exactly why it works.
A Note From My Own Workflow: Add a “Portfolio” Collection at the End
Danson’s system handles organization and culling beautifully, but there is one layer I added on top of it that changed how I select final images for clients or exhibition prints. After culling, I create a Lightroom Collection (not a folder, a Collection) called something like “Portfolio 2024.” Any image that survives the cull AND could stand alone as a finished print goes into that collection with a single keyboard shortcut. Collections do not move files; they just create a virtual grouping. Over time, this collection becomes an automatically updated best-of reel that you can hand to anyone: an art director, a gallery, a client asking to see your strongest work. It sits on top of Danson’s folder logic without changing any of it, and it has saved me hours of hunting through quarterly folders every time someone asks for “your best ten shots.”
The single most important thing I took from this tutorial is the quarterly folder layer. Years alone are too broad. Projects alone create an unmanageable flat list. Quarters are the right granularity, and once you apply them consistently, the catalog starts to feel like a tool instead of a backlog. If your Lightroom folder panel currently looks like a crime scene, this is the first fix to make.
Watch the full tutorial on YouTube to see Danson navigate his actual 275,000-image catalog and explain how he handles the separate catalog he uses while traveling before merging it back into the main archive.
Comments
Leave a Comment