
There’s a specific kind of dread that hits when a client asks you to find “that misty lake shot from a couple years back” and you realize your Lightroom catalog is basically a digital junk drawer. I’ve been there. Folders named “new folder (3)” and dates that made sense at the time but mean nothing now. The whole catalog becomes a place you avoid instead of a tool you trust.
What changed things for me was watching how working photographers actually structure their systems before problems compound. In this Nigel Danson tutorial on photo organization, landscape photographer Nigel Danson walks through the exact folder structure, import settings, and keywording habits that have kept his catalog navigable going all the way back to 2002. That’s not a typo. Over fifteen years of shoots, findable. The man has his system locked in, and it’s worth understanding why each piece of it works.
Watch the full tutorial on YouTube
What follows is a step-by-step breakdown you can apply today, even if your current catalog situation is, let’s say, a work in progress.
Step 1: Build a Folder Structure Around Years and Quarters
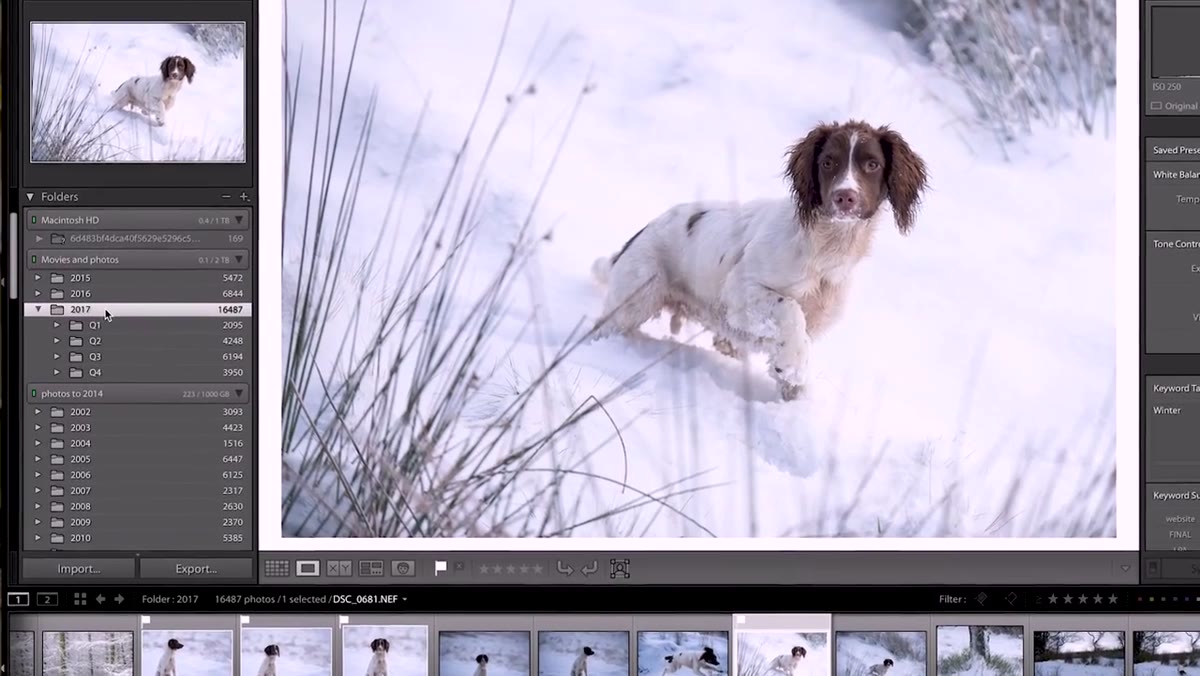 Lightroom folder panel showing years and quarters organized
Nigel’s top-level organization is simple: one folder per year, subdivided into quarters (Q1, Q2, Q3, Q4). Inside each quarter, individual shoot folders. That’s the entire skeleton. No elaborate genre categories, no location-based top folders, no color-coded chaos.
Lightroom folder panel showing years and quarters organized
Nigel’s top-level organization is simple: one folder per year, subdivided into quarters (Q1, Q2, Q3, Q4). Inside each quarter, individual shoot folders. That’s the entire skeleton. No elaborate genre categories, no location-based top folders, no color-coded chaos.
The reason this works long-term is that time is the one organizing principle that never changes. You might reshoot Iceland five times. You might stop shooting portraits entirely. But Q1 2018 will always mean January through March 2018, and that consistency makes retrieval predictable. When you’re starting a new year, you create the year folder first, then the Q1 subfolder inside it, ready for your first import.
Step 2: Store Everything on an External Hard Drive, Including Your Catalog
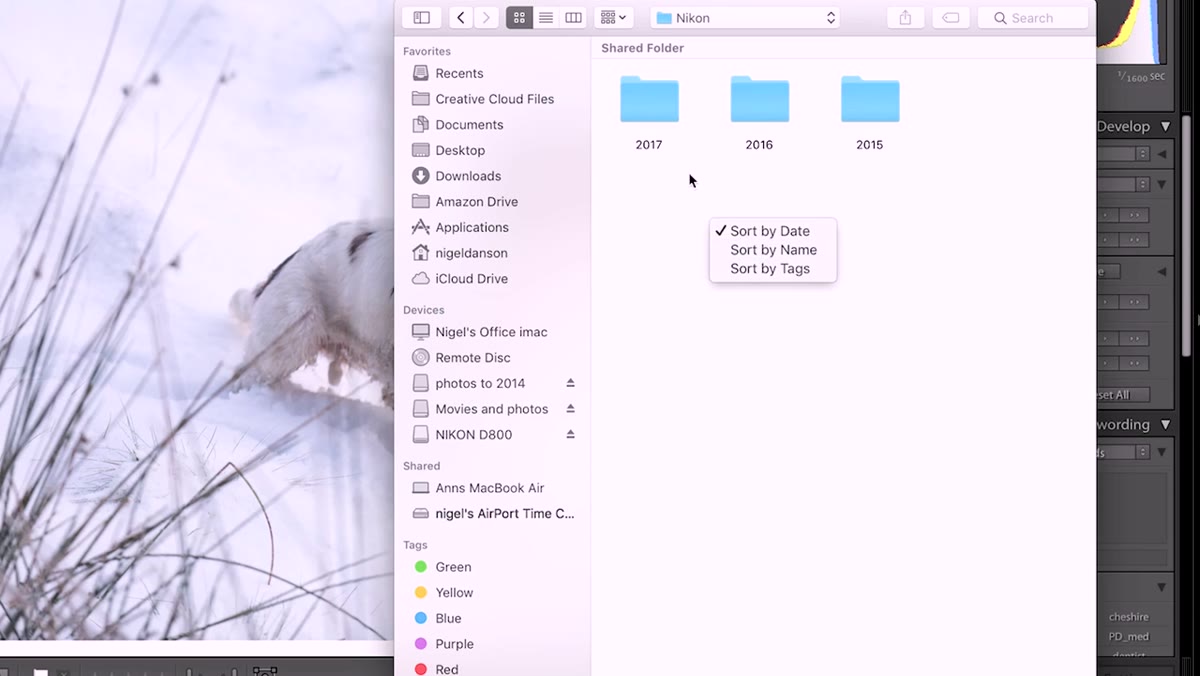 External hard drive folder being selected as import destination
This one surprised me when I first heard it framed this way, but Nigel keeps both his photos and his Lightroom catalog on the same external hard drive. Not just the photos, the actual catalog file too. The logic is elegant: plug the drive into any machine and your entire Lightroom setup comes with you. No syncing, no copying files when you return to the studio, no “where did I leave off” confusion.
External hard drive folder being selected as import destination
This one surprised me when I first heard it framed this way, but Nigel keeps both his photos and his Lightroom catalog on the same external hard drive. Not just the photos, the actual catalog file too. The logic is elegant: plug the drive into any machine and your entire Lightroom setup comes with you. No syncing, no copying files when you return to the studio, no “where did I leave off” confusion.
The practical implication is that when you go to import, you’re always directing files to that external drive. You navigate to the current year folder, then the current quarter, and you’re importing directly into the right place from the start. It also creates a natural checkpoint where you’re being intentional about destination before you ever click Import.
Step 3: Set Import Previews to 1:1
 Import dialog showing 1:1 preview option selected
During import, Lightroom gives you preview quality options, and Nigel specifically chooses 1:1 previews. These are full-resolution previews that Lightroom renders and caches so that when you’re culling and zoom in to check sharpness or focus, there’s no loading delay. The image is just there.
Import dialog showing 1:1 preview option selected
During import, Lightroom gives you preview quality options, and Nigel specifically chooses 1:1 previews. These are full-resolution previews that Lightroom renders and caches so that when you’re culling and zoom in to check sharpness or focus, there’s no loading delay. The image is just there.
It costs more time upfront during the import process, but it pays back immediately during culling. If you’re reviewing 300 images from a shoot and Lightroom has to render a preview every time you zoom in, that lag adds up fast and breaks your rhythm. 1:1 previews eliminate that friction entirely, and for anyone doing serious volume work, this is one of those settings you turn on once and never turn off.
Step 4: Skip Suspected Duplicates
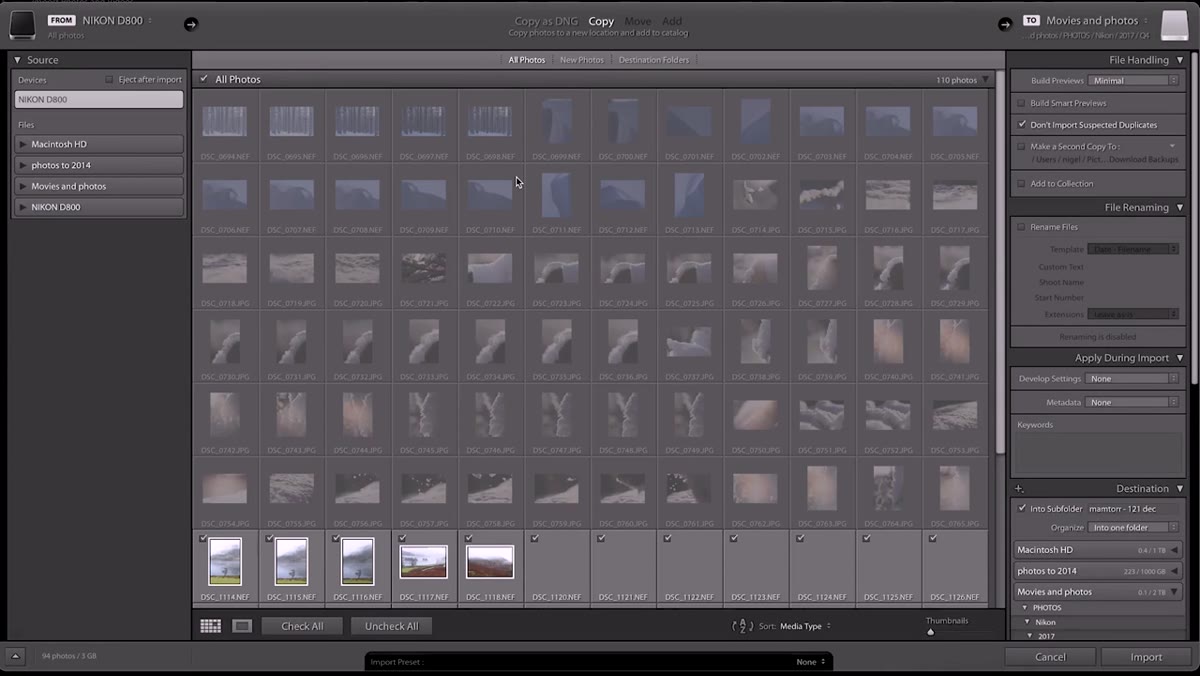
 Import dialog with “Don’t Import Suspected Duplicates” checkbox
Nigel leaves “Don’t Import Suspected Duplicates” checked in the import dialog. If he hasn’t cleared his SD card since the last shoot, those previously imported files show up grayed out automatically. Lightroom handles the recognition for you.
Import dialog with “Don’t Import Suspected Duplicates” checkbox
Nigel leaves “Don’t Import Suspected Duplicates” checked in the import dialog. If he hasn’t cleared his SD card since the last shoot, those previously imported files show up grayed out automatically. Lightroom handles the recognition for you.
This is a quiet but important habit. It prevents you from accidentally importing the same raw files twice, which can create confusing duplicates in your catalog that are annoying to untangle later. It also means you don’t have to be obsessive about clearing your card after every single shoot, which gives you a small safety net if you’re ever pulling images from a card you used multiple times.
Step 5: Add Broad Keywords at Import for the Whole Shoot
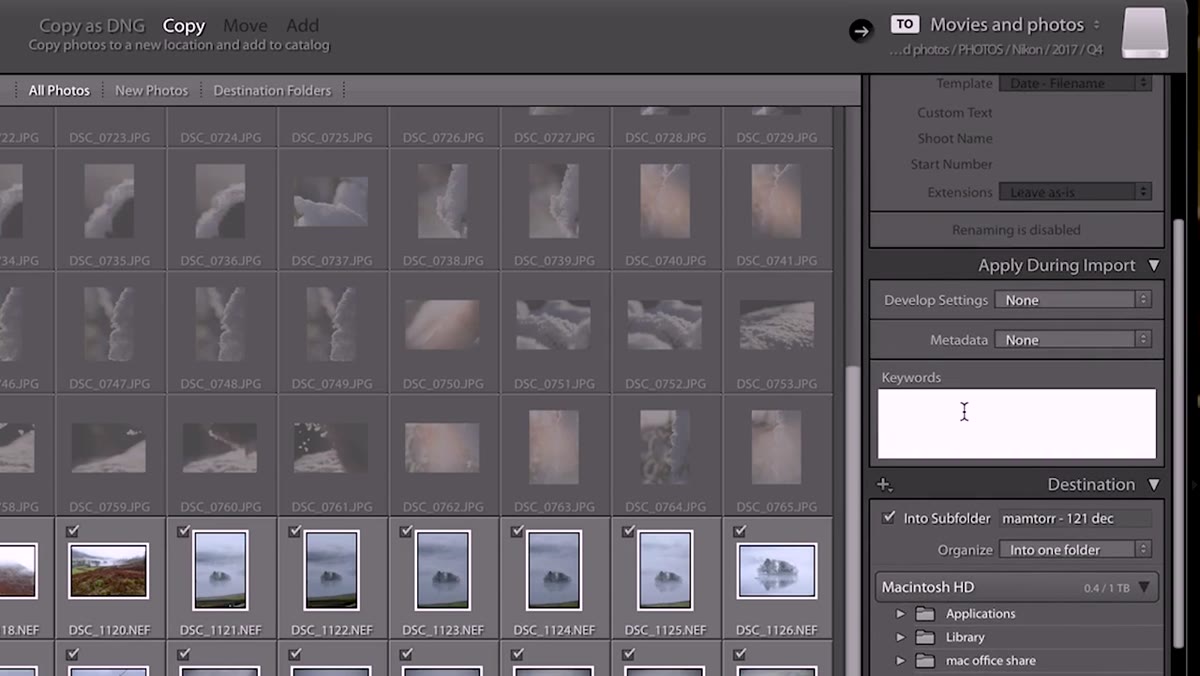 Import dialog showing keyword field with multiple tags entered
Before clicking Import, Nigel adds keywords that apply to every image in that shoot. For a misty Lake District session, that might be words like mist, water, lake, and trees. These are broad descriptors that are genuinely true of every file he’s about to bring in.
Import dialog showing keyword field with multiple tags entered
Before clicking Import, Nigel adds keywords that apply to every image in that shoot. For a misty Lake District session, that might be words like mist, water, lake, and trees. These are broad descriptors that are genuinely true of every file he’s about to bring in.
The key distinction here is that he’s not trying to keyword everything at this stage. Import keywords are just the shared context for the whole batch. Individual images get more specific keywords later during the editing process. Starting with the common ground means you’re not entering the same five words hundreds of times image by image, and searching later by something like “mist” will still pull up everything relevant from that shoot.
Step 6: Name the Shoot Folder Descriptively at Import
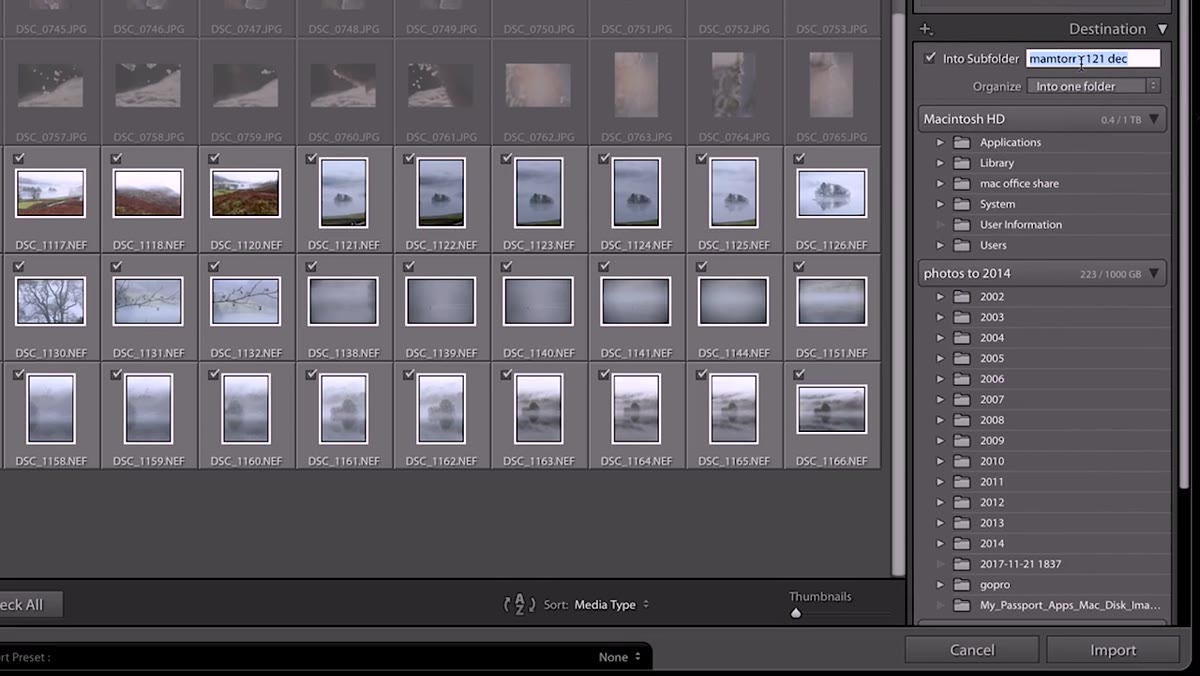 Import destination showing custom shoot folder name being typed
When selecting the destination in the import dialog, Nigel creates a new subfolder and names it with a clear, descriptive location name, something like “Rydal Water Lake District” rather than a date string or a generic label. That folder then lives inside the appropriate quarter folder.
Import destination showing custom shoot folder name being typed
When selecting the destination in the import dialog, Nigel creates a new subfolder and names it with a clear, descriptive location name, something like “Rydal Water Lake District” rather than a date string or a generic label. That folder then lives inside the appropriate quarter folder.
Location-based naming inside a time-based structure gives you two ways to find anything. You can browse by when, or you can scan folder names visually and spot the right shoot by place. That redundancy is the whole point. Fifteen years from now, “Q2 2025 - Iceland Highlands” is going to mean something. “Session 47” is not.
One Thing I’d Add: Geo-Tagging as Your Location Index
Nigel mentions he deliberately doesn’t use location names as keywords, and I think that’s a smart call. Keywording locations is inconsistent work, especially across years when your naming conventions drift. Instead, he relies on geo-tagging, and this is where I’d encourage you to double down.
If your camera supports GPS metadata or you use a companion app to log coordinates on a shoot, Lightroom can display your photos on a map and filter by location. It’s more precise than any keyword, and it doesn’t require you to decide whether something should be tagged “Lake District” or “Cumbria” or “England.” The coordinates are just true. I started geo-tagging everything about two years ago and it completely changed how I browse older work. For any landscape photographers reading this, it’s worth treating geo-tagging as non-negotiable from day one.
The single most important idea in this whole workflow is that the system needs to be consistent before it needs to be perfect. A year-quarter-shoot structure that you actually stick to will serve you better than an elaborate taxonomy you abandon by March. Nigel’s catalog going back to 2002 isn’t impressive because of complexity. It’s impressive because he picked a simple structure and never stopped using it.
Watch the full tutorial on YouTube to see him walk through the import dialog live and catch the backup workflow he covers toward the end, which is worth the watch on its own.
Comments (2)
Never thought of approaching it this way. Really creative.
Quality content like this is rare. Keep it up.
Leave a Comment