There’s a specific kind of frustration that only photographers know: a client emails six months after their session asking for reprints, and you’re staring at a blank Print module wondering how you ever arranged those eleven photos in the first place. You remember it looked great. You do not remember which images, which order, or what sizes you used. I’ve rebuilt the same layout from scratch more times than I want to admit, usually while a perfectly good record was skipping in the background because I was too annoyed to flip it.
In this KelbyOne tutorial, Scott Kelby walks through the questions he got after posting a custom package layout on Lightroom Killer Tips — and his answers are the kind of practical, “why didn’t I know this earlier” tips that actually change how you work. Watch the full tutorial on YouTube — it’s short, dense with useful information, and worth your time. Below I’ve broken it down into steps you can follow right now with your own layouts.
Step 1: Build Your Custom Package Layout First
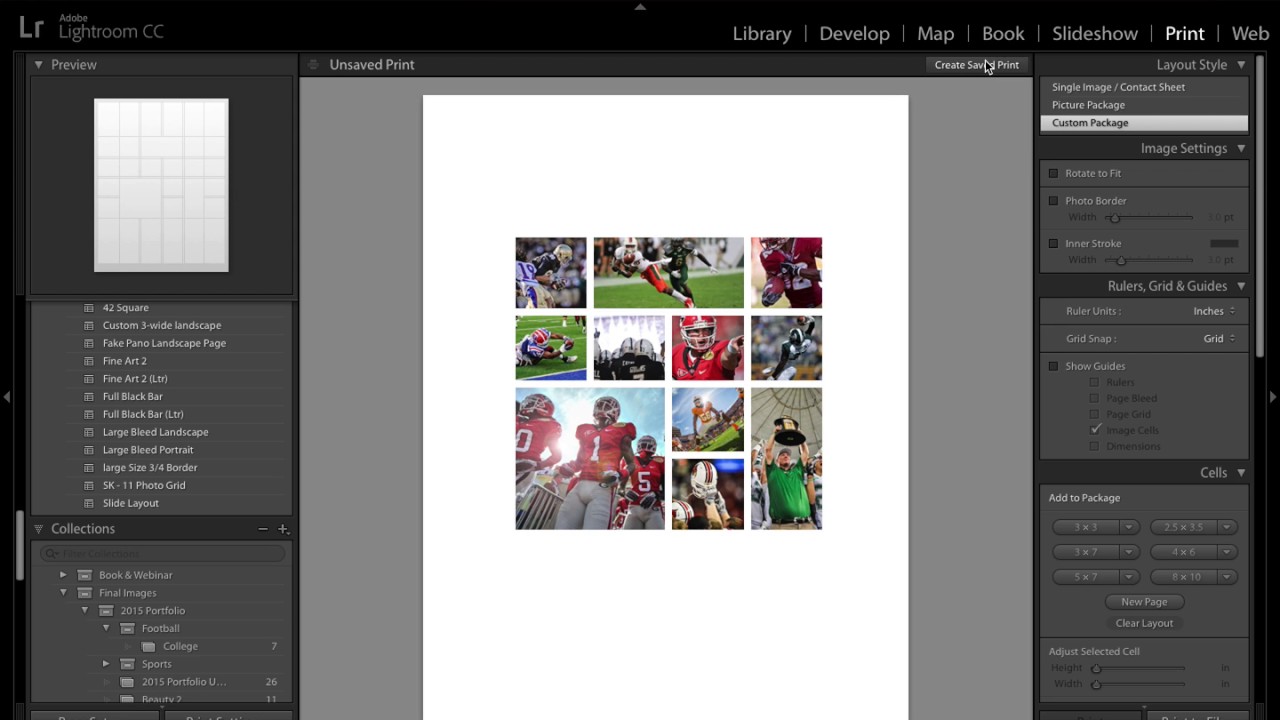
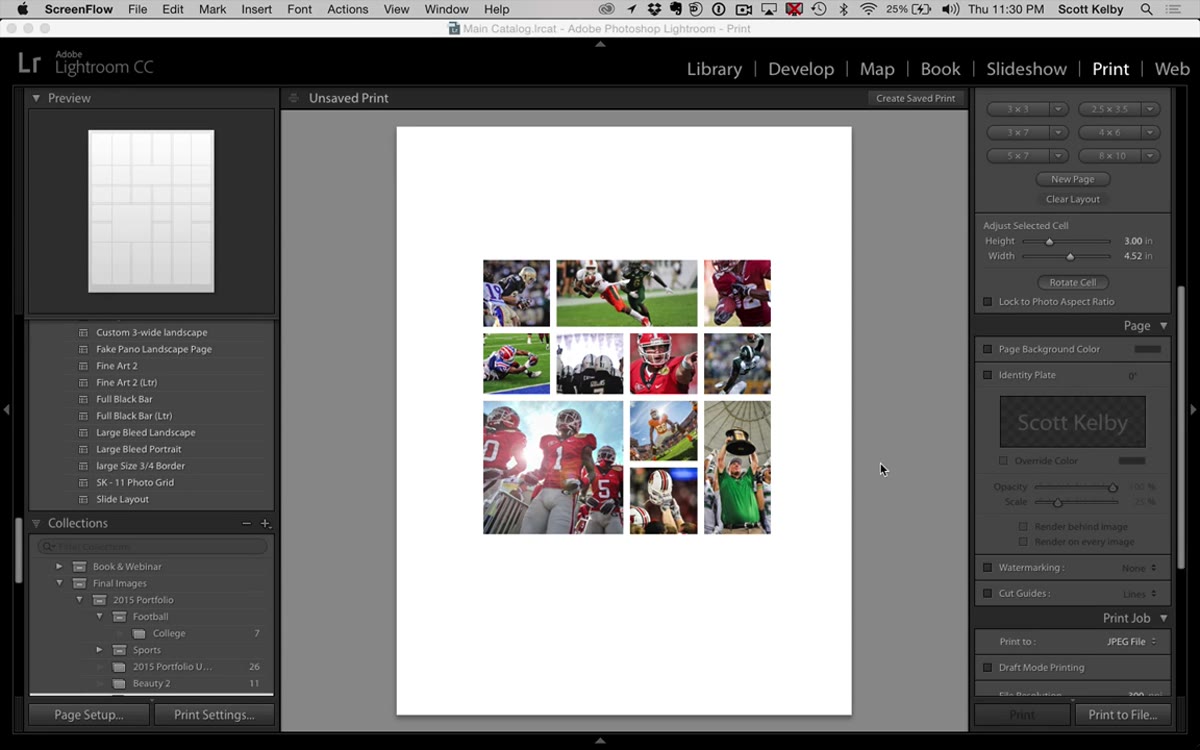 Custom package layout with multiple photos arranged on canvas
Before any saving happens, you need a layout worth saving. Kelby’s example uses Lightroom’s Custom Package option in the Print module, which lets you drag cells of different sizes onto a single canvas and arrange them however you want. This is different from the grid or contact sheet layouts — Custom Package gives you full control over cell size and placement. Get your photos arranged the way you want them, with the right images in the right cells, before you touch anything else. The order and placement you set here is exactly what gets preserved when you save.
Custom package layout with multiple photos arranged on canvas
Before any saving happens, you need a layout worth saving. Kelby’s example uses Lightroom’s Custom Package option in the Print module, which lets you drag cells of different sizes onto a single canvas and arrange them however you want. This is different from the grid or contact sheet layouts — Custom Package gives you full control over cell size and placement. Get your photos arranged the way you want them, with the right images in the right cells, before you touch anything else. The order and placement you set here is exactly what gets preserved when you save.
Step 2: Save the Template to Your Template Browser
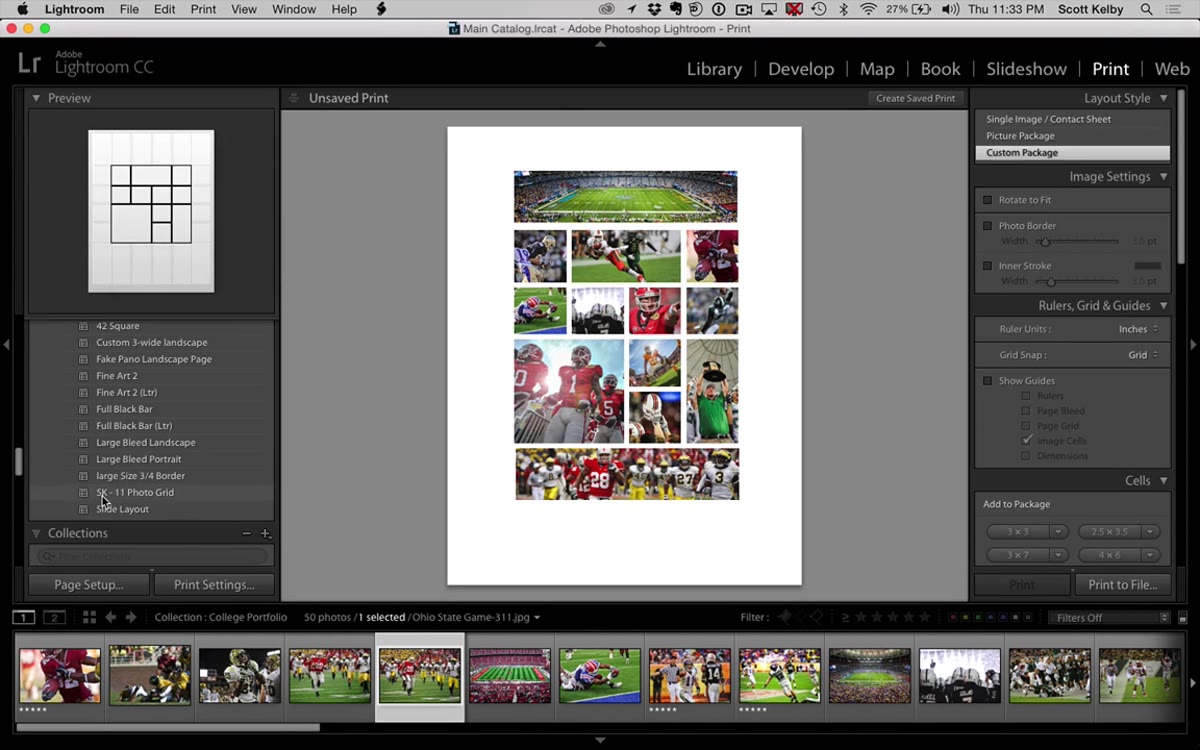
 Template browser panel with plus sign button highlighted
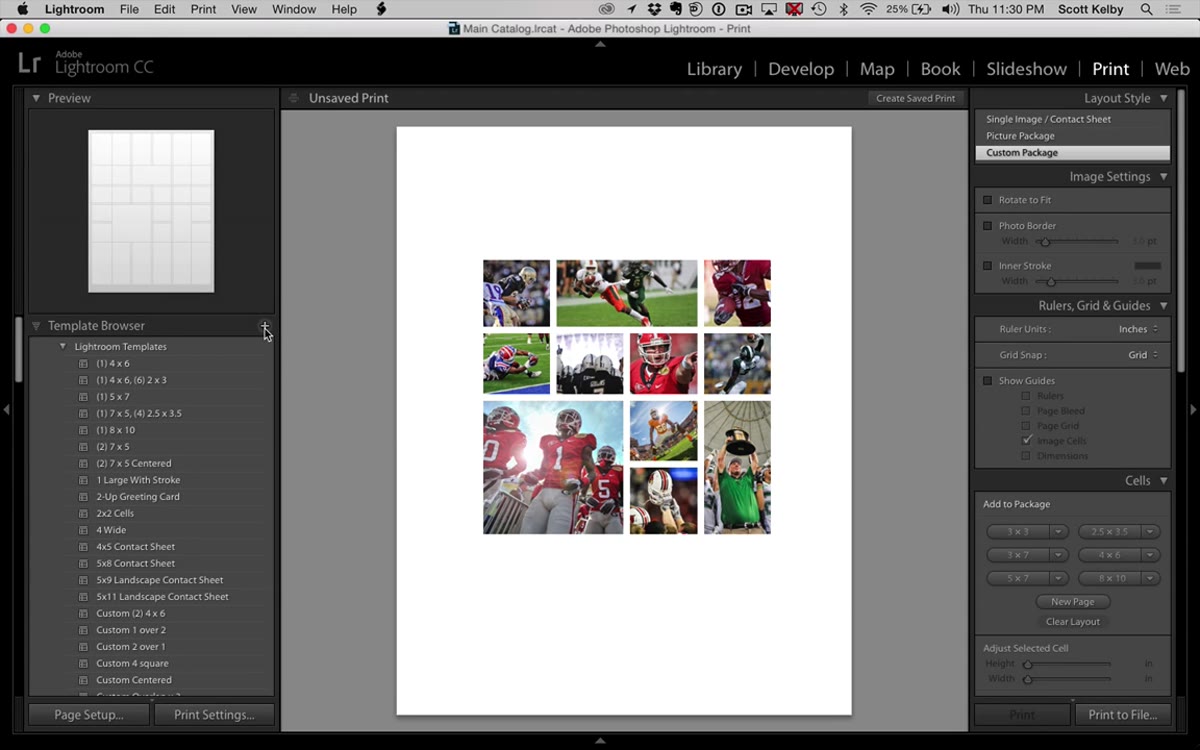
Once your layout looks right, go to the Template Browser panel on the left side and click the plus sign. A dialog box appears asking you to name the template. Kelby’s naming convention is worth borrowing: he includes the number of photos in the layout and his initials, something like “SK 11-Photo Grid.” That kind of specific naming saves you from opening five templates to find the right one six months later. Name it something you’ll actually recognize, click OK, and it lands in your User Templates section. From this point forward, hovering over any template in the browser shows a live preview of the layout in the Preview panel at the top, so you can identify it at a glance without loading it.
Template browser panel with plus sign button highlighted
Once your layout looks right, go to the Template Browser panel on the left side and click the plus sign. A dialog box appears asking you to name the template. Kelby’s naming convention is worth borrowing: he includes the number of photos in the layout and his initials, something like “SK 11-Photo Grid.” That kind of specific naming saves you from opening five templates to find the right one six months later. Name it something you’ll actually recognize, click OK, and it lands in your User Templates section. From this point forward, hovering over any template in the browser shows a live preview of the layout in the Preview panel at the top, so you can identify it at a glance without loading it.
Step 3: Create a Saved Print to Lock In the Photos AND the Layout
 Create Saved Print option in upper right corner of Print module
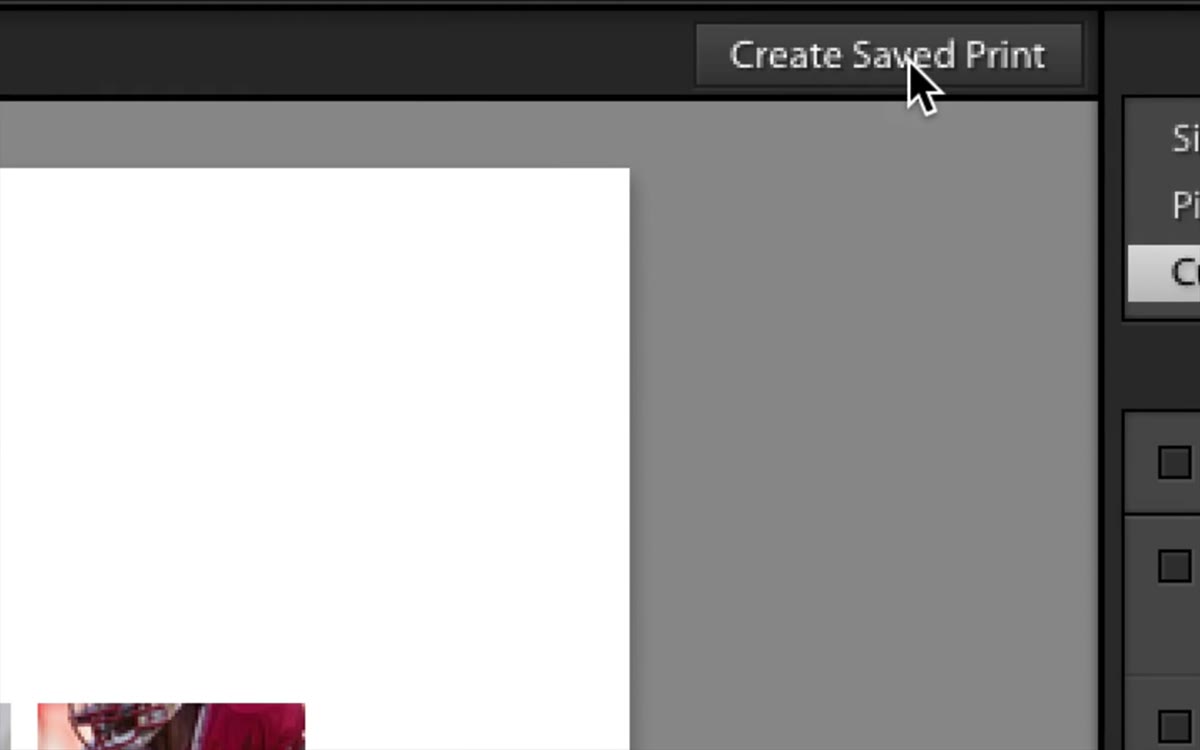
Here’s where most people stop short, and it costs them later. Saving a template only saves the layout structure, the empty containers. It does not save which photos go where. So when a client comes back and wants another run of that exact print, you’ve got the skeleton but not the body. To fix this, look in the upper right corner of the Print module and choose “Create Saved Print.” This creates a new collection that stores both the layout and the specific images in their specific positions. It’s one click now versus an hour of reconstruction later. Treat this as a non-negotiable final step any time you finish a layout for a client.
Create Saved Print option in upper right corner of Print module
Here’s where most people stop short, and it costs them later. Saving a template only saves the layout structure, the empty containers. It does not save which photos go where. So when a client comes back and wants another run of that exact print, you’ve got the skeleton but not the body. To fix this, look in the upper right corner of the Print module and choose “Create Saved Print.” This creates a new collection that stores both the layout and the specific images in their specific positions. It’s one click now versus an hour of reconstruction later. Treat this as a non-negotiable final step any time you finish a layout for a client.
Step 4: Reposition Images Inside Cells Without Resizing
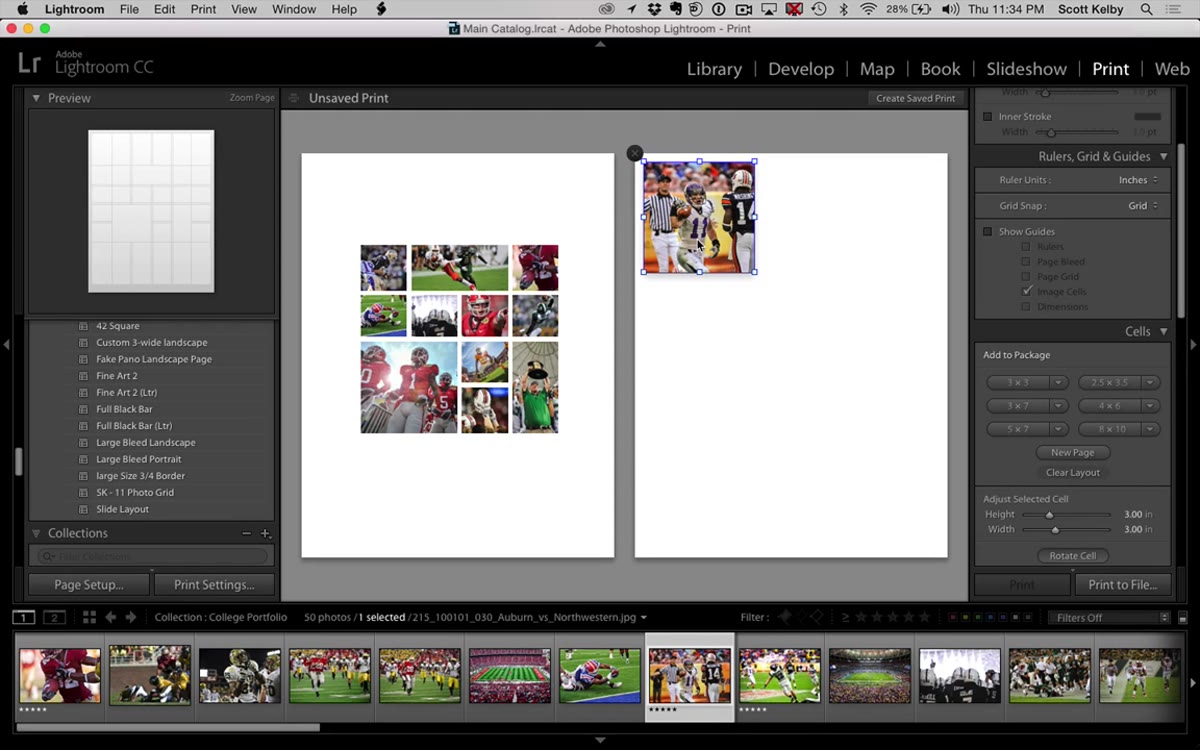
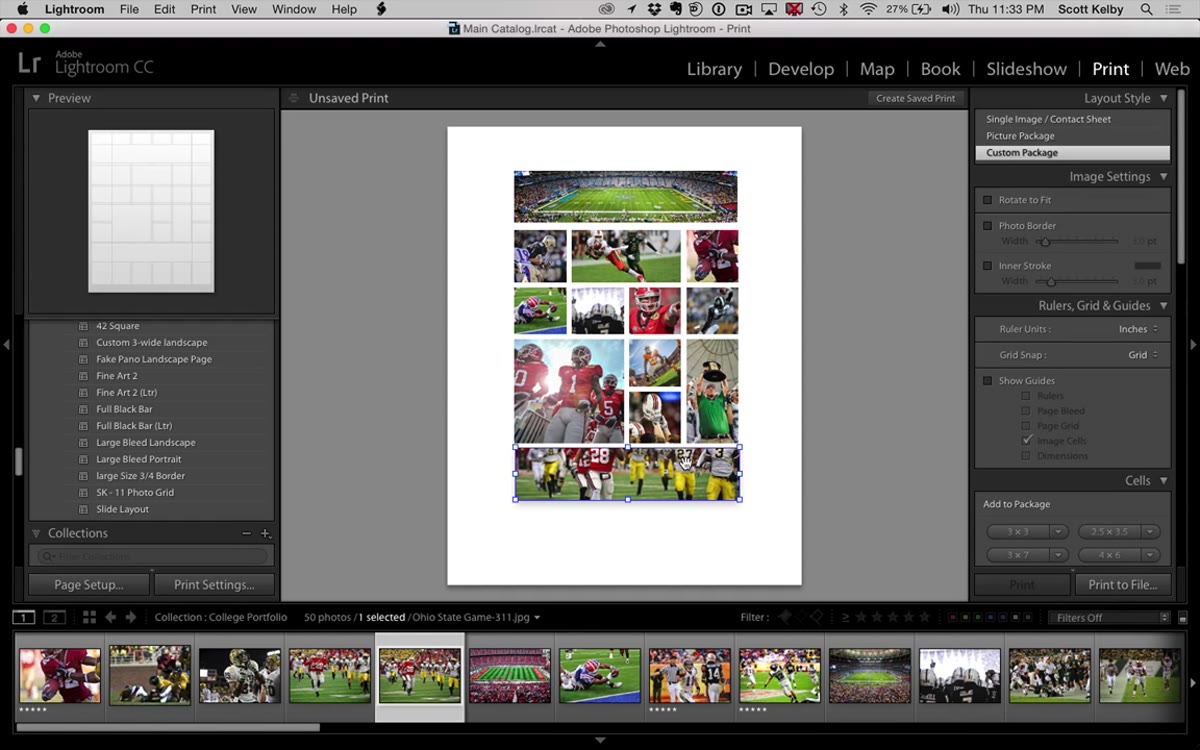 Image being repositioned inside a cell using keyboard modifier
This one’s easy to miss because there’s no obvious button for it. If a photo isn’t sitting in the cell the way you want, hold the Command key on Mac or the Control key on Windows and then click and drag the image. This lets you pan the photo inside its container without changing the cell size or moving the cell itself. It’s the difference between a portrait that shows someone’s eyes and one that shows their chin. Use it every time you drop a new image into a cell, especially with tighter crops.
Image being repositioned inside a cell using keyboard modifier
This one’s easy to miss because there’s no obvious button for it. If a photo isn’t sitting in the cell the way you want, hold the Command key on Mac or the Control key on Windows and then click and drag the image. This lets you pan the photo inside its container without changing the cell size or moving the cell itself. It’s the difference between a portrait that shows someone’s eyes and one that shows their chin. Use it every time you drop a new image into a cell, especially with tighter crops.
Step 5: Update an Existing Template Instead of Creating a New One
 Right-click menu on saved template showing Update with Current Settings
If you tweak a layout and want to keep the changes without cluttering your template browser with near-duplicate versions, right-click directly on the template name in the Template Browser and choose “Update with Current Settings.” The existing template absorbs your changes and the old version is gone. This is cleaner than saving a new template every time you make a minor adjustment. Just be intentional about it. If you’re experimenting and not sure you want to keep the changes, hit Command-Z (Mac) or Control-Z (Windows) to undo before you update, exactly as Kelby does in the tutorial to walk back his demo edits.
Right-click menu on saved template showing Update with Current Settings
If you tweak a layout and want to keep the changes without cluttering your template browser with near-duplicate versions, right-click directly on the template name in the Template Browser and choose “Update with Current Settings.” The existing template absorbs your changes and the old version is gone. This is cleaner than saving a new template every time you make a minor adjustment. Just be intentional about it. If you’re experimenting and not sure you want to keep the changes, hit Command-Z (Mac) or Control-Z (Windows) to undo before you update, exactly as Kelby does in the tutorial to walk back his demo edits.
Step 6: Auto-Fit a Cell to Match the Photo’s Actual Proportions
 Right-click menu on a cell showing fit options for photo size
When you drag a photo into a cell and the proportions don’t match, Lightroom crops the image to fill the container by default. But there’s a right-click option that flips this around and resizes the cell to fit the photo instead. Right-click on the cell after dropping in your image and look for the option to auto-fit or match the cell to the photo’s dimensions. This is especially useful when you’re working with a mix of horizontal and vertical shots and you don’t want to manually drag every cell to the right aspect ratio. Let the photo tell the cell what size it needs to be.
Right-click menu on a cell showing fit options for photo size
When you drag a photo into a cell and the proportions don’t match, Lightroom crops the image to fill the container by default. But there’s a right-click option that flips this around and resizes the cell to fit the photo instead. Right-click on the cell after dropping in your image and look for the option to auto-fit or match the cell to the photo’s dimensions. This is especially useful when you’re working with a mix of horizontal and vertical shots and you don’t want to manually drag every cell to the right aspect ratio. Let the photo tell the cell what size it needs to be.
One Thing I’d Add: Name Your Saved Prints Like You Name Presets
Kelby’s tip about naming templates by photo count is solid. I’d push it one step further for the Saved Print collections: include the client name or project in the title, not just the structure. Something like “Chen Wedding - 11 Photo Grid” tells you immediately what you’re opening, instead of making you preview three collections to find the right one. I organize mine in nested folders inside the Collections panel, one folder per client or project. When you’re managing dozens of past orders, the extra specificity is the thing that keeps a five-second task from turning into a five-minute search.
The single most important thing Kelby demonstrates here is the difference between saving a template and saving a print. One saves the container, one saves the whole package. If you only use one takeaway from this tutorial, let it be that “Create Saved Print” step. It has personally saved me from rebuilding client layouts from memory, which is not a fun exercise, and not one I’d recommend.
Watch the full tutorial on YouTube to see Kelby work through each of these steps live, including a few extra moments that show how the Custom Package layout comes together before the saving workflow begins.
Comments (3)
This saved me so much time on my last edit. Wish I'd found this sooner.
Clear and practical. No fluff. Appreciate that.
Excellent tutorial. I'd add that from a photography standpoint, this technique is incredibly versatile.
Leave a Comment