
I used to just dump photos into Lightroom the way you’d throw clothes onto a chair. Fast, thoughtless, and fine — until the day you need something specific and you’re digging through a pile that stopped making sense six months ago. It took me an embarrassing amount of time to accept that a bad import habit compounds. Every shoot you handle sloppily is another layer of chaos you’ll have to untangle later, usually at the worst possible moment, usually right before a deadline.
In this Aaron Nace (PHLEARN) tutorial, he walks through the full import and organization process in Lightroom Classic CC — from creating your first catalog all the way to flagging selects you can find again instantly. Watch the full tutorial on YouTube. What I like about Aaron’s approach is that it’s genuinely scalable. This isn’t a system built for one weekend trip. It’s the kind of structure that still makes sense two years and ten thousand images later. Below I’ve broken down each stage of the workflow so you can follow along even without the video open.
Step 1: Build Your Catalog Structure Around Genres, Not Projects
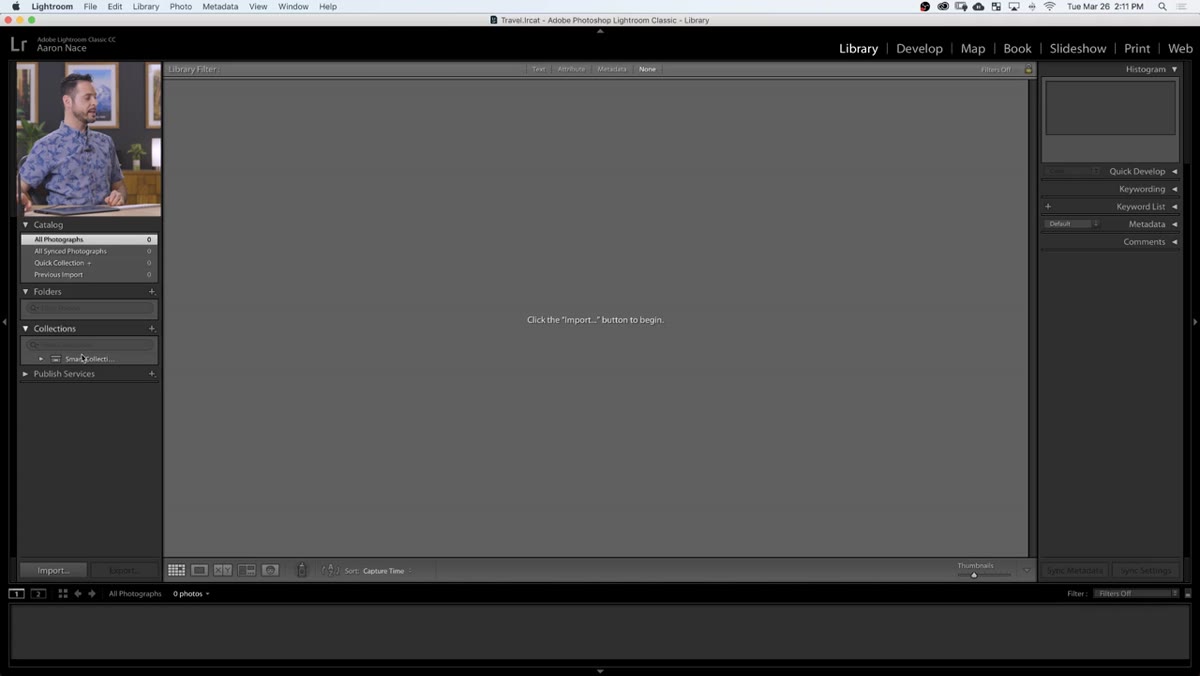
 Lightroom open with blank catalog, File menu visible
Before you import a single image, you need a catalog — and where most people go wrong is creating one giant catalog for everything they’ve ever shot. Aaron’s recommendation is smarter: organize catalogs by genre. Portrait work in one catalog, travel in another, commercial in a third. Think of each catalog as a dedicated filing cabinet rather than one enormous junk drawer.
To create a new catalog, go to File, then New Catalog, and give it a name that reflects the genre (in the tutorial, Aaron names his “Travel”). Lightroom will close and reopen with a completely blank catalog. Your actual image files don’t live inside the catalog itself — they stay wherever they are on your hard drive. The catalog is just Lightroom’s record of what exists, where it is, and what you’ve done to it. That distinction matters a lot if you ever move drives or hand off files to a client.
Step 2: Drag Your Images Into the Import Dialog
 Import dialog open with image thumbnails populating
You can open the import dialog by clicking the Import button in the lower left of the Library module, but Aaron’s preferred method is even faster. Find your images in Finder (Mac) or Windows Explorer, select them all, and drag them directly into Lightroom. The import dialog opens automatically with your files already loaded. It’s a small thing, but when you’re importing from multiple folders across a shoot, it saves a lot of clicking around.
Once your images appear in the import dialog, you’ll see all the thumbnails across the center panel. By default, everything is checked for import. Scan through and uncheck any obvious throwaway shots now, before they ever enter your catalog. Spending thirty seconds here saves you from having to delete junk later.
Step 3: Choose the Right Import Method for Your Situation
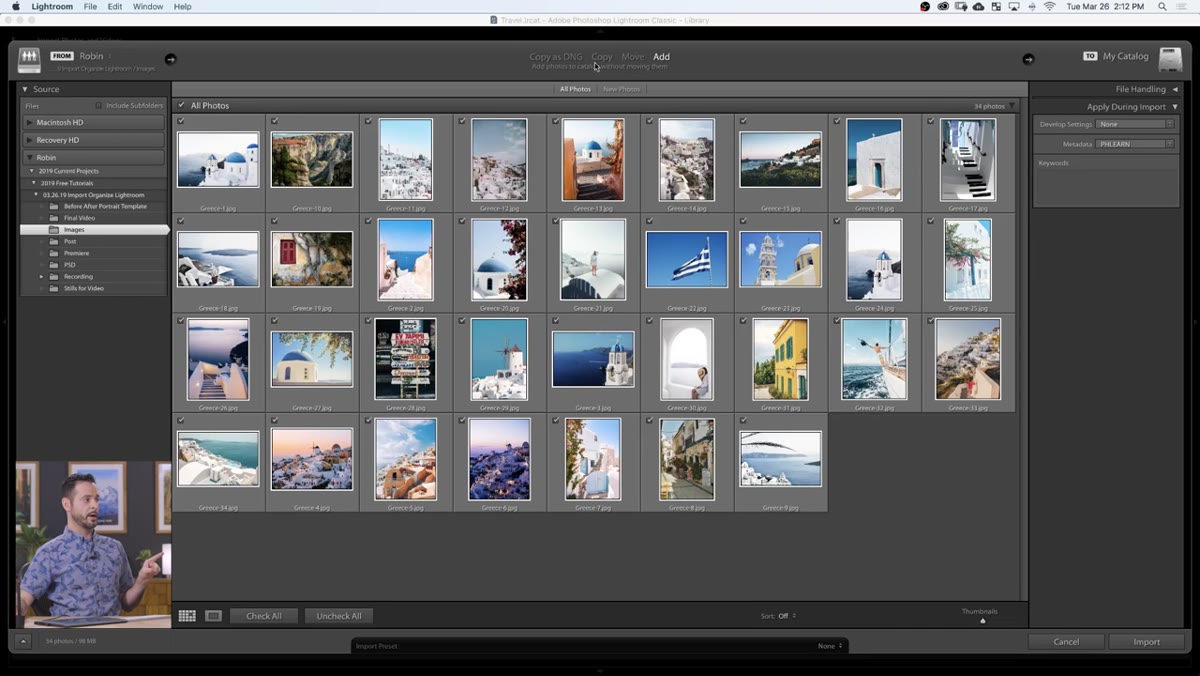 Import options panel showing Copy as DNG, Copy, Move, Add
The four options across the top of the import dialog — Copy as DNG, Copy, Move, and Add — are not interchangeable, and picking the wrong one can create real headaches. Here’s how to think about it.
If you’re pulling images straight from a memory card, Copy as DNG is the cleanest choice. DNG is Adobe’s open, non-proprietary raw format, and converting on import means you’re not dependent on your camera manufacturer’s software to read the files years from now. If you want to preserve the original raw format (Canon’s CR2, Nikon’s NEF, etc.), use plain Copy instead. If the images are already on your computer and you just want Lightroom to organize them by moving them into a new folder structure, use Move. Add leaves the files exactly where they are and simply points Lightroom at them — useful if you’ve already got a folder system you love and don’t want Lightroom touching it.
Step 4: Set a Destination Folder and Let Lightroom Sort by Date
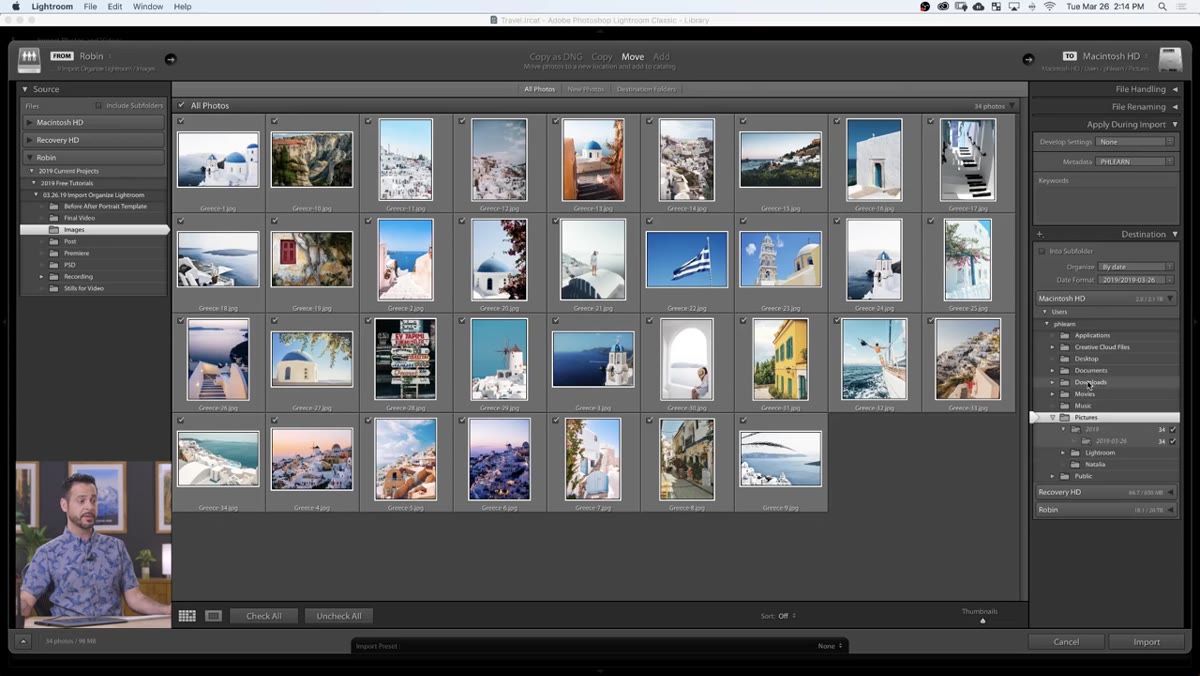 Destination panel open with date-based folder structure shown
With Move or Copy selected, you’ll see a Destination panel on the right side of the import dialog. This is where you tell Lightroom where to put your files. Aaron keeps it simple and routes everything to his Pictures folder, then lets Lightroom handle the subfolder structure automatically by date.
Date-based organization might feel impersonal compared to naming folders by shoot or location, but it pairs beautifully with the catalog system. The catalog holds all the context — keywords, collections, flags — so the underlying folder structure just needs to be consistent and predictable. Letting Lightroom sort by date means you’ll always be able to find a file based on when you shot it, even if you forget what you named the collection.
Step 5: Add Copyright Metadata Before You Import
 Metadata panel on right side of import dialog with copyright fields
This step takes about forty-five seconds and people skip it constantly, including me for an embarrassing portion of my career. In the import dialog, look for the Apply During Import panel on the right side. Under Metadata, you can create a preset that embeds your copyright information directly into every file as it’s imported.
Click the Metadata dropdown, choose New Preset, and fill in your copyright notice, creator name, website, and any other contact info you want baked in. Save it with a name you’ll recognize, and from now on just select that preset every time you import. If an image ever leaves your hard drive without your knowledge, your name is already embedded in the file itself. It’s not foolproof protection, but it’s the easiest layer of protection you can add.
Step 6: Flag Your Selects and Build a Collection You Can Always Find
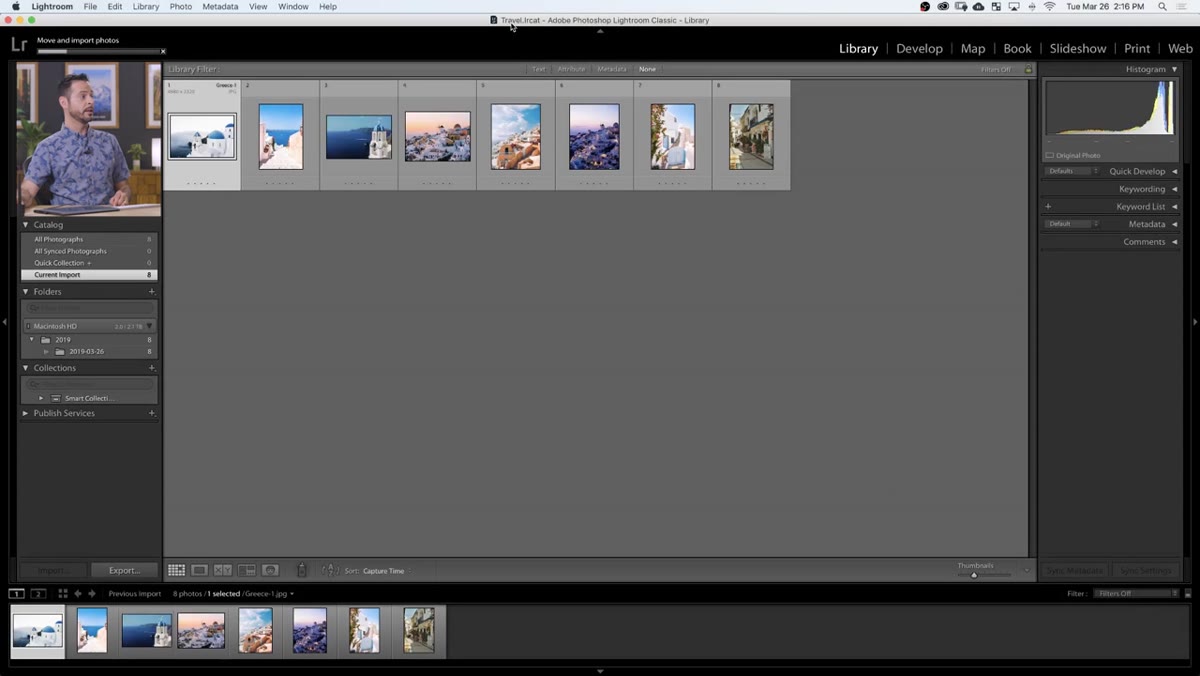 Library grid view with flagged images highlighted
Once your images are imported, Aaron’s approach to culling is to use flags rather than star ratings for the initial pass. Hit P to flag a keeper, X to mark a reject, and U to leave something unrated. Work through the grid fast — you’re not making final edit decisions yet, just separating the promising shots from the obvious misses.
After flagging, create a Collection from your picks. Collections live in the left panel of the Library module, and unlike folders, a single image can live in multiple collections without duplicating the file. Name the collection something specific to the shoot or location, add it under your genre-based catalog structure, and you now have a permanent, findable home for your best work from that session.
What I’d Add From My Own Workflow
One thing the tutorial doesn’t get into is naming your metadata presets thoughtfully. I keep two: one for personal work and one for client work with a different copyright line. If you shoot across different contexts, a single preset can quietly put the wrong rights information on your images. Takes two minutes to set up a second preset and saves a potentially awkward conversation.
I’d also push back gently on one point: date-based folder naming works great until you’re collaborating with someone who doesn’t use Lightroom. If you ever need to hand off raw files, a folder named “2024-03-15” tells your second shooter nothing. I add a short location or project tag after the date — “2024-03-15-nashville-wedding” — and it keeps both worlds happy.
The single most important thing to take away here is that the catalog is the foundation, and a catalog built around genre will serve you far longer than one built around a single shoot or a single year. Get that structure right at the beginning and every other organizational decision becomes easier.
Watch the full tutorial on YouTube to see Aaron walk through each of these steps live, including how the import dialog actually behaves with different file types.
Comments
Leave a Comment